Download on the
App Store
GET IT ON
Google Play
DRC-889
USER’S MANUAL
1
Important Pre-Flight Preparation
Pre-Flight: Documentation
Pre-Flight: Video Tutorials
Pre-Flight: Download the [VTI 360 SKYVIEW 2] App
This section introduces essential information to guide you with using
your VTI 360 SKYVIEW 2 GPS VIDEO DRONE.
Read the following included documents before using your 360
SkEYEview Video Drone for the first time:
1. The VTI 360 SKYVIEW 2 GPS VIDEO DRONE Quick Start Guide
2. The VTI 360 SKYVIEW 2 GPS VIDEO DRONE User Manual
3. Safety Tips (Safety Guidelines and Disclaimer)
It is recommended to watch the video tutorials in order to best
prepare for your first flight.
Scan the QR code or go to this address to watch the videos:
Show the QR CODE
Use the [VTI 360 SKYVIEW 2] app to fly your SkeyeView Drone. Scan
the QR Code to download the app.
You can also download the [VTI 360 SKYVIEW 2] app from the Apple
App Store or Google Play Store.
The Android version is compatible with 6.0 and later. The iOS version
is compatible with iOS 9.0 or later.
2
Pre-Fight Checklist
Check that the Propellers are Firmly Attached (see page 4)
Insert 4 AA Batteries to the Remote (see page 5)
Charge Your Drone’s Battery (see page 10)
Calibrate Your Drone with the Remote Control (see page 12)
Calibrate Your Drone’s Gyroscope (see page 13)
Complete the Compass Calibration Process (see page 13)
Unlock Your Drone (see page 14)
WARNING:
Failure to calibrate your drone before flight can lead
to severe flight malfunctions and potential damage
to your drone. Always fly carefully!

3
Please Read This User Manual
Introduction
Product Profile
Important Note: FAA REGISTRATION
This section introduces functions and installtion guidlenes of the
SkeyeView Drone.
Owners of a drone that weighs more than 0.55 lbs. (250 g) and less
than 55 lbs. (25 kg) must register
their UAS online at the FAA website, https://www.faa.gov/uas/registration.
After receiving the certificate of registration, a unique FAA registration
number will be provided
and it must be marked on the Drone by any means, such as permanent
marker, label, engraving,
or other means, as long as the number is readily accessible and
maintained in a condition that is
readable and legible upon close visual inspection.
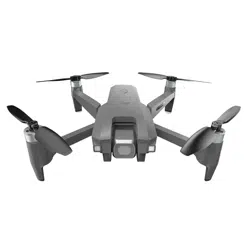
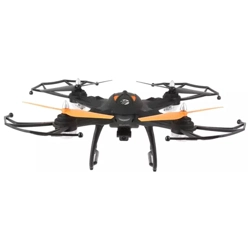
Thank you for purchasing the VTI 360 SKYVIEW 2 GPS VIDEO DRONE,
item DRC-889. The included Remote Controlled aircraft is designed
specifically for outdoor flying. In order to get the best possible results,
please read this manual carefully before using. In addition, be sure to keep
this manual ina safe place for future reference.
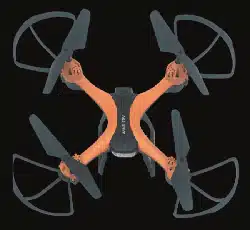
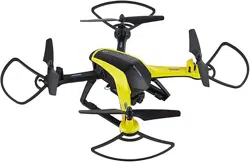
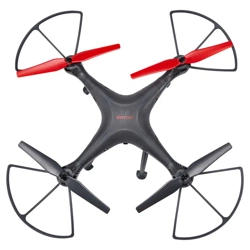
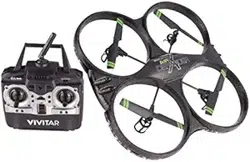
The VTI 360 SKYVIEW 2 GPS VIDEO DRONE includes an aircraft , a remote
controller with a mobile phone holder , rechargeable battery , Fisheye HD
camera, replacement propellers, landing gear, protection rings, and charging
cable.
The technology used features auto hovering, one-key return, a flight range of
1000 feet, 10 minutes of total flight time.
The VTI 360 SKYVIEW 2 GPS VIDEO DRONE is also equipped with 1080p
Full HD Video, headless mode directional lock, easy USB plug-in for charging,
and variable speed settings.
4
Setting Up Your 360 SkEYEview Video Drone
Video Tutorials
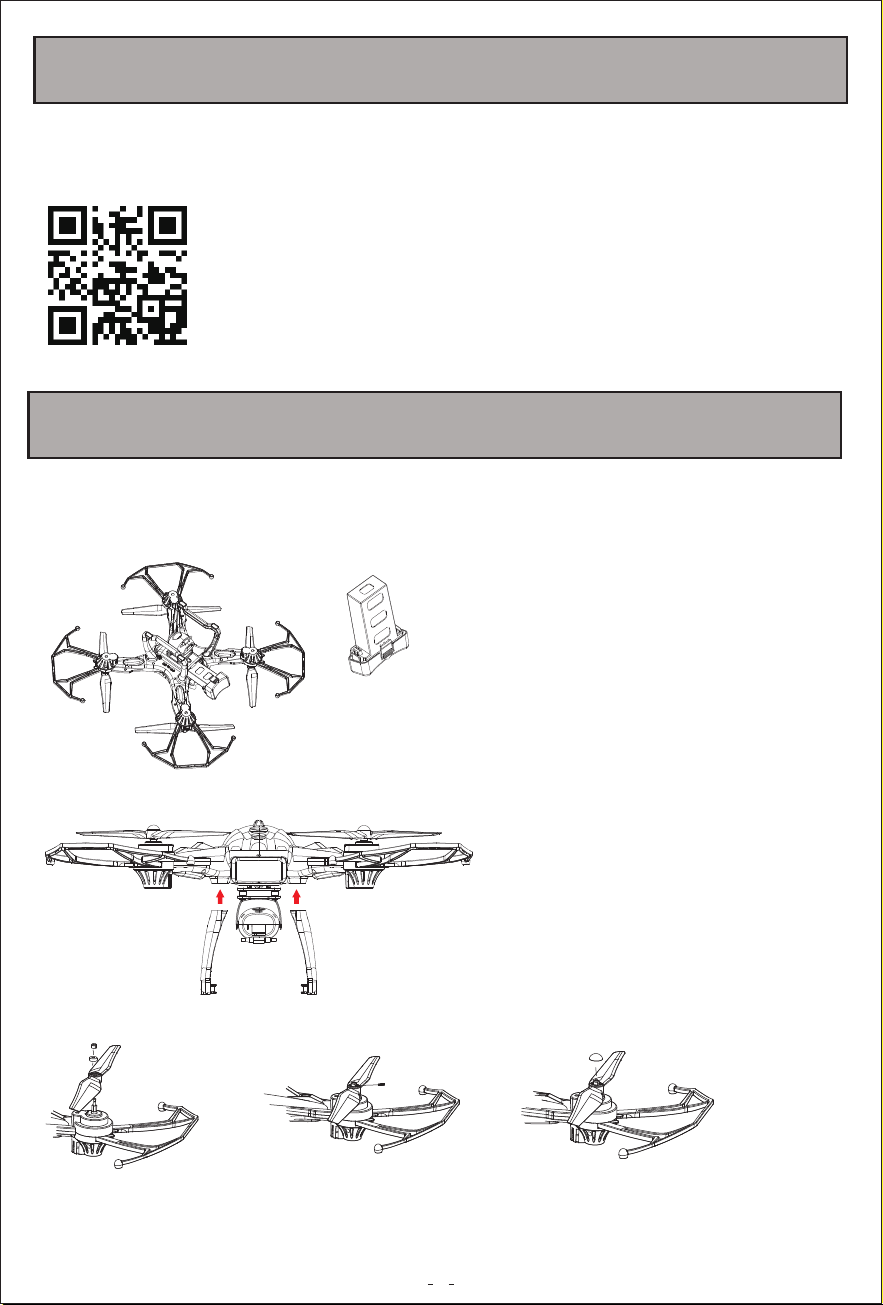
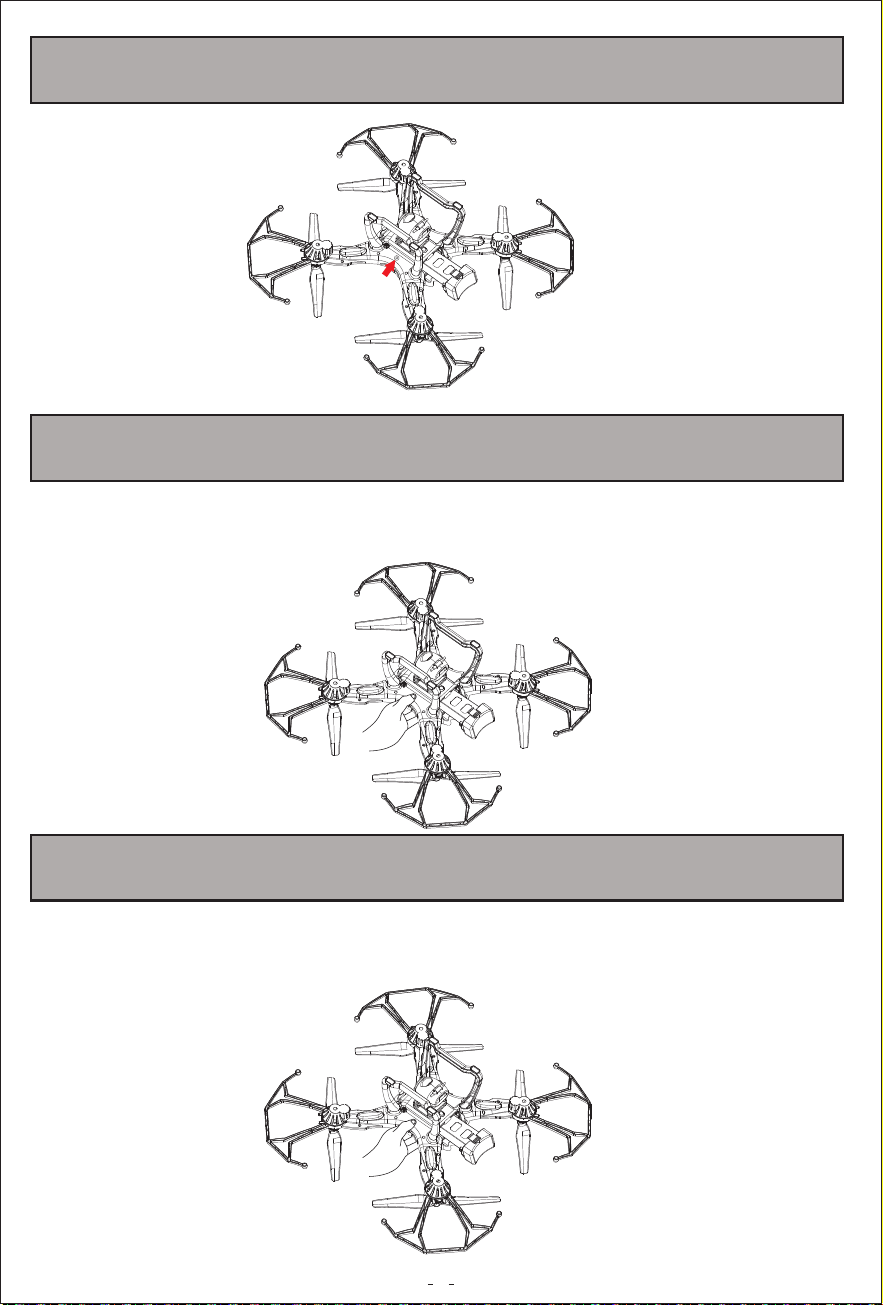
Battery Installation
Once your battry is fully charged it can be inserted directly into the
batttery slot of the underside of your drone.
Installing Your Drone's Landing Gear
Installing Your Drone's Prtotection Rings
It is recommended to watch the video tutorials in order to best prepare for
your first flight.
Scan the QR code or go to this address to watch the videos:
Setting Up Your VTI 360 SKYVIEW 2 GPS VIDEO DRONE
Remove the cap covering
the propeller.
Unscrew the propeller so
that your current propeller
can be removed and
replaced with a new one.
Scre the new propeller on
and then place the cap back
on the propeller.
5
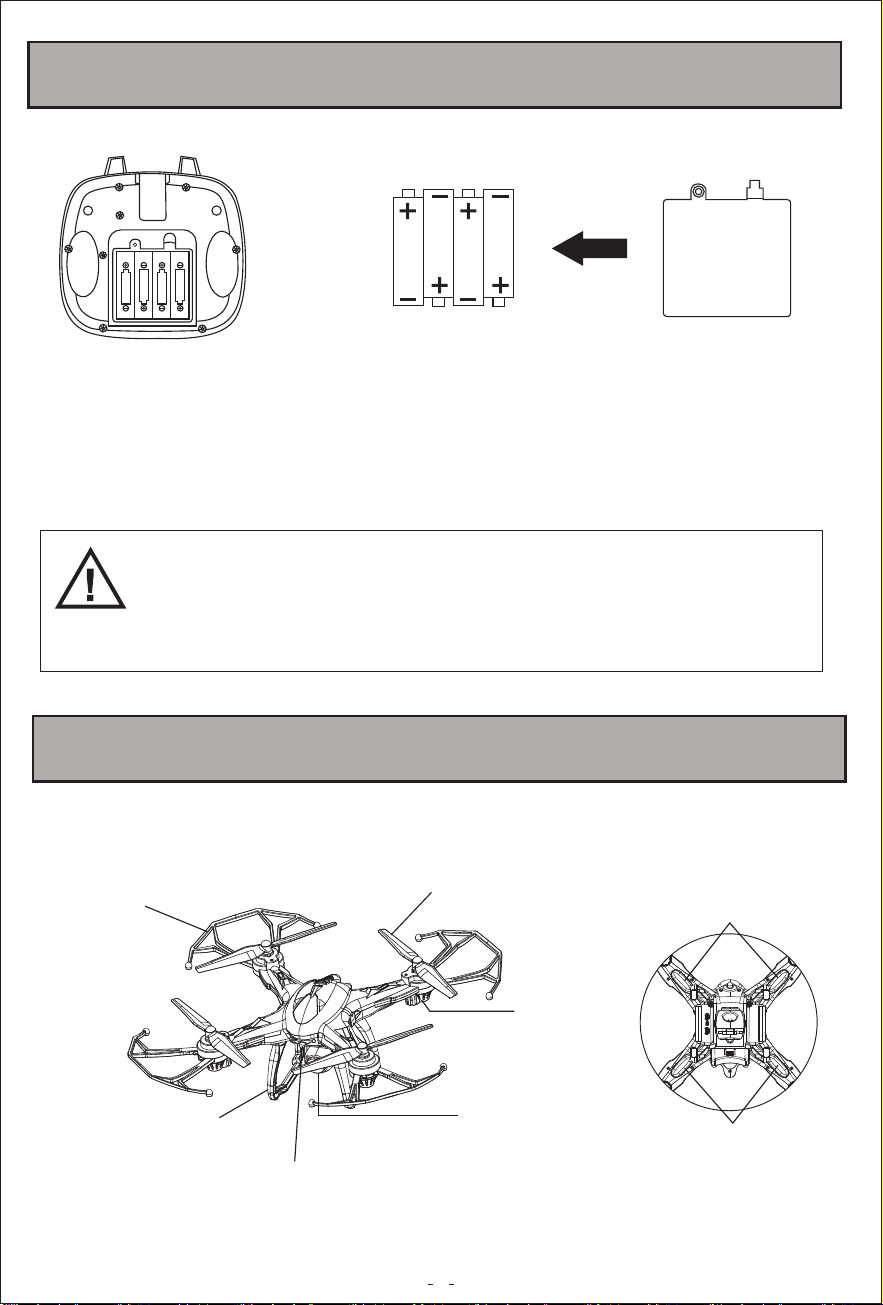
Setting Up the Remote Controller
A Quick Look at Your VTI 360 SKYVIEW 2 GPS VIDEO DRONE
Aircraft
Use a screwdriver to open up the battery compartment located on the rear of your remote control.
Insert 4 AA 1.5V batteries, making sure that the batteries are inserted with the correct polarity (+,-) as displayed
in the battery compartment.
Once the batteries are inserted, put the battery compartment cover back on the battery compartment, and use
a screwdriver to close it securely.
-Do not mix rechargeable and non-rechargeable batteries.
-Do not mix old and new batteries or different types of batteries.
-Remove exhausted batteries and dispose of them based on the rules of your local
municipality.
-Remove the batteries from your remote control if it will not be in use for an extended
period of time.
Fisheye HD Camera Lens
Motor
Propeller
Protection Ring
Indicator Light
Landing Gear
Headlights
Tail Lights
6
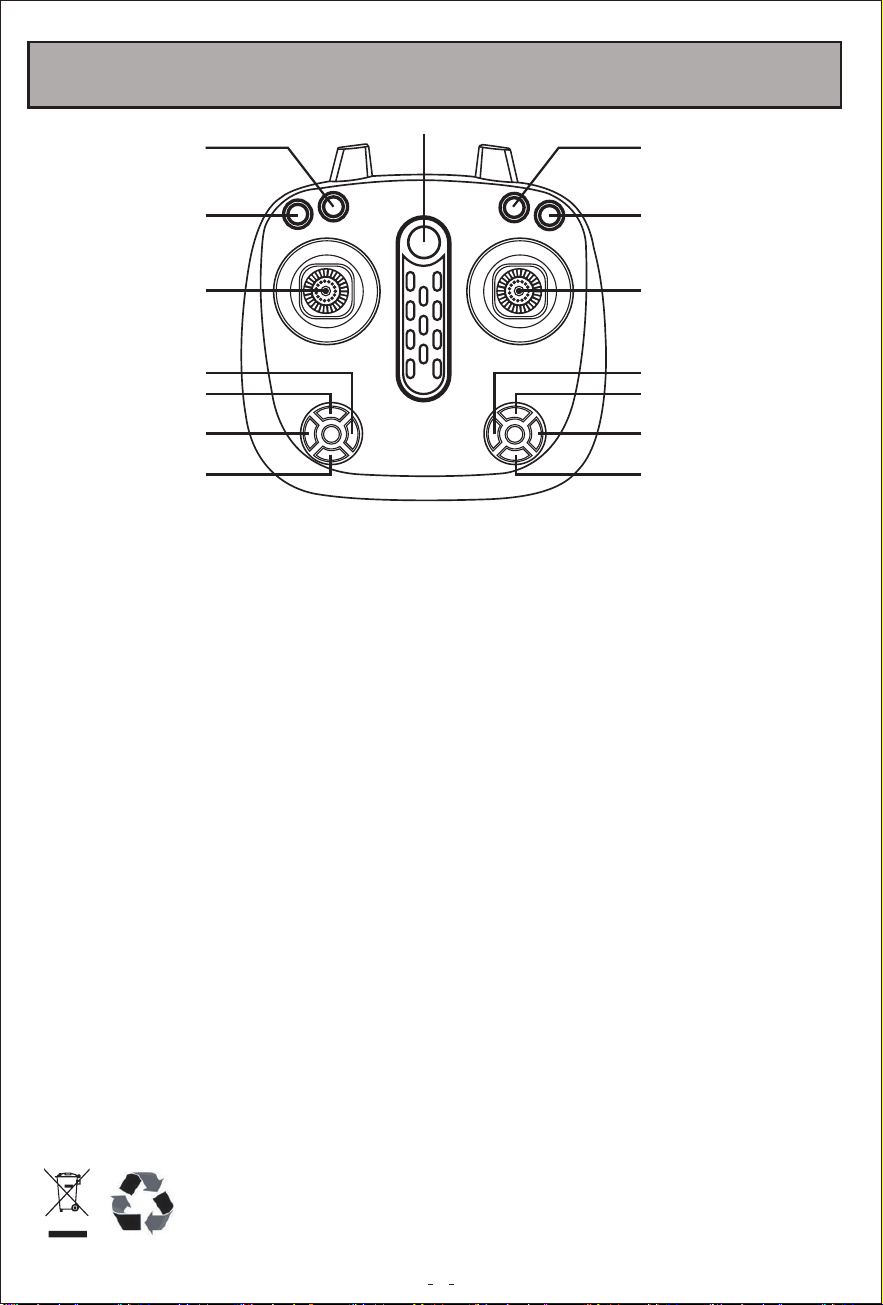
Remote Controller
Important Saftey Precautions
When using your VTI 360 SKYVIEW 2 GPS VIDEO DRONE, basic safety precautions
should always be followed, including the following:
1. Do not allow children or the infirm to operate your drone without adult supervision.
For safety purposes, only allow experienced pilots aged 14 and up fly your drone.
2. To avoid choking hazards, keep all small parts and pieces away from children.
3. Your drone is not a toy. Makes sure that it is properly assembled before use, and
operated safely.
4. Keep your drone away from obstacles, crowds, power lines, trees, and bodies of
water while it is in flight. Always fly your drone in a wide open spacious environment.
Avoid flying your drone directly above people or animals. Maintain a 7ft (2m) distance
from the aircraft when taking off and landing.
5. Only use your drone in a dry environment. Your drone is composed of sophisticated
electronic components and parts. To avoid damage to your drone, please keep your
drone away from water and moisture. Use a soft dry cloth to wipe the surface of your
drone and keep it clean.
6. Beginner and novice level pilots should practice flying with experienced pilots until
suitably experienced in flight.
7. To ensure safety, only use the included parts when using your drones.
8. Make sure to keep your ears and eyes protected when using your drone. When your
drone’s blades are spinning, make sure to keep people and objects at a distance from
rotating parts.
9. Keep your drone away from excessive heat or flames, especially while charging the
battery.
10. Please recycle or dispose of your drone properly based on the laws and rules of
your municipality. Contact local recycling facilities and/or the manufacturer of your
speaker for further information.
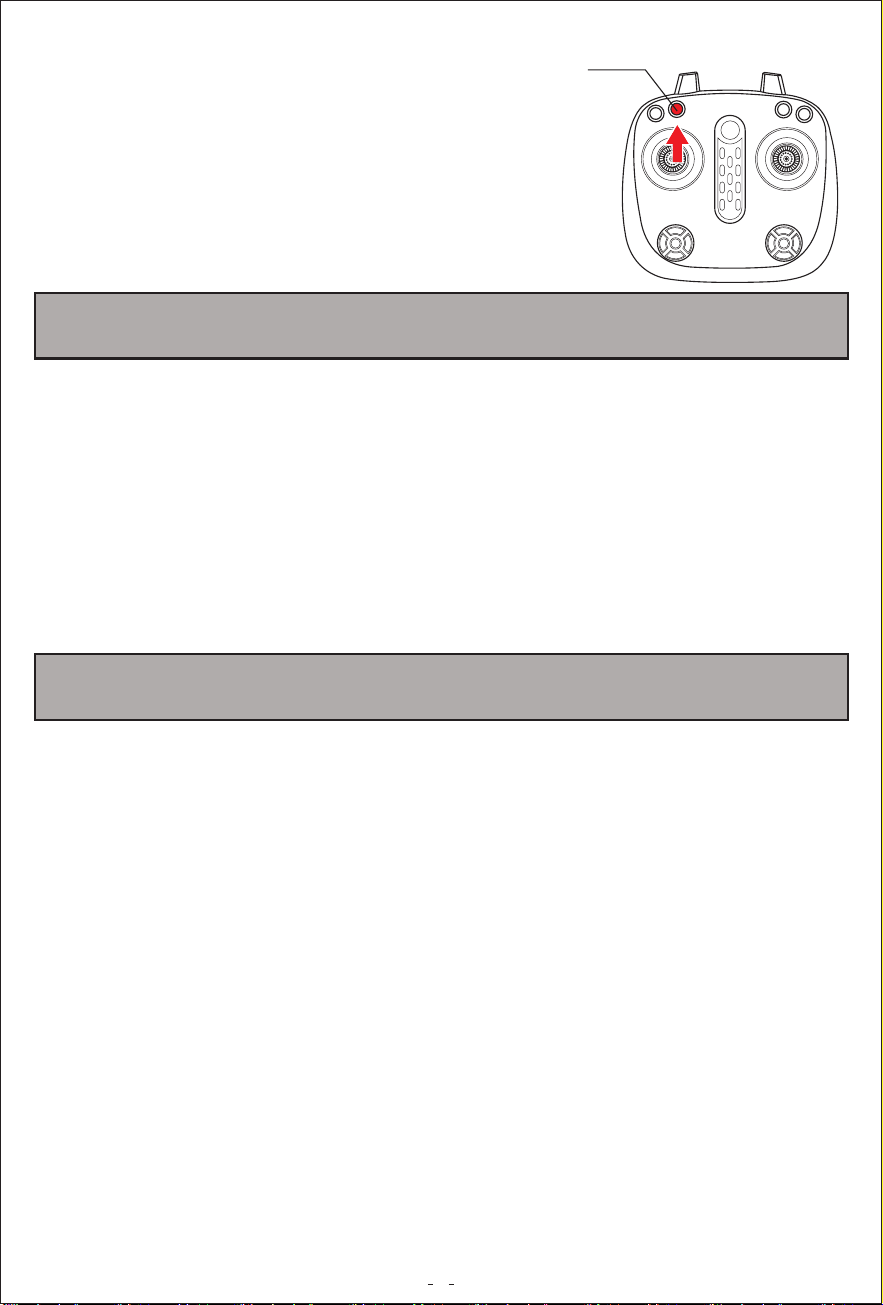
Power ON/OFF
One-Key Return
Speed Setting
Power ON/OFF
Video
Geomagnetic
Correcting
Gyro
Correcting
Trim Button Emergence Stop
Headless Mode
Photo
Surrounding Fly
Auto Takeoff /
Landing
GPS ON/OFF

7
Aircraft
Flight Modes
Aircraft Status Indicator
This section introduces functions and features of the VTI 360
SKYVIEW 2 GPS VIDEO DRONE.
Your VTI 360 SKYVIEW 2 GPS VIDEO DRONE has 2 flight modes.
GPS Mode: When the aircraft is turned on, it automatically goes into
GPS mode.
Normal Flying Mode: Press and hold the GPS/Normal Flying Mode
button to switch to Normal Flying Mode.
1 Turn on Aircraft > What is the light status?
2 Aircraft and Remote Connection > What is the light status?
3 Start Compass Calibration> What is the light status?
4 Finish Compass Calibration > What is the light status?
5 Search GPS Signal > What is the light status?
6 Return To Home > What is the light status?
7 Return to Home with Low Battery > What is the light status?
8 Headless Mode > What is the light status?
9 Lose Control > What is the light status?
Return to Home (RTH)
The Return-to-Home (RTH) function brings the aircraft back to the last
recorded Home Point.
There are 3 types of RTH: Smart RTH, Low Battery RTH and Failsafe
RTH. This section describes these 3 scenarios in detail.
Smart RTH
When the GPS signal is available (more than 7 satellites is presented),
use the RTH button on the Remote Controller and then follow the on-
screen instructions to initiate Smart RTH.
8
Low Battery RTH
Failsafe RTH
When the battery level of your aircraft is low, it automatically returns
directly to the take-off point. During the state of low battery, the aircraft
cannot be controlled beyond 20 meters. If the aircraft is returned to
within 20 meters from the take-off point, it can be controlled. If it is
beyond 20 meters, the aircraft then enters into the landing protection
mode in which it performs as follows – because it will not be able to
fly more than 20 meters and will not be able to automatically return,
it will safely land immediately when the battery is totally depleted.
If the Home Point was successfully recorded and the compass is
functioning normally, Failsafe RTH will be automatically activated
if the Remote Controller signal is lost for over 6 seconds. Return-
to-Home can be cancelled by the pilot, allowing you to regain
control when the Remote Controller signal connection is re-
established.
Smart Return Function
The Smart Return Function returns your drone to the location
of your remote control or phone. Push the one key return
button on your remote control, or the corresponding button
in the VTI 360 SKYVIEW 2 to enter Smart Return mode.
When in Smart Return mode, you can use the directional control
stick to control the drone’s landing point. Push the throttle stick
to exit Smart Return mode.
One-Key Return
9
Aircraft Power Switch
Turn On the Aircraft
Turn Off the Aircraft
Make sure the battery is inserted securely. Then press and hold the
power button, located on the bottom of side of the aircraft, for 3 seconds.
Press the power button to turn off the aircraft. The aircraft’s light
goes off and the aircraft will then power off.
Power ON/OFF
Hold for 3 seconds
Power OFF
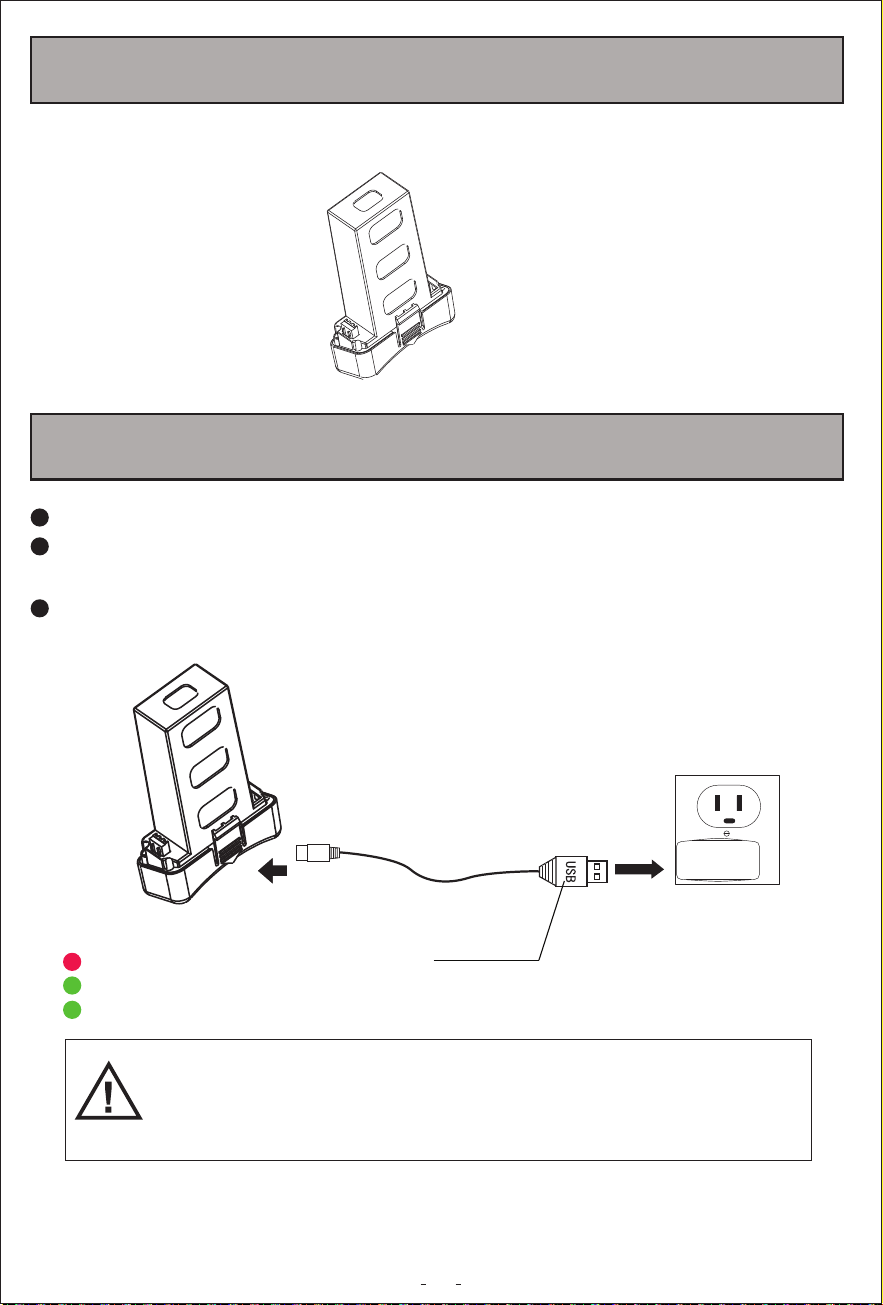
Aircraft Battery
Charging the Battery
It is made by polymer lithium ion. It has standard battery capapcity
of 7.4V 2500mAh.
10
The aircraft’s battery needs to be fully charged before every flight.
Please use the included charging adapter to charge the aircraft's
battery.
The battery takes approx 300-360 minutes to charge fully.
Battery
Charging Adapter
(red) = Charging Adapter Plugged In
(blinking green) = Battery Charging
(solid green) = Battery Fully Charged
-It is recommended to use a 5V, 1-2A charger (not included) to charge your battery.
-Do not leave the charger unattended in the presence of children.
-Do not expose the battery to excessive heat or flames.
-While charging your battery, keep it away from flammable materials.
11
Flight
This section reviews safe flight requirements and basic aircraft
operations.
Environmental Requirements
1. Please don’t fly in areas with extremely high temperatures, snow, strong wind (≥level 5),
rain or fog.
2. Always choose a wide open area for every flight. Tall structures and large metal
structures may affect the accuracy of the onboard compass and GPS system.
3. Never fly directly over people or animals.
4. To minimize interference, please do not fly the aircraft in locationsnear power lines, base
stations, electrical substations and broadcasting towers.
5. Aircraft and battery performance is subject to environment factors like temperature. Be
very careful when flying over 3200ft above sea level since the performance will be affected.
6. Your aircraft cannot use GPS within polar regions.
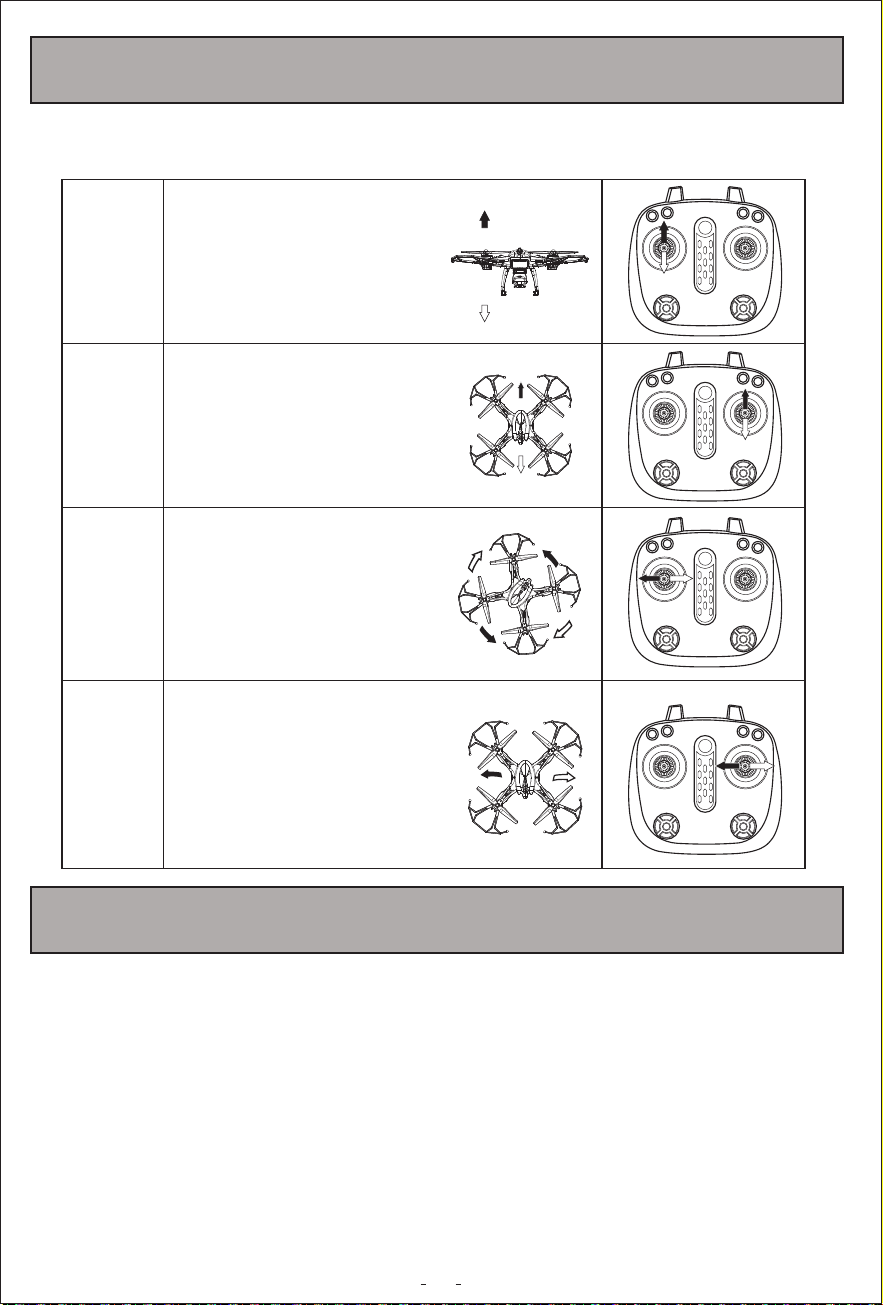
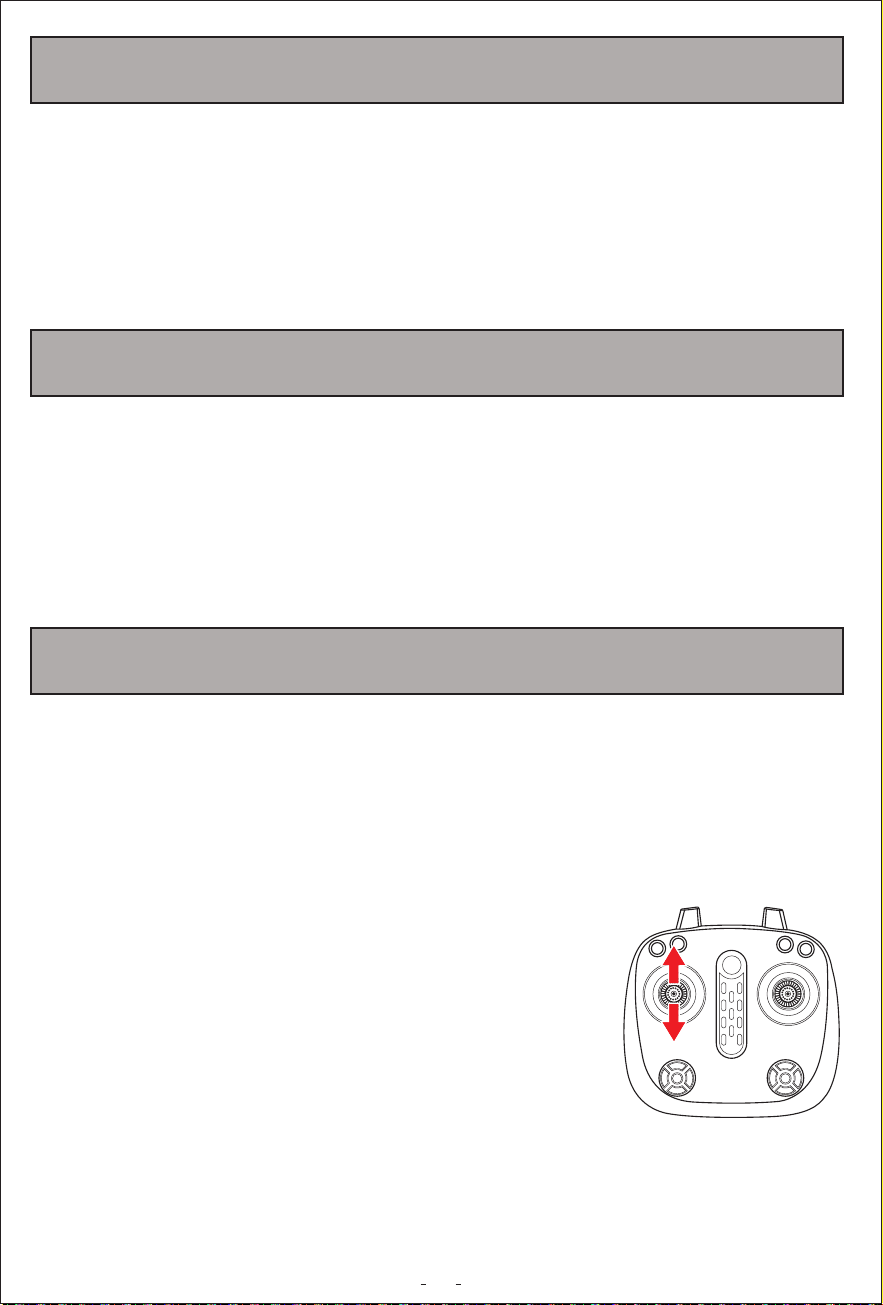
Ascend
&
Descend
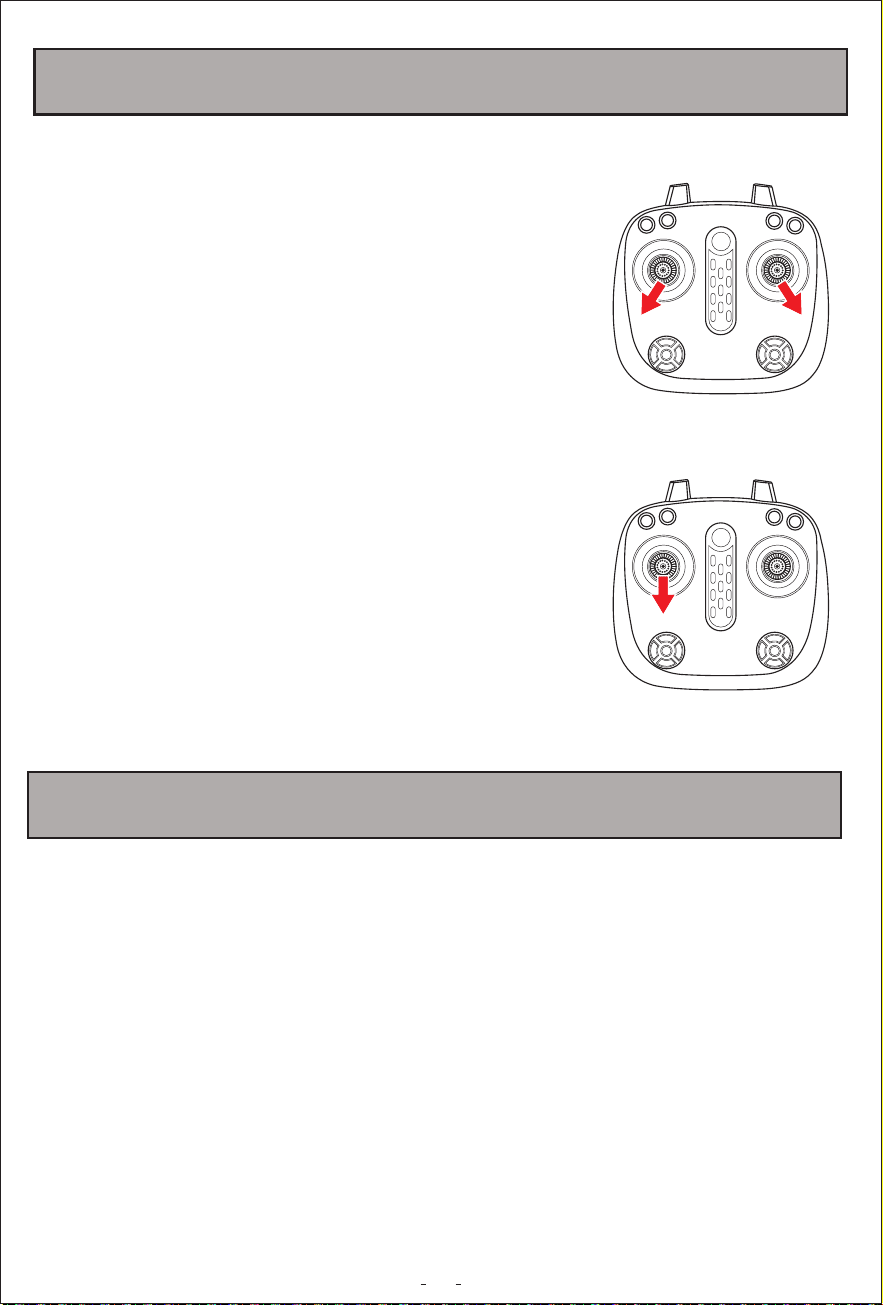
Forward
&
Backward
Slide Left
&
Slide Right
Turn
Push the throttle stick upwards and
the drone will ascend.
Pull the throttle stick downwards and
the drone will descend.
Push the directional control stick
upwards and the drone will tilt
downwards, causing it to move
forward. Push the directional control
stick downwards and the drone will tilt
upwards, causing it to move
backwards.
Slide the directional control stick to
the left and the entire body of the
drone will slide to the left.
Slide the directional control stick to
the right and the entire body of the
drone will slide to the right.
Slide the throttle stick to the left to
turn the nose of the drone, turning it
to the left. Slide the throttle stick to
the right and the nose of the drone
will turn to the right.
12
Flight Limits and GEO Zones
Abide by all laws and regulations when flying your aircraft. Flight
limitations are applied by default to help users operate this product
safely and legally. Flight limitations include altitude limits, distance
limits and GEO Zones. Altitude limits, distance limits and GEO
Zones function concurrently to manage flight safety when operating
in GPS Mode.
Pre-flight Checklist
Before flight, make sure that:
1. The aircraft's battery is fully charged and the remote controller's
batteries are full.
2. The propellers are installed correctly.
3. The camera lens is clean.
Calibrating Your Aircraft (Preparing for Flight)
To power on your drone, press and hold the ON/OFF switch on the bottom of your drone.
To power on your remote control, press the ON/OFF button.
Once your drone and remote control are powered on, follow the calibration steps below
in order to prepare your drone for flight.
Calibrating Your Drone with Your Remote Control
-Push the throttle stick all the way up and then pull it all the way
down.
-When the LED lights on the rear legs of your drone are solid red
and the LED lights on the front legs of your drone are solid green
then your drone is synchronized with your remote control and
ready to fly.
-When the LED lights on the rear legs of your drone are blinking
red then your drone is in GPS mode
13
Calibrating Your Drone’s Internal Gyroscope
-Calibrate your drone’s internal gyroscope to ensure smooth
and balanced flight. Before you start, make sure your drone
is placed on a flat, stable surface.
-Press the Gyro Correcting button on your remote control,
the LED lights of drone start blinking rapidly and then become
solid red and green. Your drone’s internal gyroscope is calibrated.
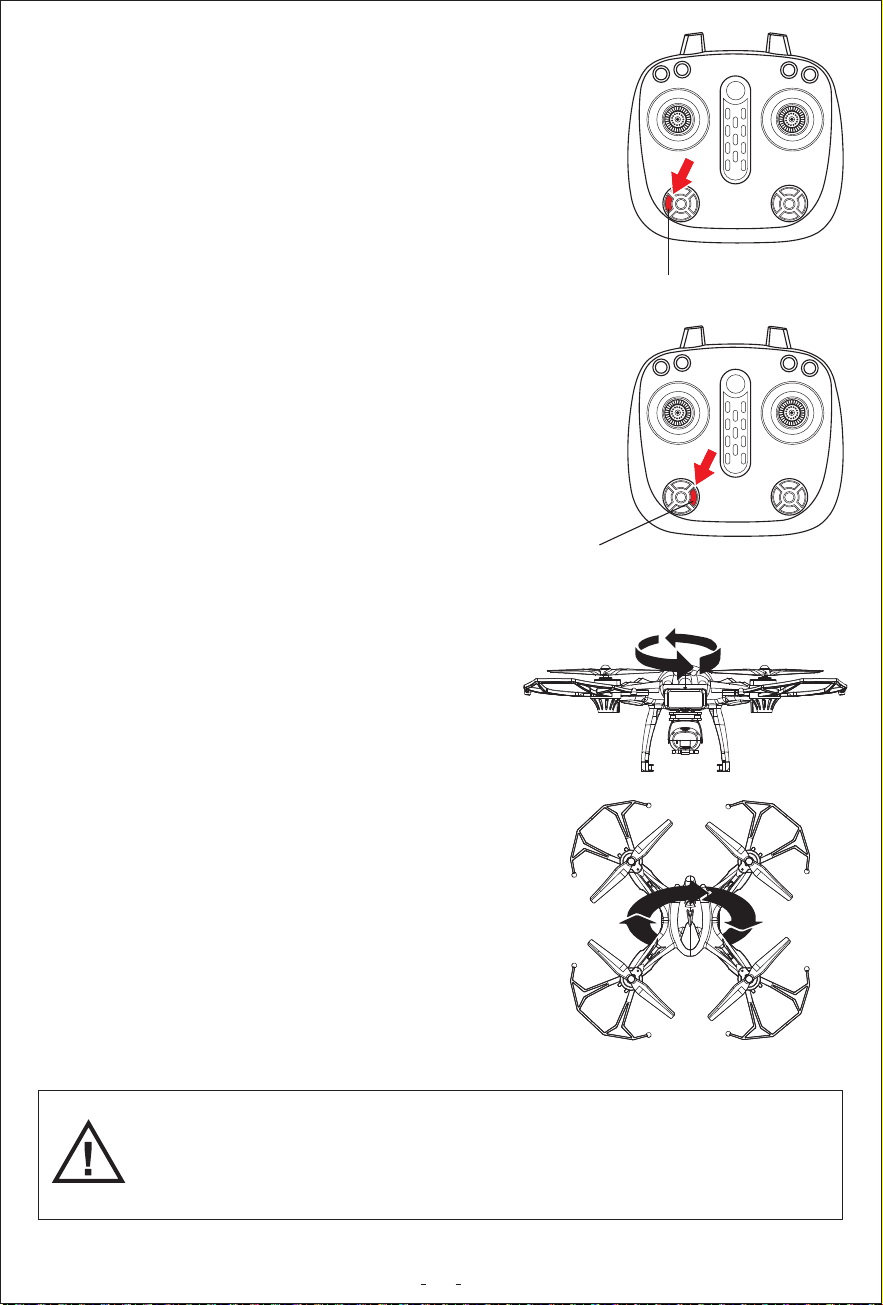
Aircraft Compass Calibration
The aircraft compass calibration allows your drone to be
tracked over GPS. Before you start, make sure your drone
is placed on a flat, stable surface.
-Press the geomagnetic calibration button on the remote
control.
Geomagnetic
Correcting
Gyro
Correcting
-Rotate your drone horizontally, spinning it in a
clockwise direction for 3 revolutions. The lights
on the front legs of your drone will solidly shine
red, while the lights on the back legs of your
drone will solidly shine green.
-Turn the head downwards and rotate your drone
vertically, spinning it for 3 revolutions. When you
see green lights shining solidly, calibration is complete.
-When flying your drone in GPS mode, make sure you are in a wide open space.
-Do not calibrate your drone in areas where there are strong magnetic fields.
-When calibrating, do not carry ferromagnetic materials such as keys or cell phones.
-Do not calibrate near large sheets of metal.
14
Important Information
The subsections are:
- Important Statement
- Flight Safety Guidelines
FCC Compliance Statement
Vivitar 1 Year Warranty
Unlocking Your Drone
If your drone is locked, push the throttle stick to bottom
left and push the right stick to bottom right, your drone
will be unlocked.
Notice: When the drone is indoor, you must press and hold
the GPS ON/OFF button until heard the sound of “DI”, the
drone will quit GPS mode, then it can be unlocked.
Locking Your Drone
With your drone in a landed position, pull the throttle
stick all the way down and hold it down for approximately
3 seconds. The motor will stop and your drone will be
locked in place.
Locking and Unlocking Your Drone

15
Important Statement
Flight Safety Guidleines
● This aircraft is not a toy. It should be assembled and operated
properly. Pilots must operate this aircraft in a safe way. Improper
operation may cause injury or property damage.
● This aircraft is suitable for pilots aged 14+ who have experience
piloting an aircraft styled aircraft.
● The manufacturer of this product is not responsible for damages
caused by misuse.
● Keep small accessories away from children and the infirm to avoid
accidents.
Users should firmly uphold the principle of “safety comes first” when flying this aircraft. Never
fly the aircraft near airports, above crowds or in zones storing dangerous goods and be mindful
of the damage that can be caused by improper operation.
● Stay away from obstacles, crowds, power lines, trees or water.
Always choose a wide open area for every flight, well away from people and property. Never fly
directly over people or animals. Don’t fly in bad weather conditions, high temperature, snow,
strong wind (≥level 5), rain or fog. Maintain
a 7ft (2m) distance from the aircraft when taking off and landing.
● Keep the aircraft in a dry environment.
The aircraft is composed by sophisticated electronic components and mechanical parts. To avoid
damage of the
mechanical and electronic components, please keep the aircraft in a dry environment and use a
clean, soft cloth to
wipe the surface and keep it clean.
● Practice flying together with a skilled, experienced pilot. Beginners are recommended to practice
flying with a skilled pilot’s guidance. Do not fly alone.
● Keep proper operation and safe flight guidelines in mind. Please take a careful look at this manual
before flying for important information regarding the product’s functions and operating tips. Stay
informed of and abide strictly by relevant local laws and regulations. Keep away from any non-flight
zones and respect other people's privacy.
● Safe flying
Please make sure you are in good shape mentally before every flight. Fly the aircraft as per your
flying experience. Never fly under influence of alcohol or drugs. Keep the Remote Controller at least
20 cm away from your body when
flying the aircraft.
● Keep distance from a flying aircraft.
Never use your hands to touch a flying aircraft under any circumstance. Don’t approach and touch
a landed aircraft before its propellers are completely locked.
● Keep away from heat sources
This aircraft is made of metal, fiber, plastic, electronic components and other materials. Please keep
it away from
heat sources to avoid deformation or even damage caused by sun exposure and high temperature.
● Environmental protection requirements
To protect our lovely planet, please recycle this aircraft as per local laws and regulations.

16
FCC Compliance Statement
Vivitar 1 Year Warranty
Changes or modifications not expressly approved by the party responsible for compliance could
void the user’s authority to operate the equipment.
This device complies with Part 15 of the FCC Rules. Operation is subject to the following two
conditions: (1) this device may not cause harmful interference, and (2) this device must accept
any interference received, including interference that may cause undesired operation.
This equipment has been tested and found to comply with the limits for a Class B digital device,
pursuant to Part 15 of the FCC Rules. These limits are designed to provide reasonable protection
against harmful interference in a residential installation. This equipment generates, uses and can
radiate radio frequency energy and, if not installed and used in accordance with the instructions,
may cause harmful interference to radio communications. However, there is no guarantee that
interference will not occur in a particular installation.
If this equipment does cause harmful interference to radio or television reception, which can be
determined by turning the equipment off and on, the user is encouraged to try to correct the
interference by one or more of the following measures:
-- Reorient or relocate the receiving antenna.
-- Increase the separation between the equipment and receiver.
-- Connect the equipment into an outlet on a circuit different from that to which the receiver is
connected.
-- Consult the dealer or an experienced radio/TV technician for help.
This warranty covers the original consumer purchaser only and is not transferable.
This warranty covers products that fail to function properly UNDER NORMAL USAGE, due to defects in
material or workmanship. Your product will be repaired or replaced at no charge for parts or labor for a
period of one year.
What Is Not Covered by Warranty
Damages or malfunctions not resulting from defects in material or workmanship and damages or
malfunctions from other than normal use, including but limited to, repair by unauthorized parties,
tampering, modification or accident.
To Obtain Warranty Service and Troubleshooting Information:
Call 1-800-592-9541 in the U.S. or visit our website at www.vivitar.com.
Sakar International Inc
195 Carter Drive Edison, NJ, 08817, USA
To receive Warranty service along with the name and address of an authorized product service center,
the original consumer purchaser must contact us for problem determination and service procedures.
Proof of purchase in the form of a bill of sale or receipted invoice, evidencing that the product is within
the applicable Warranty period(s), MUST be presented in order to obtain the requested service. It is your
responsibility to properly package and send any defective products along with a dated copy of proof of
purchase, a written explanation of the problem, and a valid return address to the authorized service
center at your expense. Do not include any other items or accessories with the defective product. Any
products received by the authorized service center that are not covered by warranty will be returned
unrepaired.

17
Vivitar One Year Warranty
This warranty covers the original consumer purchaser only and is not transferable.
This warranty covers products that fail to function properly UNDER NORMAL USAGE, due to
defects in material or workmanship. Your product will be repaired or replaced at no charge for
parts or labor for a period of one year.
What Is Not Covered by Warranty
Damages or malfunctions not resulting from defects in material or workmanship and damages
or malfunctions from other than normal use, including but limited to, repair by unauthorized parties,
tampering, modification or accident.
To Obtain Warranty Service and Troubleshooting Information:
Call 1-800-592-9541 in the U.S. or visit our website at www.vivitar.com.
To receive Warranty service along with the name and address of an authorized product service
center, the original consumer purchaser must contact us for problem determination and service
procedures. Proof of purchase in the form of a bill of sale or receipted invoice, evidencing that the
product is within the applicable Warranty period(s), MUST be presented in order to obtain the
requested service. It is your responsibility to properly package and send any defective products
along with a dated copy of proof of purchase, a written explanation of the problem, and a valid
return address to the authorized service center at your expense. Do not include any other items
or accessories with the defective product. Any products received by the authorized service center
that are not covered by warranty will be returned unrepaired.