Loading ...
Loading ...
Loading ...
1. Choose a microphone with high directivity, i.e. cardioid or hyper-cardioid polar
pattern.
2. Never point the microphone directly down in front of the speaker. Holding the micro
phone in normal position will allow you to be closer to the stage monitor with out feed
back.
3. See illustration below as to position of microphones when mounted in stand.
Cardiod polar patter microphones should always be at a 90 degree angle to the axis of
the stage monitor. Hyper Cardioid polar pattern microphones should be positioned at
an acute angle to the sage monitor.
You may choose to add a feedback eliminating processor to your system for additional
exibility on stage.
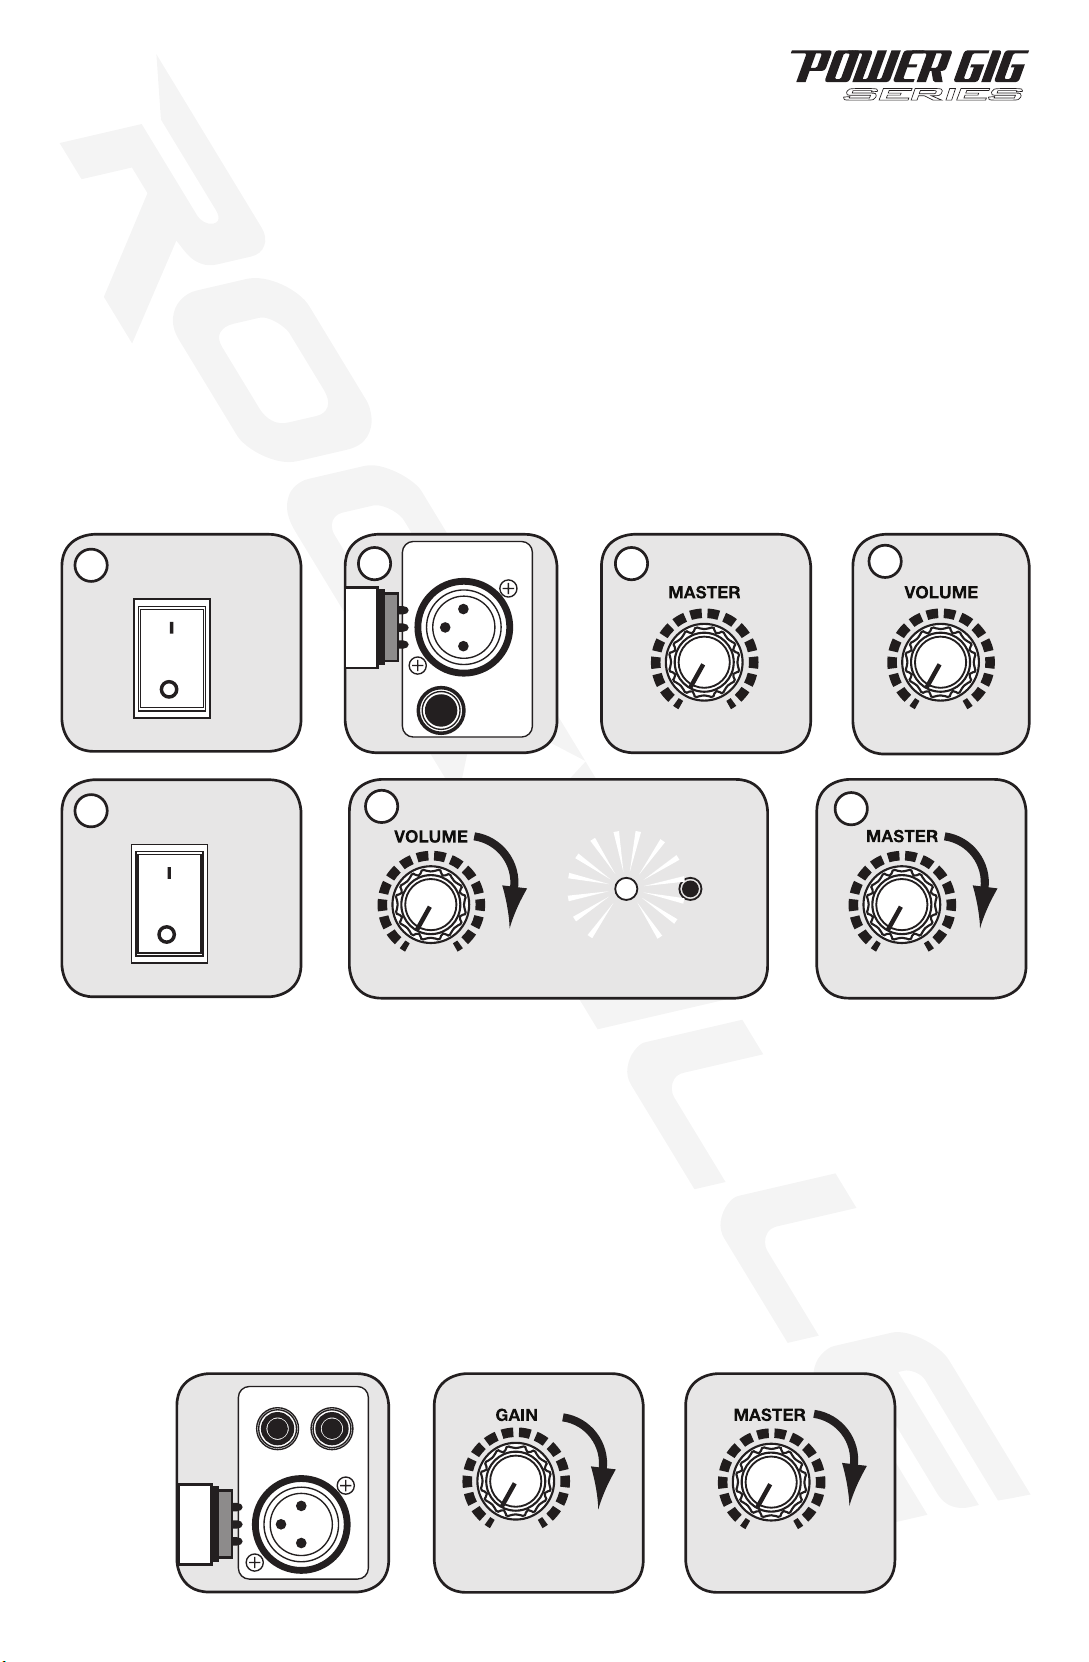
There is really only one volume control on the RPG unit, that is the knob marked MAS-
TER.
The Mic In Balanced volume control and secondary input gain control are matching de-
vices to match the preamp voltages of items such as microphones and guitars or other
musical instruments with your RPG unit. Never turn these up to maximum unless indi-
cated by the instructions below. With a properly matched signal your system will produce
less distortion, be subject to less feedback, and will produce louder, cleaner and clearer
sound. Use the Master control as your volume once all inputs are matched properly. Your
RPG features a CLIP LED indicator to help you set and match your components. Please
be sure to read all set up instructions so your RPG sounds its best.
Your RPG features a balanced microphone input accessible via XLR or ¼˝ TRS input.
1. Make sure the RPG's power switch is in the OFF position.
2. Plug in your microphone into the jack marked Mic In using an XLR or ¼˝ TRS cable
XLR cbale pictured in diagram).
A Word About System Volume Controls and Gains.
APPLICATION USES
Microphone Presentations
POWER
10
0
3. Keep Master Volume at 0 position.
4. Turn Mic Volume to 0 position.
5. Switch on the RPG unit.
6. Slowly turn microphone volume clockwise until you achieve appropriate gain setting.
This is determined by the CLIP LED indicator light. Proper function is achieved when the
CLIP indicator lights up at peak levels, it should never be in constant on position. The above
adjustment matched the microphone preamp to the input gain of the RPG unit.
7. Turn up the Master volume to achieve proper volume.
Always stand behind the RPG when making your microphone adjustments to avoid feed-
back distortion.
You can choose to hook up two microphones to your RPG in the following manner.
Set up Microphone #1 as instructed above. Using same set up instructions, insert mi-
crophone #2 into the Line In XLR balanced input which features its own separate gain
control. This second XLR, though balanced, will have a -10dB response and will be lower
in volume than microphone #1. Use the gain control associated with this input to increase
the microphone level and balance the inputs between the two microphones before at-
tempting to adjust the Master volume.
Multi-Microphone Hook Up
4
2 3
7
1
5
MIC IN BAL
6
LINE IN
BAL
R
L
CLIP
10
0
10
0
10
0
10
0
10
0
OFF
POWER
ON
POWER
Downloaded from www.ManualsFile.com manuals search engine
Loading ...
Loading ...
Loading ...