Loading ...
Loading ...
Loading ...
-59-
Model W1819/W1820 (Mfg. Since 09/11)
OPERATIONS
Push.Blocks
When used correctly, a push block reduces the risk of
injury by keeping hands away from the blade while
cutting. In the event of an accident, a push block often
takes the damage that would have otherwise happened
to hands or fingers.
A push block can be used in place of or in addition to
a push stick for feeding workpieces into the blade. Due
to their design, push blocks allow the operator to apply
firm downward pressure on the workpiece that could not
otherwise be achieved with a push stick.
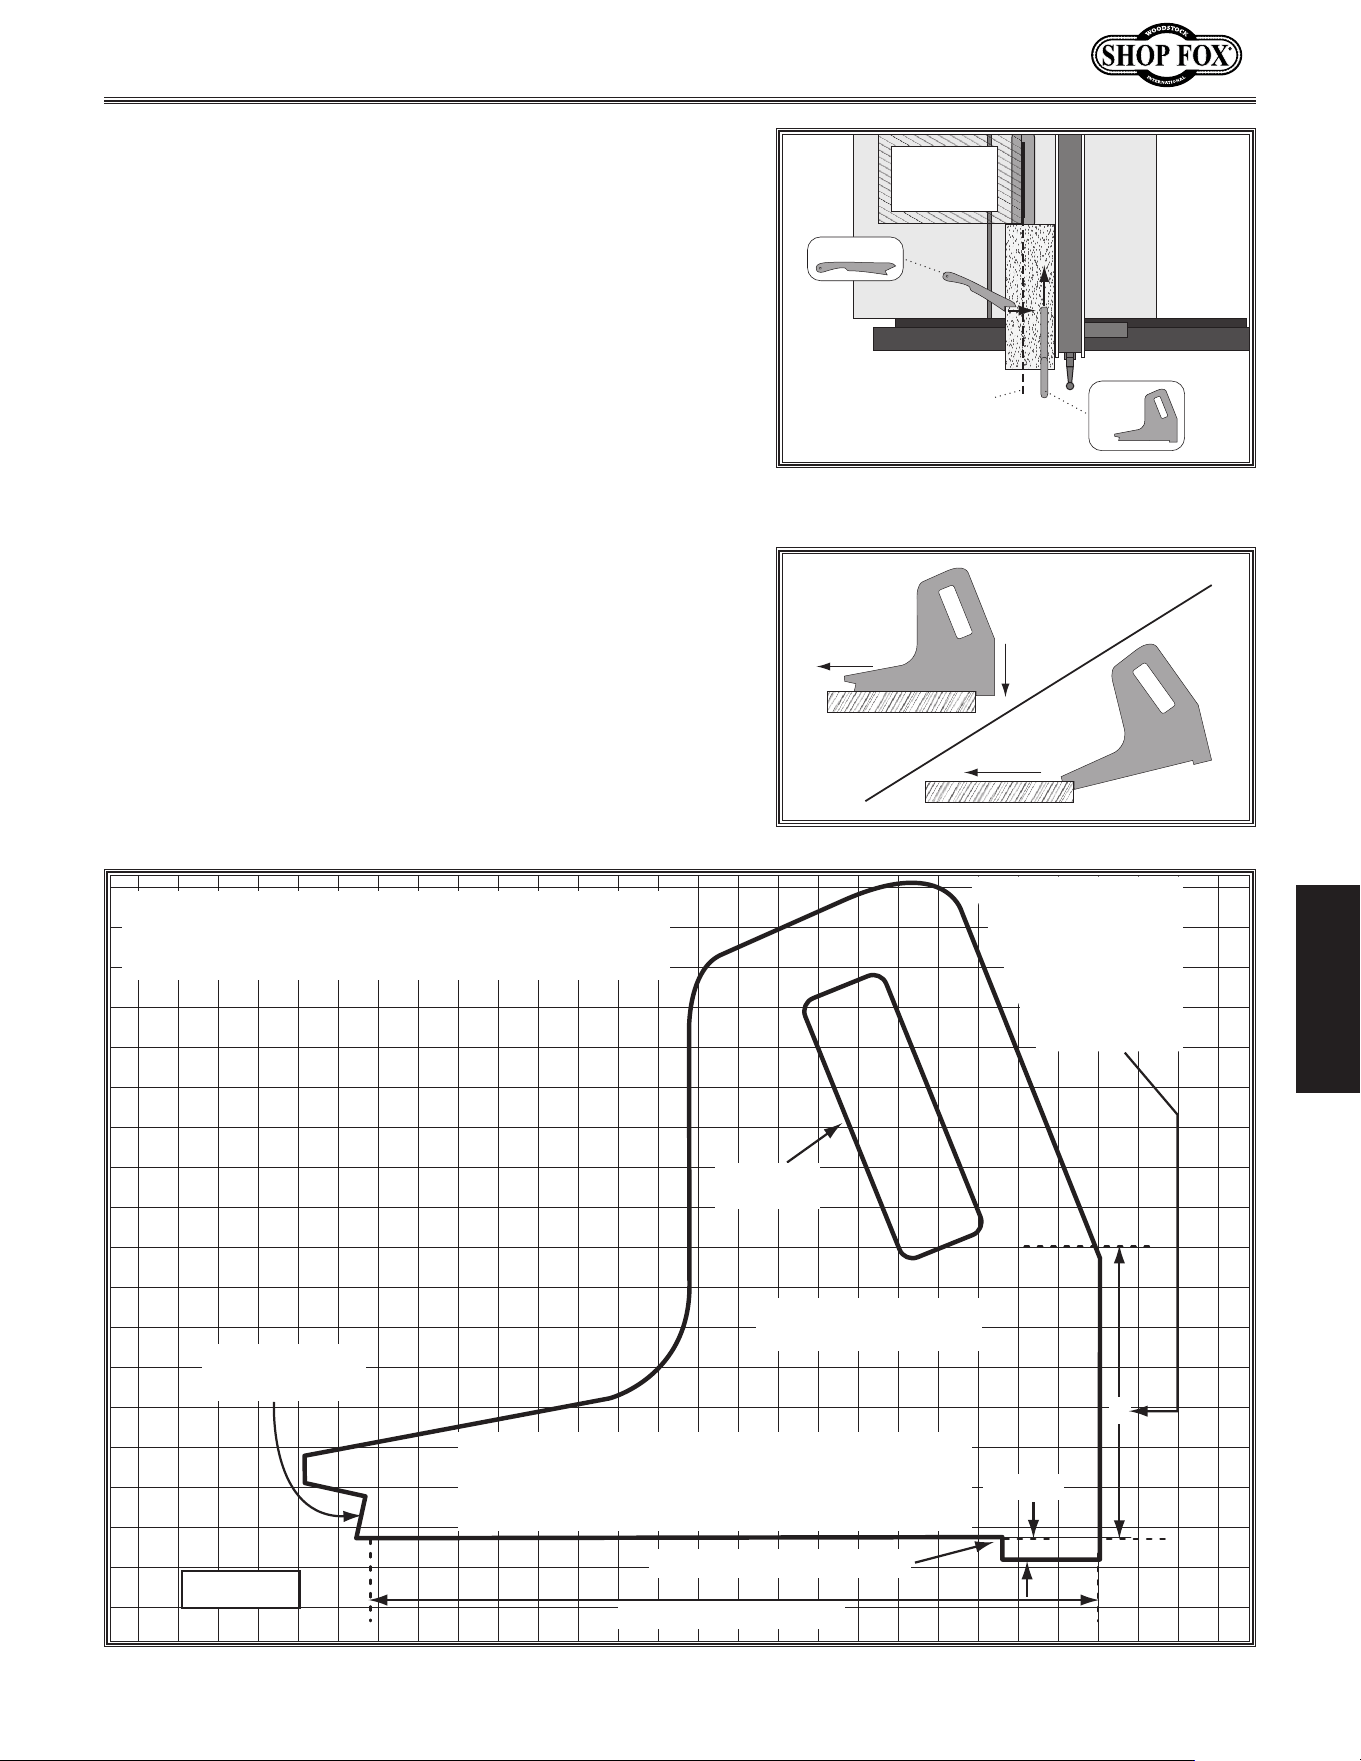
The push block design on this page (see Figure.83) can
be used in two different ways (see Figure.82). Typically,
the bottom of the push block is used until the end of the
workpiece reaches the blade.
The notched end of the push block is then used to push
the workpiece the rest of the way through the cut,
keeping the operator's hands at a safe distance from the
blade. A push stick is often used at the same time in the
other hand to support the workpiece during the cut.
Figure.82. Side view of push block in use.
Blade
Path
Push Stick
Push
Block
Push Stick
Prohibition
Zone
Feeding
Supporting
Figure.81. Using a push block and push
stick to make a rip cut.
9"−10" Minimum Length
Lip for pushing workpiece
Handle for
firm grip
Make push block with
1
⁄2"—
3
⁄4" thick material
1
⁄4"—
1
⁄2"
4"
Notch for use
as a push stick
1
⁄2" Grid
CAUTION: Only use hardwood, sturdy plywood, or
high-density plastic. Do not use softwood that
may break under pressure or metal that can break
teeth from the blade!
CAUTION: Bottom
of handle must be
at least 4" above
bottom of push
block to keep
hand away from
blade.
Figure.83. Template for a basic shop-made push stick (not shown at actual size).
Making.a.Push.Block
Use this template to make your own push block.
Loading ...
Loading ...
Loading ...