Loading ...
Loading ...
Loading ...
-56-
Model W1819/W1820 (Mfg. Since 09/11)
OPERATIONS
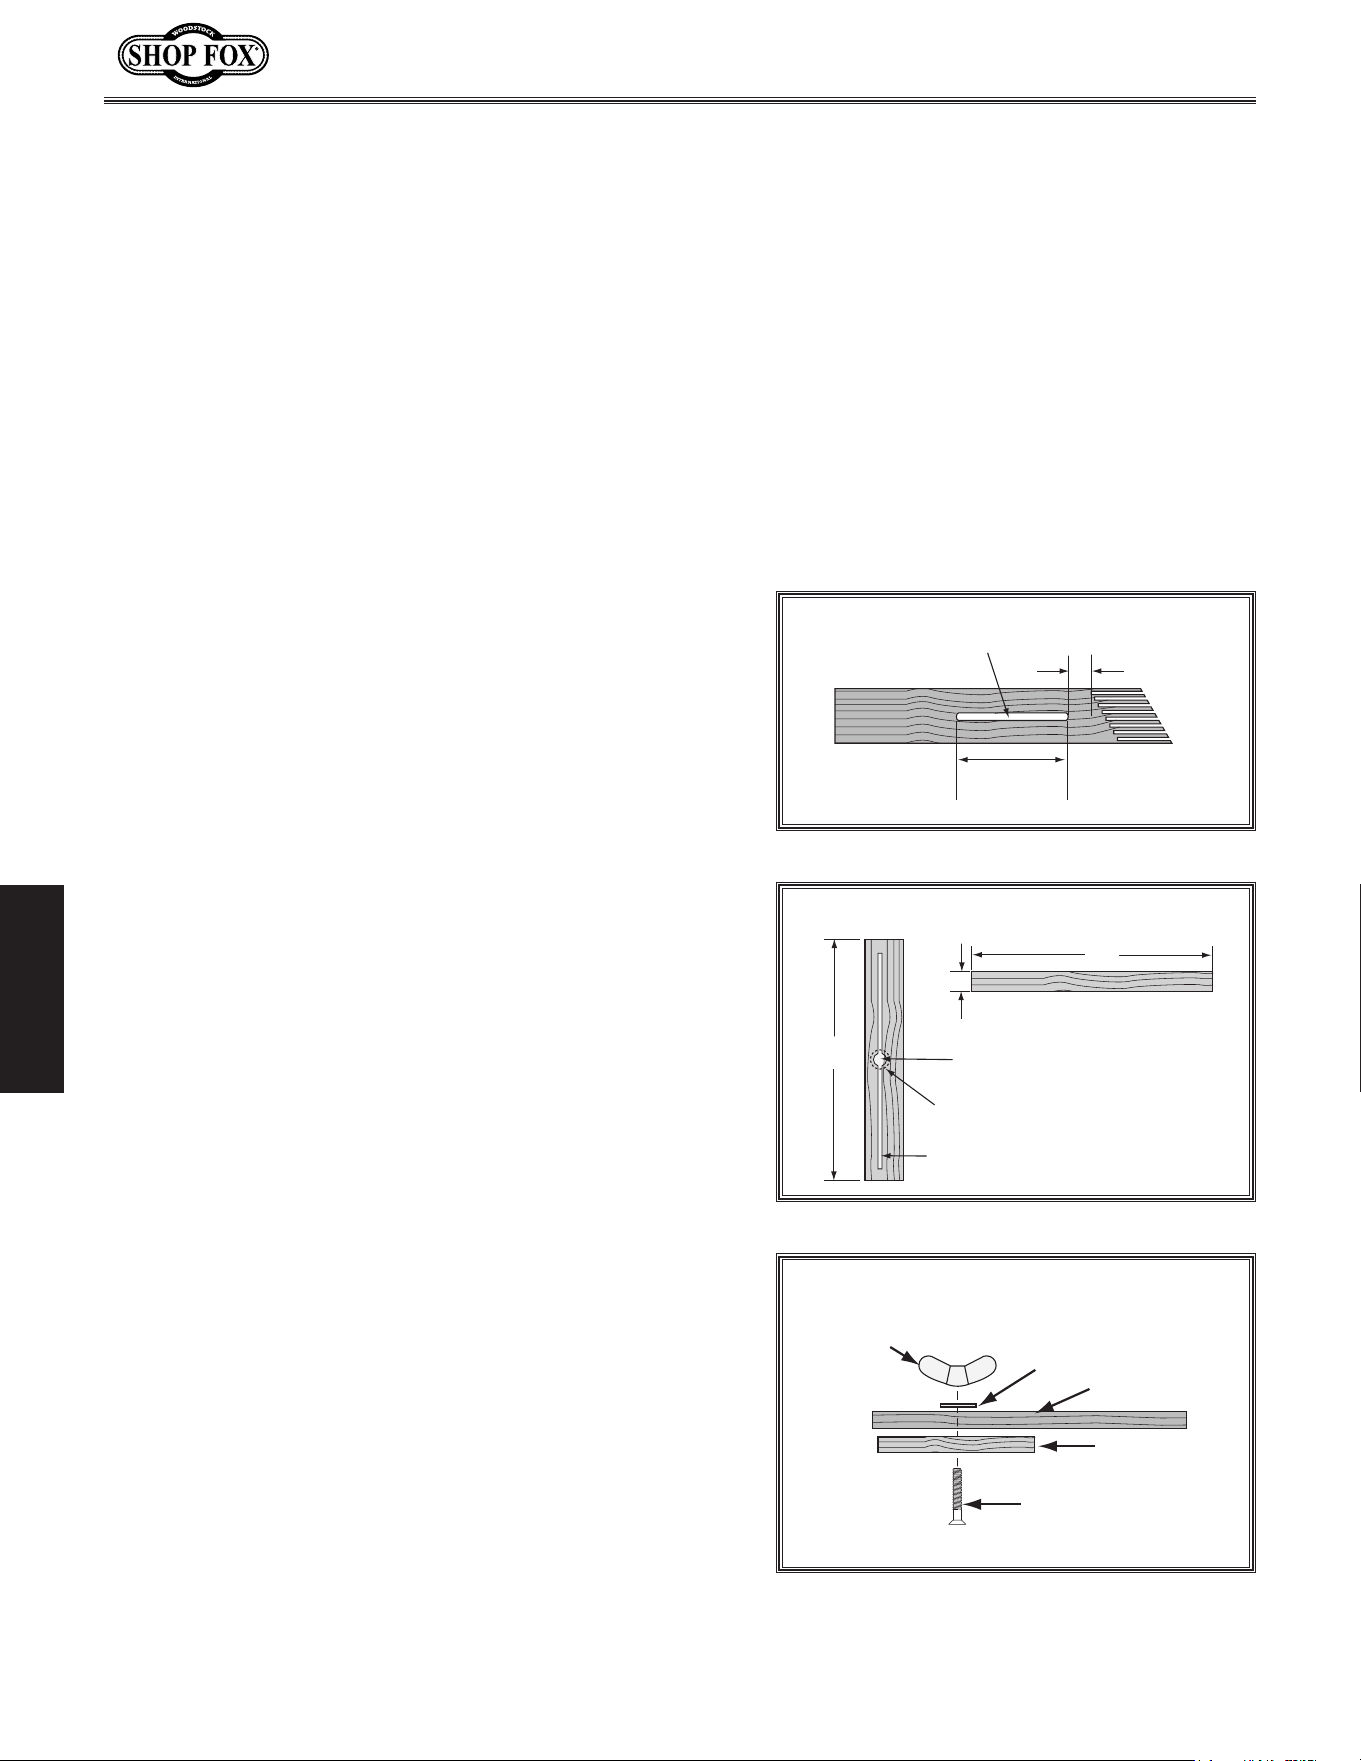
1"—2"
4"—5"
1
/
4
"—
3
/
8
" Slot
Figure.73. Slot routed in featherboard.
5"
5"
4" Slot
(Top View)
(Side View)
3
/
8
"
Countersink on Bottom
1
/
4
" Hole
Figure.74. Miter bar pattern.
(Side View)
Wing Nut
Miter Bar
Featherboard
Flat Head Screw
Flat Washer
Figure.75. Assembling miter slot
featherboard components.
4. Rout a
1
⁄4"–
3
⁄8" wide slot 4"–5" long in the workpiece
and 1"–2" from the short end of the featherboard
(see Figure.73).
5. Cut a miter bar that will fit in the table miter slot
approximately 5" long, as shown in Figure.74.
Tip:.Consider making the miter bar longer for larger
featherboards—approximately half the length of the
total featherboard—to support the force applied to
the featherboard during use.
. Tip: The length of the flat head screw depends on
the thickness of the featherboard—though 1
1
⁄2" to 2"
lengths usually work.
Now, proceed to Mounting.Featherboard.in.Miter.
Slot on Page.57.
6. Drill a
1
⁄4" hole in the center of the bar, then
countersink the bottom to fit a
1
⁄4"-20 flat head
screw.
7. Mark a 4" line through the center of the countersunk
hole, then use a jig saw with a narrow blade to cut
it out.
8. Assemble the miter bar and featherboard with a
1
⁄4"-
20 x flat head screw, flat washer, and a wing nut or
a star knob (see Figure.75). Congratulations! Your
featherboard is complete.
3. Make a series of end cuts with the grain,
approximately
3
⁄8"–
1
⁄4" apart and 2"–3" long, as shown
in Figure.72.(A).
Alternatively, start cuts at 2"-3" deep, then make
them progressively deeper, as shown in Figure.72.
(B).
IMPORTANT: Cuts made across the grain will result
in weak fingers that easily break when flexed. When
made correctly, the fingers should withstand flexing
from moderate pressure. To test the finger flexibility,
push firmly on the ends with your thumb. If the
fingers do not flex, they are likely too thick (the
cuts are too far apart).
Loading ...
Loading ...
Loading ...