Loading ...
Loading ...
Loading ...
12
1
CANOPY HOUSING INSTALLATION
D
2
E
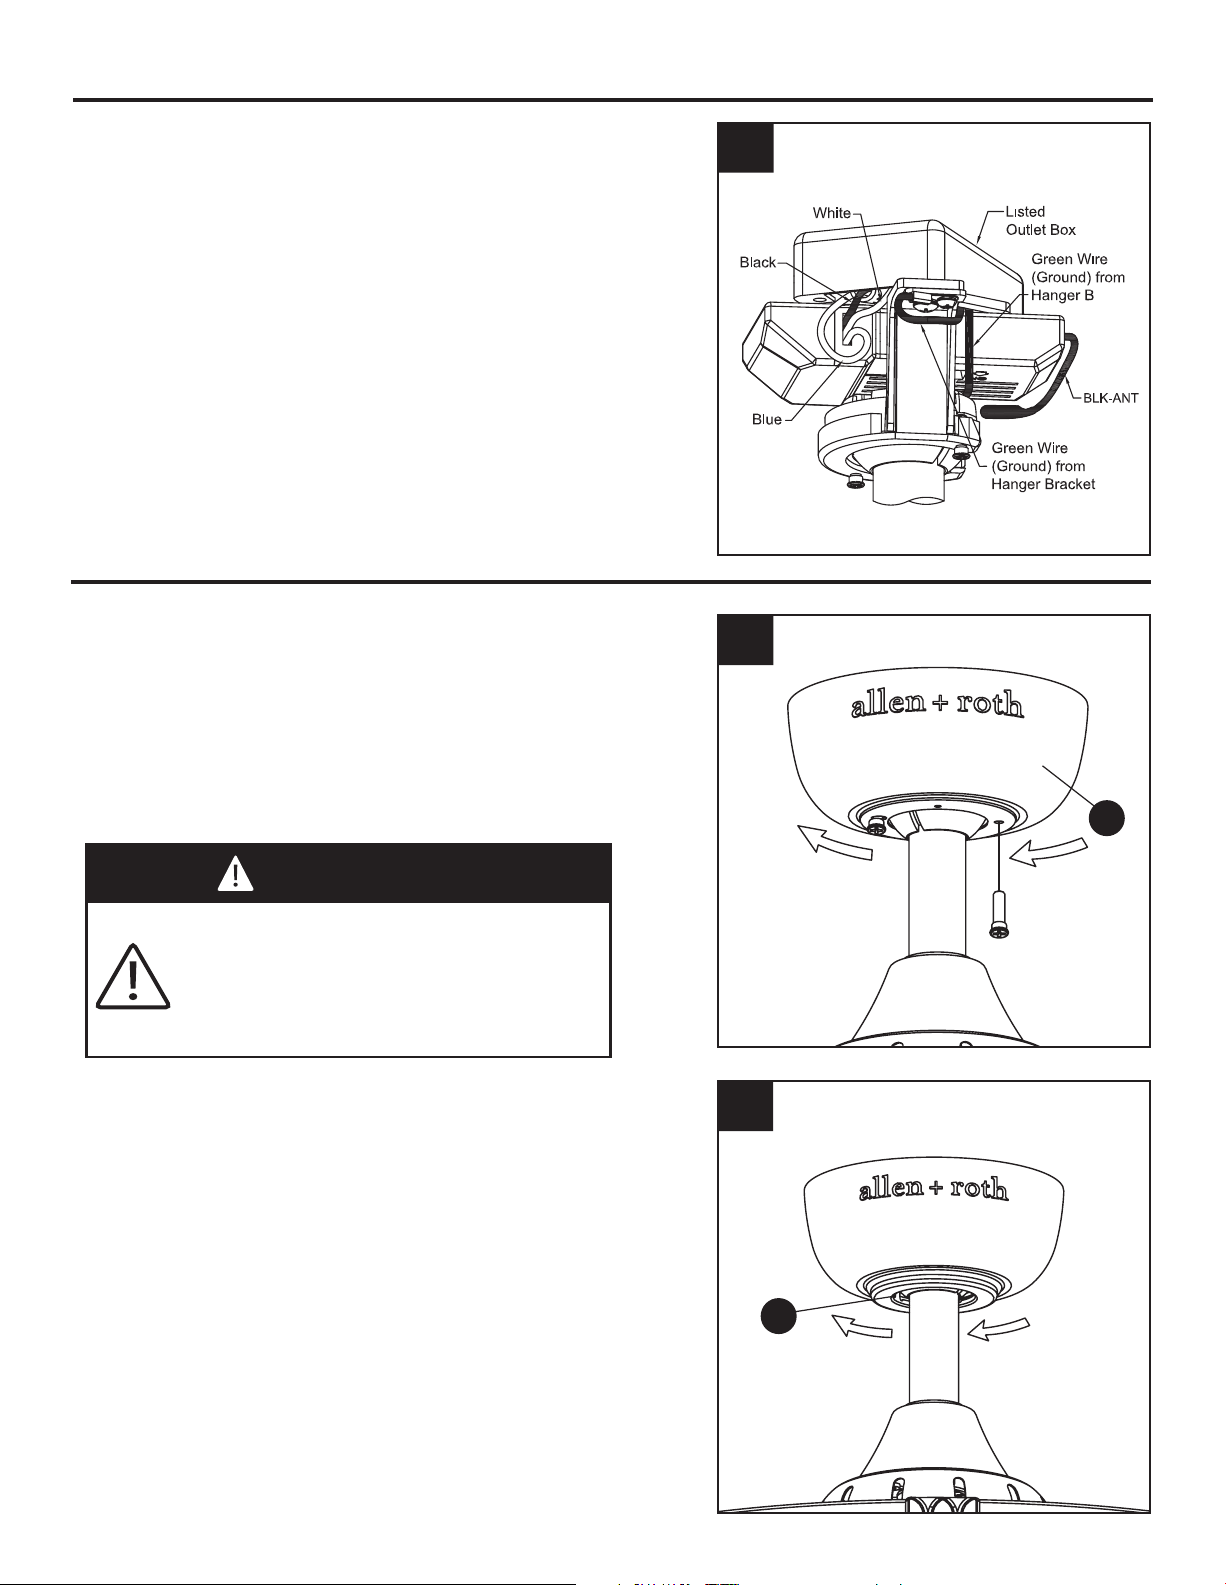
WIRING INSTRUCTIONS (Continued)
5
all
5. After connections have been made, turn leads
upward and carefully push leads into the outlet
box, with the white and green leads to one side
of the box and the black leads toward the other
side. The wires should be spread apart with the
grounded conductor and the equipment-
grounding conductor on one side of the outlet
box and the ungrounded conductor on the other
side of the outlet box. (Fig. 5)
WARNING
To avoid possible fire or shock, make
sure that the electrical wires are
completely inside the canopy housing
and not pinched between the housing
and the ceiling.
1. Remove one of the two shoulder screws in the
hanger bracket (B). Loosen the second
shoulder screw without fully removing it.
Assemble ceiling canopy (D) by rotating key
slot over shoulder screw in hanger bracket (B).
Tighten shoulder screw. Fully assemble and
tighten second shoulder screw that was
previously removed. (Fig. 1)
2. Securely attach and tighten the canopy
screw cover (E) over the shoulder screws in
the hanger bracket (B), utilizing the keyslot
twistlock feature. (Fig. 2)
Loading ...
Loading ...
Loading ...