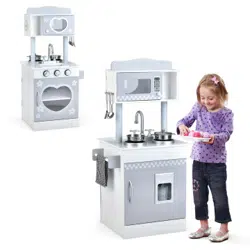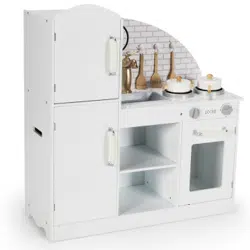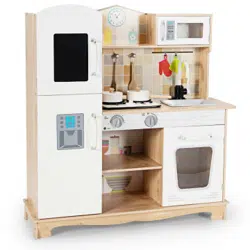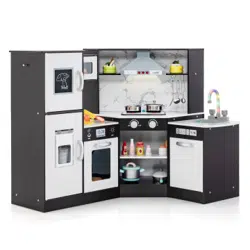
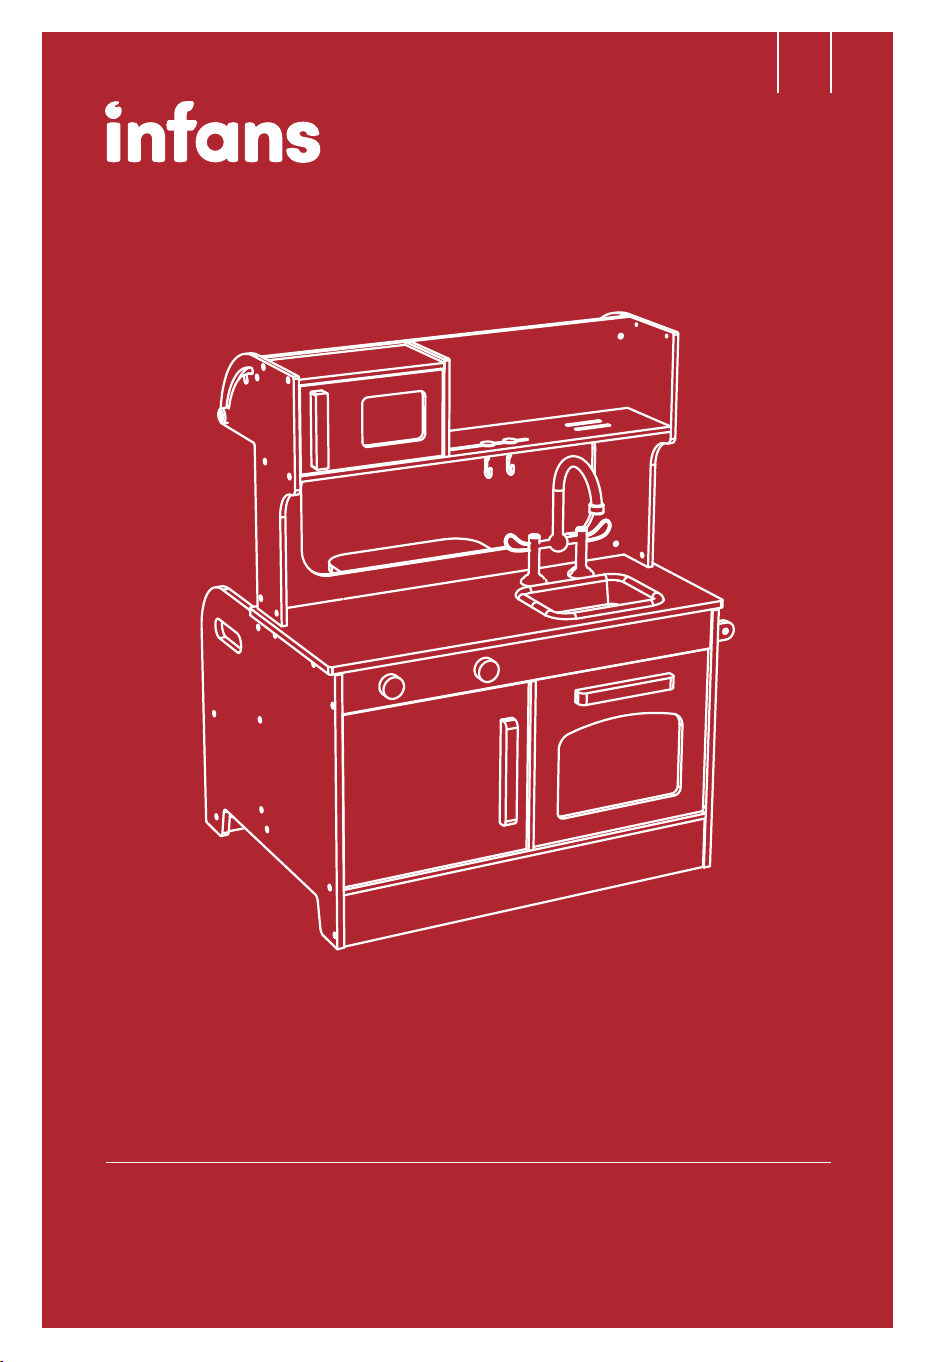
TP10050
Kids Kitchen Playset
/ Cuisine pour Enfants
USER'S MANUAL / MANUEL D'UTILISATEUR
EN FR
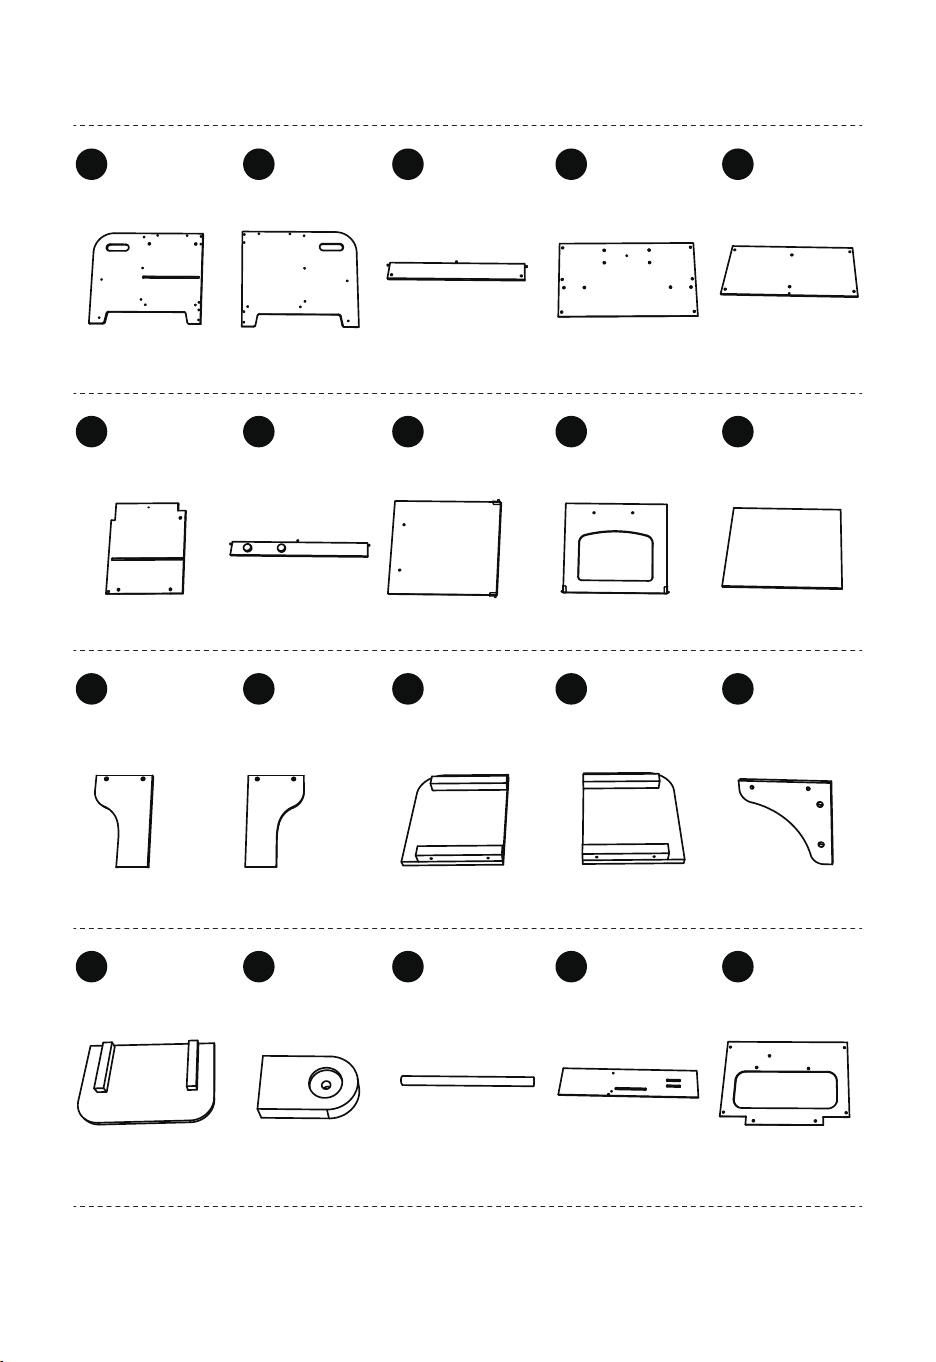
A1 x1 A2 x1 B x1 C x1 D x1
E x1 F x1 G x1 H x1 I x1
J1 x1 J2 x1 K1 x1 K2 x1 L x2
M x1 N x2 O x1 P x1 Q x1
02
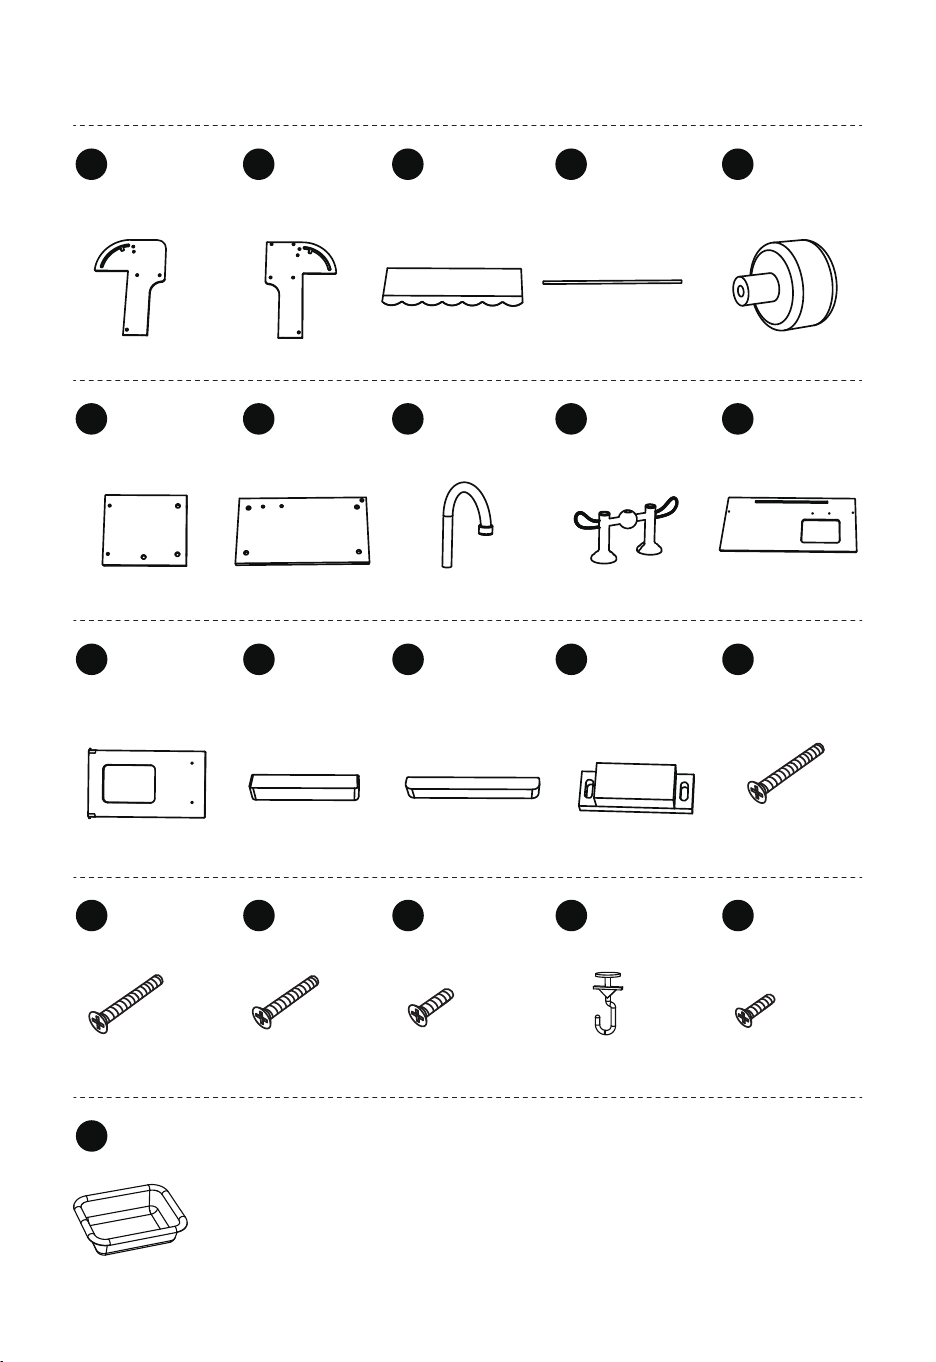
R1 x1 R2 x1 S x1 T x2 U x2
V x1 W x1 X1 x1 X2 x1 Y x1
Z x1 a x1 b x2 c x3 d x46
e x27
j x1
f x6 g x6 h x2 i x1
03
B
A2
dx6
C
D
x1 x1
x1
x1
x2 x2x2
01
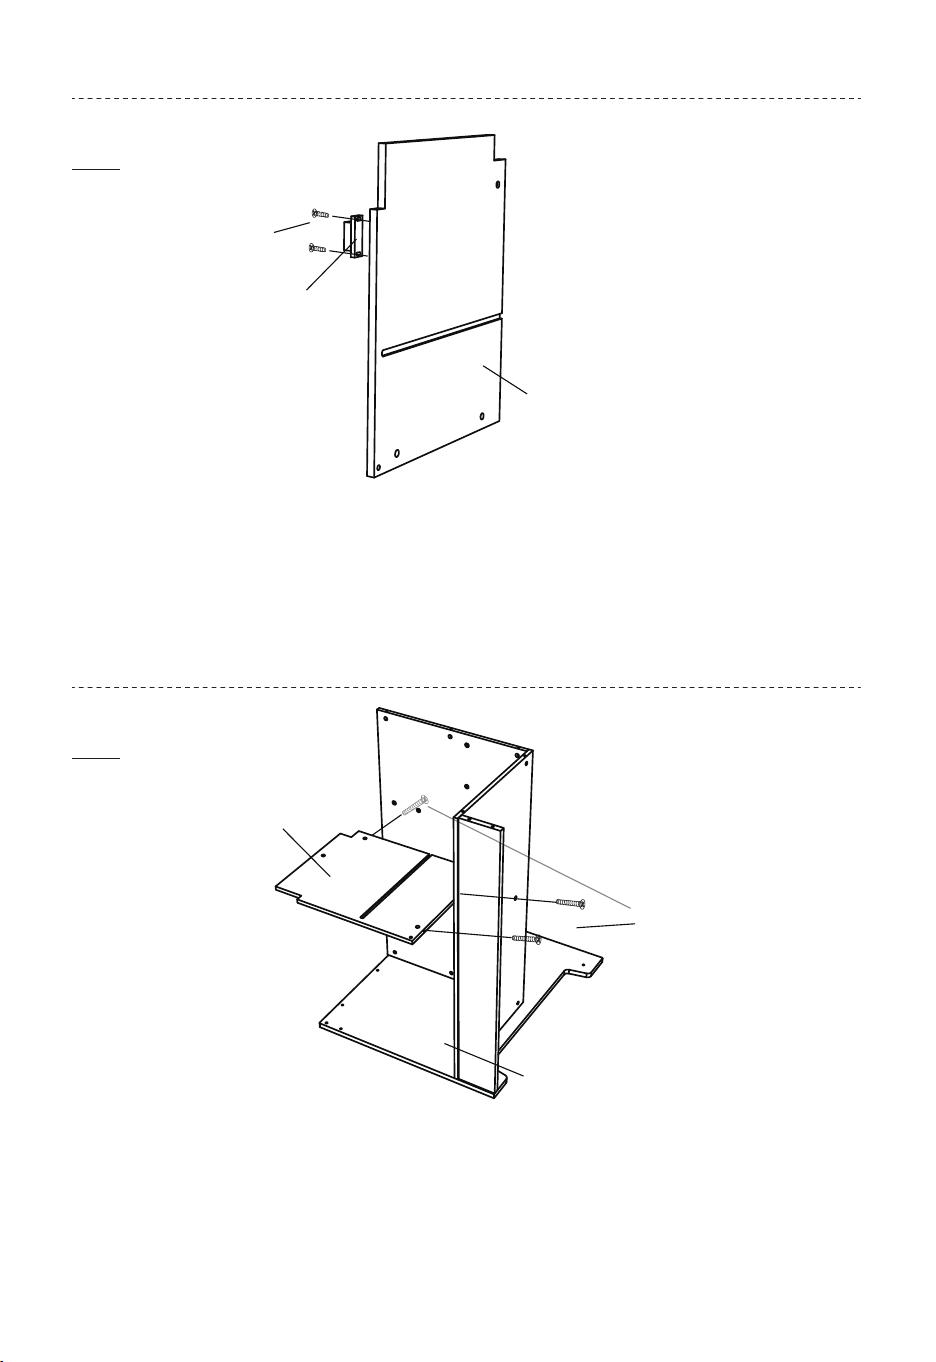
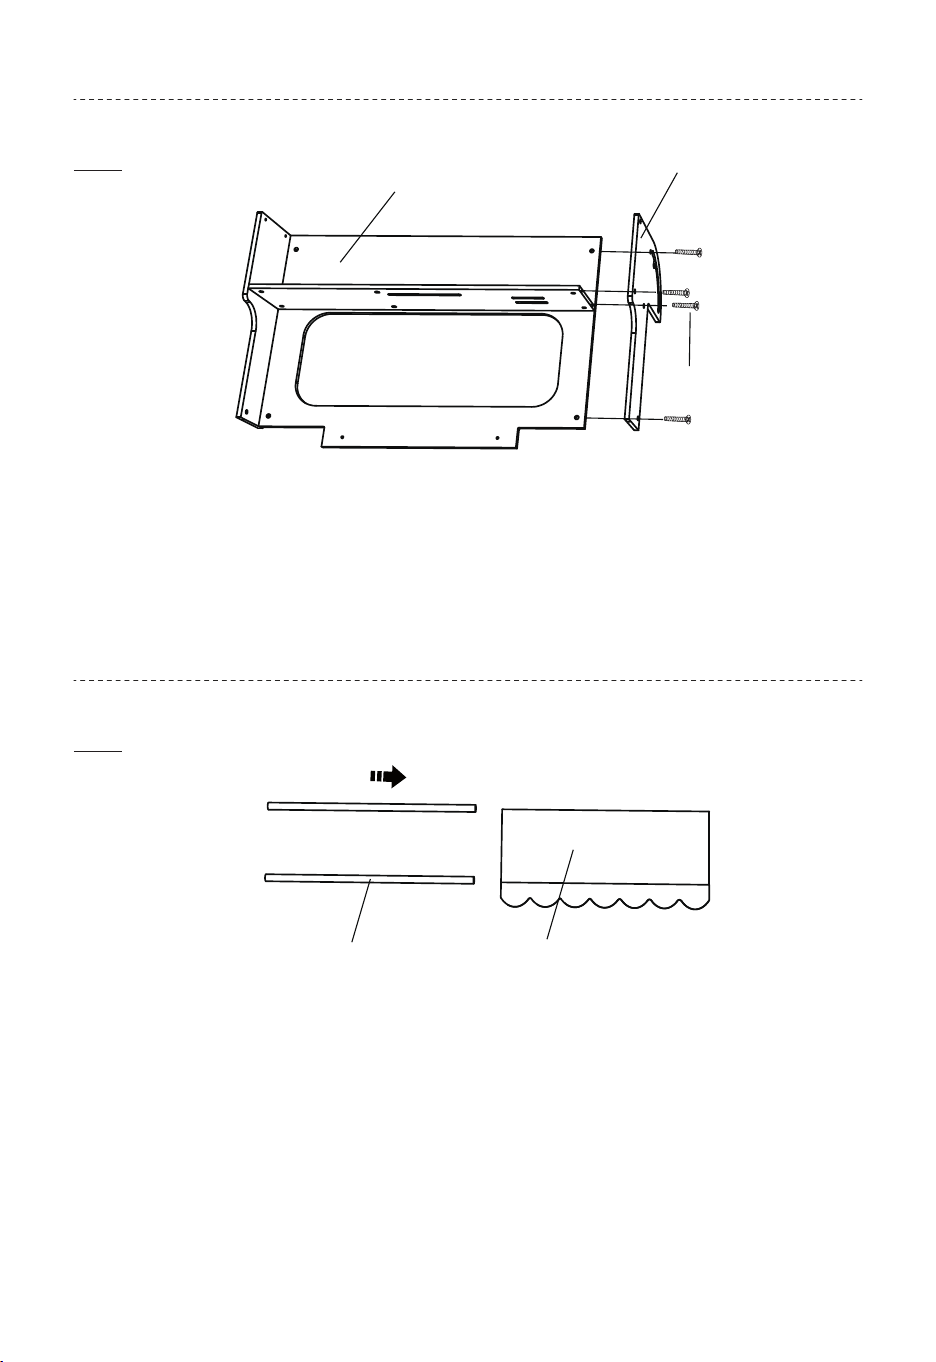
EN: Assemble the B, C and D boards to the A2 board with 6 d screws.
Align the B and D boards for easy screwing;
FR: Assemblez les planches (B, C et D) à la planche (A2) avec 6 vis
(d). Alignez les planches (B et D) pour faciliter le vissage.
04
gx2
c
E
01
dx3
02
02
03
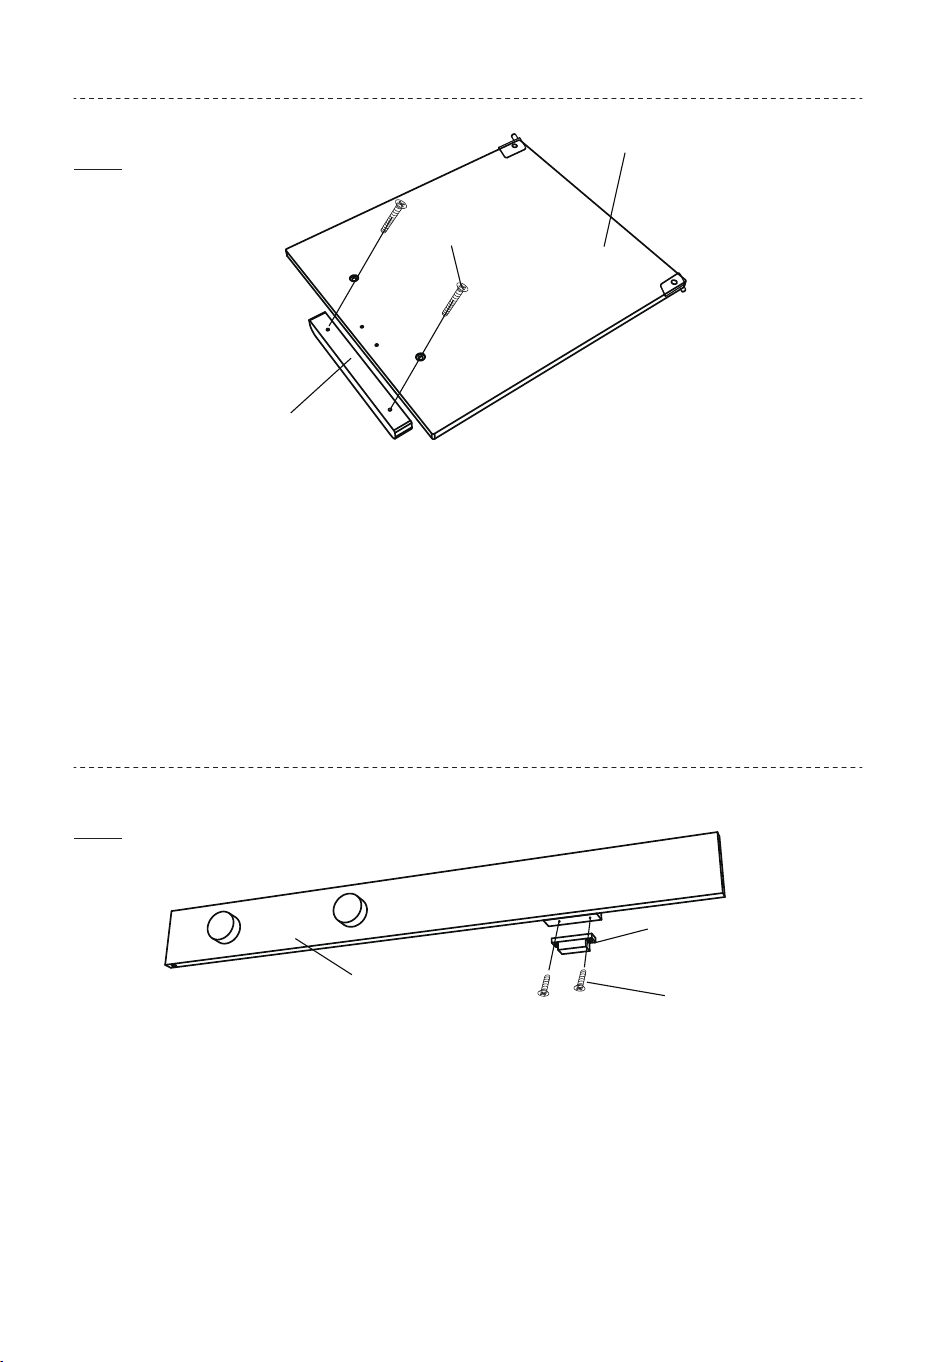
EN: Assemble the c magnetic plastic part to the E board with 2 g
screws. Note that the magnetic side is assembled outwards;
FR: Assemblez la pièce en plastique magnétique (c) à la planche (E)
avec 2 vis (g). Veuillez noter que le côté magnétique est assemblé.
EN: Connect the assembly in step 2 to the assembly in step 1 with 3
d screws;
FR: Fixez l'assemblage de l'étape 2 à l'assemblage de l'étape 1 avec 3
vis (d).
05
gx2
F
c
fx2
G
b
04
05
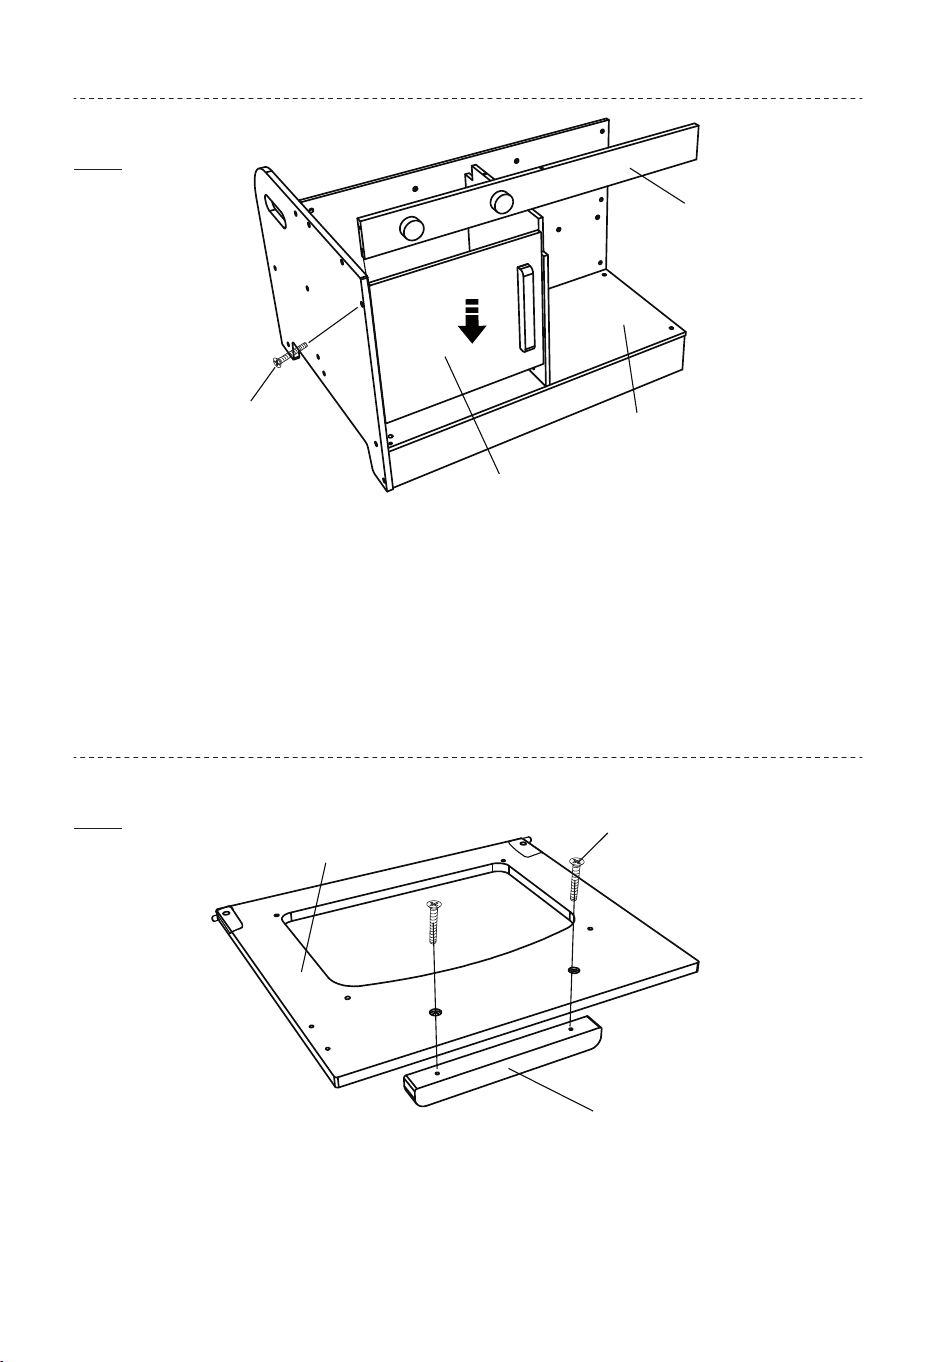
EN: Assemble the b to the G board with 2 f screws. Note that the b
has 2 colors, do not assemble the same color as the G board
together;
FR: Assemblez la pièce (b) à la planche (G) avec 2 vis (f). Veuillez
noter que la pièce (b) a 2 couleurs, ne pas assembler la même
couleur que la planche (G).
EN: Assemble the c magnetic plastic parts to the F board with 2 g
screws. Note that the magnetic side is assembled outwards;
FR: Assemblez la pièce en plastique magnétique (c) à la planche (F)
avec 2 vis (g). Veuillez noter que le côté magnétique est assemblé.
06
03
d
04
05
06
EN: First connect the assembly in step 4 to the assembly in Step 3,
and then use 1 d screw to connect the assembly in step 5 to the
assembly in step 3;
FR: Connectez d'abord l'assemblage de l'étape 4 à l'assemblage de
l'étape 3, puis utilisez 1 vis (d) pour connecter l'assemblage de
l'étape 5 à l'assemblage de l'étape 3.
07
EN: Assemble the b board to the H board with 2 f screws;
FR: Assemblez le planche (b) à la plache (H) avec 2 vis (f).
fx2
H
b
07
EN: First connect the assembly in step 7 to the assembly in Step 6,
then insert the I board into the assembly in step 6, and then
assemble A1 to assembly in step 6 with 7 d screws;
FR: Connectez d'abord l'assemblage de l'étape 7 à l'assemblage de
l'étape 6, puis insérez la planche (I) dans l'assemblage de l'étape 6,
puis assemblez la planche (A1) à l'assemblage de l'étape 6 avec 7 vis
(d).
EN: Assemble J1 and J2 to the assembly in step 8 respectively with 4
d screws;
FR: Assemblez les planches (J1 et J2) à l'assemblage de l'étape 8
respectivement avec 4 vis (d).
08
09
08
dx2
dx2
J2
J1
06
I
A1
dx7
07
08
EN: Assemble K1 and K2 to the assembly in step 9 respectively with
8 e screws;
FR: Assemblez les planches (K1 et K2) à l'assemblage de l'étape 9
respectivement avec 8 vis (e).
EN: Assemble the 2 L to the assembly in step 10 respectively with 4
d screws;
FR: Assemblez les 2 planches (L) à l'assemblage de l'étape 10
respectivement avec 4 vis (d).
10
11
09
ex8
K2
K1
10
dx4
L
x2
09
EN: Assemble the M board to the assembly in step 11 with 4 e
screws;
FR: Assemblez la planche (M) à l'assemblage de l'étape 11 avec 4 vis
(e).
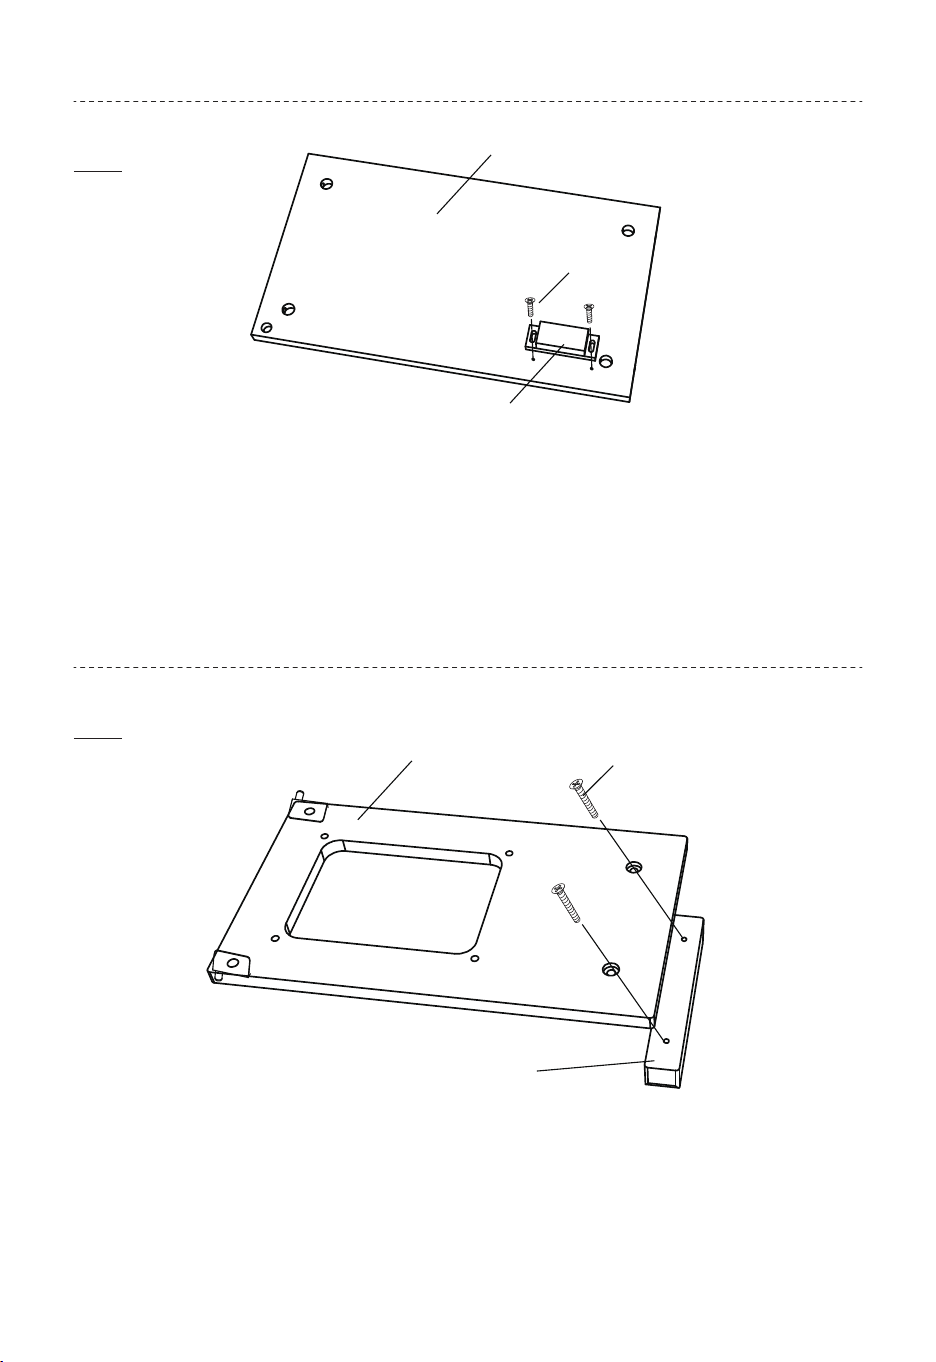
EN: Assemble the 2 N boards to the O rod with 2 e screws;
FR: Assemblez les 2 planches (N) à la tige (O) avec 2 vis (e).
12
13
11
M
ex4
O
N
ex2
x2
10
EN: First assemble the P board to the Q board with 2 d screws, and
then assemble the R2 board to the PQ assembly with 4 d screws;
FR: Assemblez d'abord la planche (P) à la planche (Q) avec 2 vis (d),
puis assemblez la planche (R2) à l'ensemble (PQ) avec 4 vis (d).
EN: Assemble the assembly in step 13 to the assembly in step 12
with 2 e screws;
FR: Assemblez d'abord la planche (P) à la planche (Q) avec 2 vis (d),
puis assemblez la planche (R2) à l'ensemble (PQ) avec 4 vis (d).
14
15
12
ex2
13
dx4
Q
P
R2
dx2
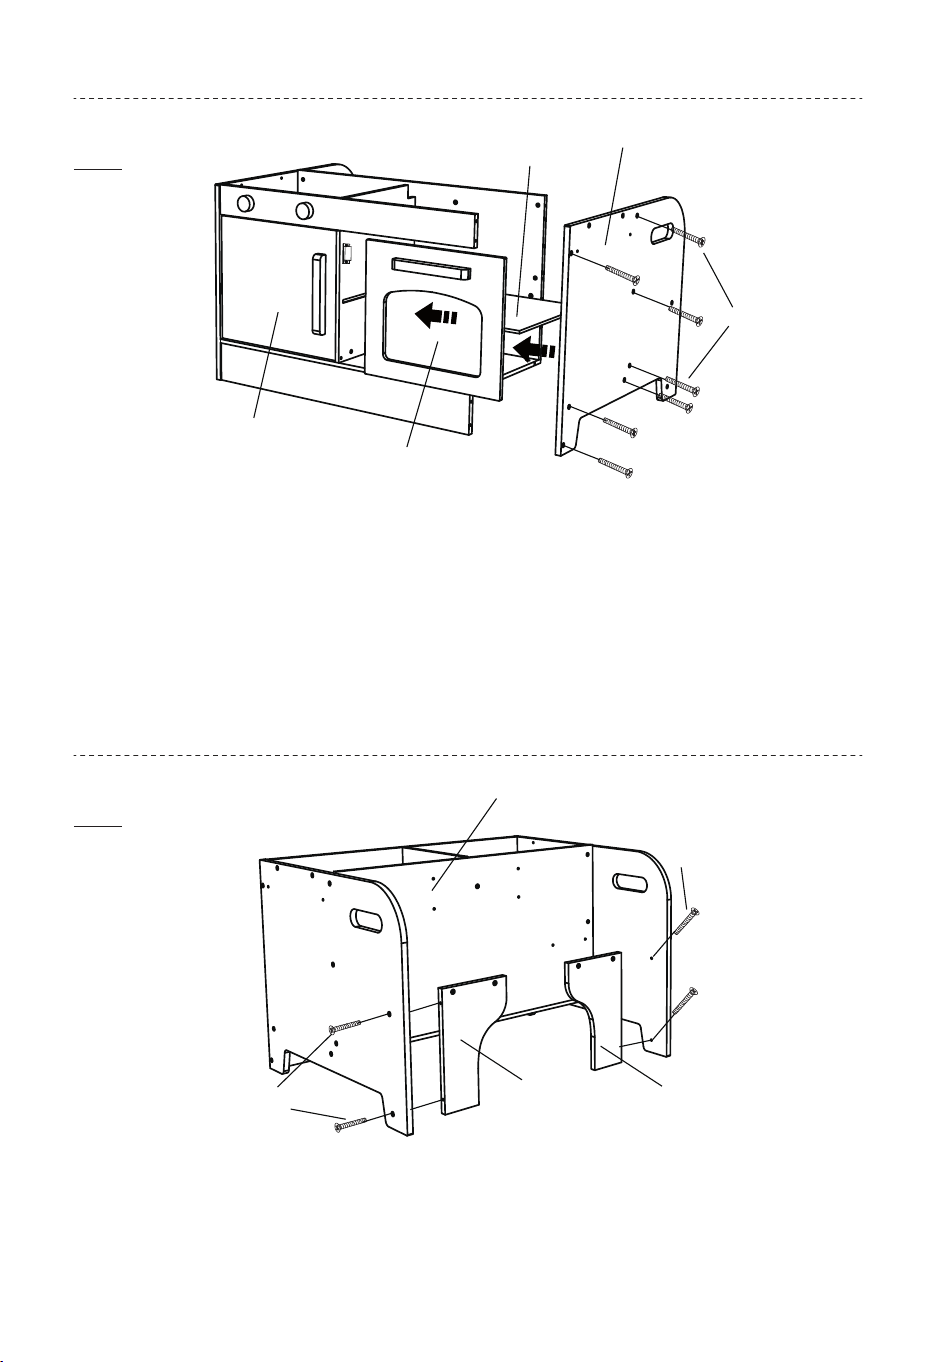
11
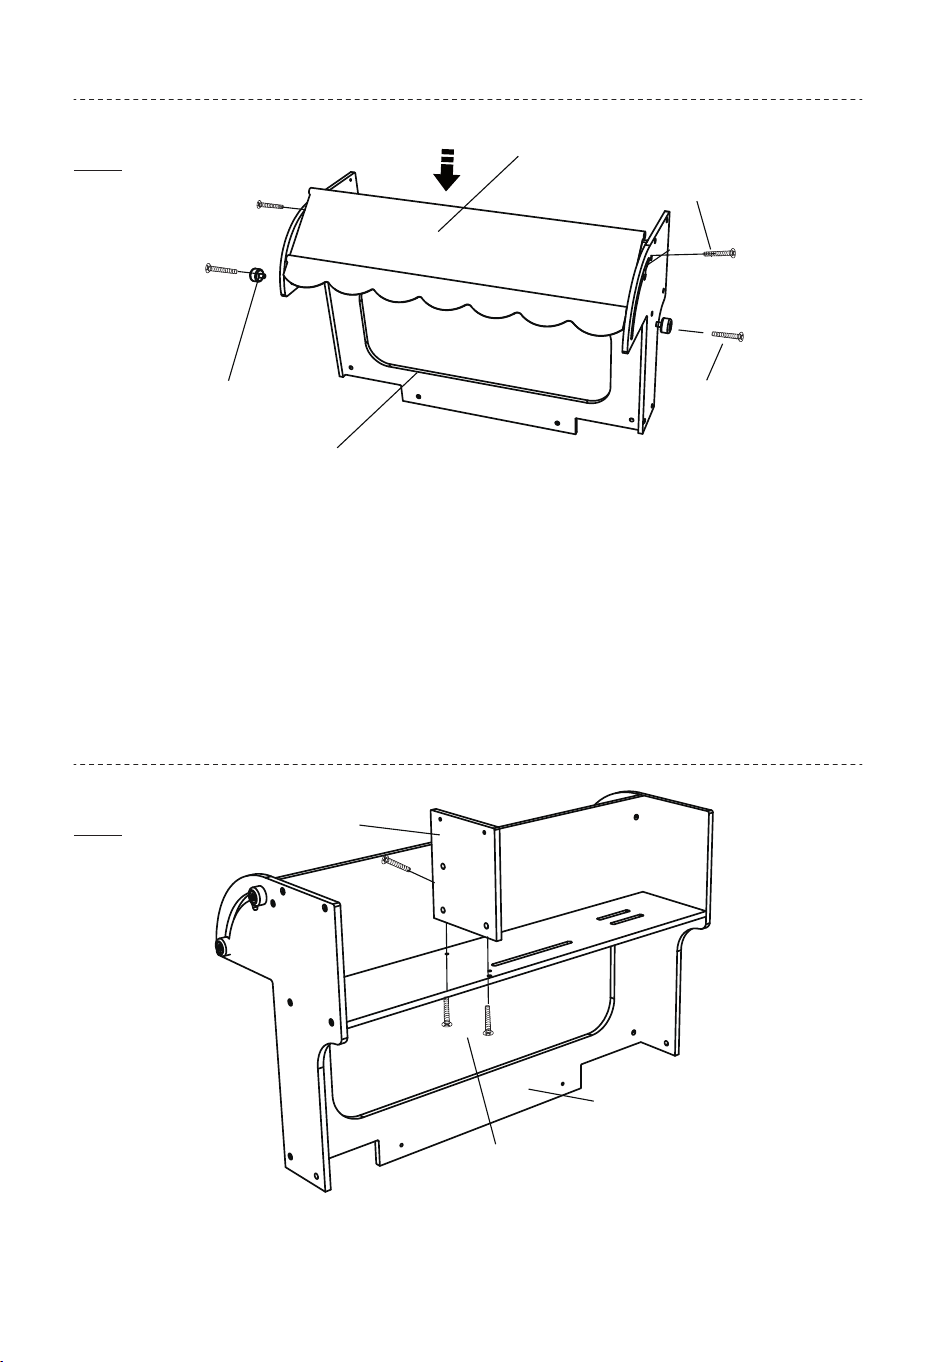
EN: Assemble the R1 board to the assembly in step 15 with 4 d
screws;
FR: Assemblez la planche (R1) à l'assemblage de l'étape 15 avec 4
vis (d).
EN: Put 2 T bars into the S fabric;
FR: Insérez 2 barres (T) dans le tissu (S).
16
17
15
dx4
R1
T
S
x2
12
EN: Connect the V board to the assembly in step 18 with 3 d screws;
FR: Fixez la planche (V) à l'assemblage de l'étape 18 avec 3 vis (d).
EN: First fix the assembly in step 17 to the assembly in step 16 with
2 e screws, and then assemble the 2 U sliders to the assembly in step
17 with 2 d screws (the screw should go through the slot in step 16,
so that it can slide freely);
FR: Fixez d'abord l'assemblage de l'étape 17 à l'assemblage de
l'étape 16 avec 2 vis (e), puis assemblez les 2 glissières (U) à
l'assemblage de l'étape 17 avec 2 vis (d) (la vis doit passer par la
fente à l'étape 16, afin qu'elle puisse coulisser librement).
18
19
16
17
dx2
U x2
ex2
18
V
dx3
13
EN: Assemble the c magnetic plastic part to the W board with 2 g
screws. Note that the magnetic side is assembled outwards;
FR: Assemblez la pièce en plastique magnétique (c) à la planche (W)
avec 2 vis (g). Veuillez noter que le côté magnétique se monte.
EN: Assemble the a board to the Z board with 2 f screws;
FR: Assemblez la planche (a) à la planche (Z) avec 2 vis (f).
20
21
gx2
c
W
Z
fx2
a
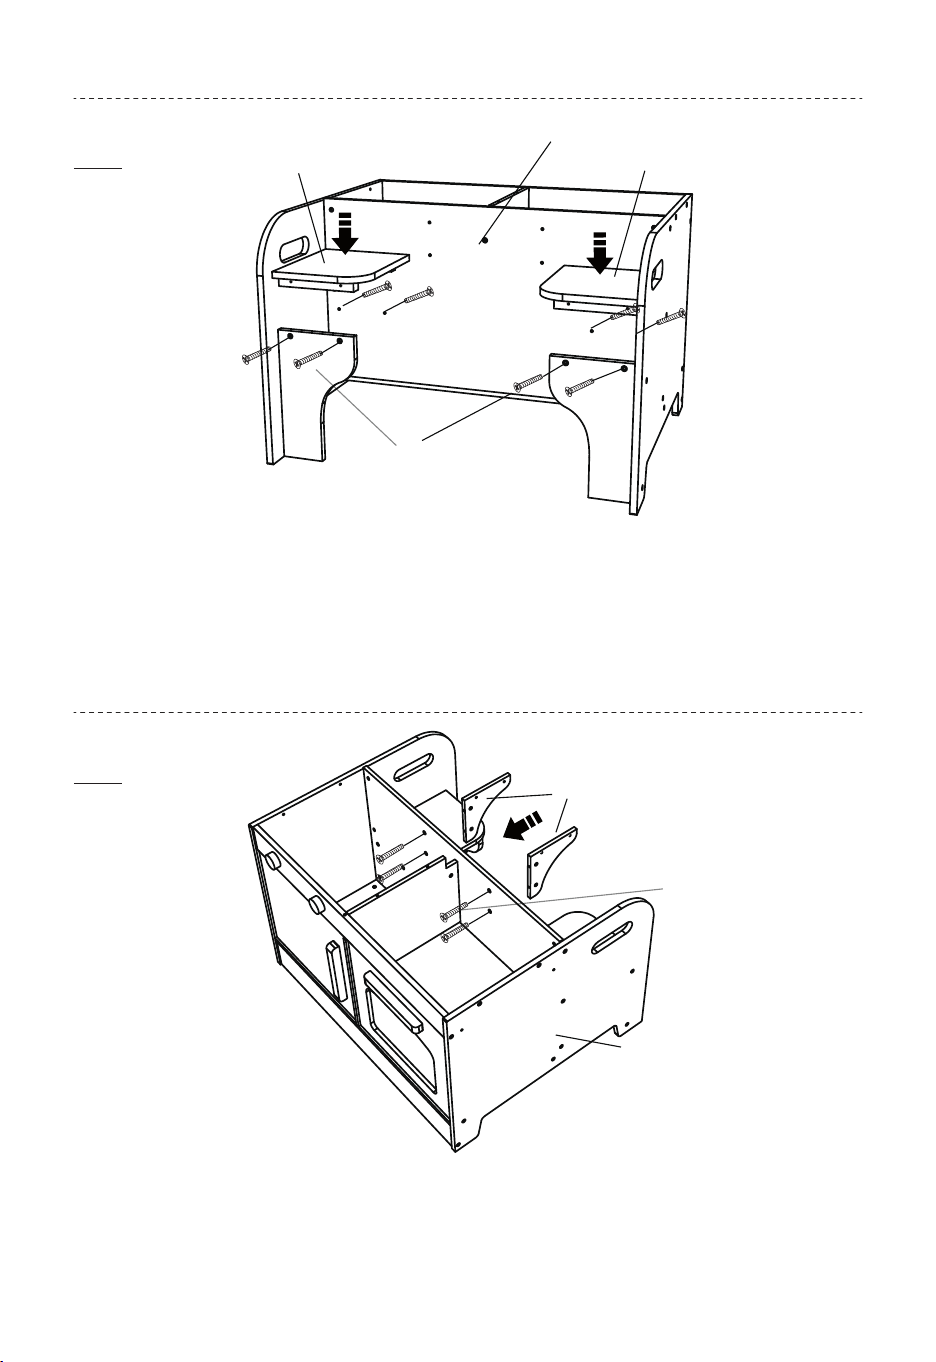
14
EN: Assemble X1 to X2 with i screw;
FR: Assemblez la pièce (X1) à la pièce (X2) avec la vis (i).
EN: First connect the assembly in step 21 to the assembly in step 19,
and then connectthe assembly in step 20 to the assembly in step 19
with 4 d screws;
FR: Connectez d'abord l'assemblage de l'étape 21 à l'assemblage de
l'étape 19, puis connectez l'assemblage de l'étape 20 à l'assemblage
de l'étape 19 avec 4 vis (d).
22
23
19
dx2
dx2
20
21
i
X1
X2
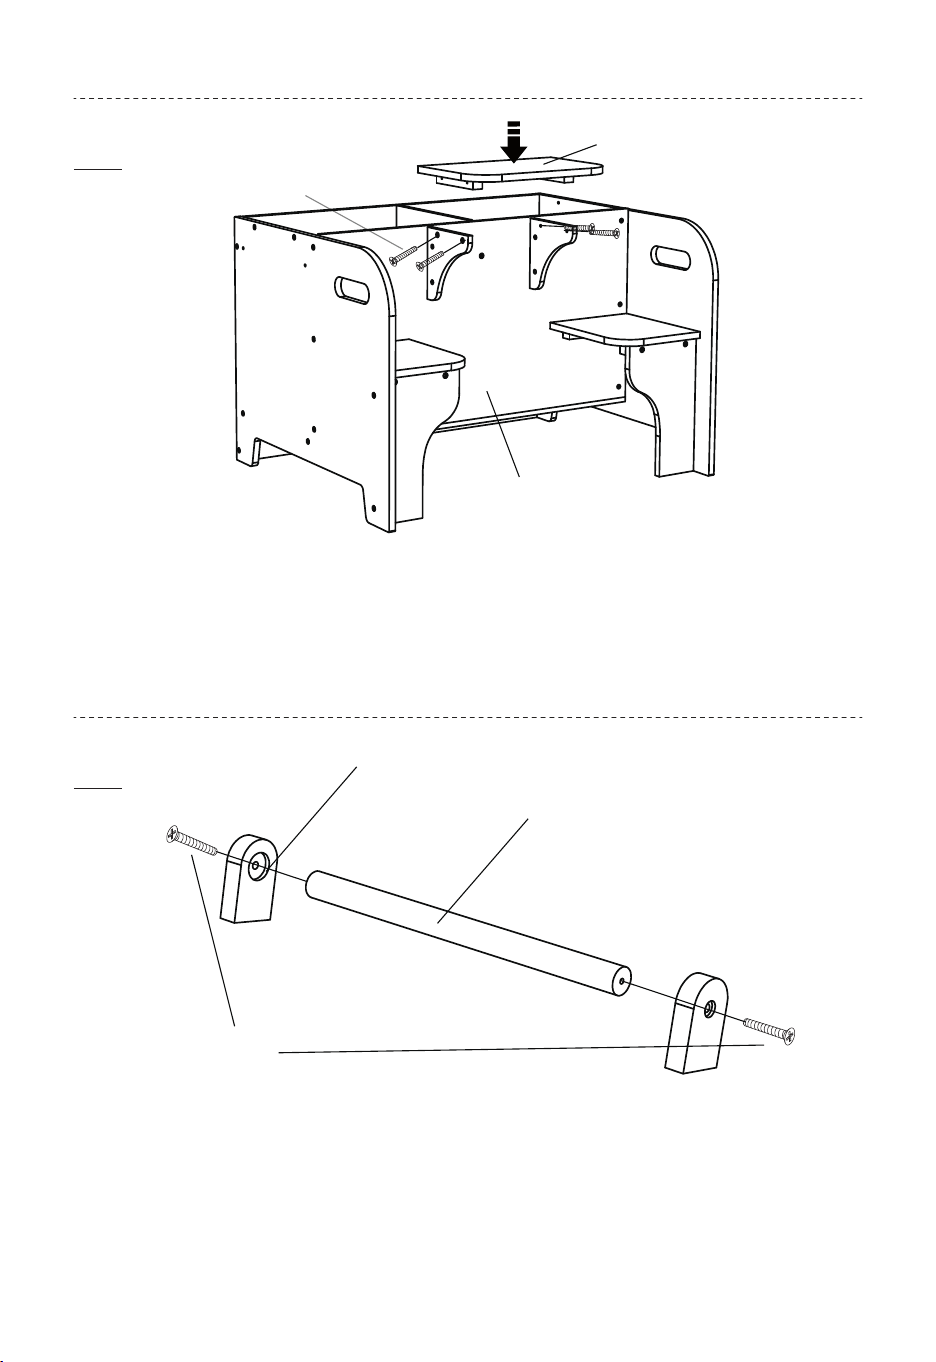
15
EN: Connect the assembly in step 23 to the Y board with 2 e screws;
FR: Fixez l'assemblage de l'étape 23 à la planche (Y) avec 2 vis (e).
EN: Connect the assembly in step 22 to the assembly in step 24 with
2 d screws and 2 e screws;
FR: Fixez l'assemblage de l'étape 22 à l'assemblage de l'étape 24
avec 2 vis (d) et 2 vis (e).
24
25
22
24
ex2
d
d
Y
G
ex2
23
16
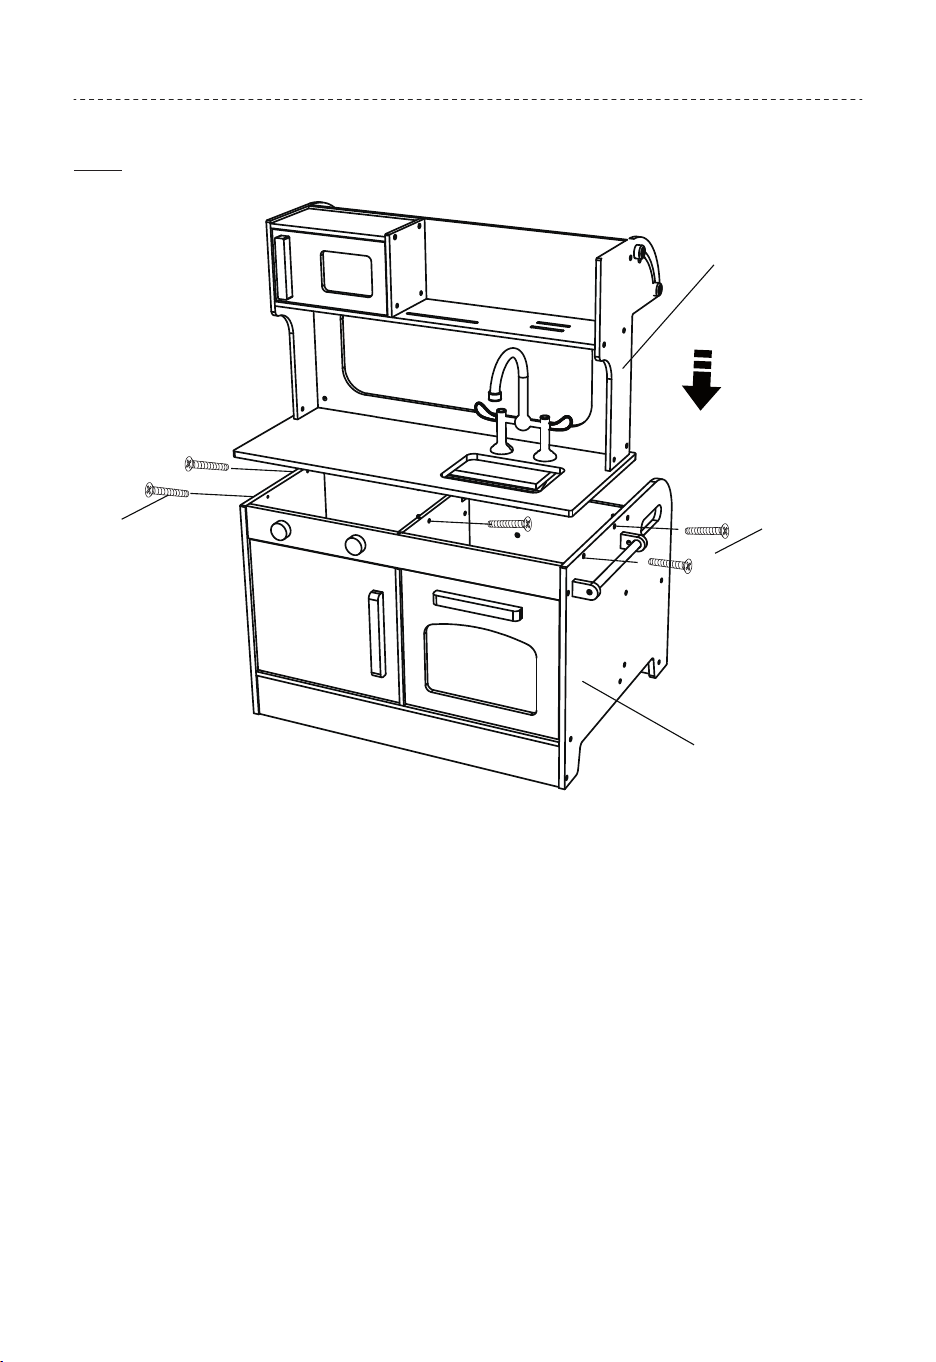
EN: Connect the assembly in step 25 to the assembly in step 14 with
5 e screws;
FR: Fixez l'assemblage de l'étape 25 à l'assemblage de l'étape 14
avec 5 vis (e).
26
14
25
ex2
ex3
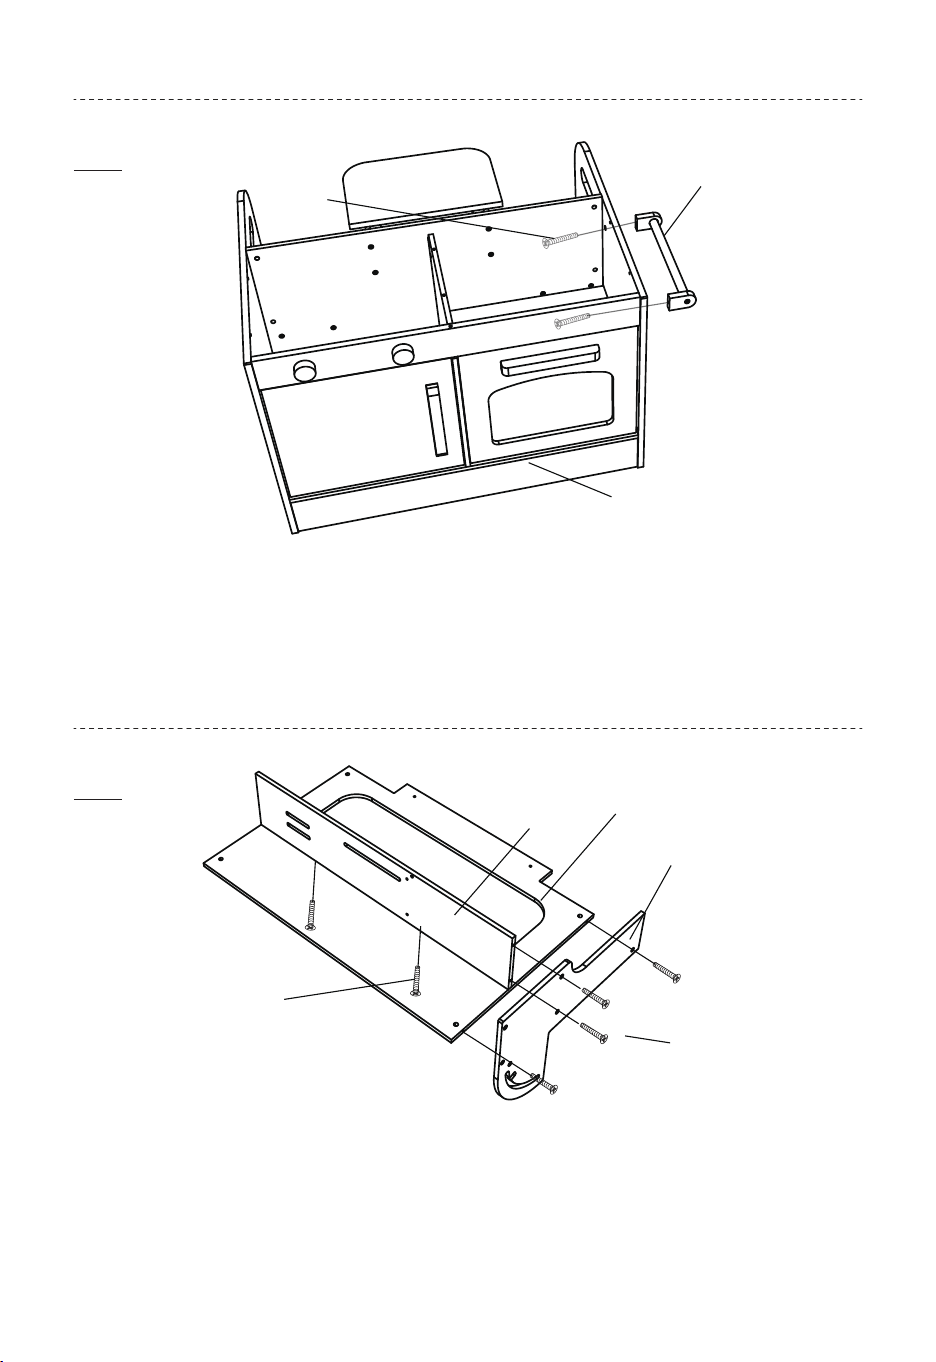
17
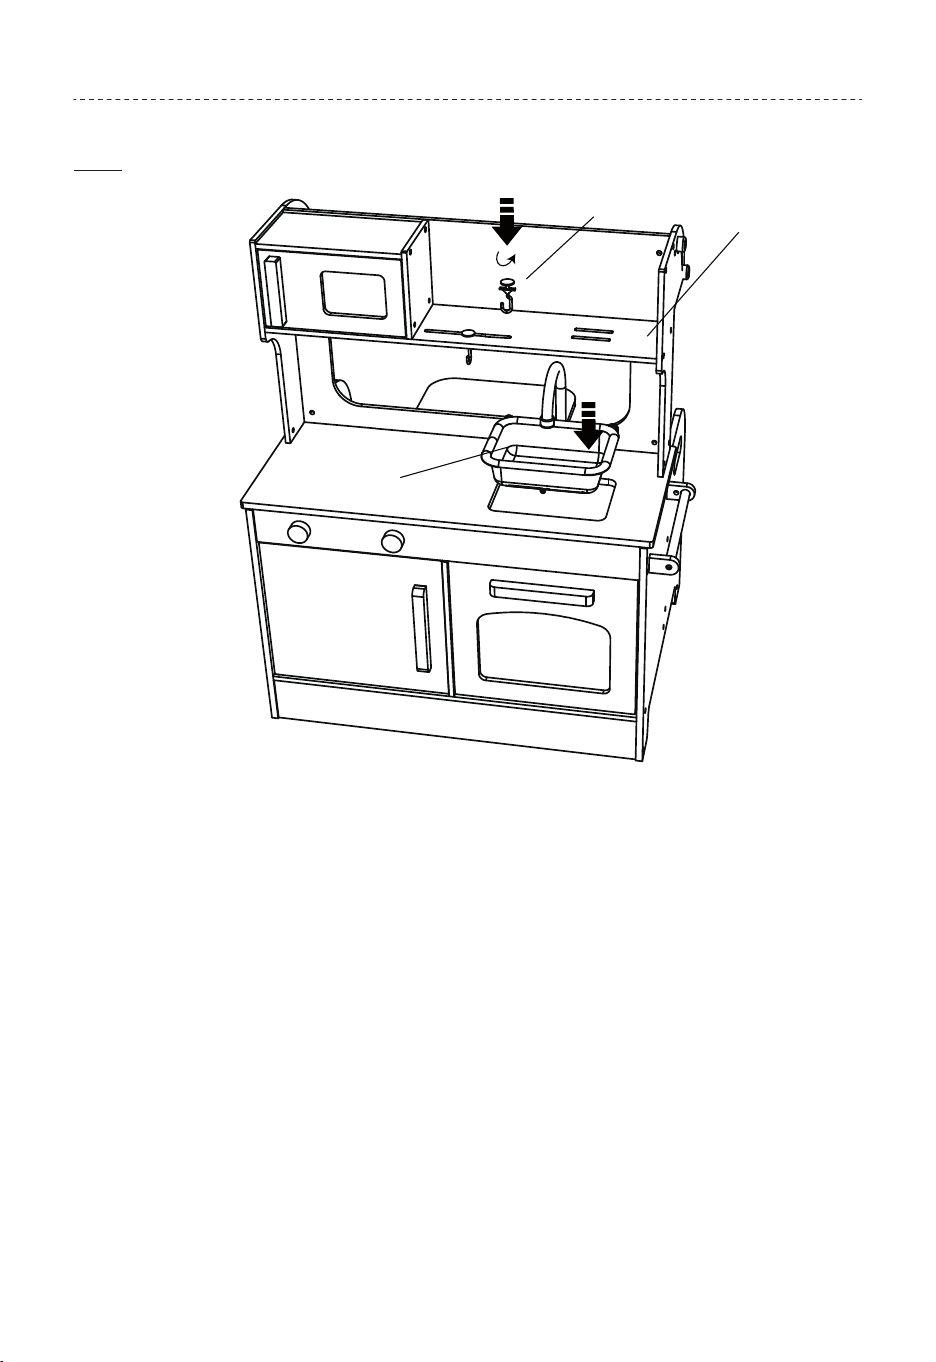
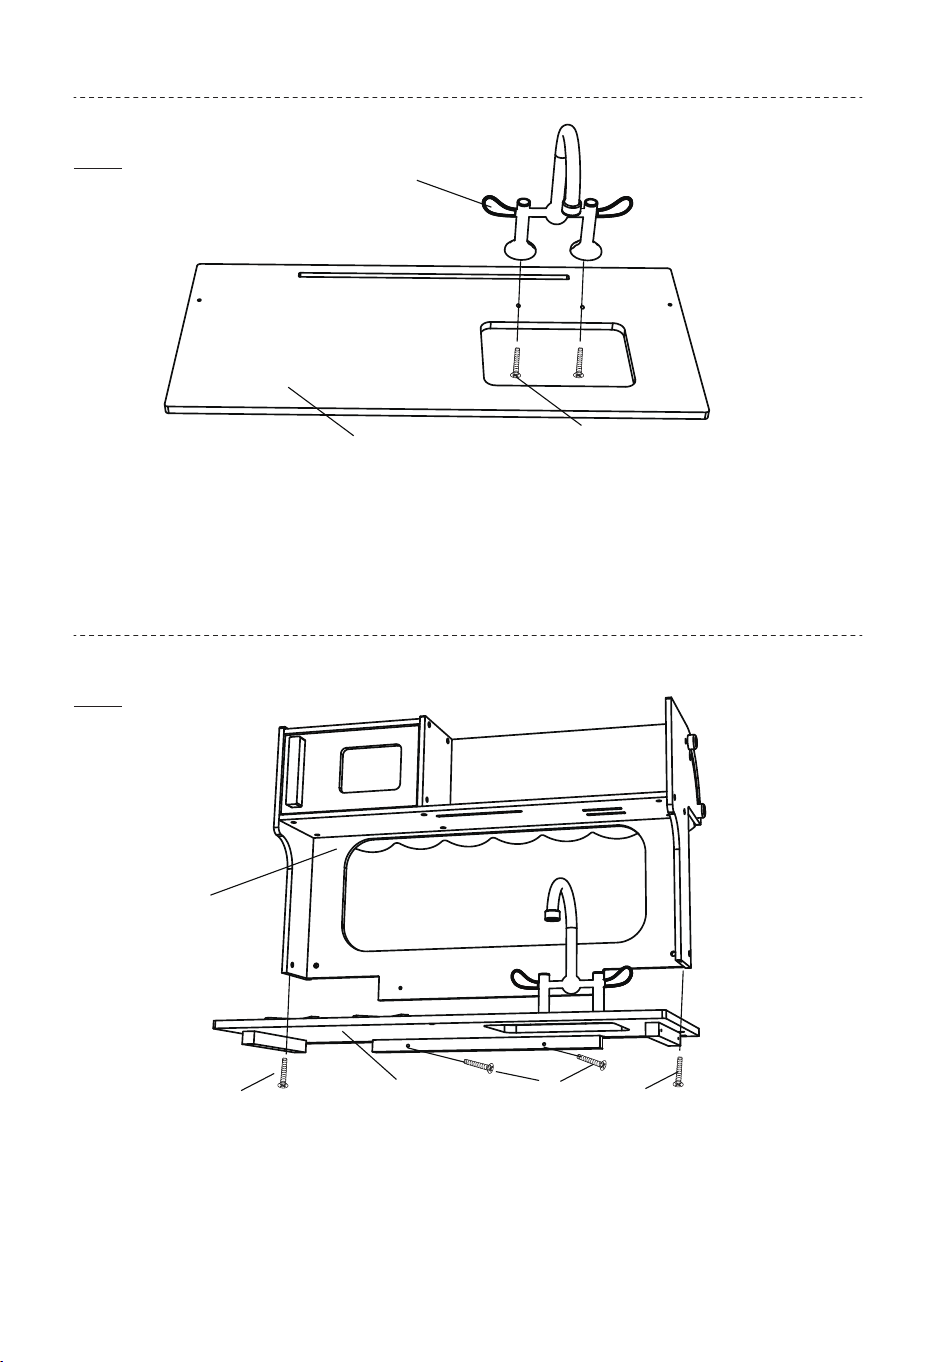
EN: First insert the 2 h plastic hooks into the assembly in step 26,
and then put the j plastic sink on the board of the assembly in step
26.
FR: Insérez d'abord les 2 crochets en plastique (h) dans l'assemblage
de l'étape 26, puis posez l'évier en plastique (j) à la planche de
l'assemblage de l'étape 26.
27
26
h
x2
j
18
28
19
Warning
Your toy is only meant to be assembled once.
• After you have assembled your toy, do not dismantle it again as this
may weaken the joints and screws leaving the toy unsafe for use.
• Regularly check that all of the bolts are fully tightened (but do not
over tighten).
• Do not allow children to sit, stand, play or climb on the top surface.
Failure to do so may cause the product to become unstable.
• Use the toy on a flat level surface only.
• Kitchen and Restaurant toy is not suitable for outdoor use. The
coatings will become scratched and product damage may occur.
• Please check the assembly of the toy regularly and frequently tighten
the bolts. If regular maintenance is not carried out, the product may
cease to function properly.
• Adult assembly only.
EN
Avertissement
Votre jouet n'est destiné à être assemblé qu'une seule fois.
• Une fois que vous avez assemblé votre jouet, ne le démontez pas à
nouveau car cela pourrait affaiblir les joints et les vis, rendant le jouet
dangereux à utiliser.
• Vérifiez régulièrement que tous les boulons sont bien serrés (mais ne
serrez pas trop).
• Ne laissez pas les enfants s'asseoir, se tenir debout, jouer ou grimper
sur la surface supérieure. Le non-respect de cette consigne peut
rendre le produit instable.
• Utilisez le jouet uniquement sur une surface plane.
•Le jouet de cuisine ne convient pas à une utilisation en extérieur. Les
revêtements seront rayés et des dommages au produit peuvent
survenir.
• Veuillez vérifier régulièrement l'assemblage du jouet et serrer
fréquemment les boulons. Si un entretien régulier n'est pas effectué, le
produit peut cesser de fonctionner correctement.
• Assemblage par un adulte uniquement.
FR
20

Avec votre note inspirante, infans seront plus cohérents pour vous offrir une
EXPÉRIENCE D'ACHAT facile, de BONS PRODUITS et un SERVICE EFFICACE !