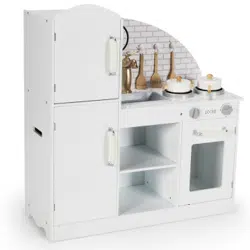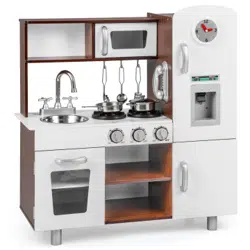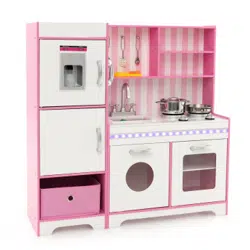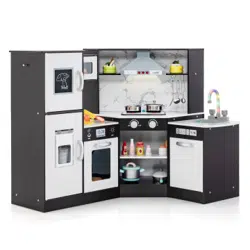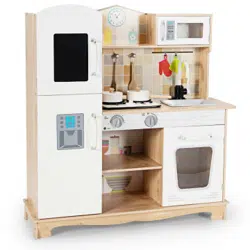
Kid Kitchen Set
HW67657
Please read all instructions carefully and keep it for future reference.
General Security Warning
Caution: The Product is not suitable for the children under 3 years
Danger: Keep all small parts and packaging materials for this product away from babies and
children, otherwise they may pose a choking hazard.
Danger: Lack of attachment may cause a risk of tipping.
Warning for Assembly
Construction only by adults
Remove all Packaging, separate and count all parts and hardware.
Read through each step carefully and follow the proper order.
We recommend that, where possible, all items are assembled near to the area in which
they will be placed in use, to avoid moving the product unnecessarily once assembled.
Ensure a secure surface during construction, and place the product always on a flat,
steady and stable surface.
WARNING:
CHOKING HAZARD-Small parts.
Not for children under 3 years.
02
03
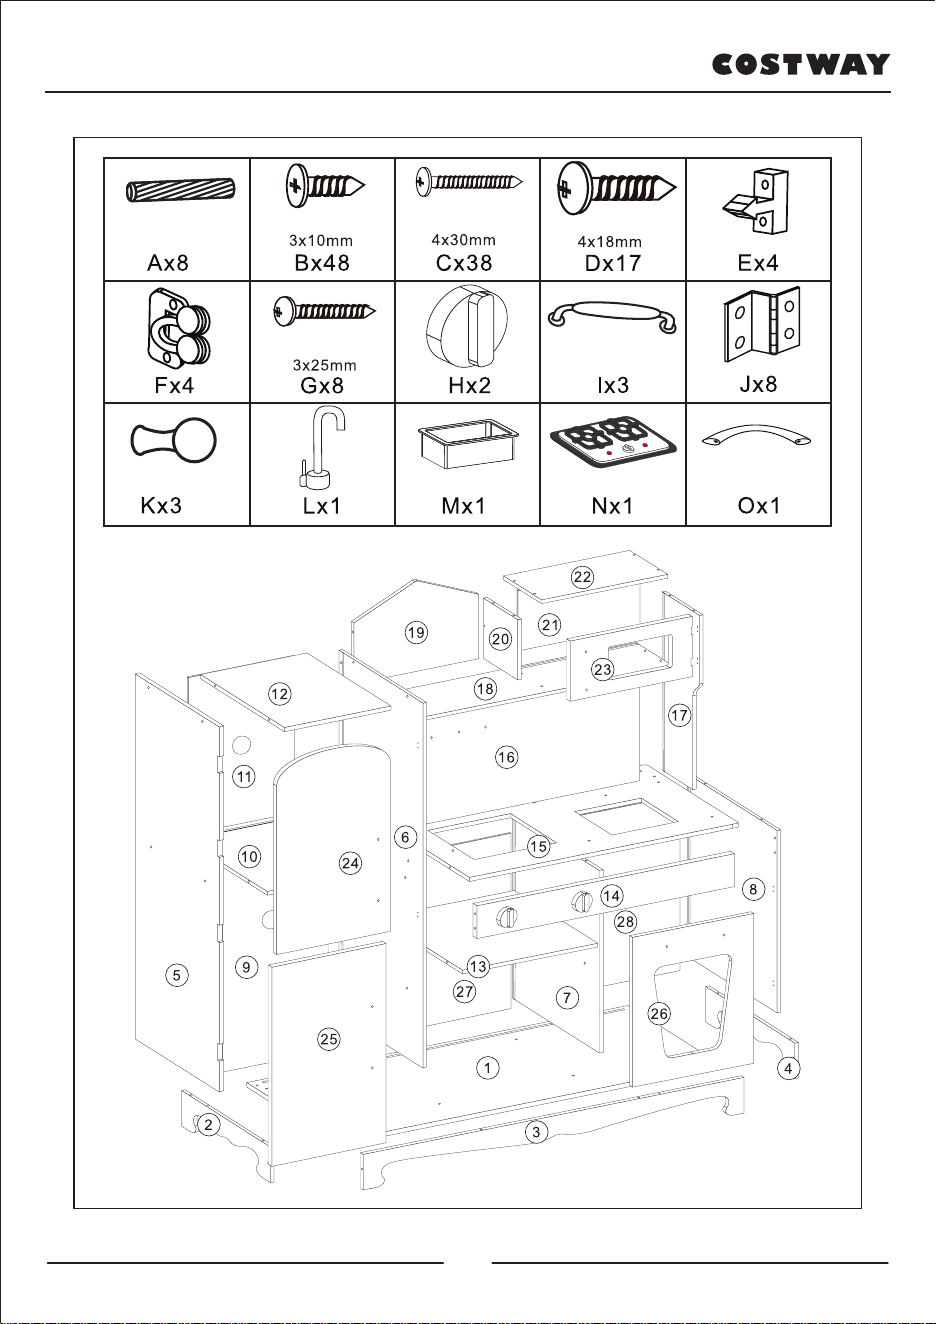
1
04
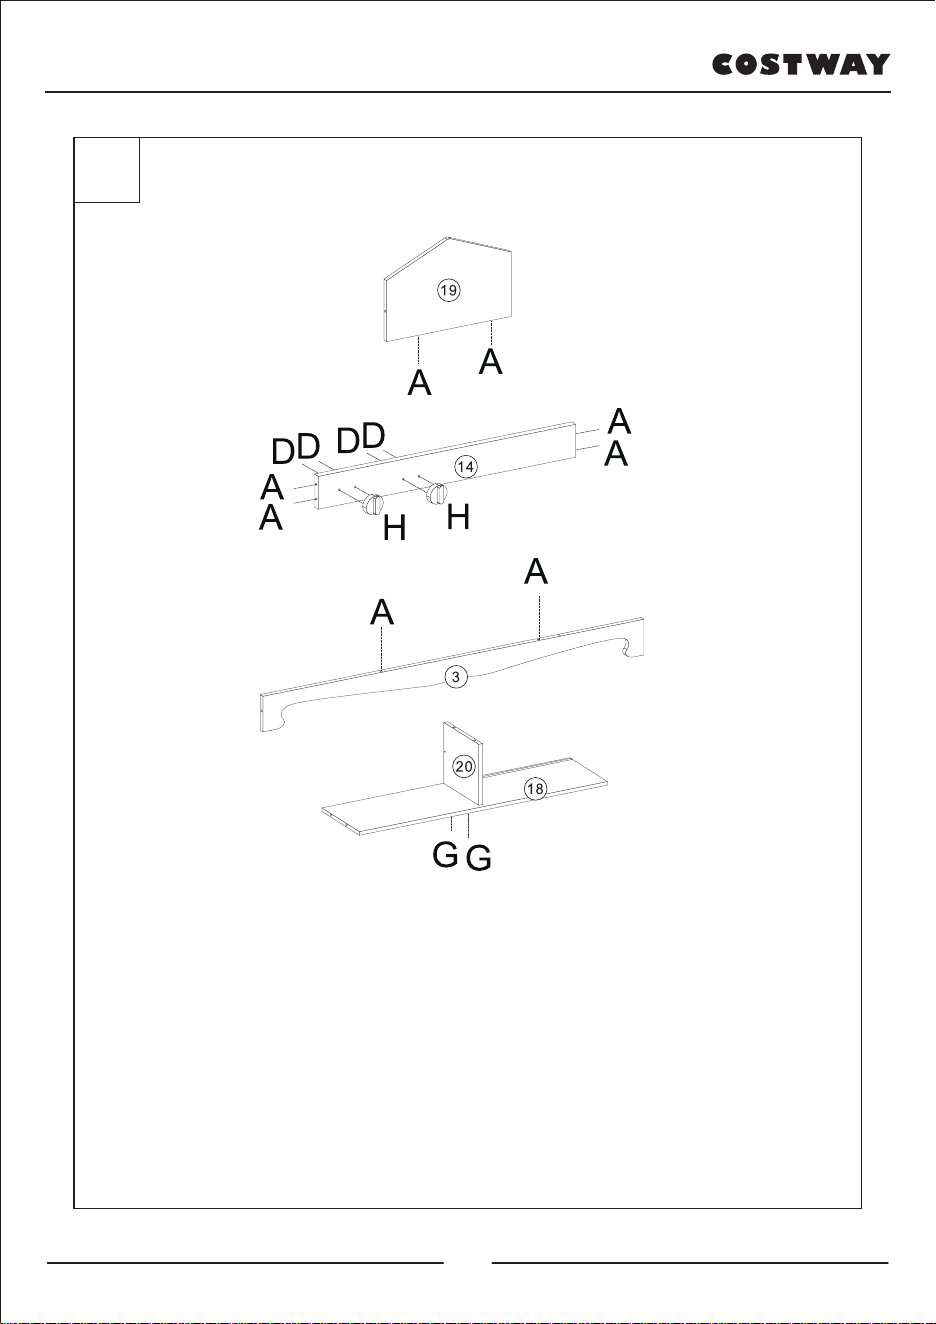
STEP 1:
Insert wooden plugs A to No.3,14,19. Assemble parts
H to No.14 with screws D.Attach No.20 to No.18 with
screws G.
2
05
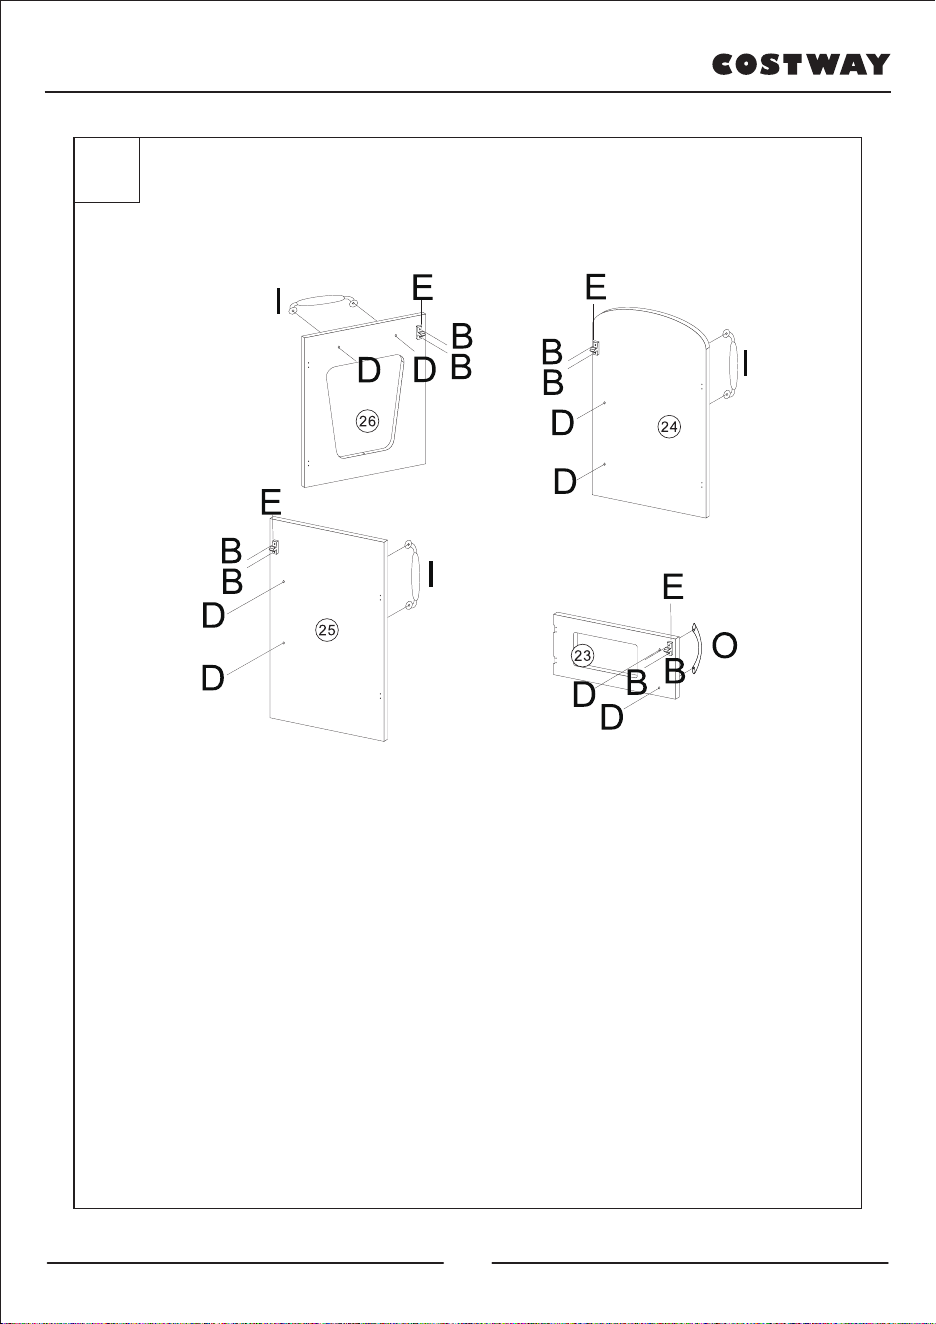
STEP 2:
Assemble parts E to No.23,24,25,26 with screws B.
Also assemble parts I to No.24,25,26 with screws D.
Assemble part O to No.23 with screws D.
3
06
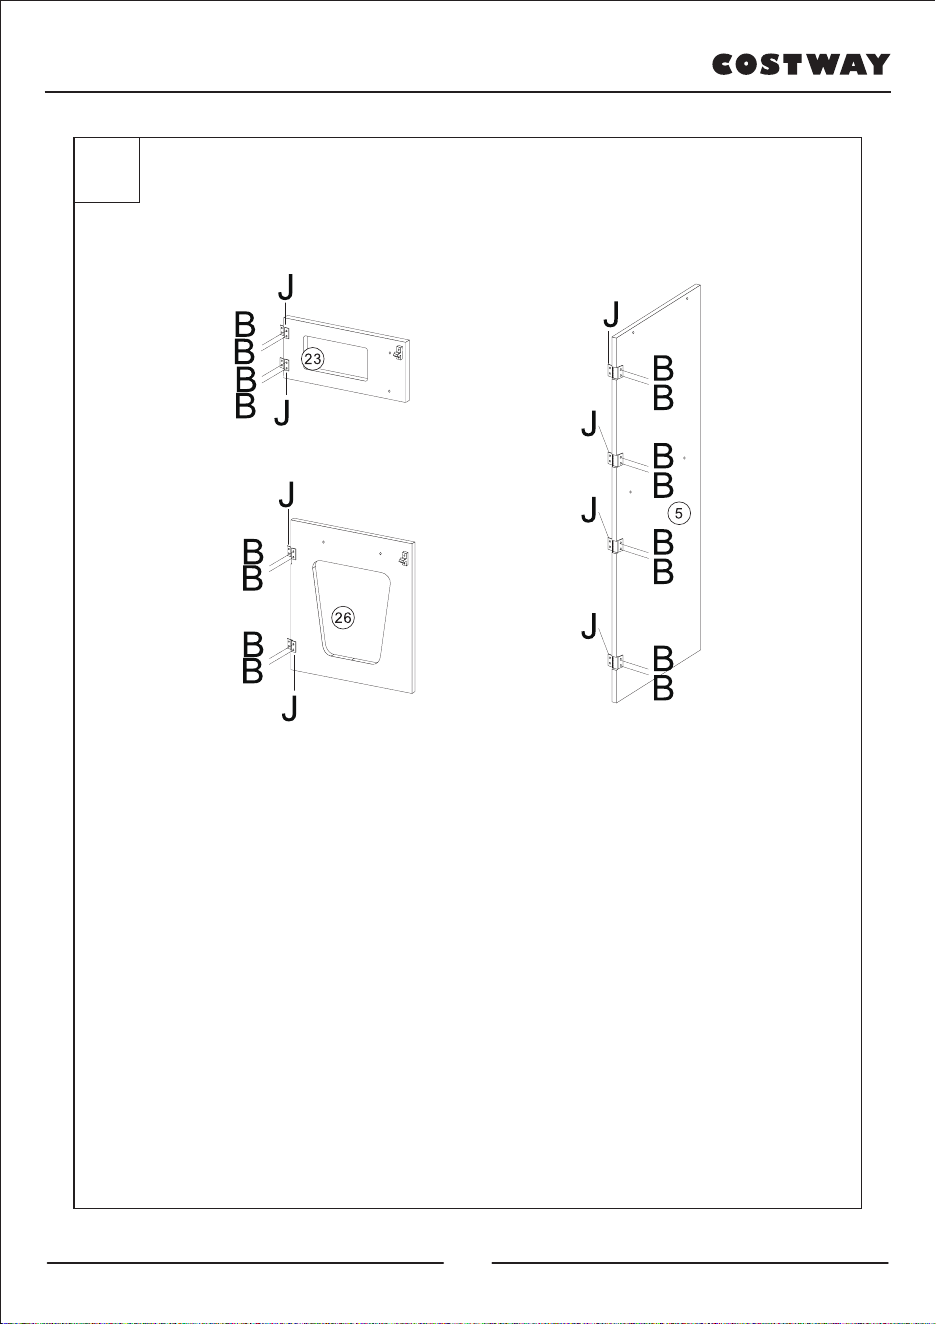
STEP 3:
Assemble parts J to No.5,23,26 with screws B.
4
07
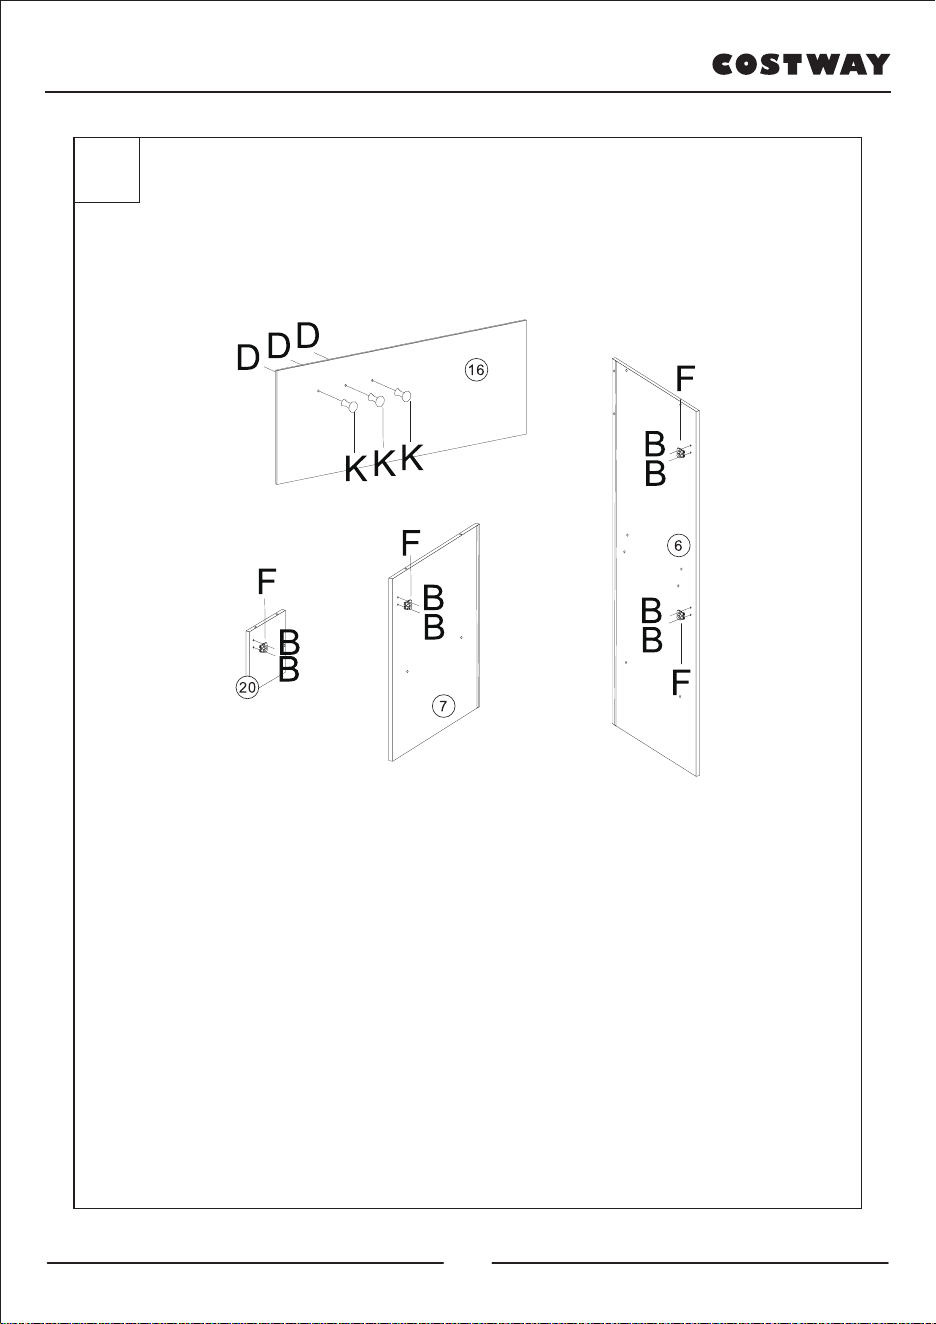
STEP 4:
Assemble parts K to No.16 with screws D.
Assemble parts F to No.6,7 ,20 with screws B.

5
08
6
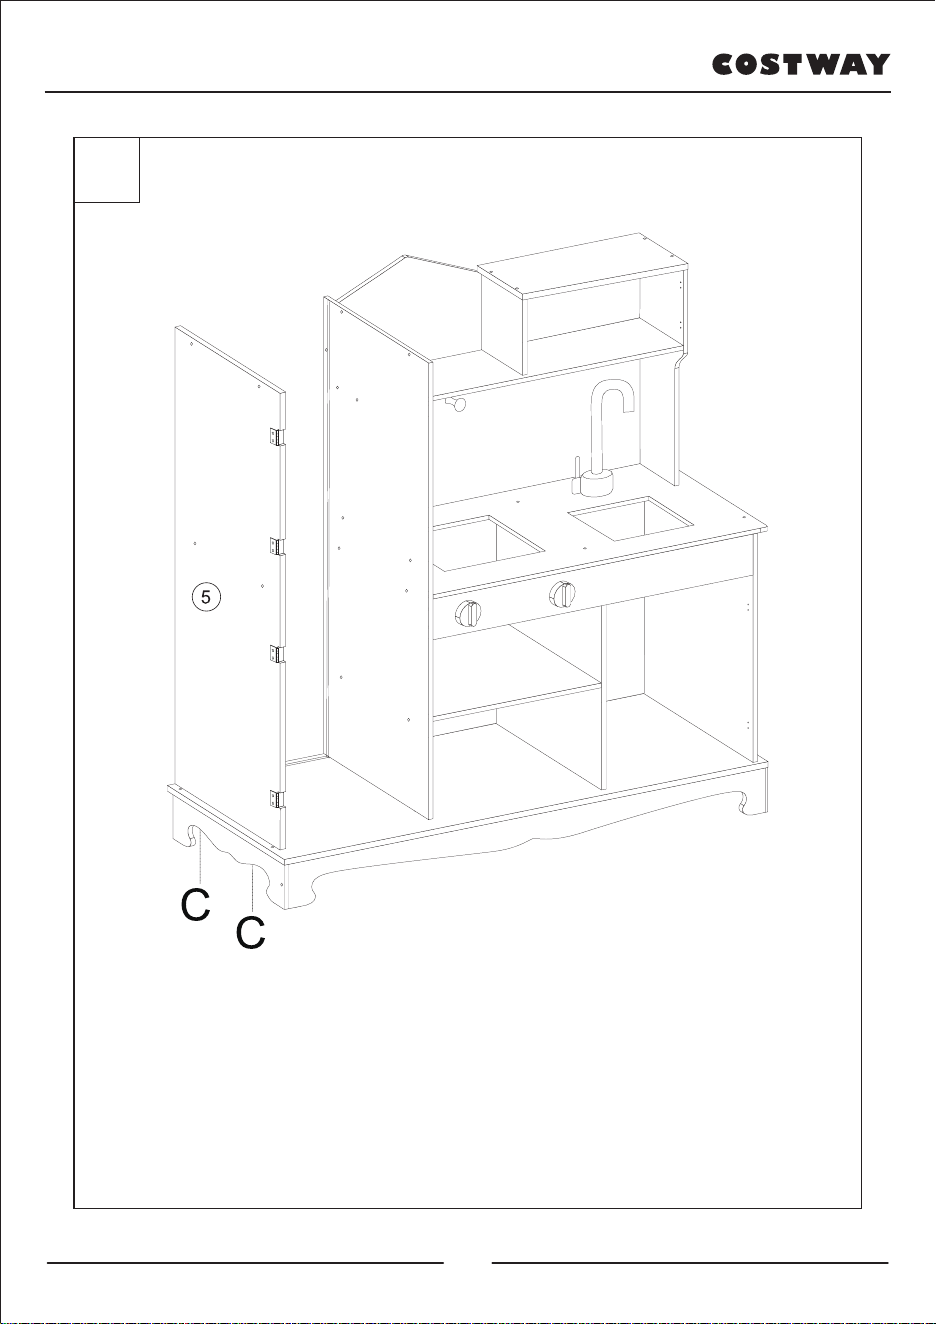
STEP 5:
Attach No.2,3 to No.4 with screws C.
STEP 6:
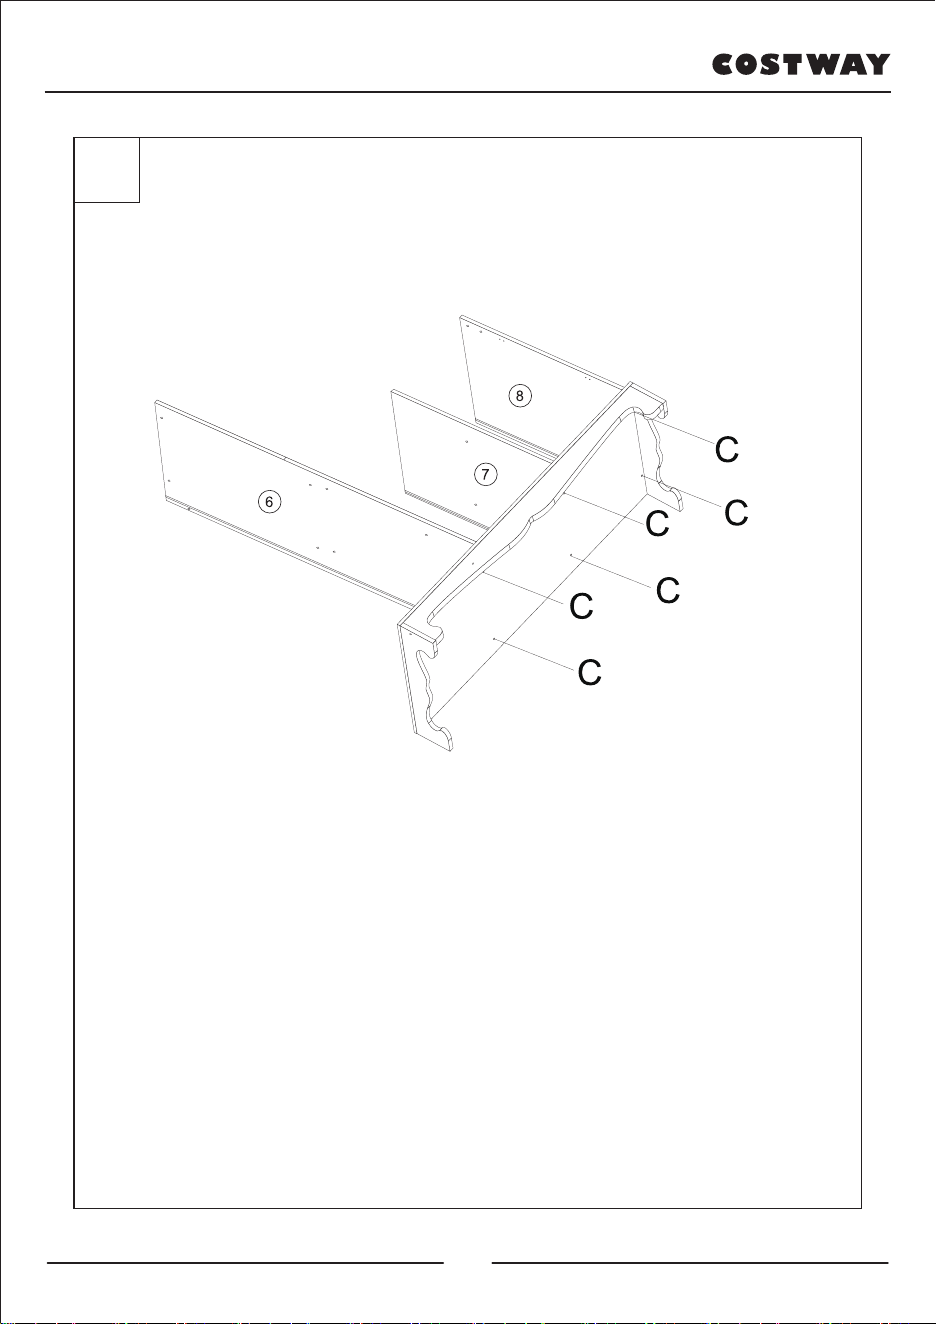
Assemble No.1 to No.2,3,4 with screws C.
7
09
STEP 7:
Assemble No.6,7 ,8 to No.1 with screws C.
8
10
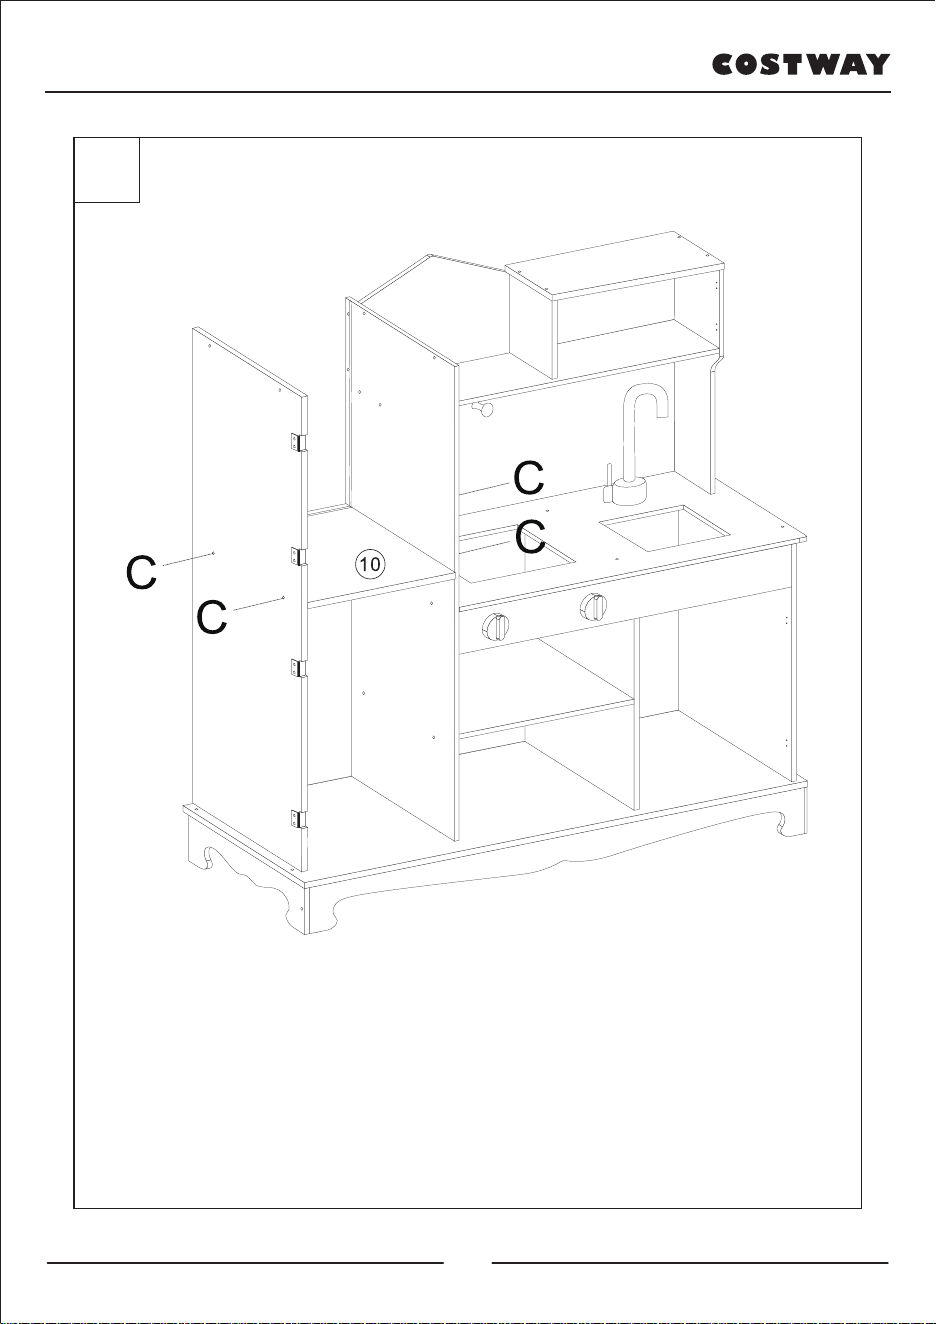
STEP 8:
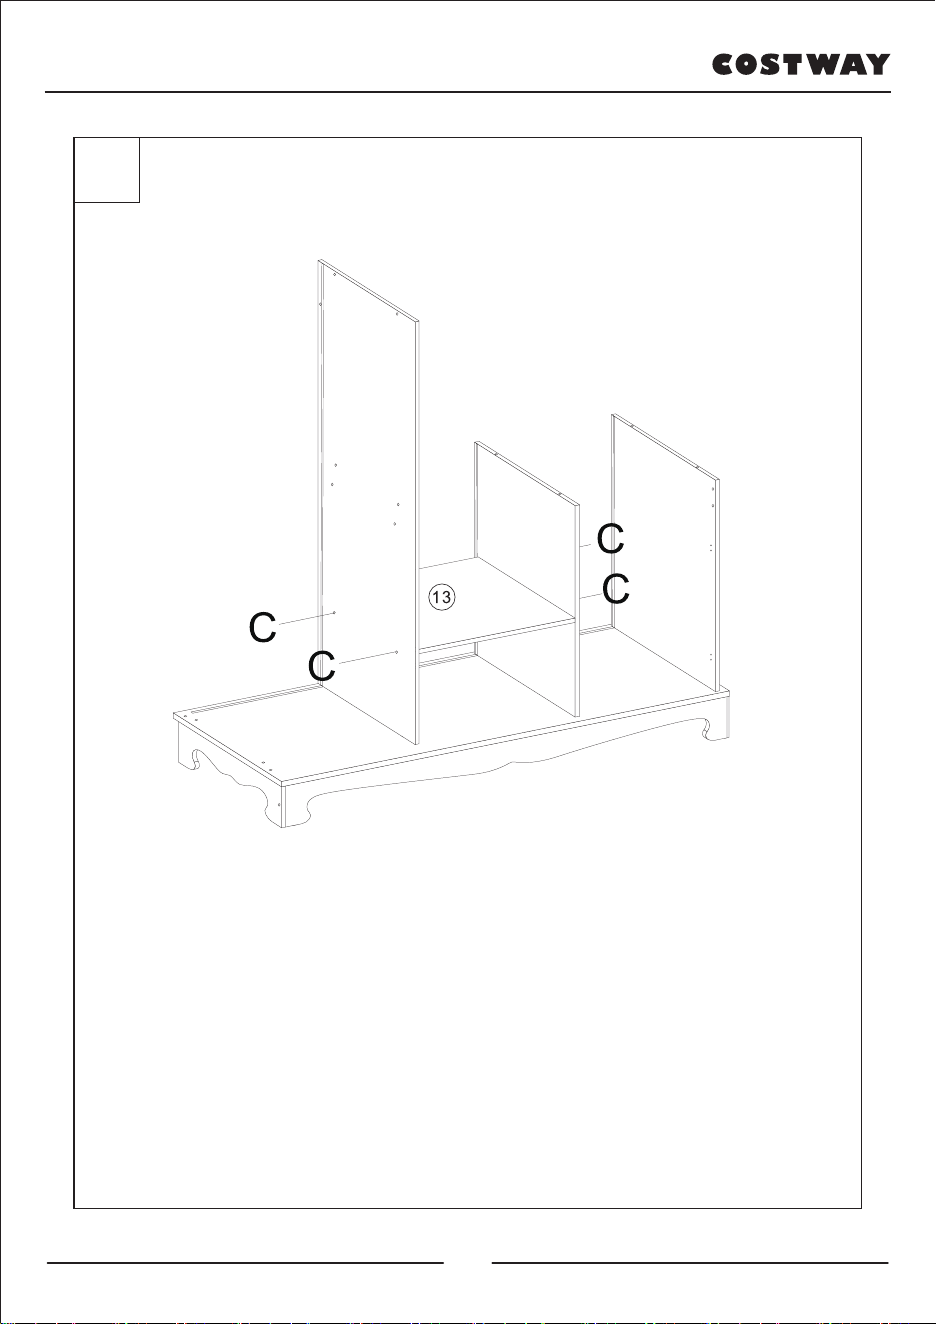
Assemble No.13 to No.6 and No.7 with screws C.
9
11
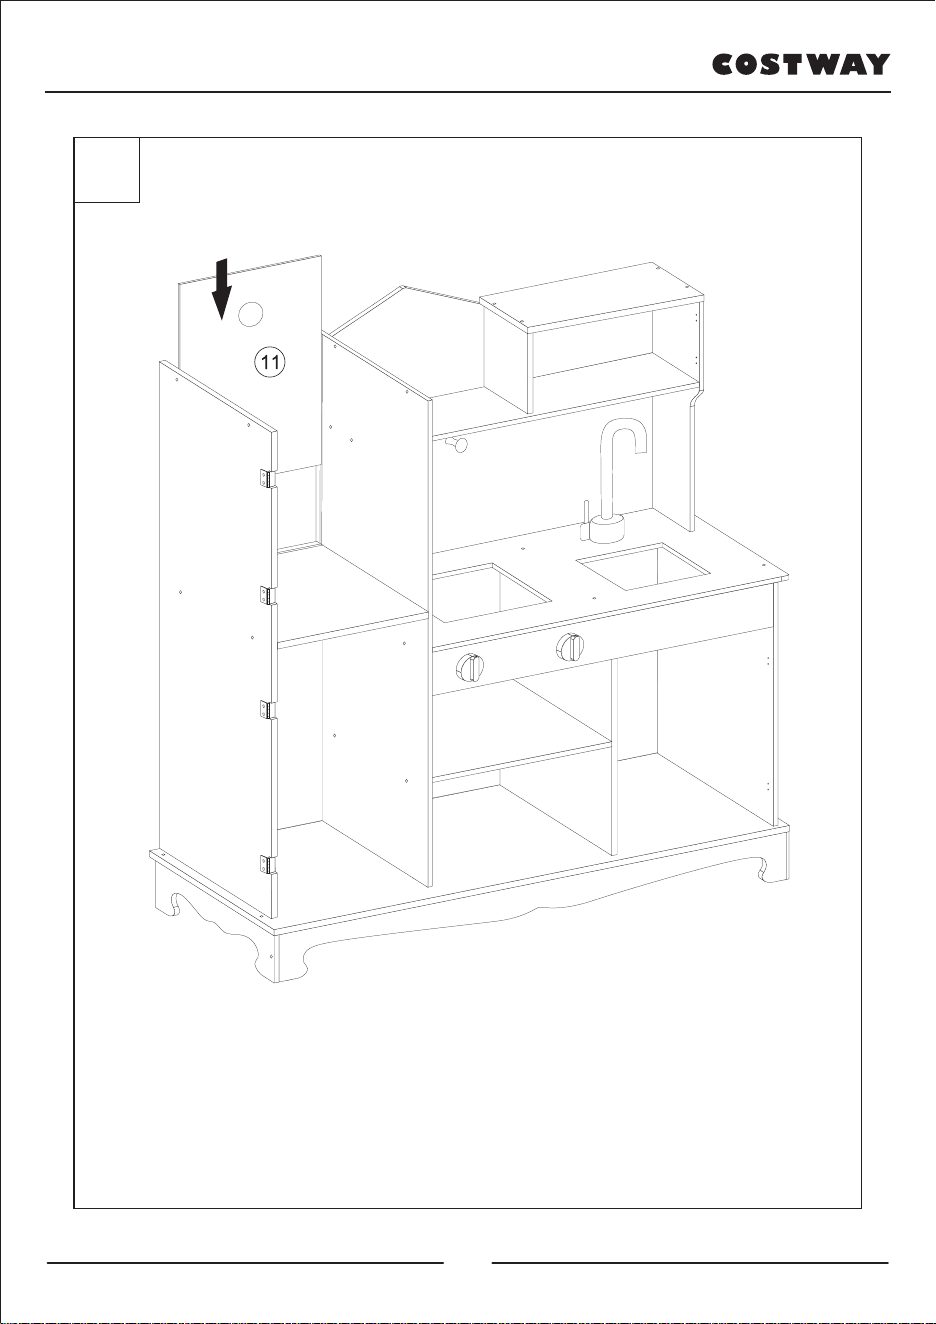
STEP 9:
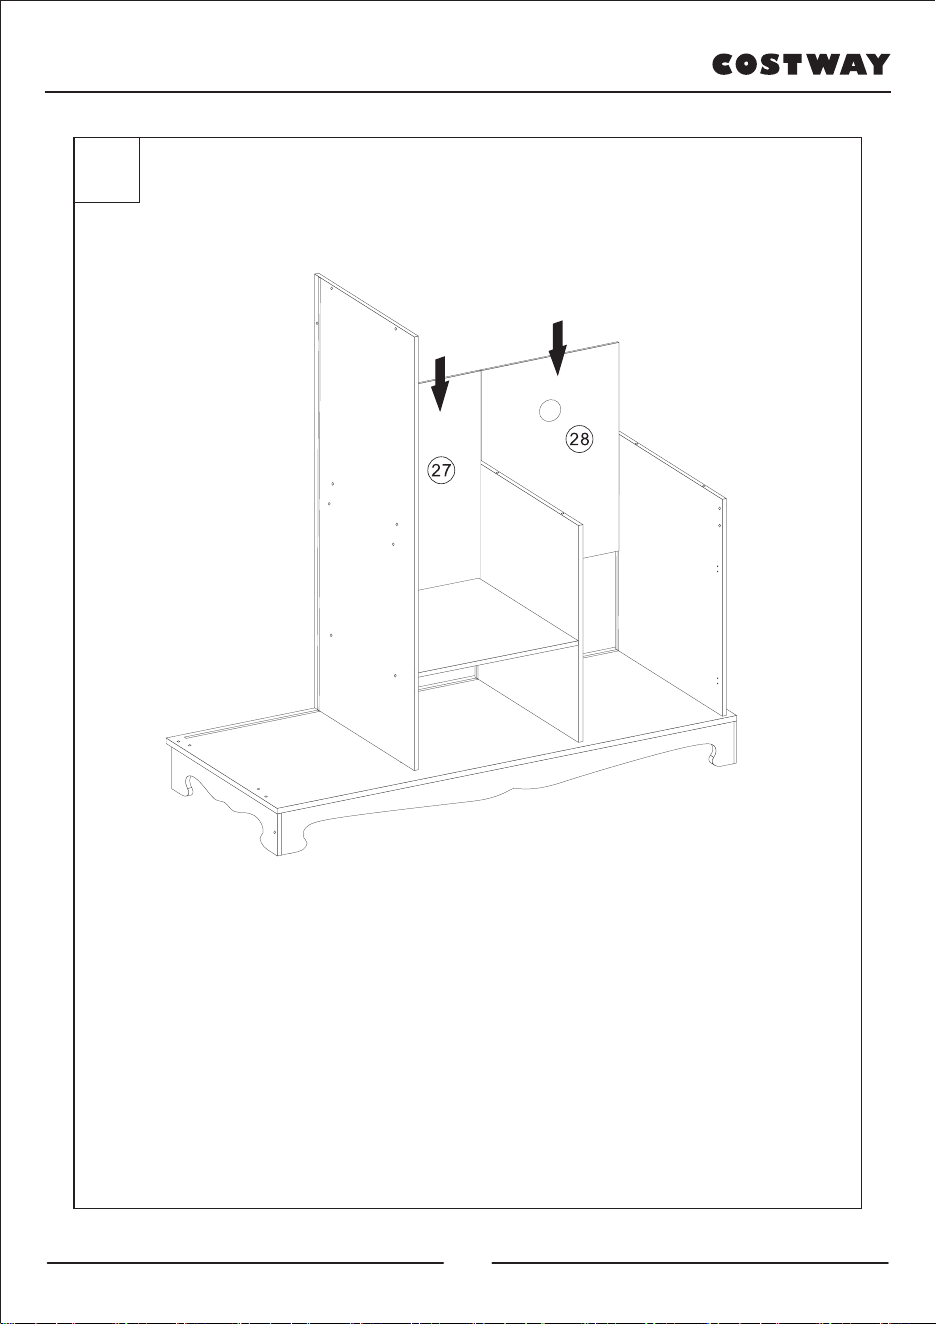
Insert No.27,28 to No.6,7,8.
10
12
STEP 10:
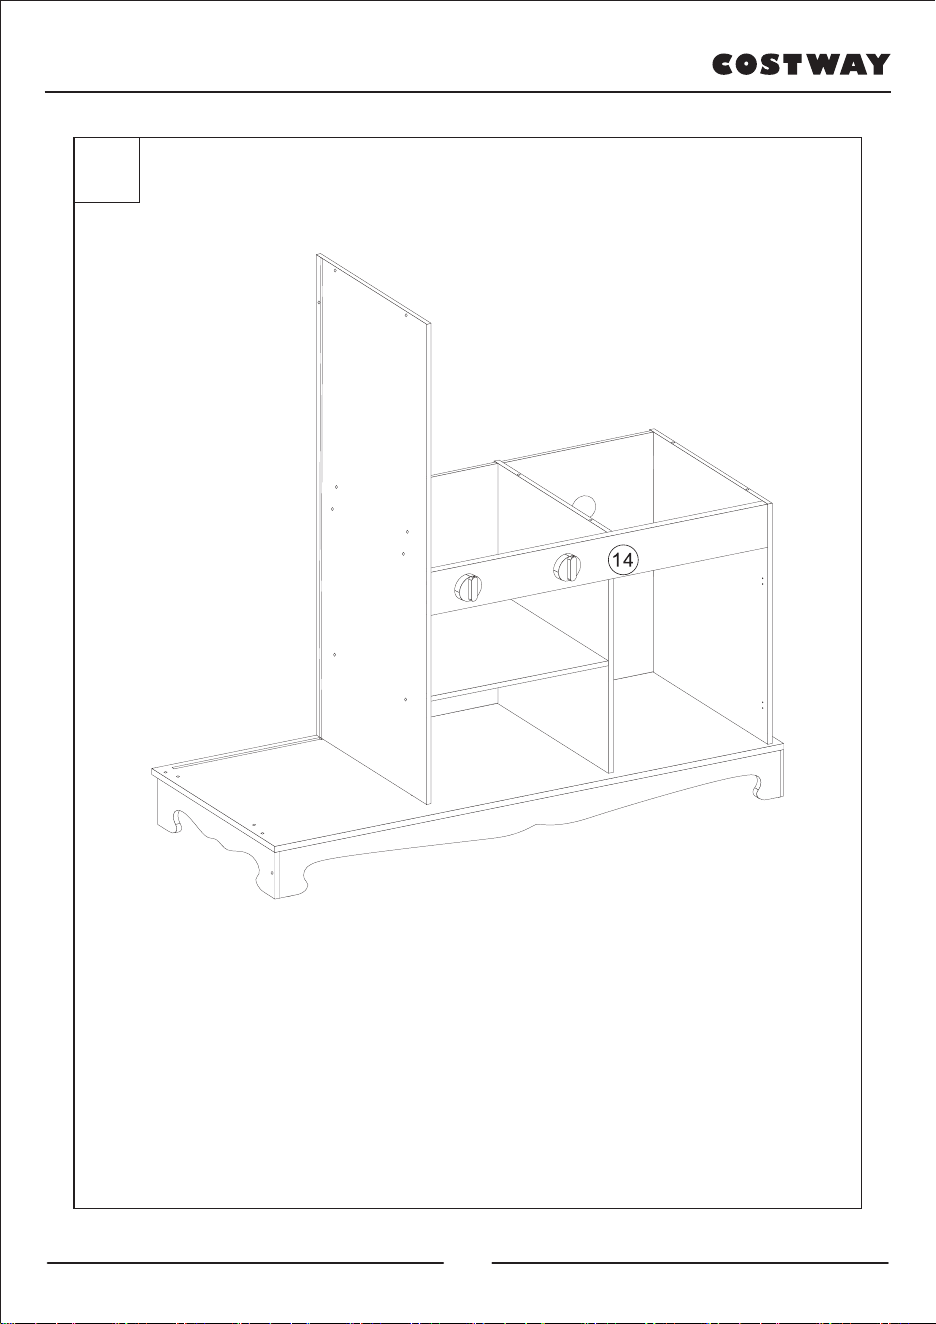
Assemble No.14 to No.6,8.

11
13
STEP 11:
Assemble No.17 to No.15 with screws C,
also assemble part L to No.15 with screws D.
12
14
STEP 12:
Assemble No.15 to No.6,7,8 with screws C.

13
15
STEP 13:
Insert No.16 to No.6 and No.17.

14
16
STEP 14:
Assemble No.18 to No.6 and No.17 with screws C.
15
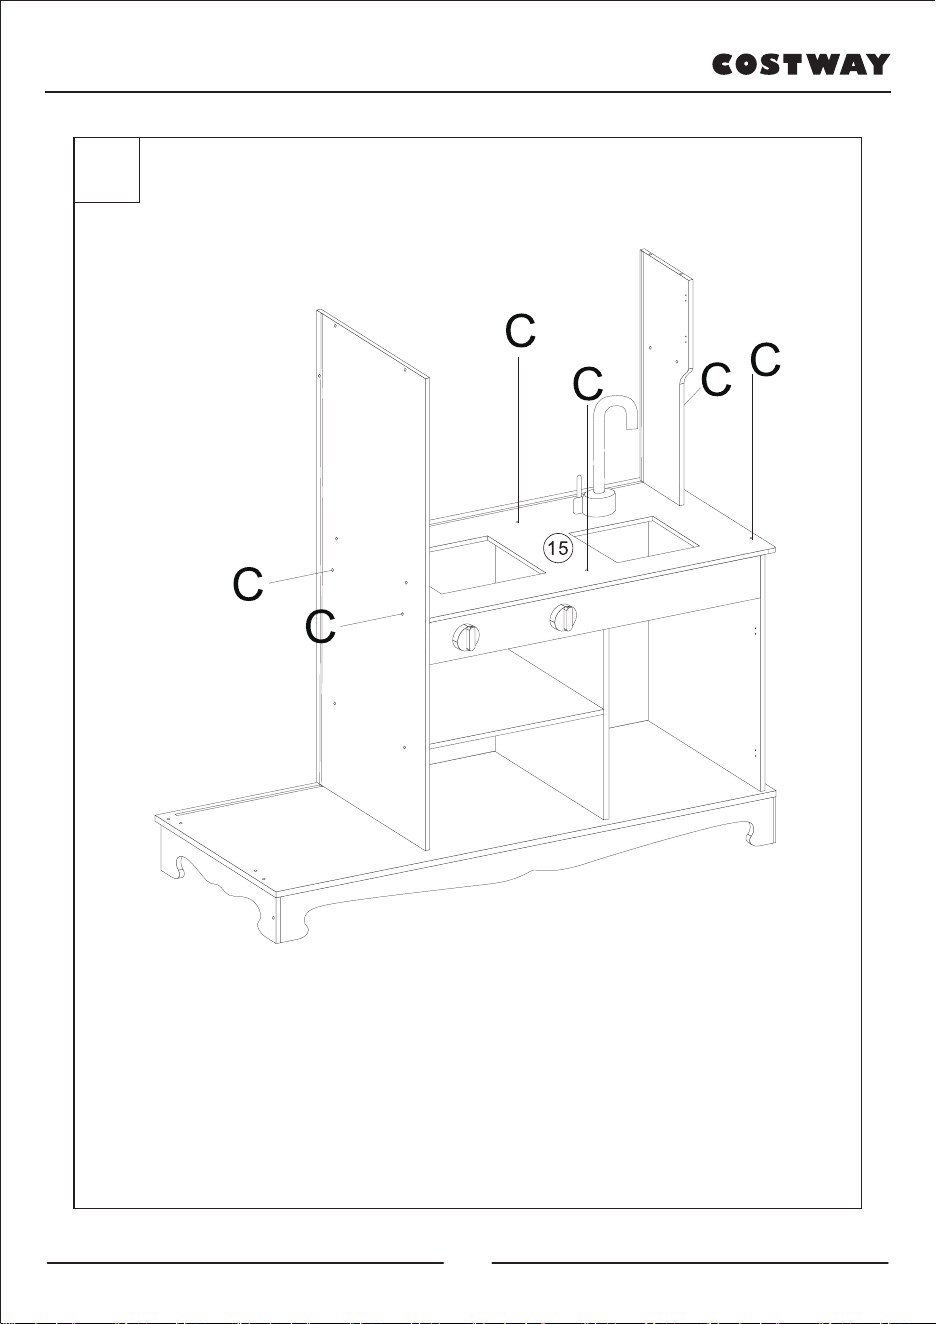
17
STEP 15:
Assemble No.19 to No.6 and No.20 with screws G.
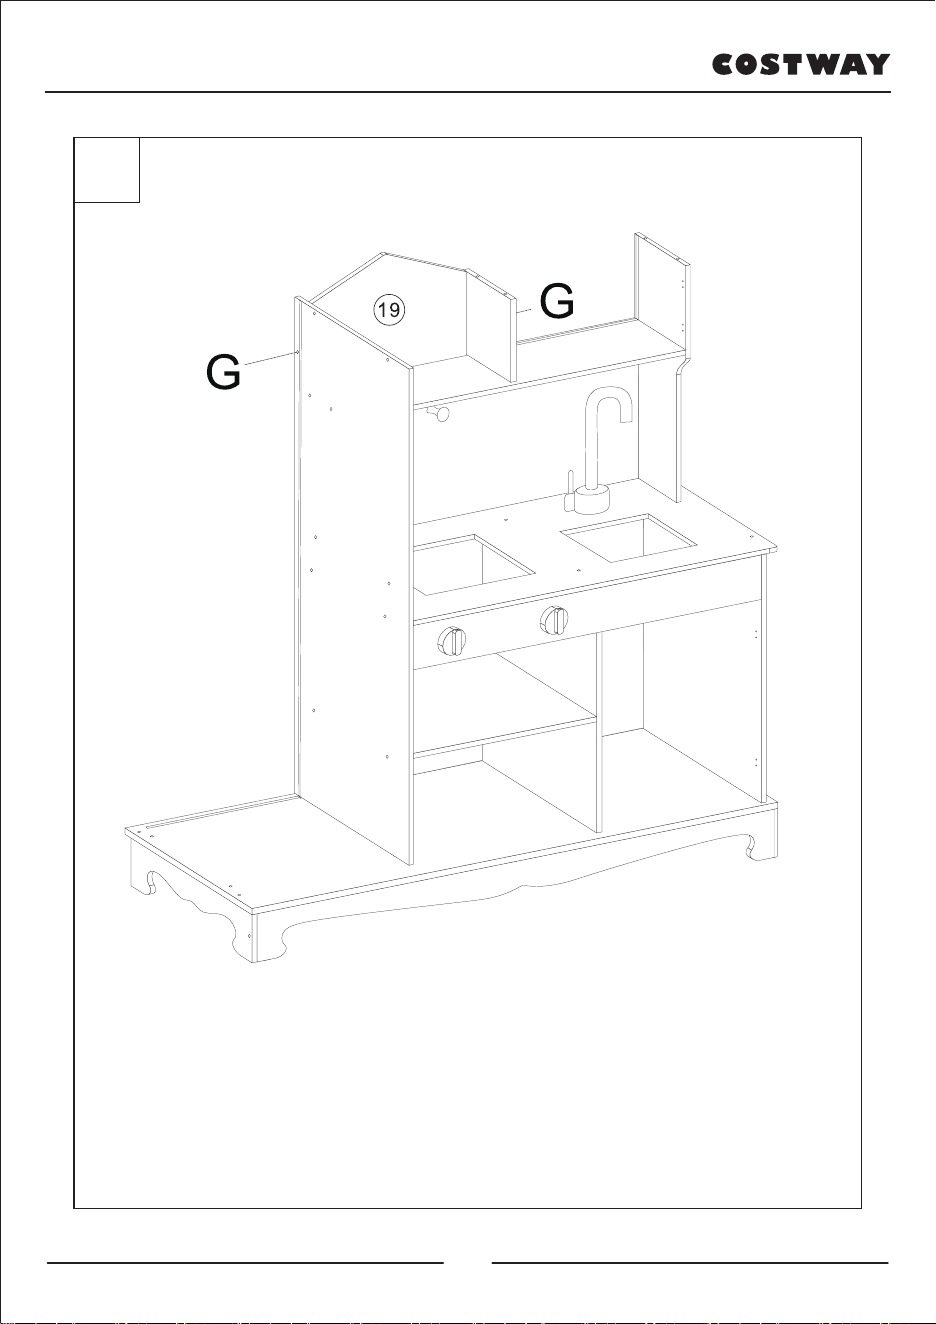
16
18
STEP 16:
Insert No.21 to No.20 and No.17.
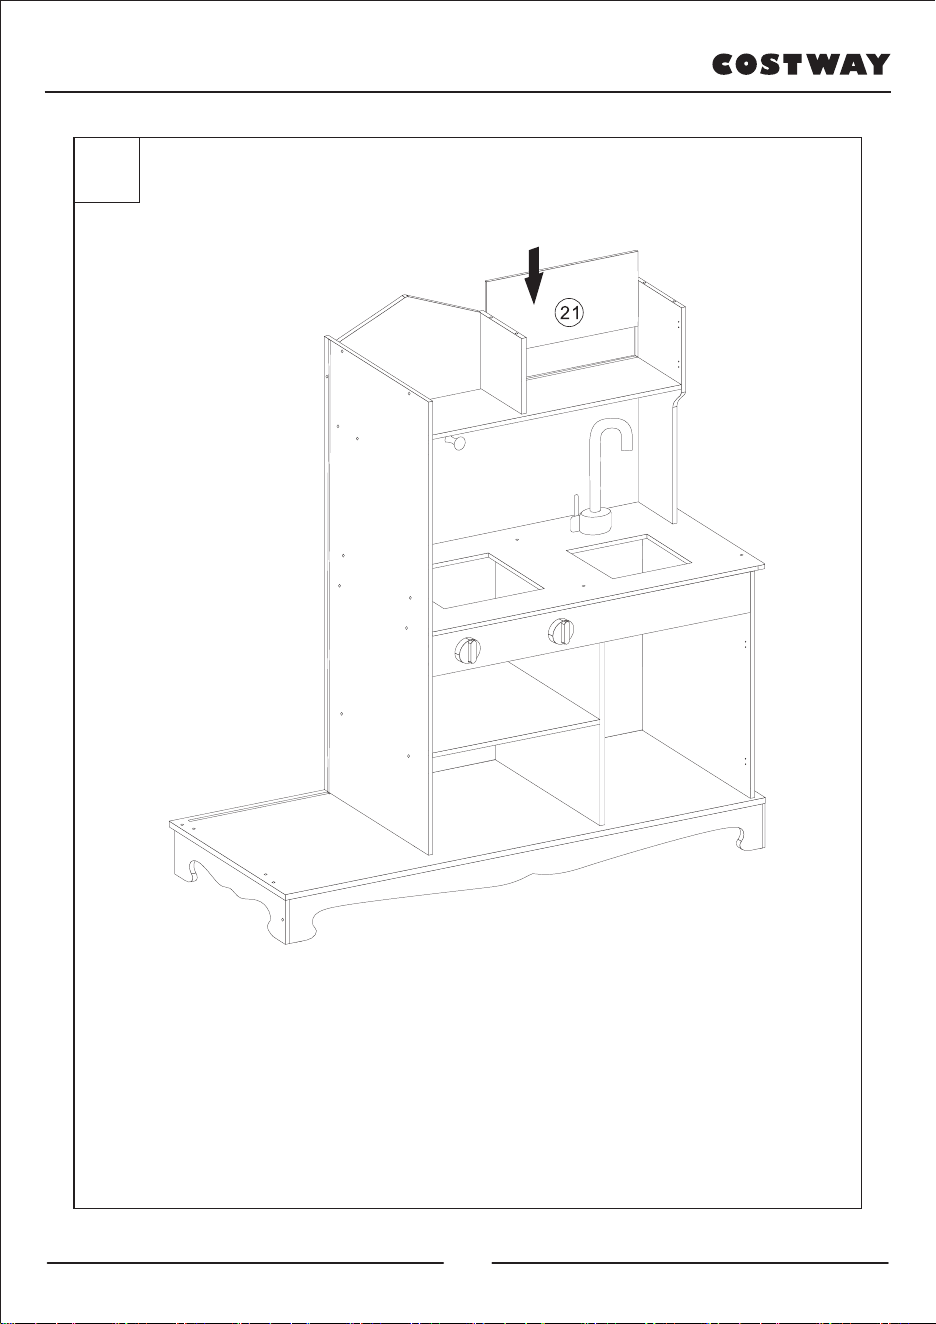
17
19
STEP 17:
Assemble No.22 to No.20 and No.17 with screws G.
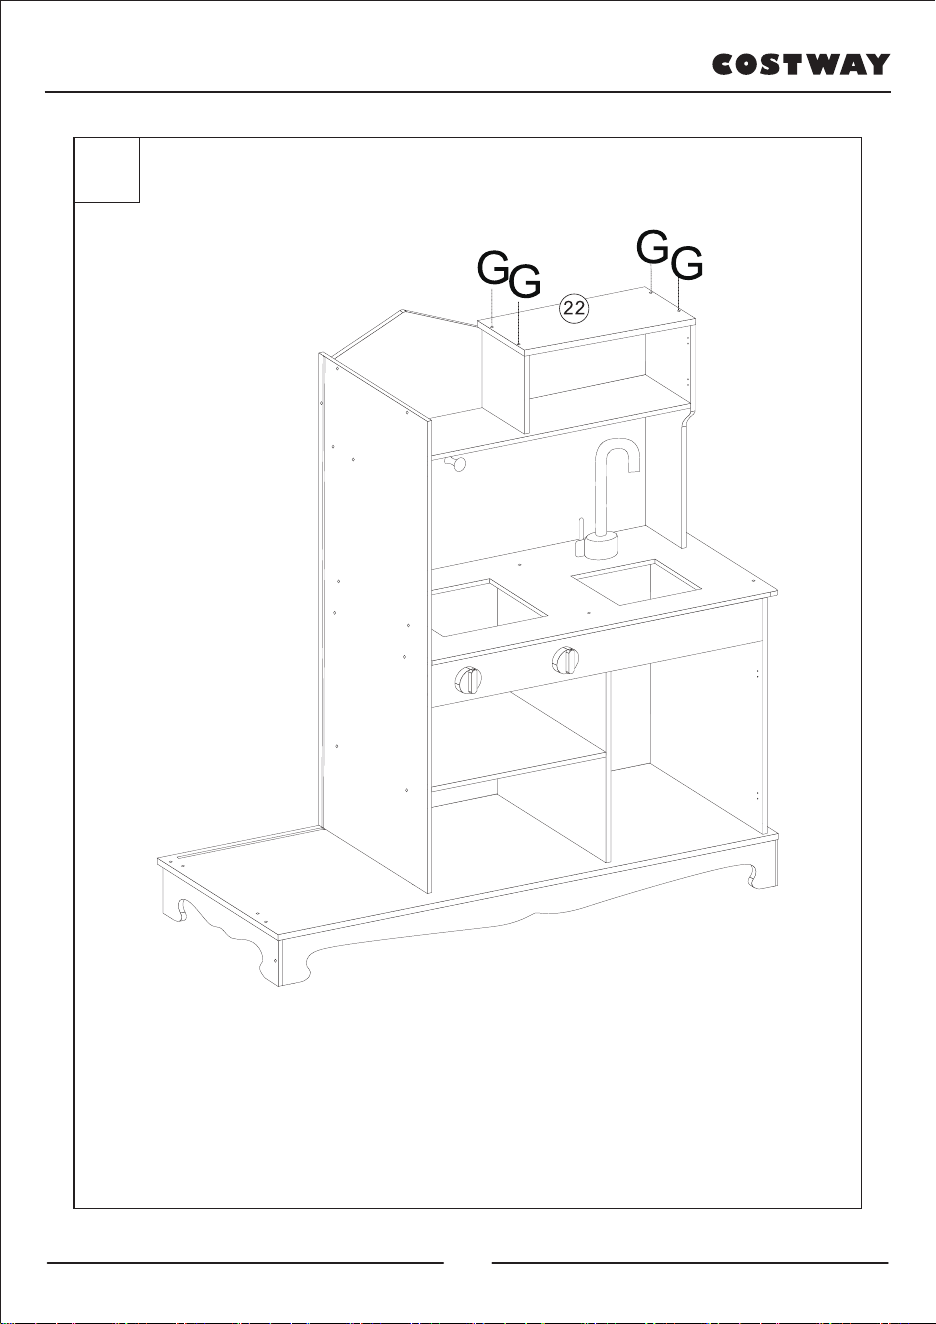
18
20
STEP 18:
Assemble No.5 to No.1 with screws C.

19
21
STEP 19:
Insert No.9 to No.5 and No.6.
20
22
STEP 20:
Assemble No.10 to No.5 and No.6 with screws C.
21
23
STEP 21:
Insert No.11 to No.5 and No.6.
22
24
STEP 22:
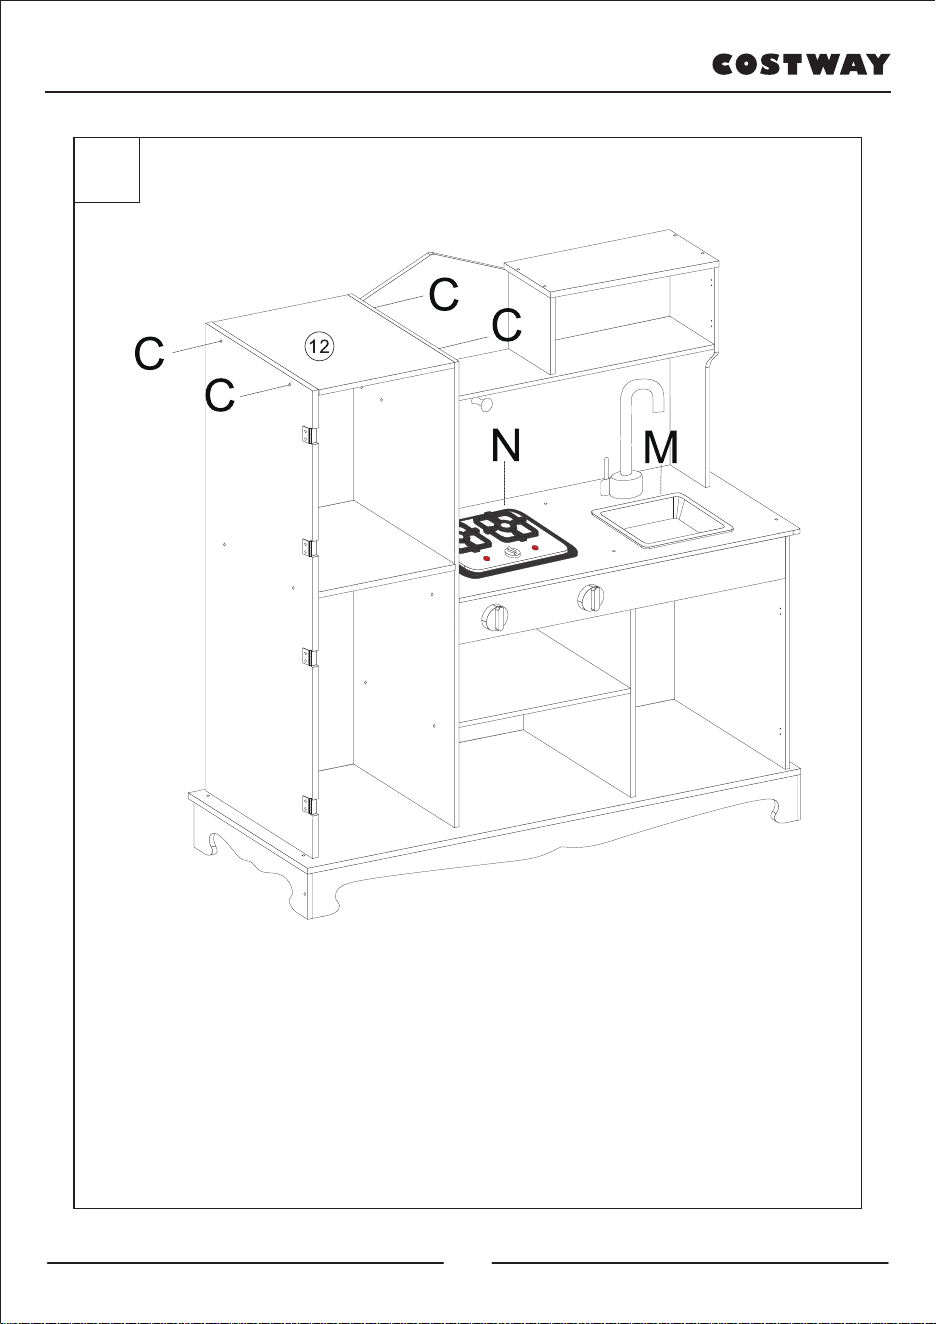
Assemble No.12 to No.5 and No.6 with screws C.
Put parts N and M above No.15.
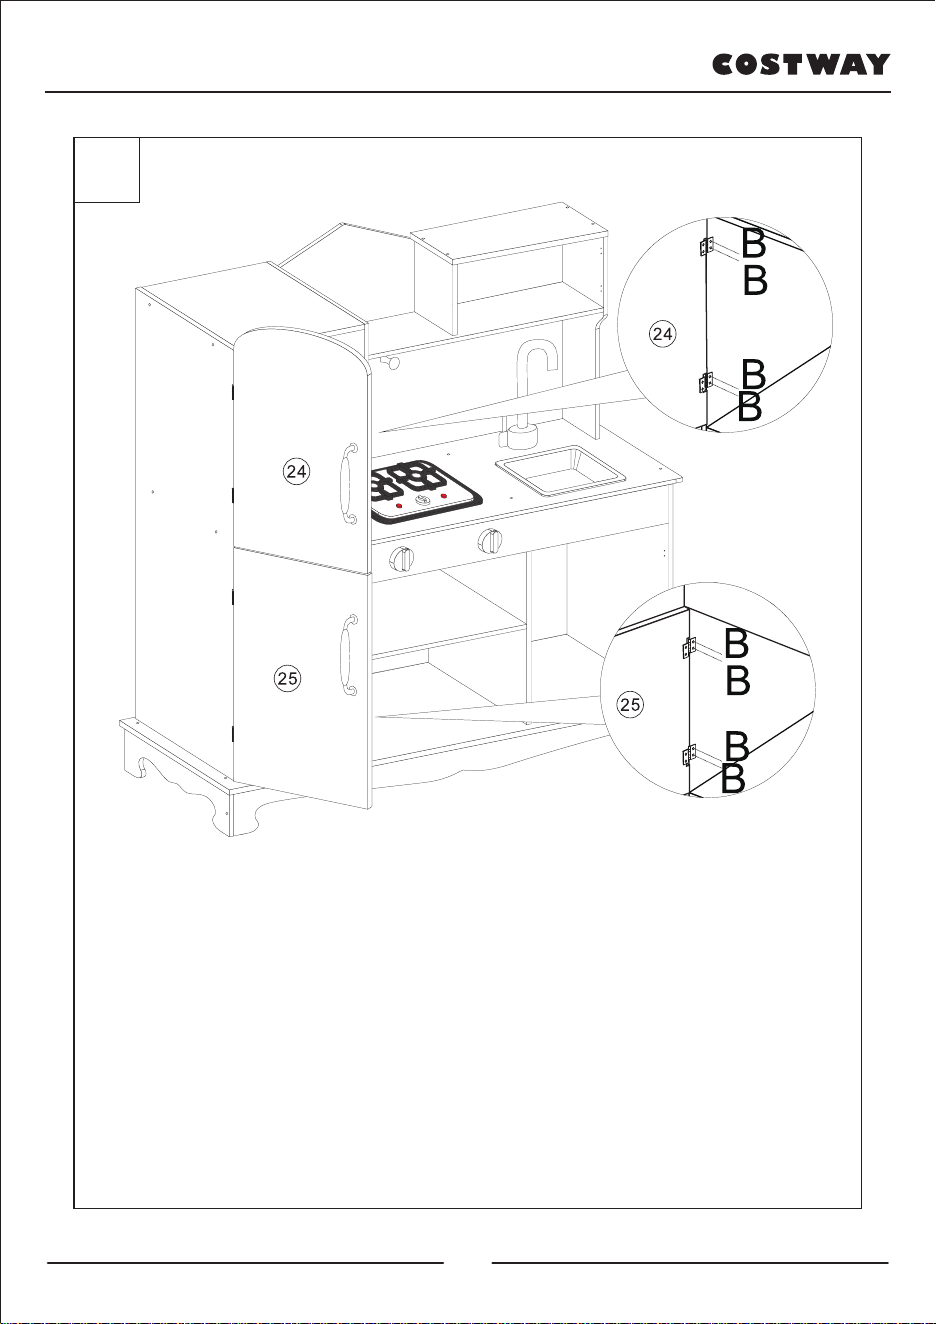
23
25
STEP 23:
Assemble No.24,25 to No.5 with screws B.
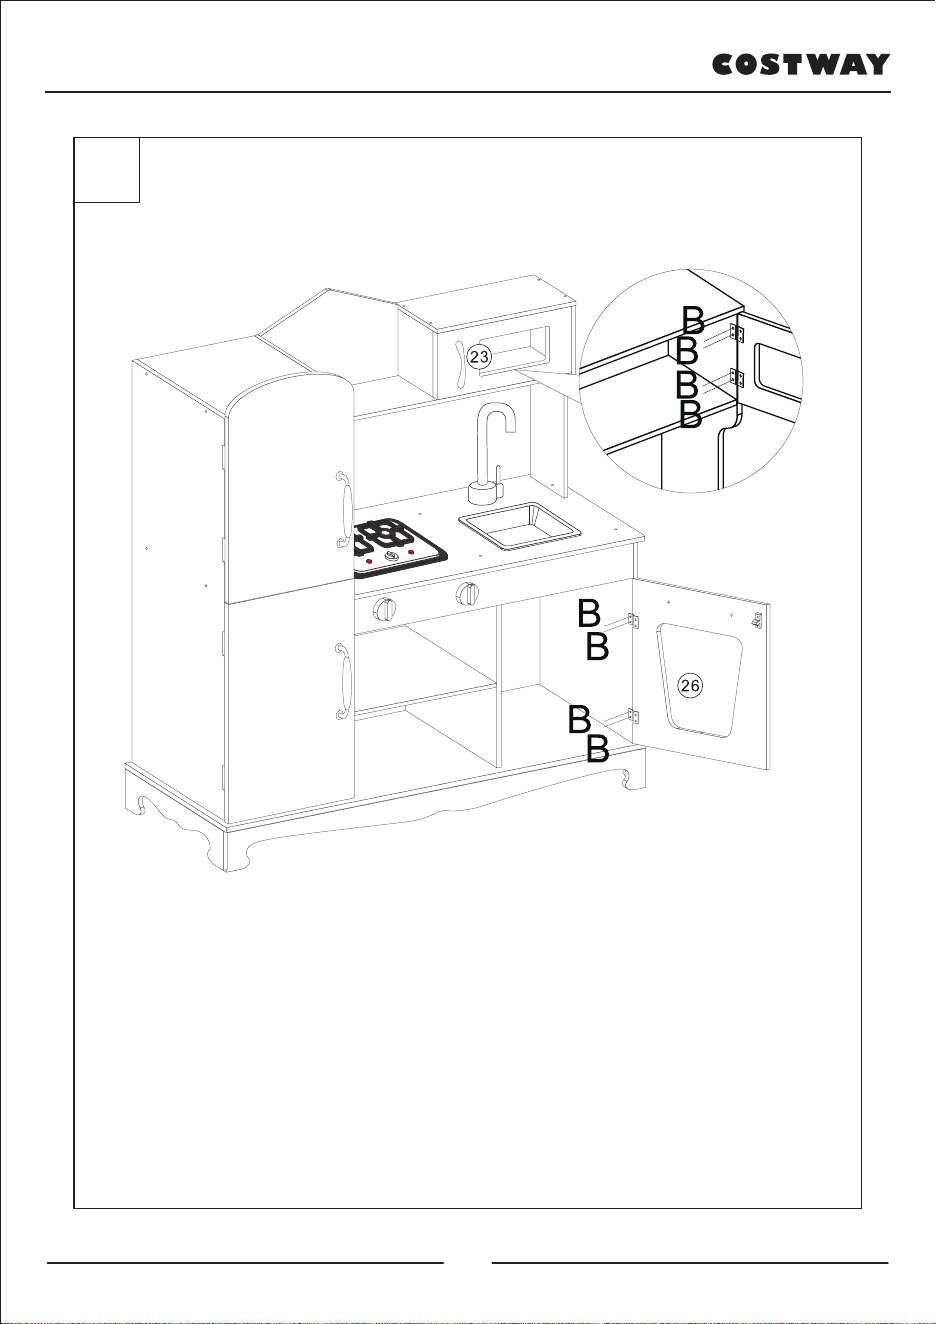
24
26
STEP 24:
Assemble No.23 to No.17 with screws B,
also assemble No.26 to No.8 with screws B.

Welcome to visit our website and purchase our quality products!
this product and giving us valuable feedbacks.
With your inspiring rating, COSTWAY will be more consistent to offer you
EASY SHOPPING EXPERIENCE, GOOD PRODUCTS and EFFICIENT SERVICE!
US office: Fontana, California
UK office: Ipswich
Reward Points
Exclusive Customer Service
Permanent Shopping Cart
Order History
27