Loading ...
Loading ...
Loading ...

Thermal Imagers
Adjusting the Thermal Image
9
Adjusting the Thermal Image
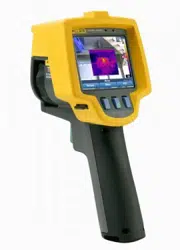
The Imager uses different colors or shades of gray to display the temperature
gradient of the area within the Imager’s field of view. There are two
adjustments for changing how the Imager displays the image: Palette and
Range.
Selecting a Palette
The palette menu provides different thermal viewing patterns. Grayscale, Blue-
Red, High Contrast, and Ironbow are available in all four Imagers. The TiR1
and Ti25 add Amber and Hot Metal to the list. To select a palette:
1. Press a until Palette appears over c.
2. Press the softkey labeled Palette to display the available palette options.
3. Press the softkey labeled Up or Down to move between the palette
options.
4. Press the softkey labeled Back/Done to set the Imager to the selected
palette.
Setting the Range
Viewing temperature (level and span) is set either automatically or manually.
To set the range, do the following:
1. Press a until Range appears over d.
2. Press the softkey labeled Range.
3. Press the softkey labeled Manual to set the Imager to manual ranging and
press the softkey labeled Auto to select auto ranging.
Fast Auto/Manual Range Toggle (Ti10, Ti25, TiR, TiR1)
When NOT in a menu mode, press F for ½ second to toggle between Auto
Range and Manual Range.
Fast Auto Rescale (Ti10, Ti25, TiR, TiR1)
When in Manual Range and NOT in a menu mode, press H for ½ second to
automatically rescale the level and span range for objects within the Imager’s
thermal field of view.
1.888.610.7664 sales@GlobalTestSupply.com
Fluke-Direct.com
Loading ...
Loading ...
Loading ...