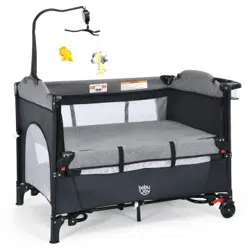
Baby Playard
BB0505
Please give us a chance to make it right and do better !
Contact our friendly customer service department for help first.
Replacements for missing or damaged parts will be shipped ASAP !
Contact Us !
Do NOT return this item.
USER’S MANUAL
THIS INSTRUCTION BOOKLET CONTAINS IMPORTANT SAFETY INFORMATION. PLEASE READ AND KEEP FOR FUTURE REFERENCE.
US:cs.us@costway.com
UK:cs.uk@costway.com
US office: Fontana UK office: Ipswich AU office: Truganina
IMPORTANT!
IMPORTANT!
To ensure safe operation of your baby playard, please follow
these instructions and keep for future reference.
IMPORTANT!
Before assembly and each use, inspect this product for damaged
hardware, loose joints, missing parts or sharp edges.
Never use if any parts are missing or broken.
WARNING: Infants can suffocate:
1. In gaps between the mattress and the sides of the baby playard.
Ensure that the mattress is the correct size for your baby playard.
* You should not be able to fit more than 2 fingers between the
sides of the baby playard and the sides of the mattress.
2. On soft bedding, loose pillows, duvets, cot bumpers. Soft toys
should be removed from baby's sleep space.
WARNING: Failure to follow these
warnings and the instructions could result in
serious injury or death.
01 02
Before You Start
General Warnings:
Attention: To prevent possible injury by entanglement, remove this toy when the
child starts trying to get up on its hands and knees in a crawling position.
Danger! Keep all small parts and packaging materials for this product away from
babies and children, otherwise they may pose a choking hazard.
The product must be installed and used under the supervision of an adult.
Read through each step carefully and follow the proper order.
Remove all Packaging, separate and count all parts and hardware before
installation.
Please ensure that all parts are correctly installed, incorrect installation can lead to
a danger.
We recommend that, where possible, all items are assembled near the area in
which they will be placed in use, to avoid moving the product unnecessarily once
assembled.
Ensure a secure surface during installation, and place the product always on a flat,
steady and stable surface.
Please read all instructions carefully and keep it for future reference.
IMPORTANT!
IMPORTANT!
To ensure safe operation of your baby playard, please follow
these instructions and keep for future reference.
IMPORTANT!
Before assembly and each use, inspect this product for damaged
hardware, loose joints, missing parts or sharp edges.
Never use if any parts are missing or broken.
WARNING: Infants can suffocate:
1. In gaps between the mattress and the sides of the baby playard.
Ensure that the mattress is the correct size for your baby playard.
* You should not be able to fit more than 2 fingers between the
sides of the baby playard and the sides of the mattress.
2. On soft bedding, loose pillows, duvets, cot bumpers. Soft toys
should be removed from baby's sleep space.
WARNING: Failure to follow these
warnings and the instructions could result in
serious injury or death.
01 02
Before You Start
General Warnings:
Attention: To prevent possible injury by entanglement, remove this toy when the
child starts trying to get up on its hands and knees in a crawling position.
Danger! Keep all small parts and packaging materials for this product away from
babies and children, otherwise they may pose a choking hazard.
The product must be installed and used under the supervision of an adult.
Read through each step carefully and follow the proper order.
Remove all Packaging, separate and count all parts and hardware before
installation.
Please ensure that all parts are correctly installed, incorrect installation can lead to
a danger.
We recommend that, where possible, all items are assembled near the area in
which they will be placed in use, to avoid moving the product unnecessarily once
assembled.
Ensure a secure surface during installation, and place the product always on a flat,
steady and stable surface.
Please read all instructions carefully and keep it for future reference.
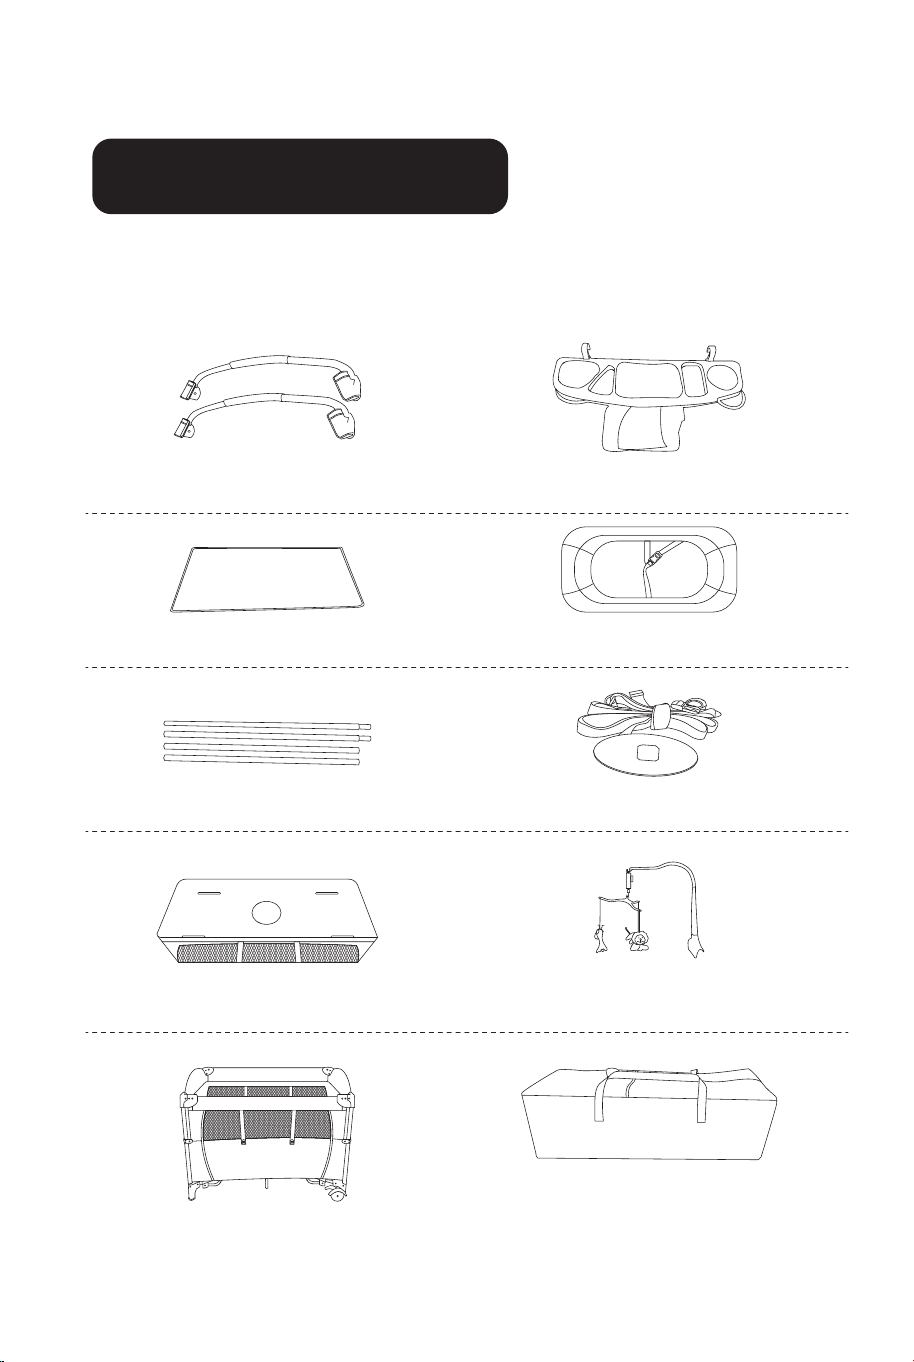
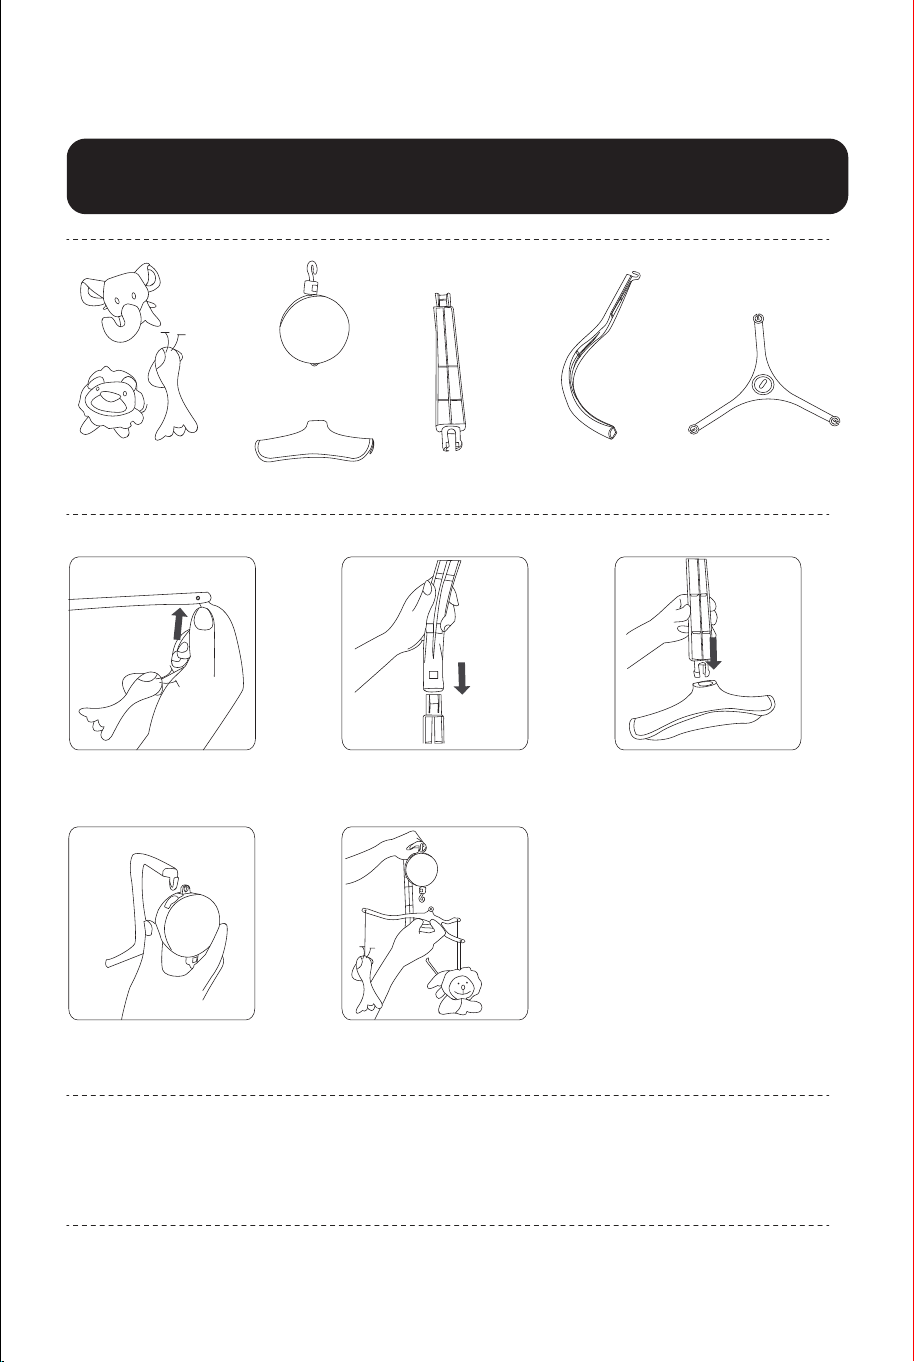
PRODUCT LIST
WHEN OPEN THE PARCEL, PLEASE CHECK IF IT HAS CONTAINED
THEM ALL LIKE BELOW:
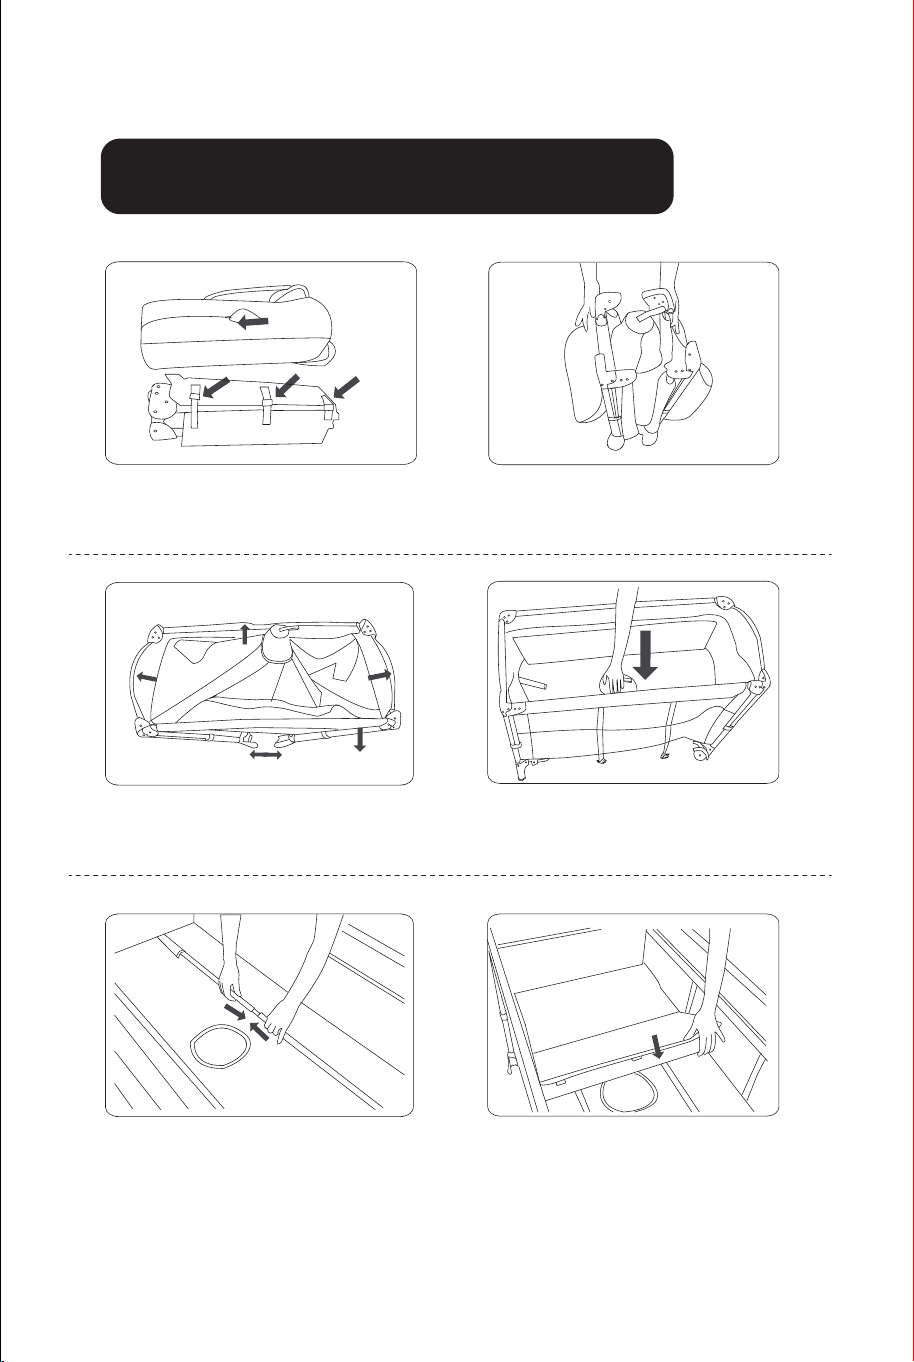
HOW TO OPEN THE BED
1. Unzip the carry bag and take
out all items.
2. Expand out 4 feet.
3. Pull up two short sides,
and then pull up two long sides.
4. Press down from the middle.
5. Connect 4 tubes. 6. Put the mattress on the
second layer.
03 04
Rocking tubes
Side storage tray
Mattress
Changing table
Second layer tubes
Safety belt
Second layer with zipper
Music & toys rack
Carry bag
Basic playard
PRODUCT LIST
WHEN OPEN THE PARCEL, PLEASE CHECK IF IT HAS CONTAINED
THEM ALL LIKE BELOW:
HOW TO OPEN THE BED
1. Unzip the carry bag and take
out all items.
2. Expand out 4 feet.
3. Pull up two short sides,
and then pull up two long sides.
4. Press down from the middle.
5. Connect 4 tubes. 6. Put the mattress on the
second layer.
03 04
Rocking tubes
Side storage tray
Mattress
Changing table
Second layer tubes
Safety belt
Second layer with zipper
Music & toys rack
Carry bag
Basic playard
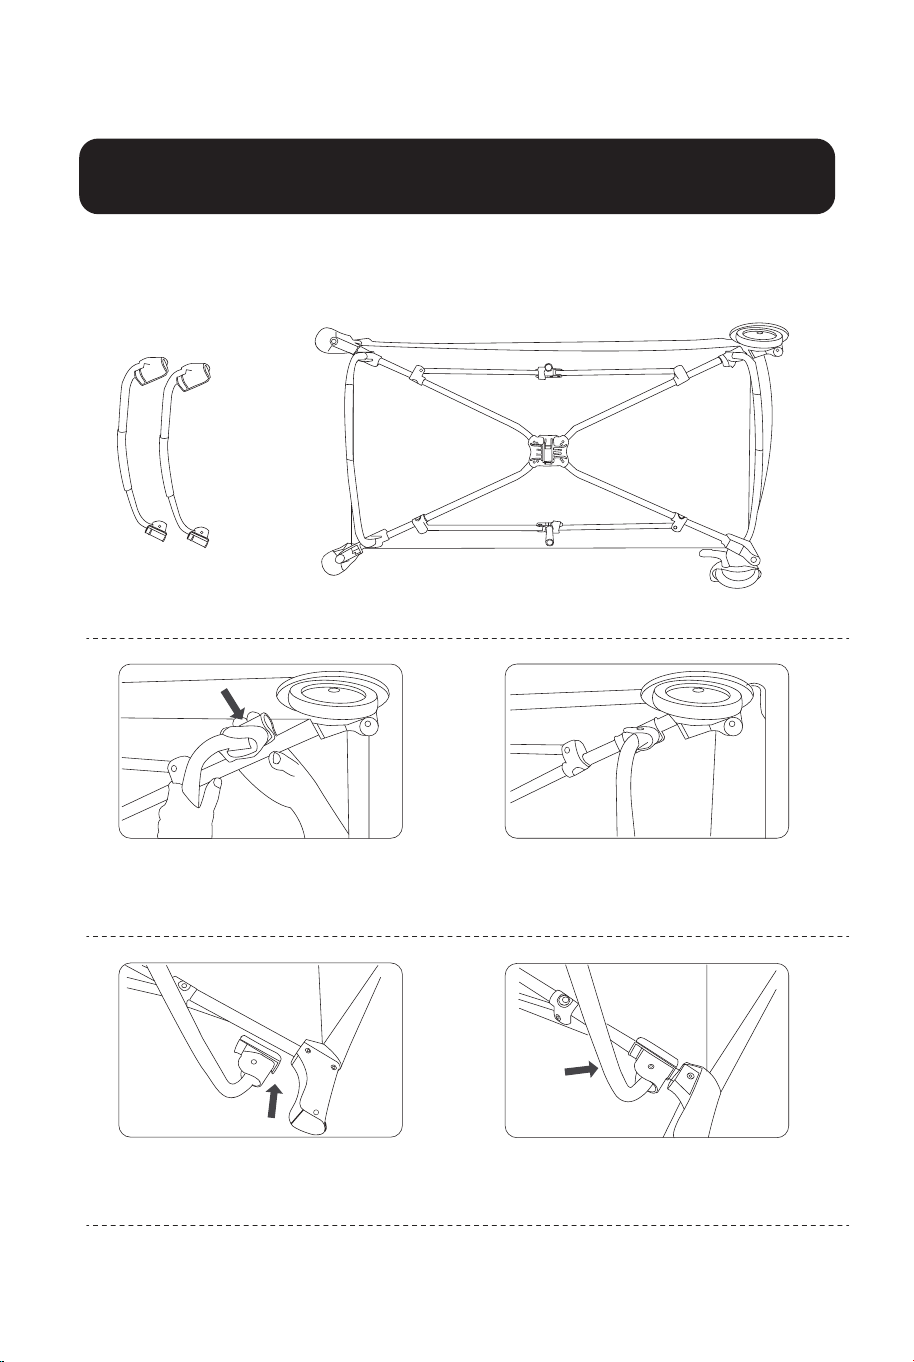
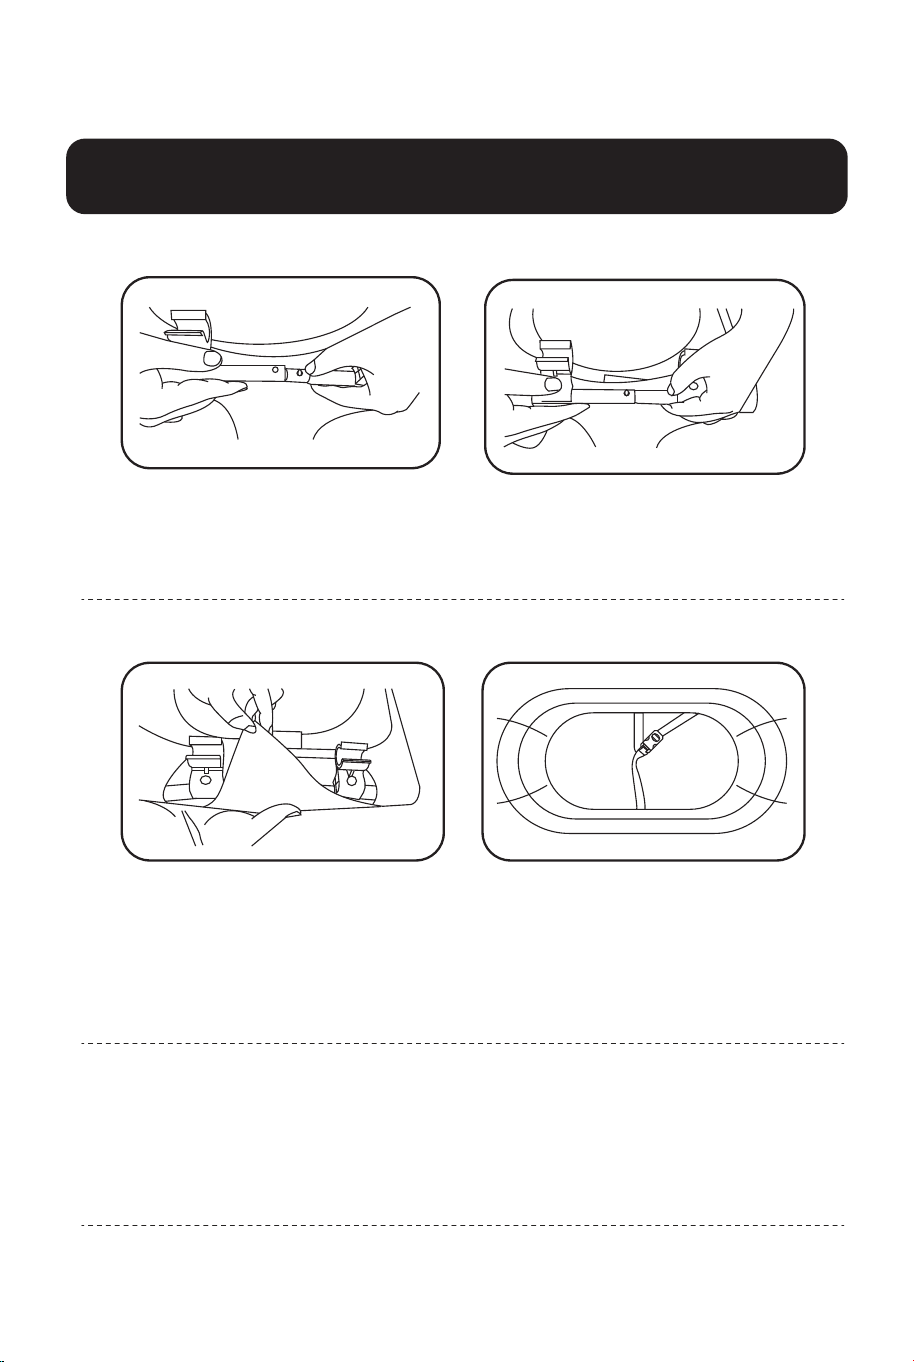
HOW TO ASSEMBLE ROCKING TUBES
Like following pictures and process, assemble rocking tubes at two bottom
short sides. If you want to cancel the rocking tubes, just fold the rocking
tubes inside, no need to remove the rocking tubes.
Rocking Tubes
General view after assembly well
1. Locate the place at two
bottom short sides.
3.Like above picture 1.
2. Press it to connect the bed's
tubes at bottom.
4.Like above picture 2.
HOW TO ASSEMBLE MUSIC&TOYS RACK
Three Toys
Music Switch
Base Base Bracket Splicer Toy Rack
1. Put toys on toy rack. 2. Connect two
splicers well.
3. Connect base
and splicer well.
4. Put on music switch. 5. Put on bracket
with toys.
Insert the 3 toys, toy bars and music box as the shown.
05 06
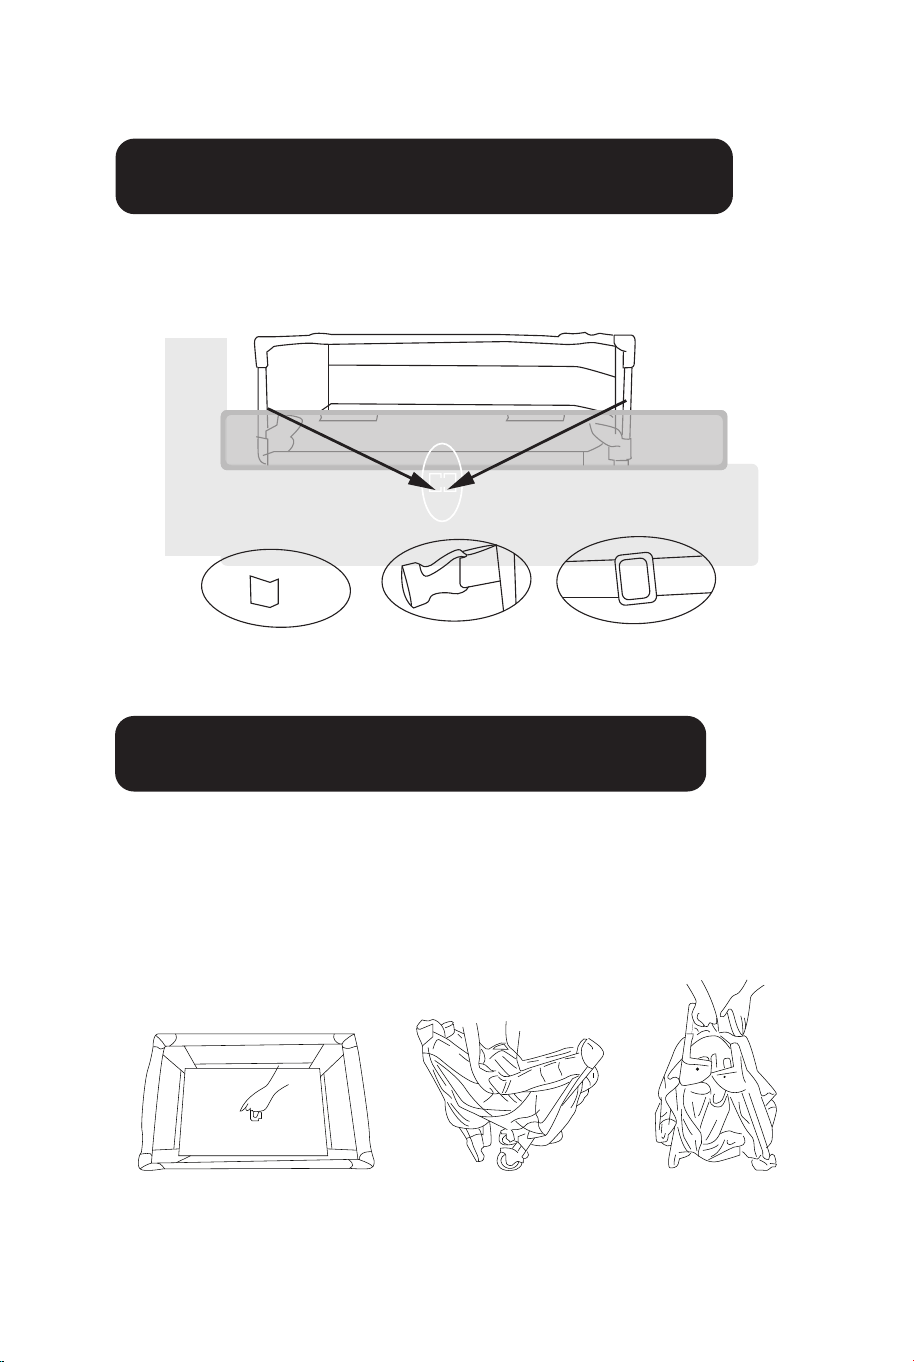
HOW TO ASSEMBLE CHANGING TABLE
1. Connect two short tubes as shown, and repeat step one.
2. Fasten together with velcro straps as shown.
WARNNING :
DO NOT LEAVE YOUR CHILD UNATTEND IN THE CHANGING TABLE .
NEVER LEAVE CHANGING TABLE IN PLACE WHEN CHILD IN
THE BABY PLAYARD.
UPGRADE TO USE AS CO-SLEEPING BED
One side of bed can be lifted up or down to connect with adult bed by 4
different heights.
No.1 height is the heights of double layer.
No.2&No.3 is other two height as your personal favourite.
No.4 is the height of baby bed.
This shows height No.2
1. Pull zipper down
to the height of
No.1-No.4
2. Pull up plastic at
two sides to the
height of No1-No.4
3. Roll up fabric and
bind it with velcro
07
08
HOW TO CONNECT ADULT BED
To connect the baby bed with adult bed and keep baby from dropping
down and harm, we strongly suggest to do like below:
Fixed disk Lock Catch Fixed ribbon
ADULT BED BOARD
ADULT BED MATTRESS
BABY BED
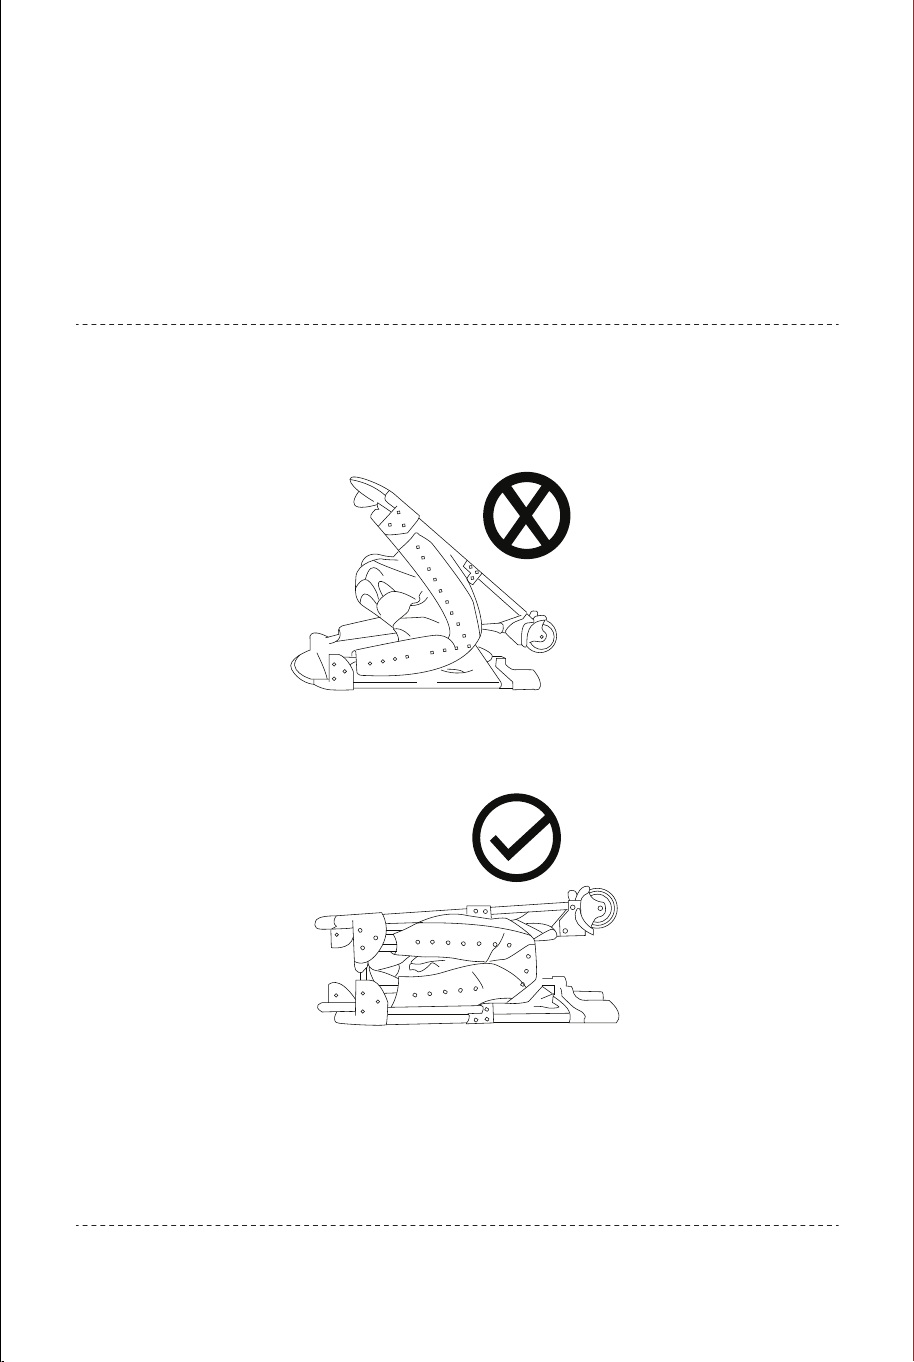
HOW TO FOLD THE BABY BED
Filed a TAB
FIG.8 FIG.9 FIG.10
SPECIAL NOTICE:
When folding the bed, please press the bed body firmly (FIG.11).
Because the long side handrail is not fully compressed, you need to fold
it again to press the long side handrail button until its flank is at a right
angle (FIG.12).
FIG.11
FIG.12
09 10
• Take off all changing table/music&toys rack/storage rack/mattress
etc, only leave bed body for folding.
• Lift the ring up at the bottom of the bed.
• Hold the folding switch in the middle of the handrail.
• Press down & fold two long sides down to shape ''V''; press down &
fold two short sides down to shape ''v''. Have all 4 feet together.
HOW TO CONNECT ADULT BED
To connect the baby bed with adult bed and keep baby from dropping
down and harm, we strongly suggest to do like below:
Fixed disk Lock Catch Fixed ribbon
ADULT BED BOARD
ADULT BED MATTRESS
BABY BED
HOW TO FOLD THE BABY BED
Filed a TAB
FIG.8 FIG.9 FIG.10
SPECIAL NOTICE:
When folding the bed, please press the bed body firmly (FIG.11).
Because the long side handrail is not fully compressed, you need to fold
it again to press the long side handrail button until its flank is at a right
angle (FIG.12).
FIG.11
FIG.12
09 10
• Take off all changing table/music&toys rack/storage rack/mattress
etc, only leave bed body for folding.
• Lift the ring up at the bottom of the bed.
• Hold the folding switch in the middle of the handrail.
• Press down & fold two long sides down to shape ''V''; press down &
fold two short sides down to shape ''v''. Have all 4 feet together.

Baby Playard
BB0505
Please give us a chance to make it right and do better !
Contact our friendly customer service department for help first.
Replacements for missing or damaged parts will be shipped ASAP !
Contact Us !
Do NOT return this item.
USER’S MANUAL
THIS INSTRUCTION BOOKLET CONTAINS IMPORTANT SAFETY INFORMATION. PLEASE READ AND KEEP FOR FUTURE REFERENCE.
US:cs.us@costway.com
UK:cs.uk@costway.com
US office: Fontana UK office: Ipswich AU office: Truganina