Loading ...
Loading ...
Loading ...
30 English
Installation instructions
Installation instructions
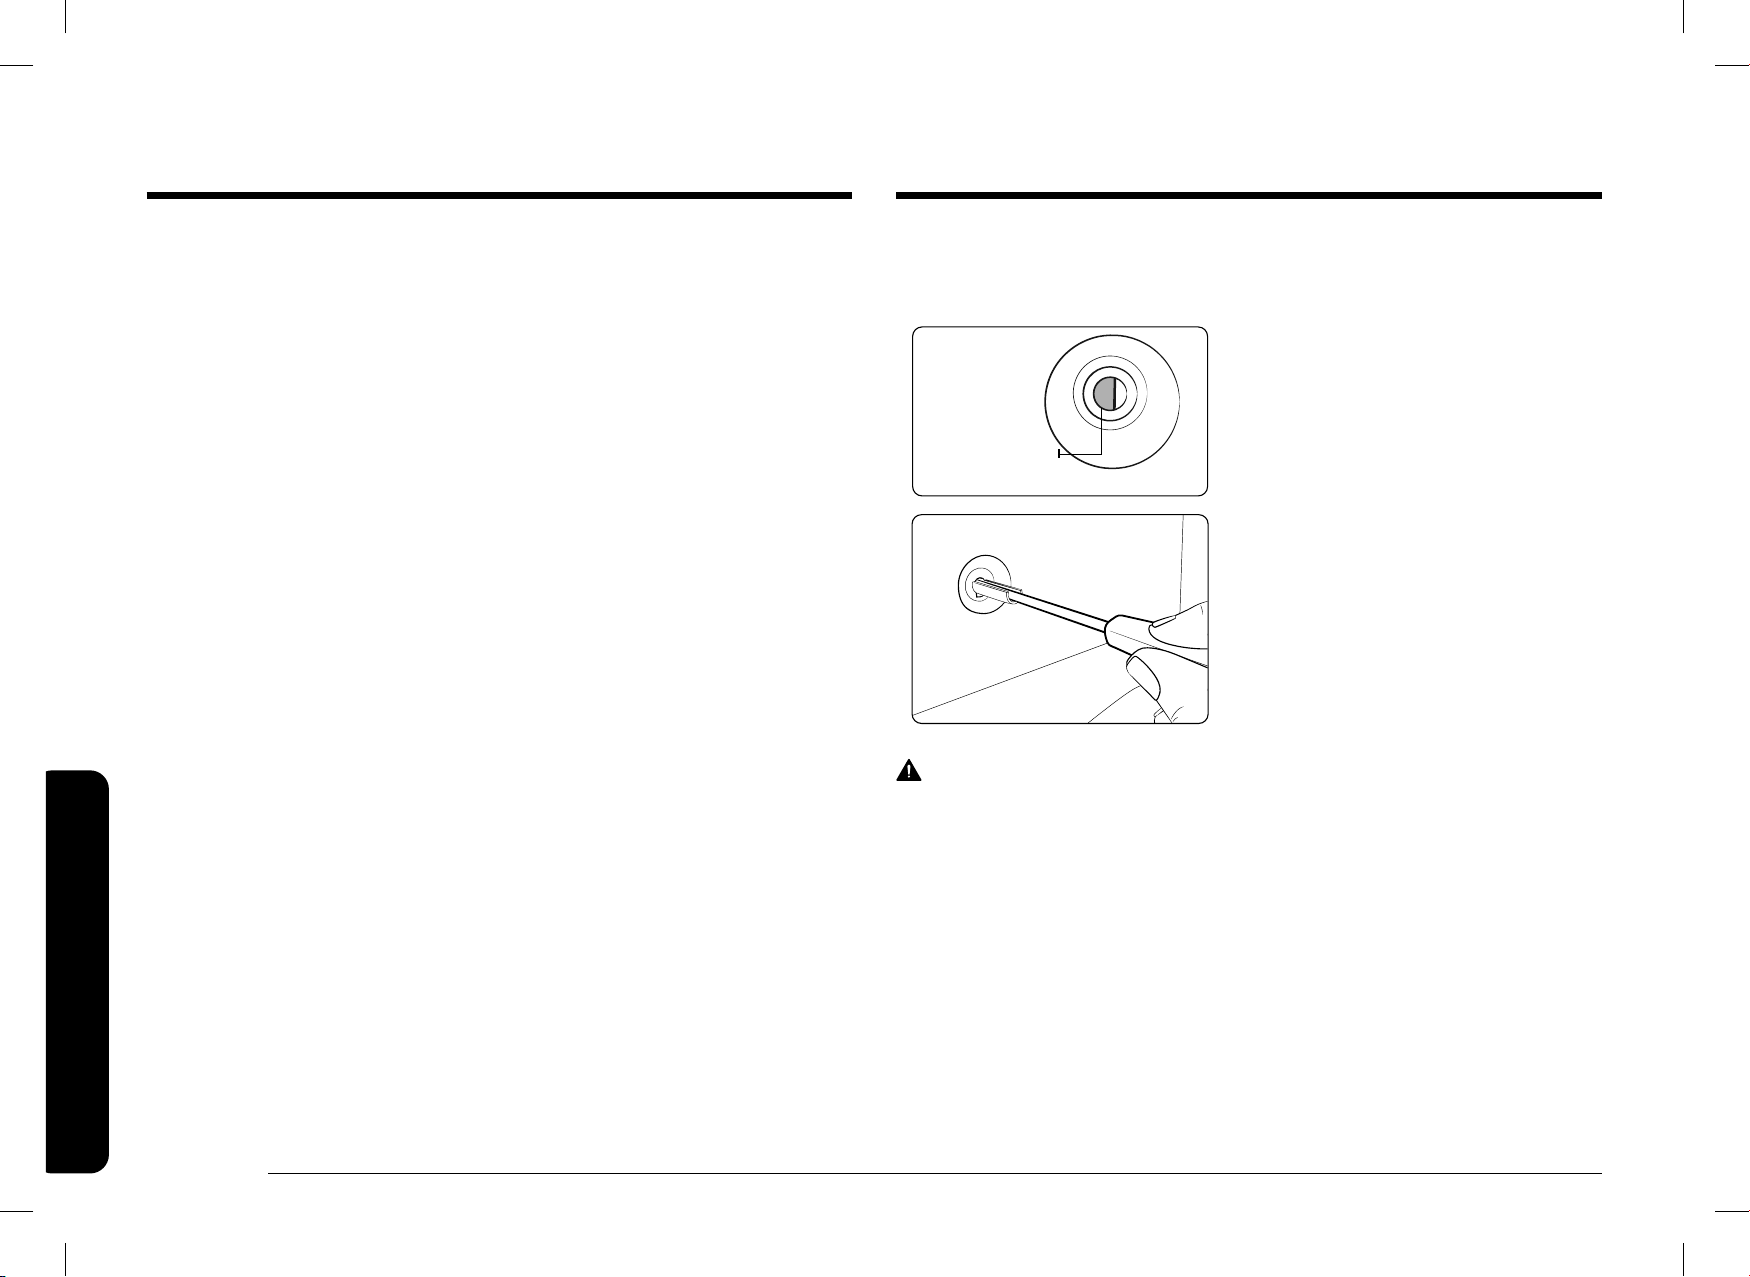
To adjust ame low setting
Identify which burner is exhibiting too high or too low simmer ame size, adjust
as necessary by following steps below:
Simmer Set
Screw
1. Rotate a knob to "LO" position and
remove the knob from the valve shaft
while the ame is lit.
2. Carefully push the screw driver into
the stem of the valve, until it hits
the simmer set screw. Make sure the
screwdriver athead is seated into the
set screw groove.
3. Rotate valve set screw clockwise to
decrease "LO" setting ame output, or
rotate set screw counter clockwise to
increase "LO" setting ame output.
WARNING
1. Do not completely remove the valve set screw from the valve stem. The valve
set screw is an integral part of the gas valve assembly. Removing the valve
set screw will cause gas to leak.
2. After adjusting the valve set screw, inspect the assembly for gas leaks.
Step 14. Final installation checklist
You have just completed installing your range. Make sure all controls are in the
OFF position and the ow of ventilation air to the range is unobstructed. The
following is a checklist to conrm your range is safely installed and ready for
operation.
• Gas line has been properly connected to the range. The gas has been turned
on. All connections have been checked for leaks.
• Range is plugged into the properly grounded electrical receptacle.
• Approved anti-tip bracket is properly installed and engaged with the range.
• Range is leveled and is rmly sitting on a solid, level oor.
• All burners have been tested for proper operation.
Install_DOP36T86DLS_DG68-01106G-00_EN+MES+CFR.indb 30Install_DOP36T86DLS_DG68-01106G-00_EN+MES+CFR.indb 30 2023-02-28 오전 10:19:102023-02-28 오전 10:19:10
Loading ...
Loading ...
Loading ...