Loading ...
Loading ...
Loading ...
20 English
Installation instructions
Installation instructions
Specied power-supply-cord kit rating
Range rating, watts
Specied rating
of power-supply-
cord kit, amperes
Diameter (inches) of range
connection opening
120/240
volts 3-wire
120/208
volts 3-wire
Power cord Conduit
8750 - 16500 7801 - 12500 40 or 50 A 1⅜" 1⅛"
Step 4. Installing the power cord
For power cord installations, hook the strain relief over the power cord hole (1⅜")
located below the rear of the drawer body. Insert the power cord through the
strain relief and tighten the device.
• You must install the power cord with a strain relief.
• Attach the strain relief to the 1⅜" opening in conduit connection plate.
A 50 amp range cord is not recommended but if used, it should be marked for
use with nominal 1⅜" diameter connection openings. Care should be taken to
center the cable and strain relief within the knockout hole to keep the edge from
damaging the cable.
Because range terminals are not accessible after range is in position, exible
service conduit or cord must be used.
NOTE
If conduit is being used, go to Step 5 on pages 22–23.
ALL NEW BRANCH-CIRCUIT CONSTRUCTIONS, MOBILE HOMES,
RECREATIONAL VEHICLES AND INSTALLATIONS WHERE LOCAL
CODES DO NOT ALLOW GROUNDING THROUGH NEUTRAL, REQUIRE A
4-CONDUCTOR UL-LISTED RANGE CORD.
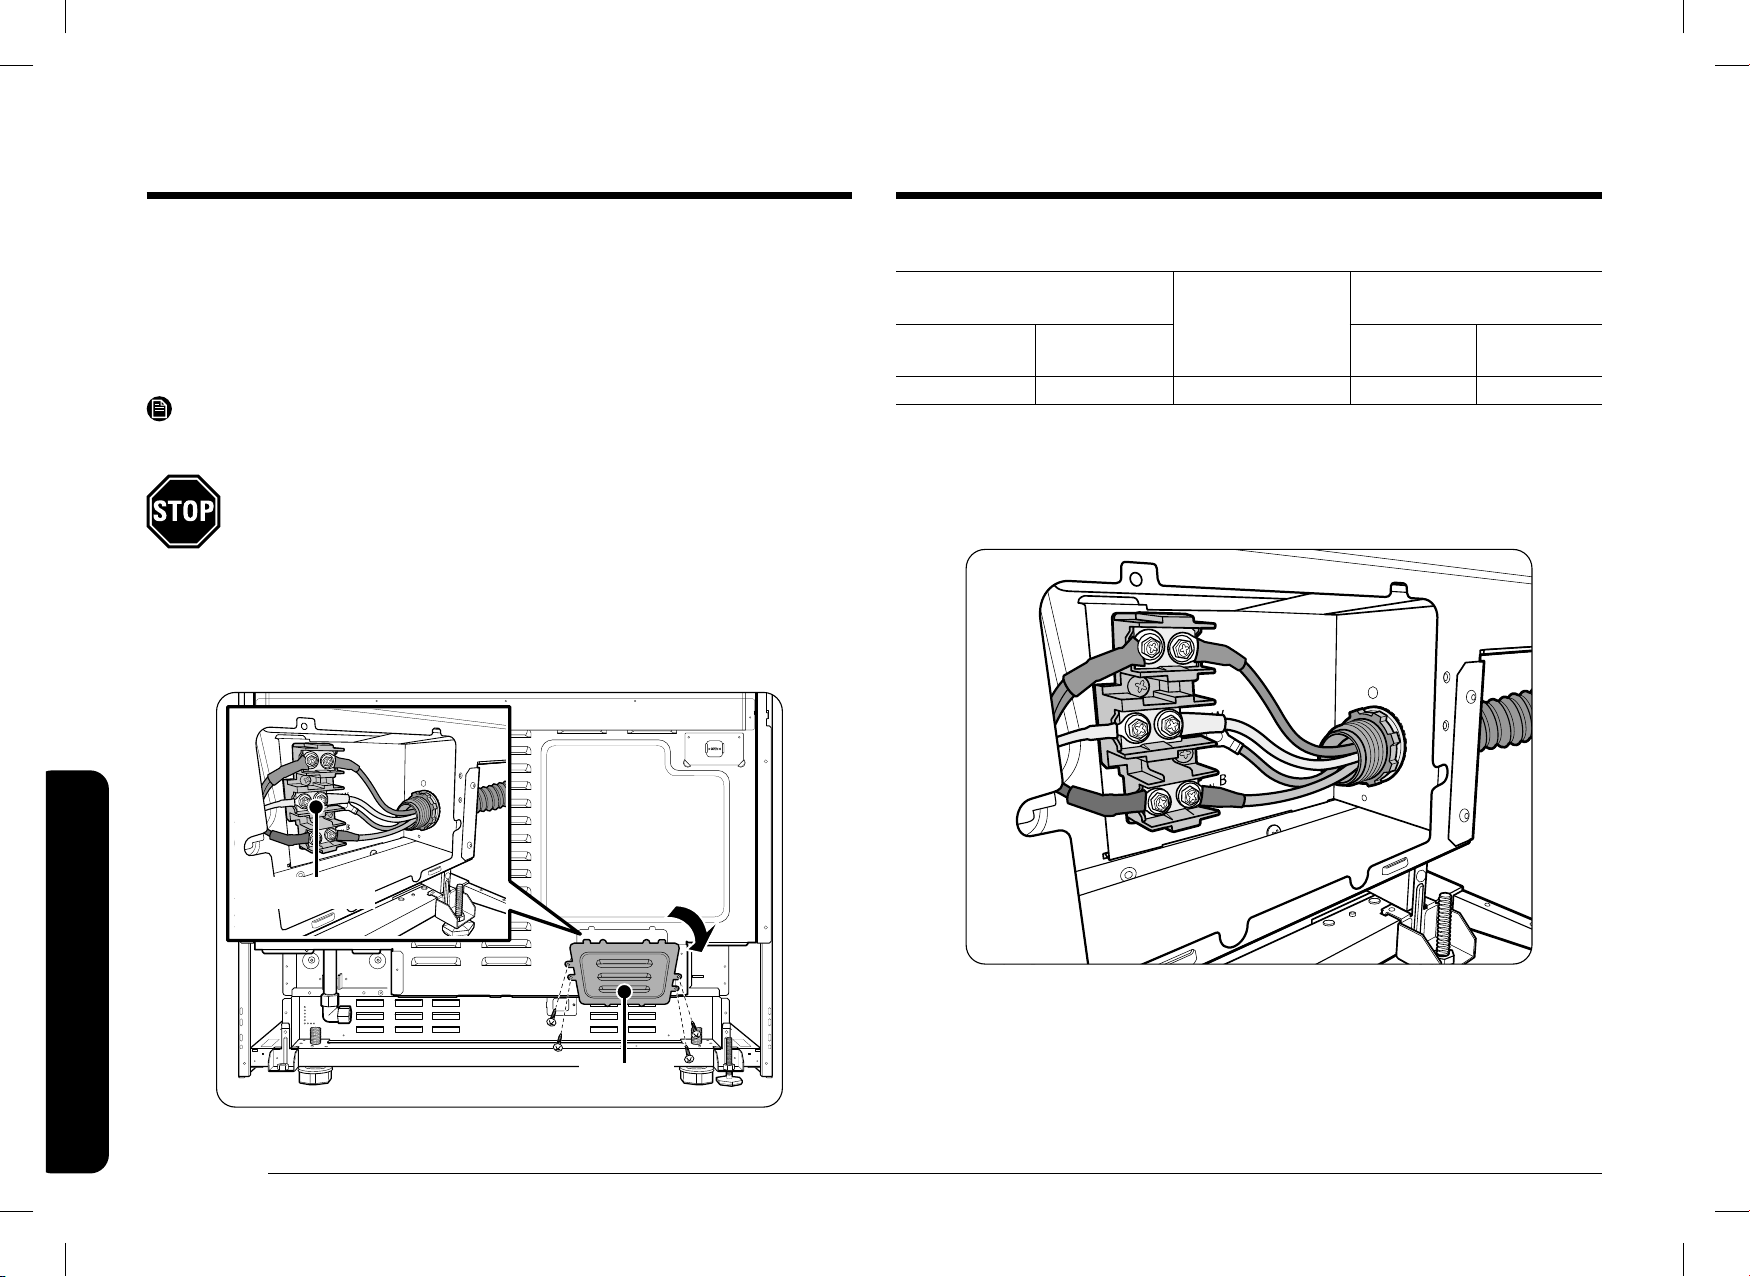
Step 3. Accessing the power cord connection
Remove the rear access cover and loosen the screw with a screwdriver. The
terminal block will then be accessible.
Terminal block
Access cover
Install_DOP36T86DLS_DG68-01106G-00_EN+MES+CFR.indb 20Install_DOP36T86DLS_DG68-01106G-00_EN+MES+CFR.indb 20 2023-02-28 오전 10:19:062023-02-28 오전 10:19:06
Loading ...
Loading ...
Loading ...