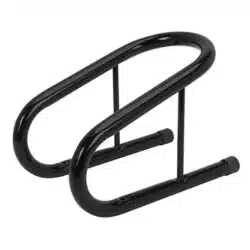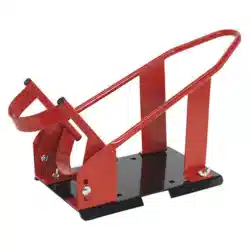
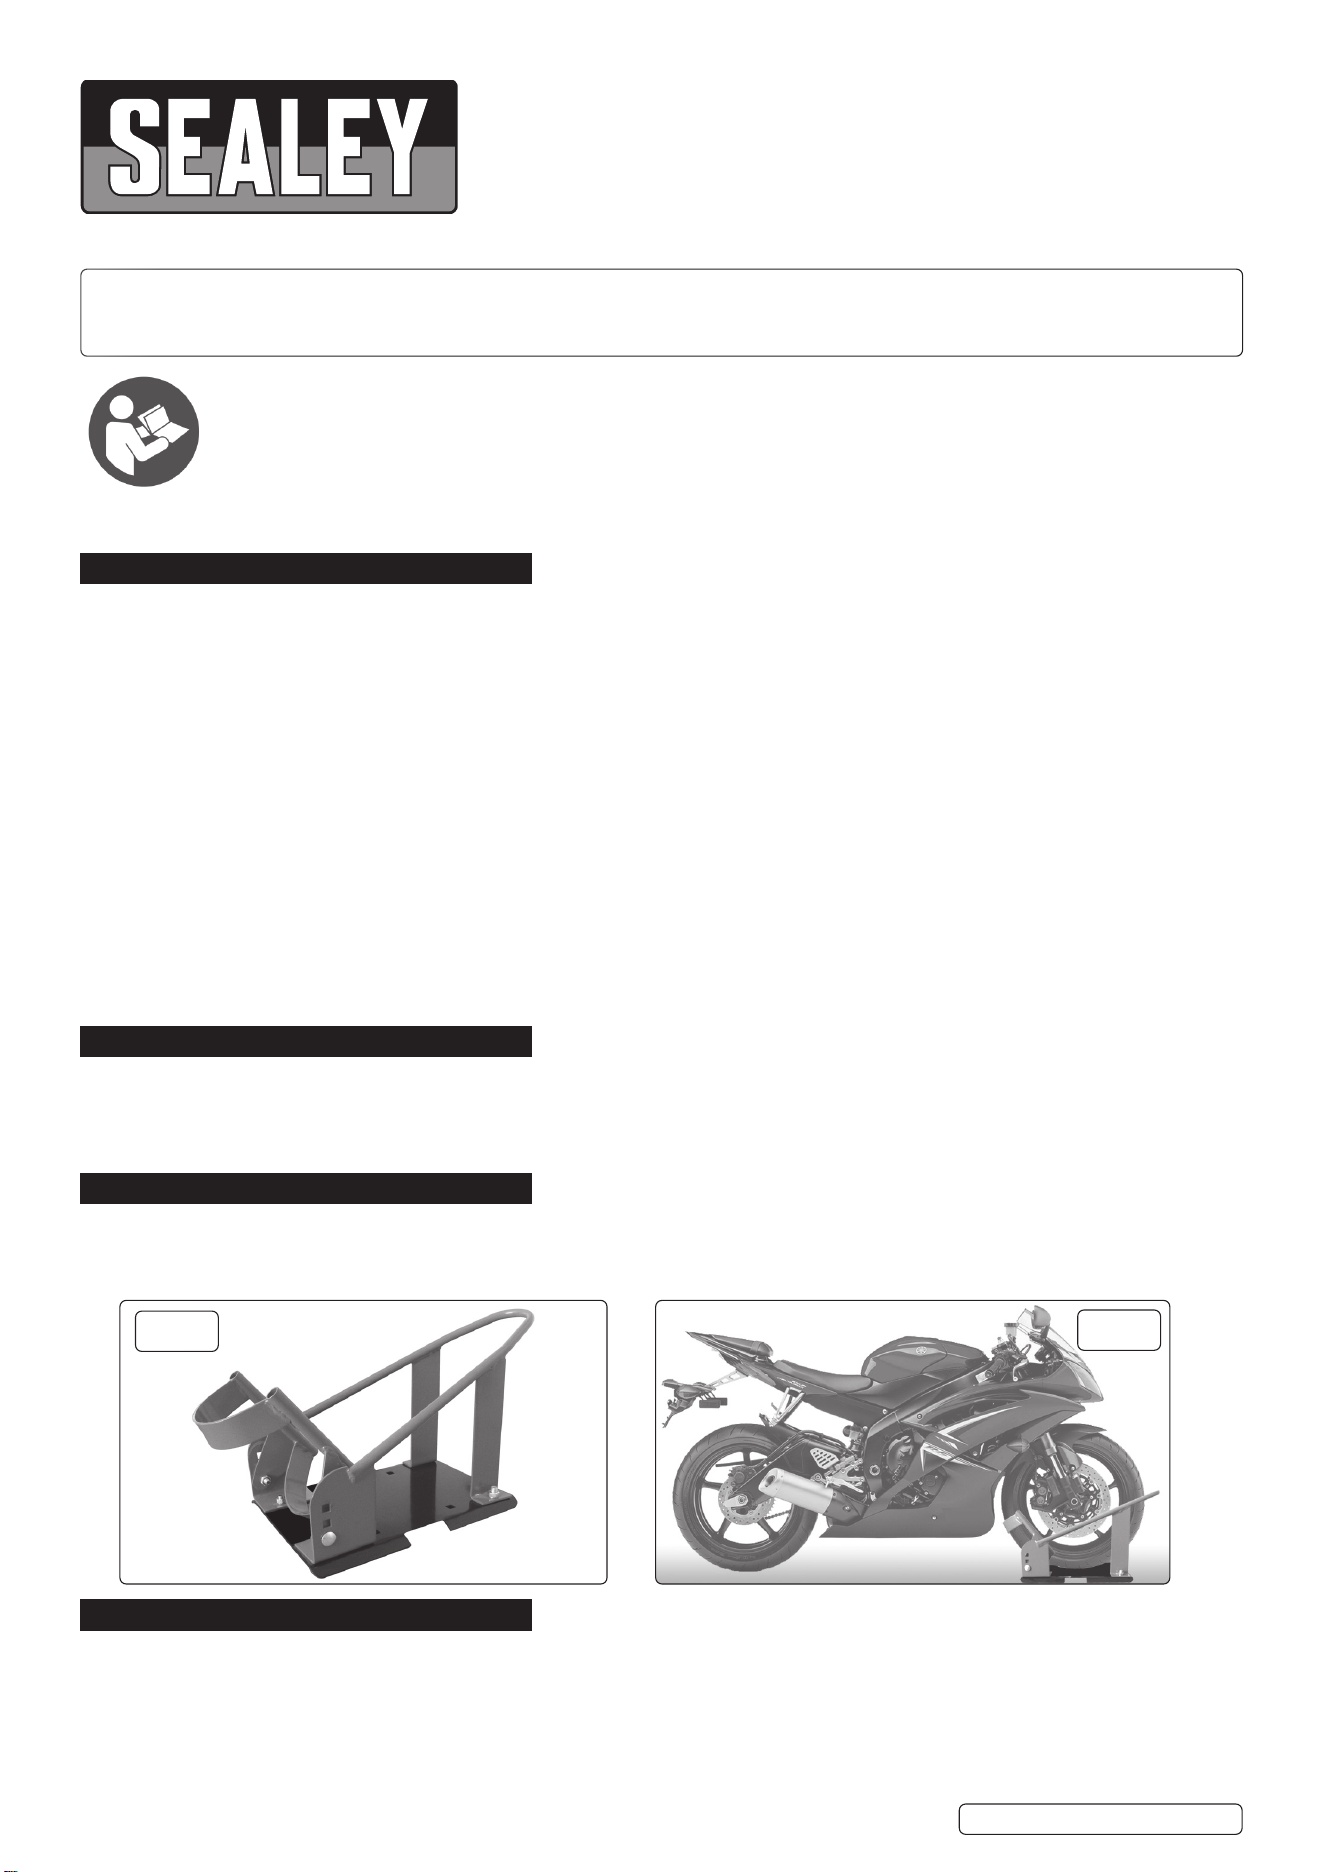
MOTORCYCLE FRONT WHEEL CHOCK
MODEL NO: FPS6.V3
Thank you for purchasing a Sealey product. Manufactured to a high standard, this product will, if used according to these instructions,
and properly maintained, give you years of trouble free performance.
IMPORTANT: PLEASE READ THESE INSTRUCTIONS CAREFULLY. NOTE THE SAFE OPERATIONAL REQUIREMENTS, WARNINGS & CAUTIONS. USE
THE PRODUCT CORRECTLY AND WITH CARE FOR THE PURPOSE FOR WHICH IT IS INTENDED. FAILURE TO DO SO MAY CAUSE DAMAGE AND/OR
PERSONAL INJURY AND WILL INVALIDATE THE WARRANTY. KEEP THESE INSTRUCTIONS SAFE FOR FUTURE USE.
1. SAFETY
WARNING! Before use, ensure that there is nothing attached to the front forks or the fairing of the motorcycle, that will foul on the chock.
9 Maintain the chock in good condition (use an authorised service agent).
9 Replace or repair damaged parts. Use genuine parts only. Unauthorised parts may be dangerous and will invalidate the warranty.
9 Locate the chock in a suitable area. Keep area clean and tidy and free from unrelated materials and ensure that there is adequate
lighting. Also ensure that the floor/ground is level and strong enough (preferably concrete) to take the weight of the chock and
the motorcycle.
8 DO NOT mount the stand on tarmacadam, as the surface may be unstable.
9 Keep the chock clean for the best and safest performance.
9 Maintain correct balance and footing whilst positioning the motorcycle in the chock.
9 Ensure that the floor is not slippery and wear non-slip shoes.
9 Ensure that the motorcycle is adequately secured to the chock if to be used for transportation purposes.
9 Keep children and unauthorised persons away from the work area.
8 DO NOT use the chock for a purpose it is not designed to perform.
8 DO NOT operate the chock if it is damaged.
8 DO NOT use the chock when you are tired or under the influence of alcohol, drugs or intoxicating medication.
8 DO NOT allow untrained persons to operate the chock.
8 DO NOT make any modifications to the chock.
Before removing a motorcycle from the chock, ensure that there are no obstructions or persons in the path of the motorcycle.
2. INTRODUCTION
Features adjustable pivoting wheel guide, which secures front wheel within chock. Three adjustable heights depending on diameter of wheel.
Suitable for wheels with tyre widths 90-130mm and diameters Ø17”-21”(430-535mm). Base can be permanently bolted to the oor (xings
included), and features a detachable upper assembly that can be easily stored and re-attached when required, stabilizing motorcycles without
the need for side or centre-stands. Base features lashing strap gap for securing the bike in transport.
3. SPECIFICATION
Model No: .................................................................FPS6.V3
Minimum/Maximum Tyre Width: ............................90-130mm
Minimum/Maximum Tyre Diameter: ....... 17-21” (430-535mm)
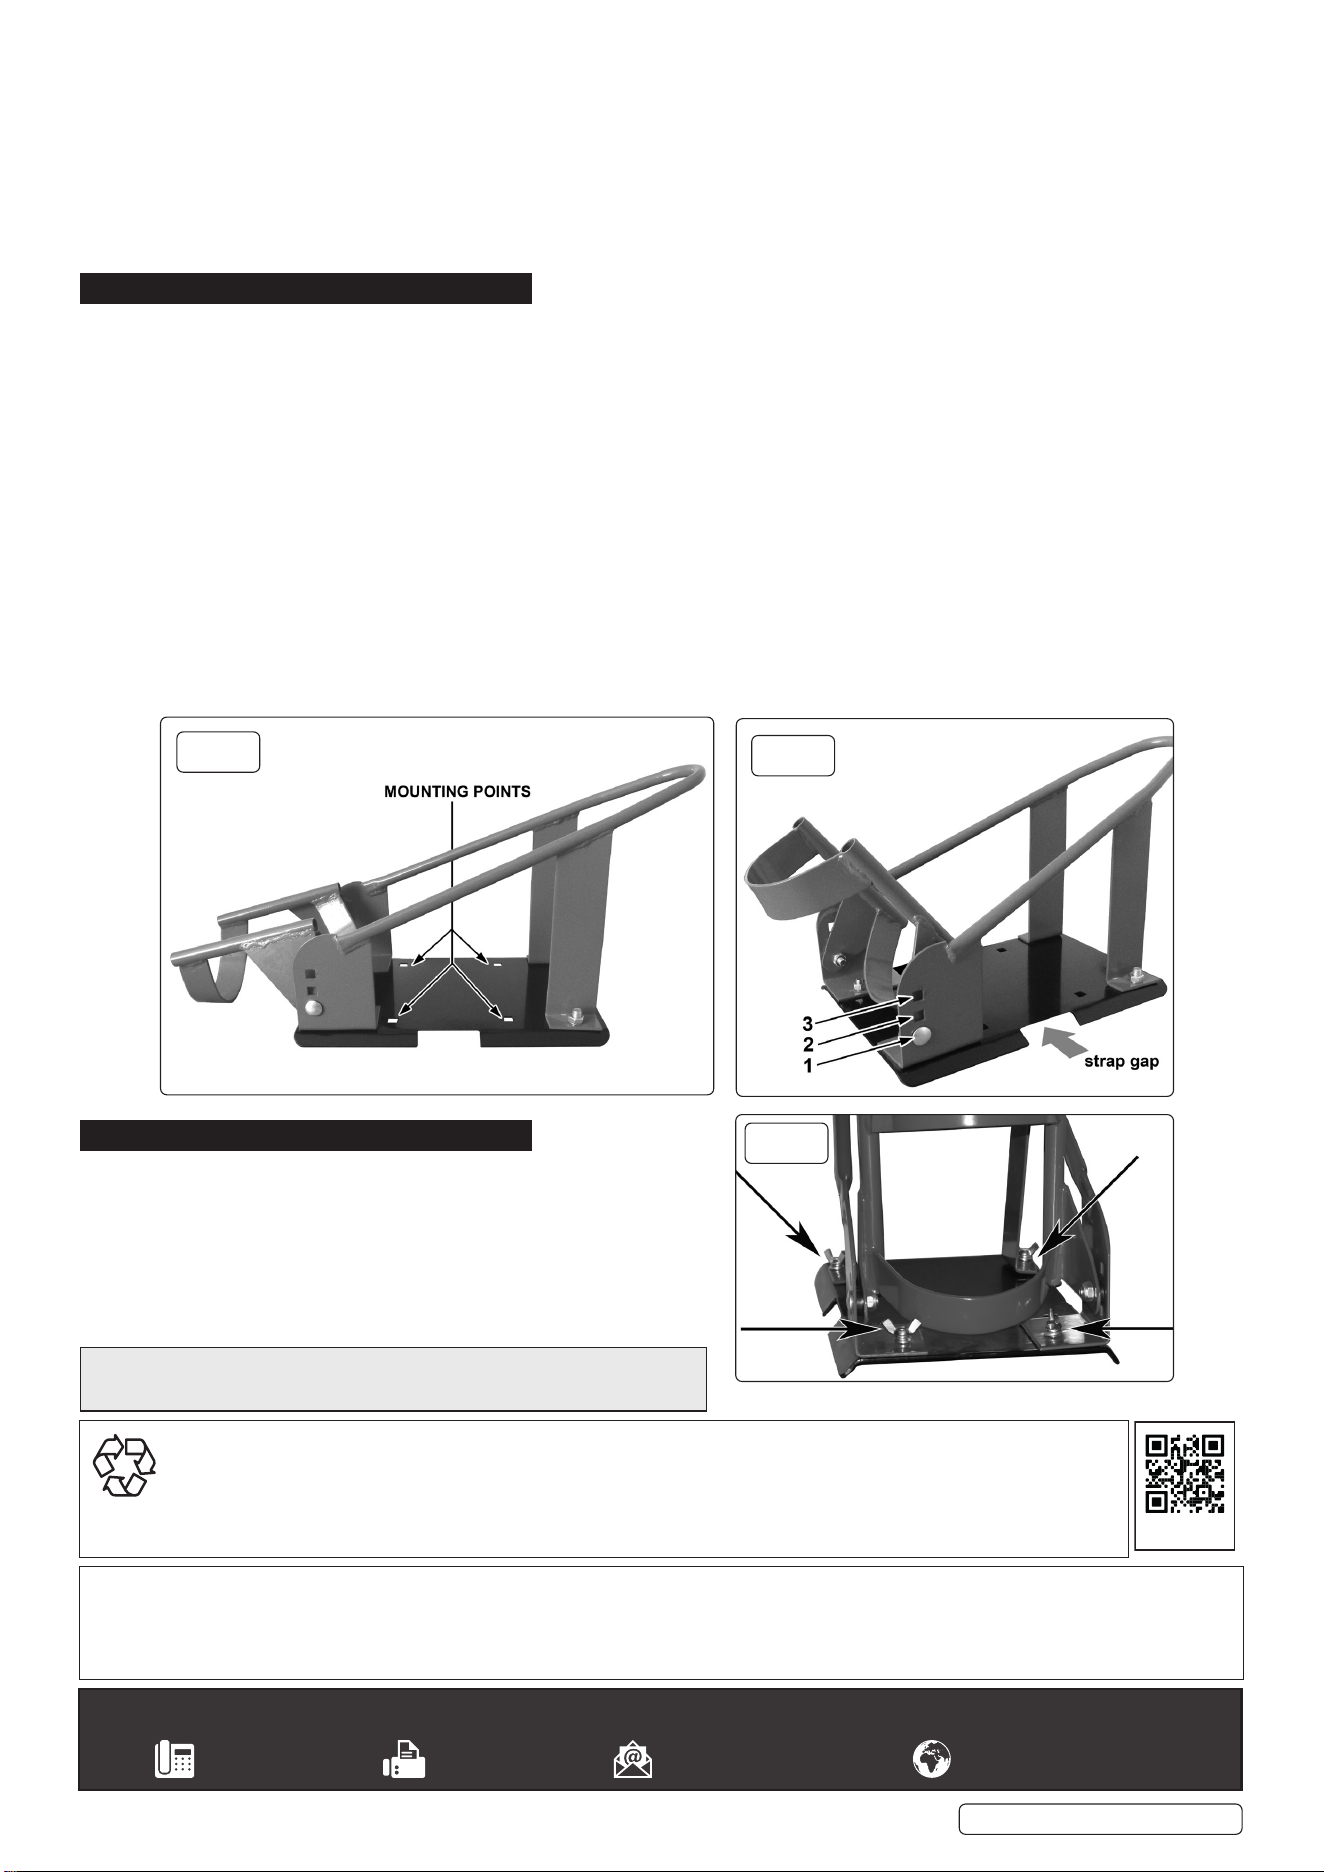
4. INSTALLATION
4.1. Identify the chock mounting points as shown in fig.3. The mounting holes are square to enable the use of coach bolts, having
a short square shank behind the head which prevents the bolt from rotating whilst the fixings are tightened.
4.2. PERMANENT INDOOR/OUTDOOR INSTALLATION
Choose the installation site carefully so that there is good access to both insert the motorcycle, and remove it, from the chock. When
mounting indoors, ensure that the motorcycle and chock do not become a hazard to people or indoor vehicles such as fork lift trucks. Use
anchor bolt fixings to secure the chock to a solid concrete surface.
Refer to
instruction
manual
FPS6.V3 Issue:1 04/11/22
Original Language Version
© Jack Sealey Limited
fig.1
fig.2
4.3. INSTALLATION FOR TRANSPORTATION
4.3.1. When used for the transport of motorcycles, the base must be firmly bolted to the floor of a trailer or van.
4.3.2. If mounting to a trailer or other vehicle, ensure that the floor is strong enough to take the weight of the motorcycle/s plus the chock/s.
4.3.3. The chock is secured to the base by means of the four wing bolts and spring washers (fig.5). When using the chock for
transportation purposes, the front wheel of the motorcycle must be securely strapped to the chock utilising the strap gap indicated in
fig.4.
4.3.4. For additional security, consideration should also be given to securing the rear wheel as well.
5. OPERATIONoperation
5.1. SET HINGED CRADLE TO CORRECT HEIGHT
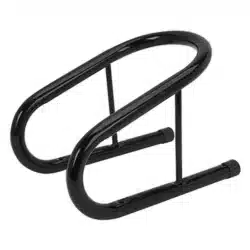
5.1.1. Ascertain the size of the motorcycle’s front wheel in order to set the hinged cradle part of the chock at the correct height (fig.4).
Position 1 is for larger wheels up to 535mm in diameter. Position 3 is for smaller wheels down to 430mm. Position 2 is for sizes in
between the stated limits.
5.1.2. Using a 17mm spanner, remove the nuts from the hinge bolts and remove the bolts. Position the cradle at the required height and
re-insert the bolts. Screw the nuts back onto the bolts and tighten them to the point where the nuts just start to grip. Now back the
nuts off slightly so that the cradle can pivot freely.
5.2. POSITIONING THE FRONT WHEEL OF THE MOTORCYCLE INTO THE CRADLE
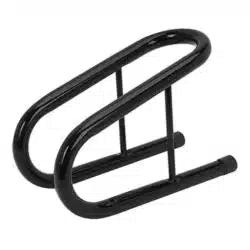
5.2.1. With the cradle in the open position as shown in fig.3, line the motorcycle up with the chock.
5.2.2. Push the motorcycle firmly into the chock so that the front tyre is held by the tapered part of the chock loop.
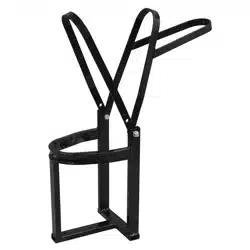
5.2.3. As the weight of the wheel passes over the inner loop of the cradle, it will cause the cradle to flip up and support the rear of the tyre as
shown in fig.1.
5.2.4. Check that the bike is stable within the chock before leaving it. If the wheel is loose in the chock, move the cradle up to the next
position. If the wheel is riding too high, move the cradle down so that the bottom of the tyre is in contact with the baseplate.
5.3. REMOVING BIKE FROM CRADLE
5.3.1. More effort will be required to remove the bike from the cradle. Ensure that the space into which the bike will move is free from
obstructions and people.
6. a MAINTENANCE
6.1. When the chock is not in use, leave it in the open position.
6.2. Keep the chock clean and wipe off any oil or grease.
6.3. Before each use check all parts. If any part of the chock is
damaged or defective, remove the chock from service and take the
necessary action to remedy the problem.
6.4.
.
Original Language Version
© Jack Sealey Limited
FPS6.V3 Issue:1 04/11/22
fig.3
fig.4
fig.5
Sealey Group, Kempson Way, Suffolk Business Park, Bury St Edmunds, Suffolk. IP32 7AR
01284 757500 01284 703534 sales@sealey.co.uk www.sealey.co.uk
ENVIRONMENT PROTECTION
Recycle unwanted materials instead of disposing of them as waste. All tools, accessories and packaging should be sorted,
taken to a recycling centre and disposed of in a manner which is compatible with the environment. When the product
becomes completely unserviceable and requires disposal, drain any fluids (if applicable) into approved containers and
dispose of the product and fluids according to local regulations.
Note: It is our policy to continually improve products and as such we reserve the right to alter data, specifications and component parts without prior
notice.
Important: No Liability is accepted for incorrect use of this product.
Warranty: Guarantee is 12 months from purchase date, proof of which is required for any claim.
REGISTER YOUR
PURCHASE HERE
Parts support is available for this product. Please email sales@sealey.co.uk
or telephone 01284 757500