Loading ...
Loading ...
Loading ...

11
restarting and operating your Snow Thrower. Never force parts or controls that have frozen.
Never use an open flame of any sort to thaw frozen parts.
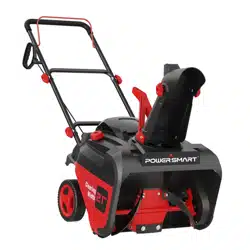
Pre-Operation Inspection - IMPORTANT!!!
Before using your Snow Thrower for the first time, check the following:
•
Have you read and followed all setup and operation procedures for the engine as outlined in
the ENGINE manual?
•
Has the engine been filled with oil and gasoline to the proper level?
•
Are all snow thrower components properly attached and assembled?
•
Are there any broken or damaged parts?
•
Are all fasteners tight?
•
Are the tires inflated to the proper pressure?
NOTICE: If you are unsure about the assembly or condition of any of your Snow Thrower parts,
please call our customer service department at (800)791 9458.
STARTING
1.
Move the choke lever to START position (Right side).
2.
Press the primer bulb 3 times.
3.
Insert switch key into slot (Do not turn switch key).
4.
Pull on the recoil starter handle slowly until a slight
resistance is felt, then pull quickly to start the engine. Return
cord gently into the recoil starter. Never allow the cord to
snap back.
5.
If engine fails to start, repeat step 4. NOTE: After repeated
failed attempts to start the engine, please consult the
troubleshooting guide before attempting again. If problems
persist, please call customer service at (800)791 9458.
6.
Once the engine has started, slowly return the choke lever
all the way to the “OPEN” position (Left side).
7.
Allow the engine to run for several minutes before using snow thrower.
CLEARING SNOW
Once your Snow Thrower has been running outside for several minutes, it is now ready for use. Make
sure the path in front of your Snow Thrower is free from people, animals, objects, and all other
obstructions except for snow.
Adjust the chute outlet to the desired direction.
Turn the chute rotation handle clockwise or counter-clockwise until the desired position is reached.
WARNING! Never direct the chute outlet toward people or animals. While snow may seem harmless,
it can contain rocks or other debris that can cause serious injury when projected through the chute.
1.
Engage/depress the auger control handle to start the augers and impeller turning.
2.
Set the desired direction and speed using the speed control lever.
3.
Engage/depress the drive control handle and direct the snow thrower into the snow to be cleared.
NOTICE: Do not change speed positions while the drive is engaged. Disengage the drive control
handle BEFORE changing speeds or directions. If the snow is deeper than the height of the auger,
remove it in several steps taking narrower swaths. Make several passes with the auger overlapping
the cleared areas and reduce forward speed.
For the best clearing efficiency, clear snow before it melts, refreezes and hardens. Hard packed and
wet snow can be very difficult to clear.
Clearing wet heavy snow can be a challenge, depending on ambient temperature, humidity levels, and
Loading ...
Loading ...
Loading ...