
Powered by ThermaVibration Technology™

Table of contents
EN 3-9
ES 10-16
FR 17-23
IT 24-30
DE 31-37
SC 38-44
@Therabody
VB
EN
3
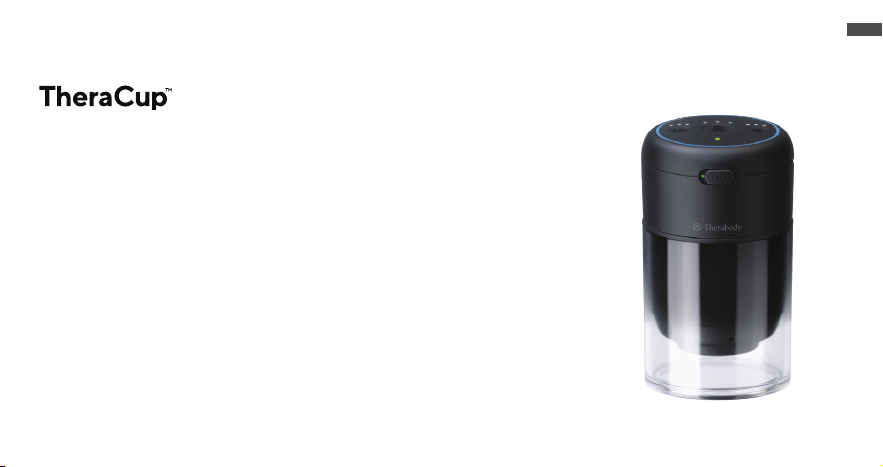
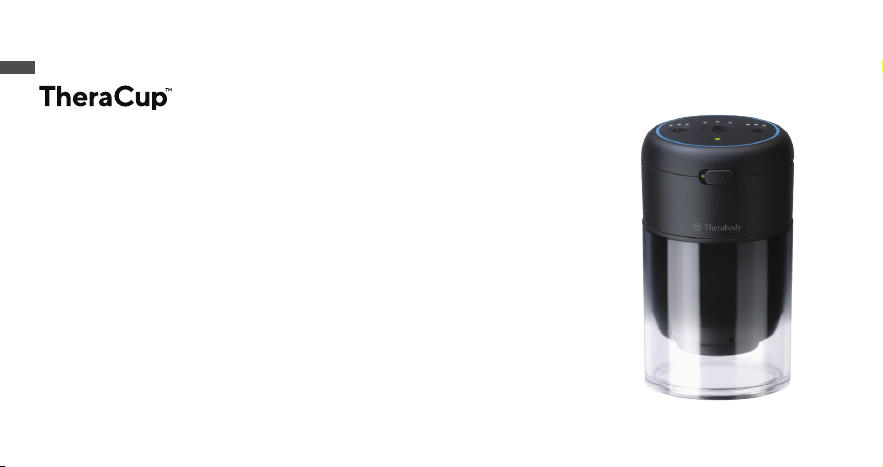
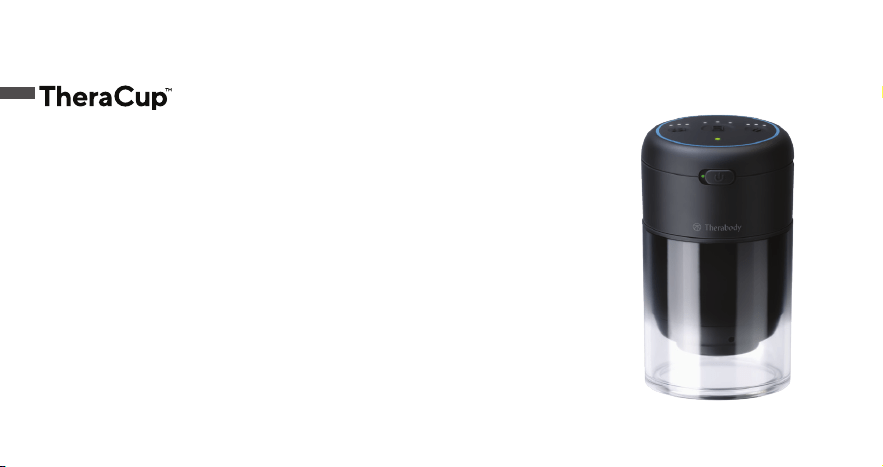
Advanced Cupping Therapy Made Easy.
Product overview
From the creators of Theragun
®
comes TheraCup™, a digitized cupping
therapy leveraging science-backed technology for a more controlled,
eective, and safe solution. TheraCup™ combines cupping with vibra-
tion and heat for a more ecient and easy-to-use recovery solution.
Advanced, eective, and portable, TheraCup’s™ innovative technology
can be used by professionals or for at-home use.
Intended Use
TheraCup™ innovates on the traditional method of cupping therapy.
TheraCup™ is intended to help relieve muscle tension and tightness
and reduce pain and soreness. This device is intended to stimulate the
natural healing process by increasing blood flow to the treated area to
help reduce pain and soreness and enhance mobility. TheraCup™ com-
bines vibration and heat together to provide an automated, eective,
pressure-controlled method to perform cupping therapy.

EN
4
Getting started
Step 1 - Use cupping technology
1. Select the cup size (small, medium, large) best suited for the area you want to use TheraCup™. See below for
more information on how to select the appropriate cup size. Ensure contact between the cup and the black ring
on the device for sealing.
2. Once comfortable, turn ON TheraCup™ by dragging the MasterSwitch slider to the right. The battery status
LED shows that the device is ON.
3. Short press the suction (middle) button to begin cupping. Short press the suction button to toggle through the
pressure settings (low, medium, high). Turning on the suction also turns on the rst level of heat and vibration.
4. Place the cup on your forearm to adjust settings accordingly before use, or place directly on the intended area,
such as your back, arms, and legs and begin use. Once placed, push the cup into the skin for strong suction.
Once suctioned, you can release your grip during the treatment.
5. Short press the vibration button to toggle through the speed settings. A long press turns o the treatment.
6. Short press the heat button to toggle through the three temperatures. A long press turns o the treatment.
7. After three minutes, you will hear a short beep, indicating that TheraCup™ treatment is complete. Five seconds
after the beep, the suction will stop. If you want to discontinue treatment at any point, long press the suction
(middle) button or drag the MasterSwitch slider to the left (o).
8. To turn OFF TheraCup™, drag the MasterSwitch slider to the left.

EN
5
Step 2 - Discover Pro Mode treatment
1. Select the cup size (small, medium, large) best suited for the area you want to use TheraCup™. See below for more information
on how to select the appropriate cup size. Ensure contact between the cup and the black ring on the device for sealing.
2. Once comfortable, turn ON TheraCup™ by dragging the MasterSwitch slider to the right. The battery status LED shows that
the device is ON.
3. There are two ways to use Pro Mode: Flash Cupping and Gliding Cupping.
4. Long press the vibration and heat buttons simultaneously for approximately ve seconds to reach Pro Mode. Two white lights
will illuminate when Pro Mode is on, and the device will begin to suction. Suction levels are not adjustable in Pro Mode. The
default setting in Pro Mode is Gliding Cupping. To access Flash Cupping, press the suction (center button). Three white lights
will illuminate to indicate that Flash Cupping mode is on.
5. Short press the vibration button to turn ON the vibration. Short press the vibration button to toggle through the speed
settings. A long press turns o the treatment.
6. Short press the heat button to turn ON the heat treatment. Short press the heat button to toggle through the three
temperatures. A long press stops the treatment.
7. Gliding mode: Apply a massage medium, such as an oil or lotion, to the intended treatment area. Place the cup on the
intended area, such as IT bands, quads, and calves. Once the cup has full suction, lightly lift the cup up and away from the skin,
slowly gliding over the treatment area.
8. Flash cupping mode: Place the cup on the intended area, such as IT bands, quads, and calves. Allow the pressure to build up
for 2-5 seconds, and then pull to release the cup. When using the smaller cup, release after about two seconds. When using
the larger cup, release after about ve seconds.
9. After ve minutes, you will hear a short beep, indicating that TheraCup™ treatment is complete. Five seconds after the beep,
the suction will stop.
10. To turn OFF TheraCup™ during or after treatment, drag the MasterSwitch slider to the left.

EN
6
Step 3 - Feel the dierence.™ Every day.
Whether used to improve soreness and tightness, post-workout, or general wellness,TheraCup™
will help keep you feeling your best.
General usage notes:
1. Cup Sizes Overview
a. Small: (35mm) recommended for smaller muscles, e.g., levator scapulae (back of the neck),
traps, knees, calves.
b. Medium: (45mm) recommended for medium muscles, e.g., deltoids, triceps, forearms, traps.
c. Large: (55mm) cup) recommended for larger muscles, e.g., traps, back, lower back,
hamstrings, quadriceps, calves.
2. As with cupping generally, bruising will occur after use of TheraCup™.
See Warnings insert for
important safety instructions
Getting started
EN
7
Suction Intensity
Settings Overview
Level 1 = Low Intensity
Level 2 = Medium Intensity
Level 3 = High Intensity
Vibration Settings Overview
Level 1 = Vibration Therapy Level Low
Level 2 = Vibration Therapy Level High
Level 3 = Vibration Therapy Level Wave
Heat Settings Overview
Level 1 = Low Heat
Level 2 = Medium Heat
Level 3 = High Heat
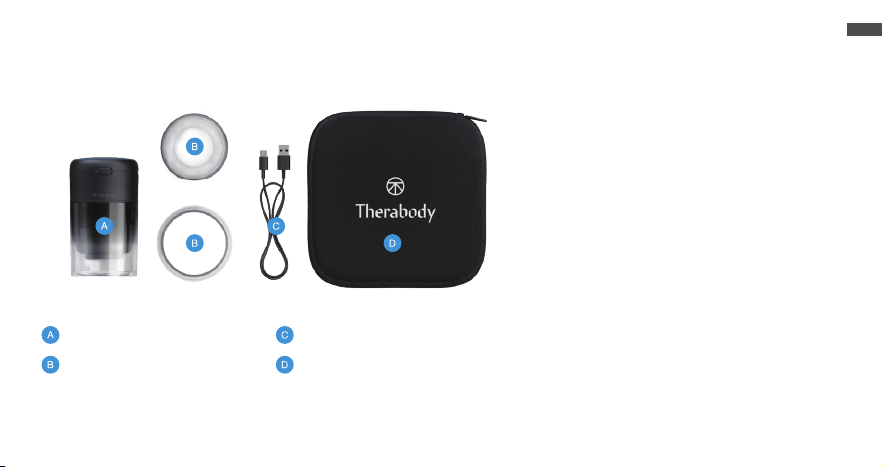
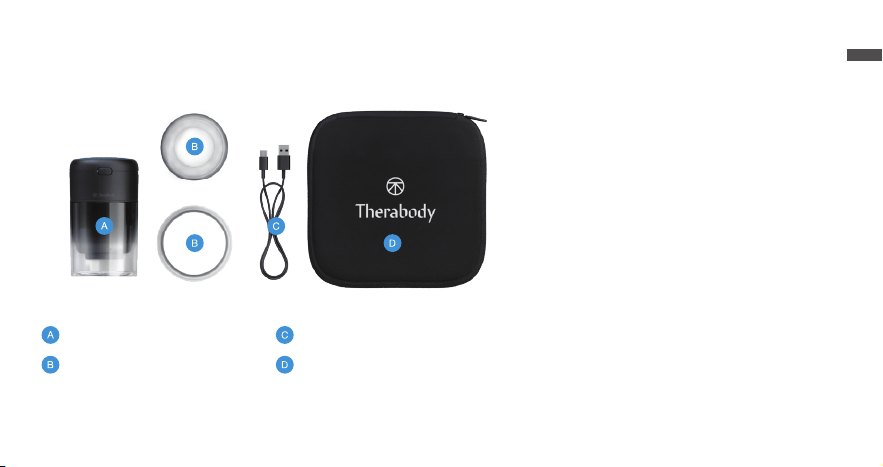
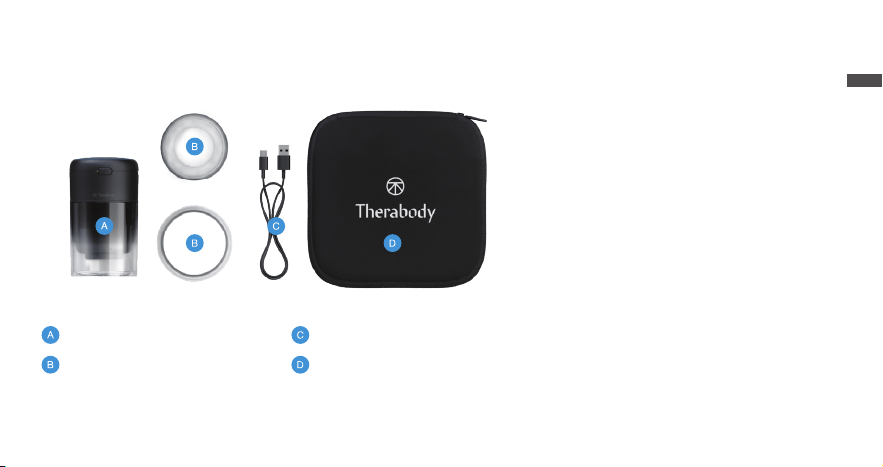
Getting to know your cupping device
Suction device
Figure 1.
Three Interchangeable
Transparent Cups:
35mm, 45mm, 55mm
Neoprene Pouch cover
USB-C Cable

EN
8
Charging
• TheraCup
TM
is USB-C enabled.
• TheraCup
TM
includes a USB-C to USB-A cable.
• You can plug the device into any standard USB adapter.
• The USB port is located opposite of the MasterSwitch.
• The battery level is indicated in the LED indicator of the battery:
• Orange: low charge, blue: mid charge, green: fully charged.
• When charging, the LED will flash to indicate it is properly connected and will turn solid green when
complete.
• You can always check the battery level by inserting the battery level by dragging the switch to the
right while the device is on. The battery LED switches o while the device is turned o.
Note: If using a charger from a third party, ensure that it is from a certied manufacturer and has not suered any structural damage.
Do not try to use the device while charging.
Getting to know your cupping device

EN
9
Cleaning Instructions:
1. Toggle the MasterSwitch to the left to turn OFF TheraCup
TM
. Ensure that the battery status LED is OFF.
2. Use disinfectant wipes for sanitizing the cups and heating element.
3. Clean TheraCup
TM
with a lightly dampened cloth or an alcohol-based solution if it comes in contact with
anything that may cause stains or other damage, like: dirt or sand, makeup, ink, soap, detergent, acids or
acidic foods, or with liquids other than fresh water, including those that may lead to skin irritation such as:
sweat, salt water, soapy water, pool water, perfume, insect repellent, lotions, sunscreen, oil, adhesive remover,
hair dye, or solvents.
4. Dry TheraCup
TM
with a non-abrasive, lint-free cloth.
5. TheraCup
TM
comes with replaceable lters to prevent foreign substances from damaging the device. To
replace the lter, remove the small rubber cap located at the top of the heated pad. Replace the lter once
every six months.

ES
10
Vacuoterapia avanzada simplicada.
Descripción general del producto
De los creadores del Theragun
®
llega el TheraCup™, una terapia de vento-
sas digitalizada que aprovecha la tecnología respaldada por la ciencia para
lograr una solución más controlada, ecaz y segura. TheraCup™ combina
ventosas con vibración y calor para ofrecer una solución de recuperación
más eciente y fácil de usar. Avanzada, ecaz y portátil, la tecnología innova-
dora de TheraCup™ puede utilizarse tanto por profesionales como en casa.
Uso previsto
TheraCup™ innova basándose en el método tradicional de la vacuotera-
pia. TheraCup™ está diseñado para ayudar a reducir la tensión y la rigidez
muscular y así aliviar el dolor. Este dispositivo está pensado para estimular
el proceso natural de curación del cuerpo aumentando el flujo sanguíneo
en la zona tratada para así contribuir a aliviar el dolor muscular y mejorar
la movilidad. TheraCup™ combina la vibración y el calor proporcionando
un método automatizado, ecaz y de presión controlada para realizar la
vacuoterapia.

ES
11
Guía de inicio rápido
Paso 1: Use la vacuoterapia
1. Seleccione el tamaño del vaso (pequeño, mediano o grande) que mejor se adapte a la zona donde desea usar el
TheraCup™. A continuación, obtendrá más información sobre cómo seleccionar el tamaño adecuado del vaso.
Asegúrese de que el vaso y el anillo negro del dispositivo están en contacto para un sellado óptimo.
2. Una vez que esté cómodo, encienda el TheraCup™ deslizando el MasterSwitch hacia la derecha. El LED indicador
de la batería indica que el dispositivo está encendido.
3. Pulse el botón de succión (central) para empezar el tratamiento. Pulse de nuevo el botón de succión para alternar
entre los distintos niveles de presión (bajo, medio y alto). Al encender la succión, también se enciende el primer
nivel de calor y vibración.
4. Coloque el vaso en el antebrazo para congurar los parámetros del tratamiento antes de usarlo o colócalo
directamente en la zona en cuestión, como la espalda, los brazos o las piernas, y comienza a usarlo. Una vez
colocado, presione el vaso contra la piel para lograr una succión fuerte. Una vez completada la succión, puede dejar
de sujetarlo durante el tratamiento.
5. Pulse de nuevo el botón de vibración para navegar entre las distintas velocidades. Si lo mantiene pulsado, se
detendrá el tratamiento.
6. Pulse una sola vez el botón de calor para alternar entre los tres modos de temperatura. Si lo mantiene pulsado, se
detendrá el tratamiento.
7. Pasados tres minutos, escuchará un pitido breve que le indicará que el tratamiento con el TheraCup™ se ha
completado. Cinco segundos después del pitido, la succión se detendrá. Si en algún momento desea interrumpir el
tratamiento, mantenga presionado el botón de succión (central) o arrastre el control deslizante MasterSwitch hacia
la izquierda (apagado).
8. Para apagar el TheraCup™, deslice el MasterSwitch hacia la izquierda.

ES
12
Paso 2: Descubra el tratamiento Pro Mode
1. Seleccione el tamaño del vaso (pequeño, mediano o grande) que mejor se adapte a la zona donde desea usar el TheraCup™.
A continuación, obtendrá más información sobre cómo seleccionar el tamaño adecuado del vaso. Asegúrese de que el vaso y
el anillo negro del dispositivo están en contacto para un sellado óptimo.
2. Una vez que esté cómodo, encienda el TheraCup™ deslizando el MasterSwitch hacia la derecha. El LED indicador de la
batería indica que el dispositivo está encendido.
3. Hay dos formas de usar el Pro Mode: Flash Cupping y Gliding Cupping.
4. Mantenga presionados los botones de vibración y calor simultáneamente durante aproximadamente cinco segundos
para activar el modo Pro. Cuando el modo Pro esté activado, se encenderán dos luces blancas y el dispositivo comenzará
a succionar. Los niveles de succión no son ajustables en el modo Pro. La conguración predeterminada en el modo Pro es
Gliding Cupping. Para acceder a Flash Cupping, presione la succión (botón central). Se encenderán tres luces blancas para
indicar que el modo Flash Cupping está activado.
5. Pulse el botón de vibración para activar la vibración. Pulse de nuevo el botón de vibración para navegar entre las distintas
velocidades. Si lo mantiene pulsado, se detendrá el tratamiento.
6. Pulse el botón de calor para activar el tratamiento de calor. Pulse una sola vez el botón de calor para alternar entre los tres
modos de temperatura. Si lo mantiene pulsado, se detendrá el tratamiento.
7. Modo Gliding: aplique un medio de masaje, como un aceite o loción, en el área de tratamiento prevista. Coloque el vaso en
el área deseada, por ejemplo, en las bandas iliotibiales, los cuádriceps o los gemelos. Una vez que el vaso haya completado la
succión, levántelo ligeramente hacia arriba, como alejándolo de la piel, y deslícelo lentamente sobre el área que va a tratar.
8. Modo Flash Cupping: coloque el vaso en el área deseada, por ejemplo, en las bandas iliotibiales, los cuádriceps o los gemelos.
Deje que la presión se acumule durante 2 a 5 segundos y luego tire para soltar el vaso. Cuando use el vaso más pequeño,
suéltelo después de unos dos segundos. Cuando use el vaso más grande, suéltelo después de unos cinco segundos.
9. Pasados cinco minutos, escuchará un pitido breve que indica que el tratamiento TheraCup™ se ha completado. Cinco
segundos después del pitido, la succión se detendrá.
10. Para apagar el TheraCup™ durante o después del tratamiento, arrastre el control deslizante MasterSwitch hacia la izquierda.

ES
13
Paso 3: Sienta la diferencia cada día.
Tanto para aliviar el dolor muscular o la rigidez después de un entrenamiento como para el
bienestar general, TheraCup™ le ayudará a sentirse mejor.
Información de uso general:
1. Resumen de los tamaños de vaso
a. Pequeño: (35 mm) recomendado para músculos más pequeños, por ejemplo, elevador de la
escápula (parte posterior del cuello), trapecios, rodillas, gemelos.
b. Mediano: (45 mm) recomendado para músculos medianos, por ejemplo, deltoides, tríceps,
antebrazos, trapecios.
c. Grande: (55 mm) recomendado para músculos más grandes, por ejemplo, trapecios, espalda,
espalda baja, isquiotibiales, cuádriceps, gemelos.
2. Al igual que ocurre con cualquier tratamiento de vacuoterapia, después de usar TheraCup™
aparecerán moretones.
Consulte el inserto con advertencias para obtener
instrucciones de seguridad importantes
Guía de inicio rápido

ES
14
Descripción general de los ajustes
de intensidad de succión
Nivel 1 = Intensidad baja
Nivel 2 = Intensidad media
Nivel 3 = Alta intensidad
Descripción de los niveles de
vibración
Nivel 1 = Terapia de vibración de nivel bajo
Nivel 2 = Terapia de vibración de nivel alto
Nivel 3 = Terapia de vibración de ondas
Descripción de los niveles de calor
Nivel 1 = Calor bajo
Nivel 2 = Calor medio
Nivel 3 = Calor alto
Introducción al dispositivo de vacuoterapia
Dispositivo de succión
Figura 1.
Tres vasos
transparentes intercambiables:
35 mm, 45 mm, 55 mm
Funda de neopreno
Cable USB C

ES
15
Batería y carga
• El TheraCup
TM
está habilitado para la carga con USB-C.
• El TheraCup
TM
incluye un cable USB-C a USB-A.
• Puedes conectar el dispositivo a cualquier adaptador USB estándar.
• El puerto USB está ubicado en el lado opuesto al MasterSwitch.
• El nivel de carga se muestra en el indicador LED de batería:
• Naranja: carga baja; azul: carga media; verde: carga completa.
• Durante la carga, el LED parpadeará para indicar que el cargador está correctamente conectado y
se iluminará en verde jo cuando nalice.
• Puede comprobar el nivel de carga de la batería en cualquier momento deslizando el interruptor
hacia la derecha una vez que el dispositivo esté encendido. El LED de la batería se apaga cuando el
dispositivo está apagado.
Aviso: Si utiliza un cargador de otro fabricante, asegúrese de que sea de un fabricante certicado y que no haya sufrido ningún daño
estructural. No intente usar el dispositivo mientras se está cargando.
Introducción al dispositivo de vacuoterapia

ES
16
Instrucciones de limpieza:
1. Deslice el MasterSwitch hacia la izquierda para apagar el TheraCup
TM
. Asegúrese de que el LED de estado de
la batería esté apagado.
2. Utilice toallitas desinfectantes para limpiar los vasos y el dispositivo de calor.
3. Limpie el TheraCup
™
con un paño ligeramente húmedo o una solución a base de alcohol si este entra en
contacto con algo que pueda causar manchas u otros desperfectos, como suciedad, arena, maquillaje,
tinta, jabón, detergente, alimentos ácidos o líquidos que no sean agua dulce, incluidos aquellos que puedan
provocar irritación de la piel como sudor, agua salada, agua con jabón, agua de piscina, perfume, repelente
de insectos, lociones, crema solar, aceites, producto para eliminar adhesivos, tinte para el pelo o disolventes.
4. Seque el TheraCup
™
con un paño antipelusa no abrasivo
5. El TheraCup
TM
incluye ltros reemplazables para evitar que las sustancias extrañas dañen el dispositivo.
Para reemplazar el ltro, retire la pequeña tapa de goma ubicada en la parte superior de la almohadilla
calefactada. Reemplace el ltro una vez cada seis meses.

FR
17
Thérapie par ventouses avancée à portée de main.
Présentation du produit
Les créateurs du Theragun
®
présentent le TheraCup™, un appareil de
thérapie par ventouses digitalisée s'appuyant sur une technologie scienti-
quement éprouvée qui ore une solution plus contrôlée, ecace et sûre.
Le TheraCup™ associe la thérapie par ventouses, la chaleur et les vibrations
pour orir une solution de récupération plus ecace et simple d'utilisation.
Sophistiquée, ecace et portable, la technologie innovante du TheraCup™
est adaptée à une utilisation professionnelle comme à domicile.
Utilisation prévue
Le TheraCup™ révolutionne la thérapie par ventouses classique. Cet appareil
a été conçu pour soulager les tensions et contractures musculaires, et pour
réduire la douleur et les courbatures. Il vise à accélérer le processus de
récupération naturel en stimulant la circulation sanguine dans la zone traitée
pour réduire la douleur, soulager les courbatures et optimiser la mobilité.
Le TheraCup™ associe vibrations et chaleur pour proposer une méthode
ecace et automatisée de thérapie par ventouses à pression contrôlée.

FR
18
Pour commencer
Étape 1 - Utiliser la technologie de thérapie par ventouses
1. Sélectionnez la taille de ventouses (petite, moyenne ou grande) qui convient le mieux à la zone où vous souhaitez
utiliser le TheraCup™. Consultez les informations ci-dessous pour savoir comment choisir la bonne taille de
ventouses. Assurez le contact entre la ventouse et l'anneau noir de l'appareil pour garantir l'étanchéité.
2. Une fois à l'aise, allumez le TheraCup™ en faisant glisser le bouton MasterSwitch vers la droite. Le voyant LED de la
batterie indique que l'appareil est allumé.
3. Appuyez brièvement sur le bouton de succion central pour commencer la séance de thérapie par ventouses.
Appuyez brièvement sur le bouton de succion pour choisir parmi les paramètres de pression (basse, moyenne,
élevée). L'activation de la succion active également le premier niveau de chaleur et de vibration.
4. Placez la ventouse sur l'avant-bras pour régler les paramètres en conséquence avant toute utilisation, ou bien
directement sur la zone à traiter, comme le dos, les bras et les jambes, puis démarrez la séance. Après l'avoir placée,
appuyez la ventouse contre la peau pour provoquer une forte succion. Une fois la succion eectuée, vous pouvez
relâcher la ventouse pendant la séance.
5. Appuyez brièvement sur le bouton contrôlant les vibrations pour choisir parmi les paramètres de vitesse. Appuyez
longuement pour arrêter la séance.
6. Appuyez brièvement sur le bouton contrôlant la chaleur pour choisir parmi les trois températures. Appuyez
longuement pour arrêter la séance.
7. Au bout de trois minutes, vous entendrez un petit bip indiquant que la séance de TheraCup™ est terminée.
La succion cesse cinq secondes après le bip. Si vous souhaitez interrompre la séance à tout moment, appuyez
longuement sur le bouton de succion central ou faites glisser le bouton MasterSwitch vers la gauche, en position O.
8. Pour éteindre le TheraCup™, faites glisser le bouton MasterSwitch vers la gauche.

FR
19
Étape 2 - Découvrir le traitement en mode Pro
1. Sélectionnez la taille de ventouses (petite, moyenne ou grande) qui convient le mieux à la zone où vous souhaitez utiliser
le TheraCup™. Consultez les informations ci-dessous pour savoir comment choisir la bonne taille de ventouses. Vériez
l'adhérence entre la ventouse et l'anneau noir de l'appareil pour garantir l'étanchéité.
2. Une fois que vous êtes à l'aise, allumez le TheraCup™ en faisant glisser le bouton MasterSwitch vers la droite. Le voyant LED
de la batterie indique que l'appareil est allumé.
3. Le mode Pro peut être utilisé de deux façons: Ventouses éclair et Ventouses glissantes.
4. Appuyez simultanément sur les boutons contrôlant la chaleur et les vibrations pendant environ cinqsecondes pour activer
le mode Pro. Deux voyants blancs s'allument lorsque le mode Pro est activé, et l'appareil commence alors la succion. Les
niveaux de succion ne sont pas réglables en mode Pro. Le mode Pro est réglé par défaut sur Ventouses glissantes. Pour régler
sur Ventouses éclair, appuyez sur le bouton de succion central. Trois voyants blancs s'allument pour indiquer que le mode
Ventouses éclair est activé.
5. Appuyez brièvement sur le bouton contrôlant les vibrations pour activer la vibration. Appuyez brièvement sur le bouton
contrôlant les vibrations pour choisir parmi les paramètres de vitesse. Appuyez longuement pour arrêter la séance.
6. Appuyez brièvement sur le bouton contrôlant la chaleur pour activer le traitement thermique. Appuyez brièvement sur le
bouton contrôlant la chaleur pour choisir parmi les trois températures. Appuyez longuement pour arrêter la séance.
7. Mode de glissement: appliquez un produit de massage tel qu'une huile ou une lotion sur la zone à traiter. Placez la ventouse
sur la zone visée, comme les bandelettes de Maissiat, les quadriceps ou les mollets. Lorsque la ventouse exerce une succion
complète, soulevez-la légèrement sur la peau et faites-la glisser lentement sur la zone à traiter.
8. Mode Ventouse éclair: placez la ventouse sur la zone visée, comme les bandelettes de Maissiat, les quadriceps ou les mollets.
Laissez la pression augmenter pendant 2 à 5secondes, puis tirez pour relâcher la ventouse. Lorsque vous utilisez la plus petite
ventouse, relâchez après environ deux secondes. Lorsque vous utilisez la plus grande ventouse, relâchez après environ cinq
secondes.
9. Au bout de cinqminutes, vous entendrez un petit bip indiquant que la séance de TheraCup™ est terminée. La succion cesse
cinq secondes après le bip.
10. Pour éteindre le TheraCup™ pendant ou après la séance, faites glisser le bouton MasterSwitch vers la gauche.

FR
20
Étape3: Sentez la diérence.™ Chaque jour.
Que vous l'utilisiez pour soulager les courbatures et les tensions, après l'entraînement ou pour le
bien-être général, le TheraCup™ vous aidera à vous sentir au mieux.
Remarques générales sur l'utilisation:
1. Aperçu des tailles de ventouses
a. Petite: (35mm) recommandée pour les petits muscles, par exemple, le muscle élévateur de
l'omoplate (nuque), les trapèzes, les genoux et les mollets.
b. Moyenne: (45mm) recommandée pour les muscles moyens comme les deltoïdes, les triceps, les
avant-bras et les trapèzes.
c. Grande: (55mm) ventouse recommandée pour les muscles plus gros comme les trapèzes, les
dorsaux, le bas du dos, les ischio-jambiers, les quadriceps et les mollets.
2. Comme c'est le cas en général avec les ventouses, des ecchymoses apparaissent après l'utilisation
du TheraCup™.
Voir la notice contenant d’importantes
précautions d’emploi
Pour commencer
FR
21
Intensité de la succion
Aperçu des paramètres
Niveau 1 = basse intensité
Niveau 2 = intensité moyenne
Niveau 3 = haute intensité
Aperçu des paramètres de vibration
Niveau 1 = thérapie par vibration de niveau faible
Niveau 2 = thérapie par vibration de niveau élevé
Niveau 3 = thérapie par vibration oscillante
Aperçu des paramètres de chaleur
Niveau 1 = basse température
Niveau 2 = température moyenne
Niveau 3 = température élevée
Apprendre à connaître votre appareil de thérapie par ventouses
Appareil de succion
Figure 1.
Trois ventouses
transparentes
interchangeables:
35mm, 45mm, 55mm
Housse de pochette
en néoprène
Câble USB-C

FR
22
Recharger
• Le TheraCup
TM
est doté d'un port USB-C.
• Le TheraCup
TM
comprend un câble USB-C vers USB-A.
• Vous pouvez brancher l’appareil sur n’importe quel adaptateur USB standard.
• Le port USB se trouve en face du MasterSwitch.
• Le niveau de charge est indiqué par le voyant LED de la batterie:
• Orange: batterie faible, bleu: charge moyenne, vert: charge terminée.
• Durant la charge, la LED clignote pour indiquer que l’appareil est branché correctement et émet une
lumière verte xe une fois la charge terminée.
• Vous pouvez à tout moment vérier le niveau de charge en faisant glisser l'interrupteur vers la droite
quand l'appareil est allumé. Le voyant LED de la batterie s'éteint lorsque l'appareil est éteint.
Remarque: si vous utilisez un chargeur tiers, assurez-vous qu'il provient d'un fabricant certié et qu'il n'a subi aucun dommage
structurel. N'essayez pas d'utiliser l'appareil pendant le chargement.
Apprendre à connaître votre appareil de thérapie par ventouses

FR
23
Consignes d’entretien:
1. Faites glisser le MasterSwitch vers la gauche pour éteindre le TheraCup
TM
. Veillez à ce que le voyant LED de
la batterie soit éteint.
2. Utilisez des lingettes désinfectantes pour nettoyer les ventouses et l’élément chauant.
3. Nettoyez le TheraCup
TM
à l’aide d’un chion légèrement humide ou d’une solution alcoolique en cas de
contact avec toute substance pouvant tacher ou endommager l'appareil (poussière, sable, maquillage,
encre, savon, détergent, acides ou aliments acides), ou avec des liquides autres que l’eau douce, notamment
ceux pouvant entraîner une irritation cutanée (sueur, eau salée, eau savonneuse, eau de piscine, parfum,
répulsif à insectes, lotion, crème solaire, huile, dissolvant d'adhésif, coloration à cheveux ou solvant).
4. Séchez le TheraCup
TM
à l’aide d’un chion non abrasif et non pelucheux.
5. Le TheraCup
TM
est fourni avec des ltres remplaçables qui empêchent les corps étrangers d'endommager
l'appareil. Pour remplacer le ltre, retirez le petit embout en caoutchouc situé en haut de l’électrode
chauante. Remplacez le ltre tous les six mois.
IT
24
La terapia di coppettazione avanzata semplicata.
Descrizione del prodotto
Dai creatori di Theragun
®
nasce TheraCup™, una terapia di coppettazione
digitalizzata supportata dalla scienza per una soluzione più controllata,
ecace e sicura. TheraCup™ combina la coppettazione con la vibrazione
e il calore per una soluzione di recupero più eciente e facile da usare.
Avanzata, ecace e portatile, l'innovativa tecnologia di TheraCup™ può
essere utilizzata sia dai professionisti che a casa.
Uso previsto
TheraCup™ innova la metodologia tradizionale della coppettazione.
TheraCup™ ha lo scopo di aiutare ad alleviare le tensioni e le contratture
muscolari e a ridurre il dolore e l'indolenzimento. Questo dispositivo ha lo
scopo di stimolare il naturale processo di guarigione aumentando il flusso
sanguigno nell'area trattata per aiutare a ridurre il dolore e l'indolenzimen-
to e migliorare la mobilità. Combinando vibrazione e calore, TheraCup™
ore un metodo automatico, ecace e con controllo della pressione per
eseguire la terapia di coppettazione.

IT
25
Per iniziare
Fase 1 - Utilizzo della tecnologia di coppettazione
1. Selezionare la misura della coppetta (piccola, media, grande) più adatta alla zona in cui si desidera usare TheraCup™.
Per ulteriori informazioni su come selezionare le dimensioni adeguate della coppetta, vedere di seguito. Vericare il
contatto tra la coppetta e l'anello nero sul dispositivo per la sigillatura.
2. Quando ci si sente a proprio agio, attivare TheraCup™ trascinando il cursore MasterSwitch verso destra. Il LED di
stato della batteria indica che il dispositivo è acceso.
3. Premere brevemente il pulsante di aspirazione (centrale) per iniziare la coppettazione. Premere brevemente il
pulsante di aspirazione per alternare le tre modalità di pressione (bassa, media, alta). L'attivazione dell'aspirazione
comporta anche l'accensione del primo livello di calore e vibrazione.
4. Posizionare la coppetta sull'avambraccio per regolare le impostazioni di conseguenza prima dell'uso o collocarla
direttamente sull'area desiderata, come schiena, braccia e gambe, e iniziare a utilizzarla. Una volta posizionata,
spingere la coppetta sulla pelle per ottenere una forte aspirazione. Dopo l'aspirazione, è possibile rilasciare la presa
durante il trattamento.
5. Premere brevemente il pulsante della vibrazione per alternare le impostazioni della velocità. Una pressione
prolungata spegne il trattamento.
6. Premere brevemente il pulsante del calore per alternare le tre temperature. Una pressione prolungata spegne il
trattamento.
7. Dopo tre minuti, si avvertirà un breve segnale acustico a indicare che il trattamento con TheraCup™ è terminato.
Cinque secondi dopo il segnale acustico, l'aspirazione si arresta. Se in qualsiasi momento si desidera interrompere il
trattamento, premere a lungo il pulsante di aspirazione (centrale) o trascinare il cursore MasterSwitch a sinistra (o).
8. Per spegnere TheraCup™, trascinare il cursore MasterSwitch a sinistra.

IT
26
Fase 2 - Trattamento in modalità Pro
1. Selezionare la misura della coppetta (piccola, media, grande) più adatta alla zona in cui si desidera usare TheraCup™. Per ulteriori
informazioni su come selezionare le dimensioni adeguate della coppetta, vedere di seguito. Vericare il contatto tra la coppetta e
l'anello nero sul dispositivo per la sigillatura.
2. Quando ci si sente a proprio agio, attivare TheraCup™ trascinando il cursore MasterSwitch a destra. Il LED di stato della batteria
indica che il dispositivo è acceso.
3. Ci sono due modi per utilizzare la modalità Pro: Coppettazione flash e Coppettazione a scorrimento.
4. Premere a lungo contemporaneamente i pulsanti di vibrazione e calore per circa cinque secondi per selezionare la modalità Pro.
Quando la modalità Pro è attiva, si accenderanno due luci bianche e il dispositivo inizierà l'aspirazione. I livelli di aspirazione non
sono regolabili in modalità Pro. L'impostazione predenita della modalità Pro è la Coppettazione a scorrimento. Per accedere
alla Coppettazione flash, premere l'aspirazione (pulsante centrale). Si accenderanno tre luci bianche a indicare che la modalità
Coppettazione flash è attiva.
5. Premere brevemente il pulsante della vibrazione per attivare la vibrazione. Premere brevemente il pulsante della vibrazione per
alternare le impostazioni di velocità. Una pressione prolungata spegne il trattamento.
6. Premere brevemente il pulsante del calore per attivare il trattamento del calore. Premere brevemente il pulsante del calore per
alternare le tre temperature. Una pressione prolungata interromperà il trattamento.
7. Modalità a scorrimento: applicare un prodotto per il massaggio, ad esempio un olio o una crema, sull'area da trattare. Posizionare
la coppetta sull'area desiderata, ad esempio bandellette ileotibiali, quadricipiti e polpacci. Dopo l'aspirazione completa, sollevare
delicatamente la coppetta verso l'alto e lontano dalla pelle, facendola scivolare lentamente sull'area da trattare.
8. Modalità Coppettazione flash: posizionare la coppetta sull'area desiderata, ad esempio bandellette ileotibiali, quadricipiti e
polpacci. Lasciar aumentare la pressione per 2-5 secondi, quindi tirare per rilasciare la coppetta. Quando si usa la coppetta più
piccola, rilasciare dopo circa due secondi. Quando si usa la coppetta più grande, rilasciare dopo circa cinque secondi.
9. Dopo cinque minuti, si avverte un breve segnale acustico che indica che il trattamento con TheraCup™ è terminato. Cinque
secondi dopo il segnale acustico, l'aspirazione si arresta.
10. Spegnere TheraCup™ durante o dopo il trattamento trascinando il cursore MasterSwitch verso sinistra.

IT
27
Fase 3 - Senti la dierenza.™ Ogni giorno.
Per ridurre l'indolenzimento e la tensione, per il post-allenamento o per il benessere generale,
TheraCup™ aiuterà a sentirsi sempre al meglio.
Note di utilizzo generali:
1. Descrizione delle dimensioni delle coppette
a. Piccola: (35 mm) consigliata per i muscoli più piccoli, come elevatori della scapola (nuca),
trapezi, ginocchia e polpacci.
b. Media: (45 mm) consigliata per i muscoli medi, come deltoidi, tricipiti, avambracci, trapezi.
c. Grande: (55 mm) consigliata per i muscoli più grandi, come trapezi, schiena, lombari, muscoli
posteriori della coscia, quadricipiti, polpacci.
2. Come per la coppettazione in generale, dopo l'uso di TheraCup™ potrebbero comparire
ematomi.
Consultare la scheda Avvertenze che
contiene importanti istruzioni di sicurezza
Per iniziare

IT
28
Intensità di aspirazione
Descrizione delle impostazioni
Livello 1 = Bassa intensità
Livello 2 = Media intensità
Livello 3 = Intensità elevata
Descrizione delle impostazioni di
vibrazione
Livello 1 = Terapia a vibrazione, Livello basso
Livello 2 = Terapia a vibrazione, Livello alto
Livello 3 = Terapia a vibrazione, Livello Wave
Descrizione delle impostazioni di
calore
Livello 1 = Calore basso
Livello 2 = Calore medio
Livello 3 = Calore elevato
Introduzione al dispositivo di coppettazione
Dispositivo di aspirazione
Figura 1.
Tre coppette trasparenti
intercambiabili:
35 mm, 45 mm, 55 mm
Custodia in neoprene
Cavo USB-C

IT
29
Per ricaricare
• TheraCup
TM
è dotato di porta USB-C.
• TheraCup
TM
include un cavo da USB-C a USB-A.
• Il dispositivo può essere collegato a qualsiasi adattatore USB standard.
• La porta USB si trova di fronte al MasterSwitch.
• Il livello della batteria è indicato dalla relativa spia a LED:
• Arancione: carica bassa. Blu: carica media. Verde: carica completa.
• Durante la ricarica, la luce LED lampeggia per indicare che il dispositivo è collegato correttamente e
diventa verde sso al termine.
• È sempre possibile controllare il livello della batteria trascinando l'interruttore a destra mentre il
dispositivo è acceso. Il LED della batteria si spegne quando il dispositivo è spento.
Nota: se si utilizza un caricabatteria di terzi, accertarsi che provenga da un produttore certicato e che non abbia subito danni
strutturali. Non cercare di utilizzare il dispositivo durante la ricarica.
Introduzione al dispositivo di coppettazione

IT
30
Istruzioni per la pulizia:
1. Spostare il MasterSwitch verso sinistra per spegnere TheraCup
TM
. Assicurarsi che il LED di stato della batteria
sia spento.
2. Utilizzare salviette disinfettanti per disinfettare le coppette e l'elemento riscaldante.
3. Pulire TheraCup
TM
con un panno leggermente umido o con una soluzione alcolica se entra in contatto con
sostanze che potrebbero causare macchie o altri danni, come sporcizia o sabbia, trucco, inchiostro, sapone,
detergente, acidi o cibi acidi o con liquidi diversi dall'acqua, compresi quelli che possono causare irritazione
della pelle, quali sudore, acqua salata, acqua con detersivo, acqua con cloro, profumo, repellente per gli
insetti, lozioni, protezione solare, olio, solvente per colla, tintura per capelli o altri solventi.
4. Asciugare TheraCup
TM
con un panno non abrasivo e privo di pelucchi.
5. TheraCup
TM
è dotato di ltri sostituibili per evitare che sostanze estranee danneggino il dispositivo. Per
sostituire il ltro, rimuovere il tappino di gomma situato nella parte superiore del pad riscaldato. Sostituire il
ltro ogni sei mesi.
DE
31
Moderne Schröpftherapie leicht gemacht.
Produktübersicht
Von den Entwicklern von Theragun
®
kommt TheraCup™, eine digitalisierte Schröp-
ftherapie, die eine wissenschaftlich gestützte Technologie für eine kontrolliertere,
eektivere und sicherere Lösung nutzt. TheraCup™ kombiniert Schröpfen mit
Vibration und Wärme zu einer ezienteren und einfach anzuwendenden Re-
generationslösung. Die innovative Technologie von TheraCup™ ist fortschrittlich,
eektiv und tragbar und kann sowohl von Fachkräften als auch für die häusliche
Anwendung verwendet werden.
Vorgesehene Verwendung
TheraCup™ ist eine innovative Weiterentwicklung der traditionellen Schröpfthera-
pie. TheraCup™ ist dafür gedacht, Muskelverspannungen zu lösen und Schmerzen
zu lindern. Das Gerät soll den natürlichen Heilungsprozess anregen, indem es die
Durchblutung der behandelten Stelle fördert, um Schmerzen und Verspannungen
zu lindern und die Beweglichkeit zu verbessern. Dabei kombiniert TheraCup™
stimulierende Vibration und Wärme zu einer automatisierten, eektiven, druckges-
teuerten Methode zur Anwendung der Schröpftherapie.

DE
32
Erste Schritte
Schritt 1 – Anwendung der Schröpftechnik
1. Wählen Sie die Schröpfkopfgröße (klein, mittel, groß), die am besten für den Bereich geeignet ist, für den Sie TheraCup™ verwenden
möchten. Weitere Informationen zur Auswahl der richtigen Schröpfkopfgröße nden Sie weiter unten. Achten Sie auf den Kontakt
zwischen den Schröpfköpfen und dem schwarzen Ring am Gerät, um eine optimale Abdichtung zu gewährleisten.
2. Sobald es bequem sitzt, schalten Sie Ihr TheraCup™ ein, indem Sie den MasterSwitch-Schieberegler nach rechts ziehen. Die
Batteriestatus-LED zeigt an, dass das Gerät eingeschaltet ist.
3. Drücken Sie kurz auf die Saugtaste (Mitte), um mit dem Schröpfen zu beginnen. Kurzes Drücken der Saugtaste schaltet zwischen
den Druckeinstellungen (niedrig, mittel, hoch) um. Das Einschalten der Saugfunktion schaltet auch die erste Stufe der Wärme und
Vibration ein.
4. Legen Sie den Schröpfkopf auf Ihren Unterarm, um die Einstellungen vorab anzupassen. Sie können das Gerät aber auch direkt
auf die gewünschte Stelle setzen, z.B. Ihren Rücken, Ihre Arme oder Beine, und mit der Anwendung beginnen. Drücken Sie den
Schröpfkopf in die Haut, um eine starke Saugwirkung zu erzeugen. Sobald das Gerät seine volle Saugleistung erreicht hat, können
Sie Ihren Gri während der Behandlung lockern.
5. Drücken Sie kurz auf die Vibrationstaste, um zwischen den Geschwindigkeitseinstellungen zu wechseln. Langes Drücken schaltet
die Behandlung aus.
6. Drücken Sie kurz auf die Wärmetaste, um zwischen den drei Wärmeeinstellungen zu wechseln. Langes Drücken schaltet die
Behandlung aus.
7. Nach drei Minuten hören Sie einen kurzen Piepton, der signalisiert, dass die TheraCup™-Behandlung abgeschlossen ist. Fünf
Sekunden nach dem Signalton wird die Saugfunktion beendet. Wenn Sie die Behandlung zu einem beliebigen Zeitpunkt
unterbrechen möchten, halten Sie die Saugtaste (Mitte) gedrückt oder ziehen Sie den MasterSwitch-Schieberegler nach links.
8. Um das TheraCup™ auszuschalten, ziehen Sie den MasterSwitch-Schieberegler nach links.

DE
33
Schritt 2 – Entdecken Sie die Behandlung im Pro-Modus
1. Wählen Sie die Schröpfkopfgröße (klein, mittel, groß), die am besten für den Bereich geeignet ist, für den Sie TheraCup™
verwenden möchten. Weitere Informationen zur Auswahl der richtigen Schröpfkopfgröße nden Sie weiter unten. Achten Sie auf
den Kontakt zwischen den Schröpfköpfen und dem schwarzen Ring am Gerät, um eine optimale Abdichtung zu gewährleisten.
2. Sobald es bequem sitzt, schalten Sie Ihr TheraCup™ ein, indem Sie den MasterSwitch-Schieberegler nach rechts ziehen. Die
Batteriestatus-LED zeigt an, dass das Gerät eingeschaltet ist.
3. Es gibt zwei Möglichkeiten zur Verwendung des Pro-Modus: Blitzschröpfen und Gleitschröpfen.
4. Halten Sie die Tasten für Vibration und Wärme gleichzeitig etwa fünf Sekunden lang gedrückt, um den Pro-Modus zu aktivieren.
Wenn der Pro-Modus aktiviert ist, leuchten zwei weiße LEDs auf, wonach das Gerät mit der Saugwirkung beginnt. Die Saugstufen
sind im Pro-Modus nicht einstellbar. Die Standardeinstellung im Pro-Modus ist das Gleitschröpfen. Um das Blitzschröpfen zu
aktivieren, drücken Sie die Saugtaste (mittlere Taste). Daraufhin leuchten drei weiße LEDs und signalisieren, dass der Modus
Blitzschröpfen eingeschaltet ist
5. Drücken Sie kurz auf die Vibrationstaste, um die Vibration einzuschalten. Durch erneutes kurzes Drücken der Vibrationstaste
können Sie zwischen den Geschwindigkeitseinstellungen wechseln. Ein langes Drücken schaltet die Behandlung aus.
6. Drücken Sie kurz die Wärmetaste, um die Wärmebehandlung einzuschalten. Durch erneutes kurzes Drücken der Wärmetaste
können Sie zwischen den drei Temperatureinstellungen wechseln. Ein langes Drücken schaltet die Behandlung aus.
7. Modus Gleitschröpfen: Tragen Sie ein Massageprodukt (z.B. ein Öl oder eine Lotion) auf den zu behandelnden Bereich auf.
Setzen Sie den Schröpfkopf auf die zu behandelnde Stelle, z.B. IT-Bänder, Quads und Waden. Sobald der Schröpfkopf seine volle
Saugkraft erreicht hat, heben Sie den Schröpfkopf leicht nach oben und von der Haut weg an und gleiten langsam über die zu
behandelnde Stelle.
8. Modus Blitzschröpfen: Setzen Sie den Schröpfkopf auf den gewünschten Bereich (z.B. auf die IT-Bänder, die Quads und die
Waden). Lassen Sie den Druck 2-5 Sekunden lang aufbauen und ziehen Sie dann, um den Becher wieder zu lösen. Wenn Sie den
kleineren Schröpfkopf verwenden, lösen Sie ihn nach etwa zwei Sekunden. Wenn Sie den größeren Schröpfkopf verwenden,
lösen Sie ihn nach etwa fünf Sekunden.
9. Nach fünf Minuten hören Sie einen kurzen Piepton, der signalisiert, dass die TheraCup™-Behandlung abgeschlossen ist. Fünf
Sekunden nach dem Signalton wird die Saugfunktion beendet.
10. Um TheraCup™ während oder nach der Behandlung auszuschalten, ziehen Sie den MasterSwitch-Schieberegler nach links.

DE
34
Schritt 4– Spüren Sie den Unterschied.™ Jeden Tag.
Ob bei Muskelkater und Verspannungen, nach dem Training oder für eine allgemeine Wellness-
Behandlung– TheraCup™ wird Ihnen zu einem optimalen Wohlbenden verhelfen.
Allgemeine Nutzungshinweise:
1. Übersicht der Schröpfkopfgrößen
a. Klein: (35mm) empfohlen für kleinere Muskeln, z. B. Nacken, Trapez, Knie, Waden.
b. Mittel: (45mm) empfohlen für mittelgroße Muskeln, z. B. Deltamuskel, Trizeps, Unterarme,
Trapez.
c. Groß: (55mm) empfohlen für größere Muskeln, z. B. Trapez, Rücken, unterer Rücken,
Hamstrings, Quadrizeps, Waden.
2. Wie beim Schröpfen generell, können nach der Anwendung von TheraCup™ Blutergüsse
auftreten.
Bitte die beiliegenden wichtigen Warnhinweise
zu Ihrer eigenen Sicherheit beachten
Erste Schritte
DE
35
Intensität der Saugkraft
Einstellungen im Überblick
Stufe 1 = Niedrige Intensität
Stufe 2 = Mittlere Intensität
Level 3 = Hohe Intensität
Vibrationseinstellungen im Überblick
Stufe 1 = Vibrationstherapie Stufe Niedrig
Stufe 2 = Vibrationstherapie Stufe Hoch
Stufe 3 = Vibrationstherapie Stufe Wave
Wärmeeinstellungen im Überblick
Stufe 1 = Niedrige Wärme
Stufe 2 = Mittlere Wärme
Stufe 3 = Hohe Wärme
Lernen Sie Ihr Schröpfgerät kennen
Schröpfgerät
Abbildung 1.
Drei austauschbare
transparente Schröpfköpfe:
35mm, 45mm, 55mm
Neopren-Tasche
USB-C Kabel

DE
36
Aufladen
• TheraCup
TM
ist USB-C-fähig.
• Im Lieferumfang des TheraCup
TM
ist ein USB-C-Kabel mit USB-A-Anschluss enthalten.
• Sie können das Gerät an einen beliebigen Standard-USB-Adapter anschließen.
• Der USB-Anschluss bendet sich gegenüber dem MasterSwitch.
• Der Akkustand wird in Form einer LED-Anzeige angezeigt:
• Orange: niedrige Ladung, Blau: mittlere Ladung, Grün: volle Ladung.
• Beim Aufladen blinkt die LED-Leuchte, um anzuzeigen, dass das Gerät ordnungsgemäß
angeschlossen ist, und leuchtet nach Abschluss grün.
• Sie können den Batteriestand jederzeit überprüfen, indem Sie den Schalter nach rechts ziehen,
während das Gerät eingeschaltet ist. Beim Ausschalten des Geräts schaltet sich die Akku-LED aus.
Hinweis: Wenn Sie ein Ladegerät von einem Drittanbieter verwenden, sollten Sie sicherstellen, dass es von einem zertizierten
Hersteller stammt und keine strukturellen Schäden aufweist. Versuchen Sie nicht, das Gerät während des Ladevorgangs zu benutzen.
Lernen Sie Ihr Schröpfgerät kennen

DE
37
Reinigungshinweise:
1. Schieben Sie den MasterSwitch nach links, um das TheraCup
TM
auszuschalten. Vergewissern Sie sich, dass die
Batteriestatus-LED ausgeschaltet ist.
2. Verwenden Sie Desinfektionstücher zum Desinzieren der Schröpfköpfe und des Wärmeelements.
3. Reinigen Sie das TheraCup
TM
mit einem leicht angefeuchteten Tuch oder einer alkoholhaltigen Lösung, wenn
es mit etwas in Berührung gekommen ist, das Flecken oder andere Schäden verursachen kann. Dazu gehören:
Schmutz oder Sand, Make-up, Tinte, Seife, Reinigungsmittel, Säuren oder säurehaltige Lebensmittel oder andere
Flüssigkeiten als Süßwasser. Dies umfasst auch Flüssigkeiten, die zu Hautreizungen führen können, darunter:
Schweiß, Salzwasser, Seifenwasser, Poolwasser, Parfüm, Insektenschutzmittel, Lotionen, Sonnenschutzmittel, Öl,
Klebstoentferner, Haarfärbemittel oder Lösungsmittel.
4. Trocknen Sie TheraCup
TM
mit einem nicht scheuernden, fusselfreien Tuch ab.
5. TheraCup
TM
wird mit austauschbaren Filtern geliefert, die verhindern, dass Fremdkörper das Gerät beschädigen.
Um den Filter auszutauschen, entfernen Sie die kleine Gummikappe, die sich oben auf dem Wärme-Pad bendet.
Der Filter sollte einmal alle sechs Monate ausgetauscht werden.
SC
38
先进、易用的拔罐疗法。
产品概述
Theragun
®
的创造者们推出了 TheraCup™,这是一种数字化的拔
罐疗法,利用基于科学的技术,提供更可控、有效和安全的解决方
案。TheraCup™ 将拔罐与振动和加热相结合,提供更高效、更易用的恢
复解决方案。先进、高效、便携,TheraCup™ 的创新技术可供专业人士或
家庭使用。
预期用途
TheraCup™ 对传统的拔罐治疗方法进行了创新。TheraCup™ 旨在帮助
缓解肌肉紧张和紧绷,减轻疼痛和酸痛。TheraCup™ 旨在通过增加理疗
区域的血液流动来促进自然愈合过程,帮助减轻疼痛和酸痛,增强活动
能力。TheraCup™ 将振动和加热结合在一起,提供一种自动、有效、压力
可控的方法来进行拔罐治疗。

SC
39
使用方法
第 1 步 - 使用拔罐技术
1. 选择最适合目标部位的 TheraCup™ 火罐尺寸(小、中、大)。请参阅下文,详细了解如何选择合适的火罐尺寸。确保
火罐和设备上的黑环有良好接触,以做到密封。
2. 感觉舒适后,将 MasterSwitch 滑块向右拨动,开启 TheraCup™。电池状态 LED 灯显示设备处于开启状态。
3. 短按抽吸(中间)按钮,开始拔罐。短按抽吸按钮可以切换压力设置(低、中、高)。开启抽吸也会同时开启一级加热
和振动。
4. 在使用前,将火罐放在前臂上进行相应的调整,或直接放在预定部位,如背部、手臂和腿部,然后开始使用。放好
后,将火罐压入皮肤以获得强大吸力。火罐吸住后,理疗过程中即不必再拿握火罐。
5. 短按振动按钮,切换速度设置。长按可以关闭振动理疗。
6. 短按加热按钮,在三档温度之间切换。长按可以关闭振动理疗。
7. 三分钟后,会听到一声短促的提示音,表明 TheraCup™ 理疗已经完成。发出提示音五秒钟后,将停止抽吸。如果想
在任何时候停止理疗,请长按抽吸(中间)按钮或向左拨动 MasterSwitch 滑块(关闭)。
8. 要关闭 TheraCup™,请向左拨动 MasterSwitch 滑块。

SC
40
第 2 步 - 探索 Pro 模式理疗
1. 选择最适合目标部位的 TheraCup™ 火罐尺寸(小、中、大)。请参阅下文,详细了解如何选择合适的火罐尺寸。确保火罐和设
备上的黑环有良好接触,以做到密封。
2. 感觉舒适后,将 MasterSwitch 滑块向右拨动,开启 TheraCup™。电池状态 LED 灯显示设备处于开启状态。
3. 有两种使用 Pro 模式的方法:Flash 拔罐和 Gliding 拔罐。
4. 同时长按振动和加热按钮约五秒钟,即可进入 Pro 模式。Pro 模式开启时,两盏白灯将亮起,设备将开始抽吸。在 Pro 模式
下,吸力强度不可调节。Pro 模式下的默认设置是 Gliding 拔罐。要使用 Flash 拔罐,请按下抽吸(中间按钮)。三盏白灯将亮
起,表示 Flash 拔罐模式已开启。
5. 短按振动按钮,开启振动。短按振动按钮,切换速度设置。长按可以关闭振动理疗。
6. 短按加热按钮,开启热疗。短按加热按钮,在三档温度之间切换。长按按钮,停止热疗。
7. Gliding 模式:将按摩介质,例如精油或乳液,涂抹在预定理疗部位。将火罐放在预定部位,例如骼胫束、股四头肌和小腿肚。
火罐完全吸住后,轻轻地向上提起火罐,使其离开皮肤,慢慢滑过理疗区域。
8. Flash 拔罐模式:将火罐放在预定部位,例如骼胫束、股四头肌和小腿肚。让压力积聚 2-5 秒钟,然后拉开火罐。使用较小的火
罐时,大约两秒钟后松开。使用较大的火罐时,大约五秒钟后松开。
9. 五分钟后,会听到一声短促的提示音,表明 TheraCup™ 理疗已经完成。发出提示音五秒钟后,将停止抽吸。
10. 要在理疗中或理疗后关闭 TheraCup™,请向左拨动 MasterSwitch 滑块。

SC
41
第 3 步 - 每一天都感受到与众不同™ 。
无论是用于减轻酸痛和紧绷感、锻炼后恢复或一般健康目的,TheraCup™ 都将帮助您保持最佳状态。
一般使用说明:
1. 火罐尺码概述
a. 小号:(35mm)建议用于较小的肌肉,例如肩胛提肌(颈后)、斜方肌、膝盖、小腿肚。
b. 中号:(45mm)建议用于中等大小的肌肉,例如三角肌、三头肌、前臂、斜方肌。
c. 大号:(55 毫米)建议用于较大的肌肉,例如斜方肌、背部、下背部、腘绳肌、四头肌、小腿肚。
2. 与一般的拔火罐一样,使用 TheraCup™ 后会留下瘀斑。
查看警告标志上的重要安全说明
使用方法

SC
42
抽吸强度
设置概述
1 级 = 低强度
2 级 = 中等强度
3 级 = 高强度
振动设置概述
1 级 = 低强度振动疗法
2 级 = 高强度振动疗法
3 级 = 波动式振动疗法
加热设置概述
1 级 = 低热
2 级 = 中热
3 级 = 高热
了解您的拔罐设备
抽吸装置
图 1.
三个可互换的透明火罐:
35mm、45mm、55mm
氯丁橡胶收纳包
USB-C 充电线

SC
43
充电
• TheraCup
TM
支持 USB-C。
• TheraCup
TM
内含 USB-C 转 USB-A 的转接线。
• 可以将设备插入任何标准的 USB 适配器。
• USB 端口位于 MasterSwitch 的对侧。
• 电池的 LED 指示灯显示电池电量:
• 橙色:电量过低;蓝色:电量适中;绿色:已充满电。
• 充电时,LED 灯将闪烁,表示连接良好,充电完成后灯将变为绿色常亮状态。
• 当设备处于开机状态时,可以随时通过向右拨动开关来查看电池电量。当设备关闭时,电池 LED 灯会
熄灭。
注意:如果使用第三方充电器,请确保其来自经过认证的制造商,并且没有任何结构性损坏。请勿在充电时使用设备。
了解您的拔罐设备

SC
44
清洁说明:
1. 将 MasterSwitch 向左拨动,关闭 TheraCup
TM
。确保指示电池状态的 LED 灯熄灭。
2. 使用消毒湿巾对火罐和加热元件进行消毒。
3. 如果 TheraCup
TM
接触到任何可能形成污渍或造成其他损坏的物质(例如污垢或沙子、化妆品、墨水、肥皂、清洁
剂、酸或酸性食物),或除水以外的液体(包括可能导致皮肤刺激的物质,例如:汗水、盐水、肥皂水、泳池水、香水、
驱虫剂、乳液、防晒霜、油、粘合剂去除剂、染发剂或溶剂),请使用稍稍沾湿的抹布或酒精溶液对其进行清洁。
4. 使用柔软的无绒布擦干 TheraCup
TM
。
5. TheraCup
TM
配有可更换的过滤器,以防止外来物质损坏设备。要更换过滤器,请取下位于加热垫顶部的小橡胶
帽。每 6 个月更换一次过滤器。
