Loading ...
Loading ...
Loading ...
INSTRUCTION SHEET
©2021 Electrolux Home Products, Inc. Instruction Sheet A00343905 7.23.21
Leveling System Installation
1. a. Lay refrigerator and
freezer on their backs
on packing material
or a drop cloth to
prevent damage.
Instructions for Dual Installation Trim Kits:
TRMKTEZ2FL75 (Frigidaire)
TRMKTEZ2LV79 (Frigidaire)
TRMKTEZ2FL79 (Frigidaire)
TRMKTSS2FL79 (Electrolux)
TRMKTSS2LV84 (Electrolux)
Fig. 1
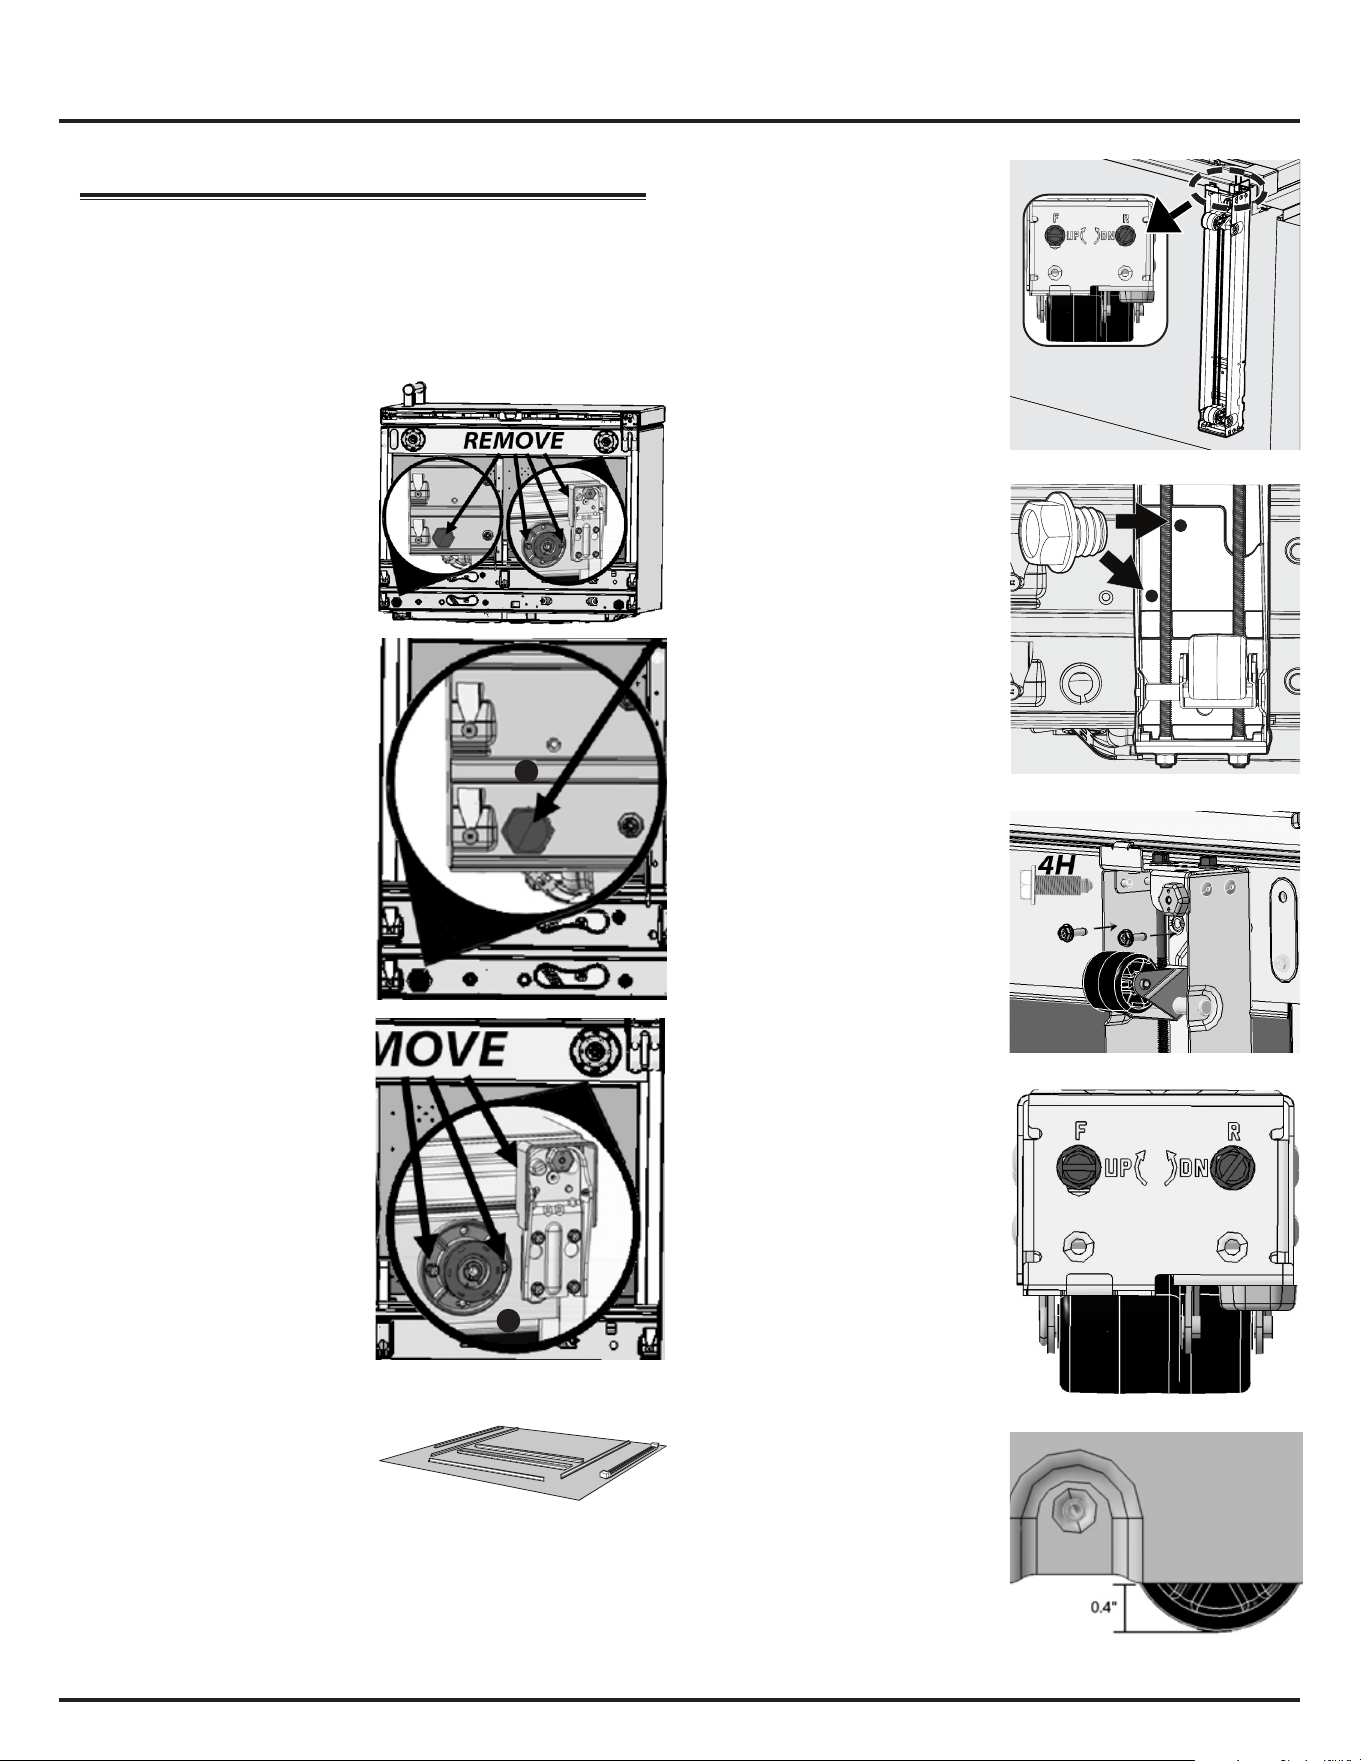
b. Remove all 4 rear leg
levelers from the 2 units by
unscrewing
counterclockwise (Fig.
1A), and store them with
your Product Literature.
c. Remove all 4 front leg
levelers from the 2 units
by unscrewing the outer
peg and 2 bolts on each
front leveler with a
5
/
16
” nut driver and
store them with your
Product Literature.
Remove the hinge cover
if it is installed (Fig 1B).
Fig. 2
Fig. 3
2. Lay the parts out on a
cleared area face down. Be
sure to place a drop cloth
over the floor to prevent
scratching the trim kit and/or
floor (Fig. 2).
Fig. 5
Fig. 6
3. a. Fit the first Leveler
Assembly onto
a refrigerator/freezer
(Fig. 3).
Fig. 4
b. Using a 5H bolt and
a power drill, fasten the
bottom of the Leveler
Assembly with a
3
/
8
”
hex drill bit in whichever
hole overlaps the screw
hole (Fig. 4).
Note: The rear of the
bracket is contoured to
slip over the metal
compressor base. Driving
the rear bolt first will
ensure proper alignment
of the lever assembly.
Fig. 7
A
B
c. Using the 4H bolts from
step 1, fasten the front of
the Leveler Assembly
to the refrigerator/freezer
using a
5
/
16
” nut driver
(Fig. 5).
If more fastening space
is required, rotate the
bolt labeled F clockwise
(Fig. 6) using a flathead
screwdriver or a
3
/
8
”
socket wrench.
d. Attach remaining 3
Leveler Assemblies as
described in the previous
3 steps using the
remaining six 4H bolts
and the remaining three
5H bolts.
With the unit(s) still on
their backs, adjust all
leveling wheels to
approximately the
orientation in Fig. 7.
Loading ...
Loading ...
Loading ...