
LCD Monitor
User Manual

Legal Informaon
©2021 Hangzhou Hikvision Digital Technology Co., Ltd. All rights reserved.
About this Manual
The Manual includes instrucons for using and managing the Product. Pictures, charts, images and
all other informaon hereinaer are for descripon and explanaon only. The informaon
contained in the Manual is subject to change, without noce, due to rmware updates or other
reasons. Please nd the latest version of this Manual at the Hikvision website ( hps://
www.hikvision.com/ ).
Please use this Manual with the guidance and assistance of professionals trained in
supporng the
Product.
Trademarks
and other Hikvision's trademarks and logos are the properes of
Hikvision in various jurisdicons.
Other trademarks and logos menoned are the properes of their respecve owners.
: The terms HDMI and HDMI High-Denion Mulmedia Interface, and the HDMI
Logo are trademarks or registered trademarks of HDMI Licensing Administrator, Inc. in the United
States and other countries.
Disclaimer
TO THE MAXIMUM EXTENT PERMITTED BY APPLICABLE LAW, THIS MANUAL AND THE PRODUCT
DESCRIBED, WITH ITS HARDWARE, SOFTWARE AND FIRMWARE, ARE PROVIDED "AS IS" AND "WITH
ALL FAULTS AND ERRORS". HIKVISION MAKES NO WARRANTIES, EXPRESS OR IMPLIED, INCLUDING
WITHOUT LIMITATION, MERCHANTABILITY, SATISFACTORY QUALITY, OR FITNESS FOR A PARTICULAR
PURPOSE. THE USE OF THE PRODUCT BY YOU IS AT YOUR OWN RISK. IN NO EVENT WILL HIKVISION
BE LIABLE TO YOU FOR ANY SPECIAL, CONSEQUENTIAL, INCIDENTAL, OR INDIRECT DAMAGES,
INCLUDING, AMONG OTHERS, DAMAGES FOR LOSS OF BUSINESS PROFITS, BUSINESS
INTERRUPTION, OR LOSS OF DATA, CORRUPTION OF SYSTEMS, OR LOSS OF DOCUMENTATION,
WHETHER BASED ON BREACH OF CONTRACT, TORT (INCLUDING NEGLIGENCE), PRODUCT LIABILITY,
OR OTHERWISE, IN CONNECTION WITH THE USE OF THE PRODUCT, EVEN IF HIKVISION HAS BEEN
ADVISED OF THE POSSIBILITY OF SUCH DAMAGES OR LOSS.
YOU ACKNOWLEDGE THAT THE NATURE OF THE INTERNET PROVIDES FOR INHERENT SECURITY
RISKS, AND HIKVISION SHALL NOT TAKE ANY RESPONSIBILITIES FOR ABNORMAL OPERATION,
PRIVACY LEAKAGE OR OTHER DAMAGES RESULTING FROM CYBER-ATTACK, HACKER ATTACK, VIRUS
INFECTION, OR OTHER INTERNET SECURITY RISKS; HOWEVER, HIKVISION WILL PROVIDE TIMELY
TECHNICAL SUPPORT IF REQUIRED.
YOU AGREE TO USE THIS PRODUCT IN COMPLIANCE WITH ALL APPLICABLE LAWS, AND YOU ARE
SOLELY RESPONSIBLE FOR ENSURING THAT YOUR USE CONFORMS TO THE APPLICABLE LAW.
ESPECIALLY, YOU ARE RESPONSIBLE, FOR USING THIS PRODUCT IN A MANNER THAT DOES NOT
LCD Monitor User Manual
i

INFRINGE ON THE RIGHTS OF THIRD PARTIES, INCLUDING WITHOUT LIMITATION, RIGHTS OF
PUBLICITY, INTELLECTUAL PROPERTY RIGHTS, OR DATA PROTECTION AND OTHER PRIVACY RIGHTS.
YOU SHALL NOT USE THIS PRODUCT FOR ANY PROHIBITED END-USES, INCLUDING THE
DEVELOPMENT OR PRODUCTION OF WEAPONS OF MASS DESTRUCTION, THE DEVELOPMENT OR
PRODUCTION OF CHEMICAL OR BIOLOGICAL WEAPONS, ANY ACTIVITIES IN THE CONTEXT RELATED
TO ANY NUCLEAR EXPLOSIVE OR UNSAFE NUCLEAR FUEL-CYCLE, OR IN SUPPORT OF HUMAN
RIGHTS ABUSES.
IN THE EVENT OF ANY CONFLICTS BETWEEN THIS MANUAL AND THE APPLICABLE LAW, THE LATTER
PREVAILS.
LCD Monitor User Manual
ii
Regulatory Informaon
FCC Informaon
Please take aenon that changes or modicaon not expressly approved by the party responsible
for compliance could void the user's authority to operate the equipment.
FCC compliance: This equipment has been tested and found to comply with the limits for a Class B
digital device,pursuant to part 15 of the FCC Rules. These limits are designed to provide reasonable
protecon against harmful interference in a residenal installaon. This equipment generates, uses
and can radiate radio frequency energy and, if not installed and used in accordance with the
instrucons, may cause harmful interference to radio communicaons. However, there is no
guarantee that interference will not occur in a parcular installaon. If this equipment does cause
harmful interference to radio or television
recepon, which can be determined by turning the
equipment o and on, the user is encouraged to try to correct the interference by one or more of
the following measures:
●
Reorient or relocate the receiving antenna.
●
Increase the separaon between the equipment and receiver.
●
Connect the equipment into an outlet on a circuit
dierent from that to which the receiver is
connected.
●
Consult the dealer or an experienced radio/TV technician for help.
FCC
Condions
This device complies with part 15 of the FCC Rules. Operaon is subject to the following two
condions:
1. This device may not cause harmful interference.
2. This device must accept any interference received, including interference that may cause
undesired
operaon.
EU Conformity Statement
This product and - if applicable - the supplied accessories too are marked with
"CE" and comply therefore with the applicable harmonized European
LCD Monitor User Manual
iii
standards listed under the EMC Direcve 2014/30/EU, the RoHS Direcve
2011/65/EU.
2012/19/EU (WEEE direcve): Products marked with this symbol cannot be
disposed of as unsorted municipal waste in the European Union. For proper
recycling, return this product to your local supplier upon the purchase of
equivalent new equipment, or dispose of it at designated
collecon points.
For more
informaon see: hp://www.recyclethis.info .
2006/66/EC (baery direcve): This product contains a baery that cannot be
disposed of as unsorted municipal waste in the European Union. See the
product documentaon for specic baery informaon. The baery is
marked with this symbol, which may include
leering to indicate cadmium
(Cd), lead (Pb), or mercury (Hg). For proper recycling, return the
baery to
your supplier or to a designated
collecon point. For more informaon see:
hp://www.recyclethis.info .
Industry Canada ICES-003 Compliance
This device meets the CAN ICES-3 (B)/NMB-3(B) standards requirements.
LCD Monitor User Manual
iv
Preface
Applicable Models
This manual is applicable to 4K monitors of the following sizes: 43 inches, and 55 inches, 65 inches,
and 75 inches.
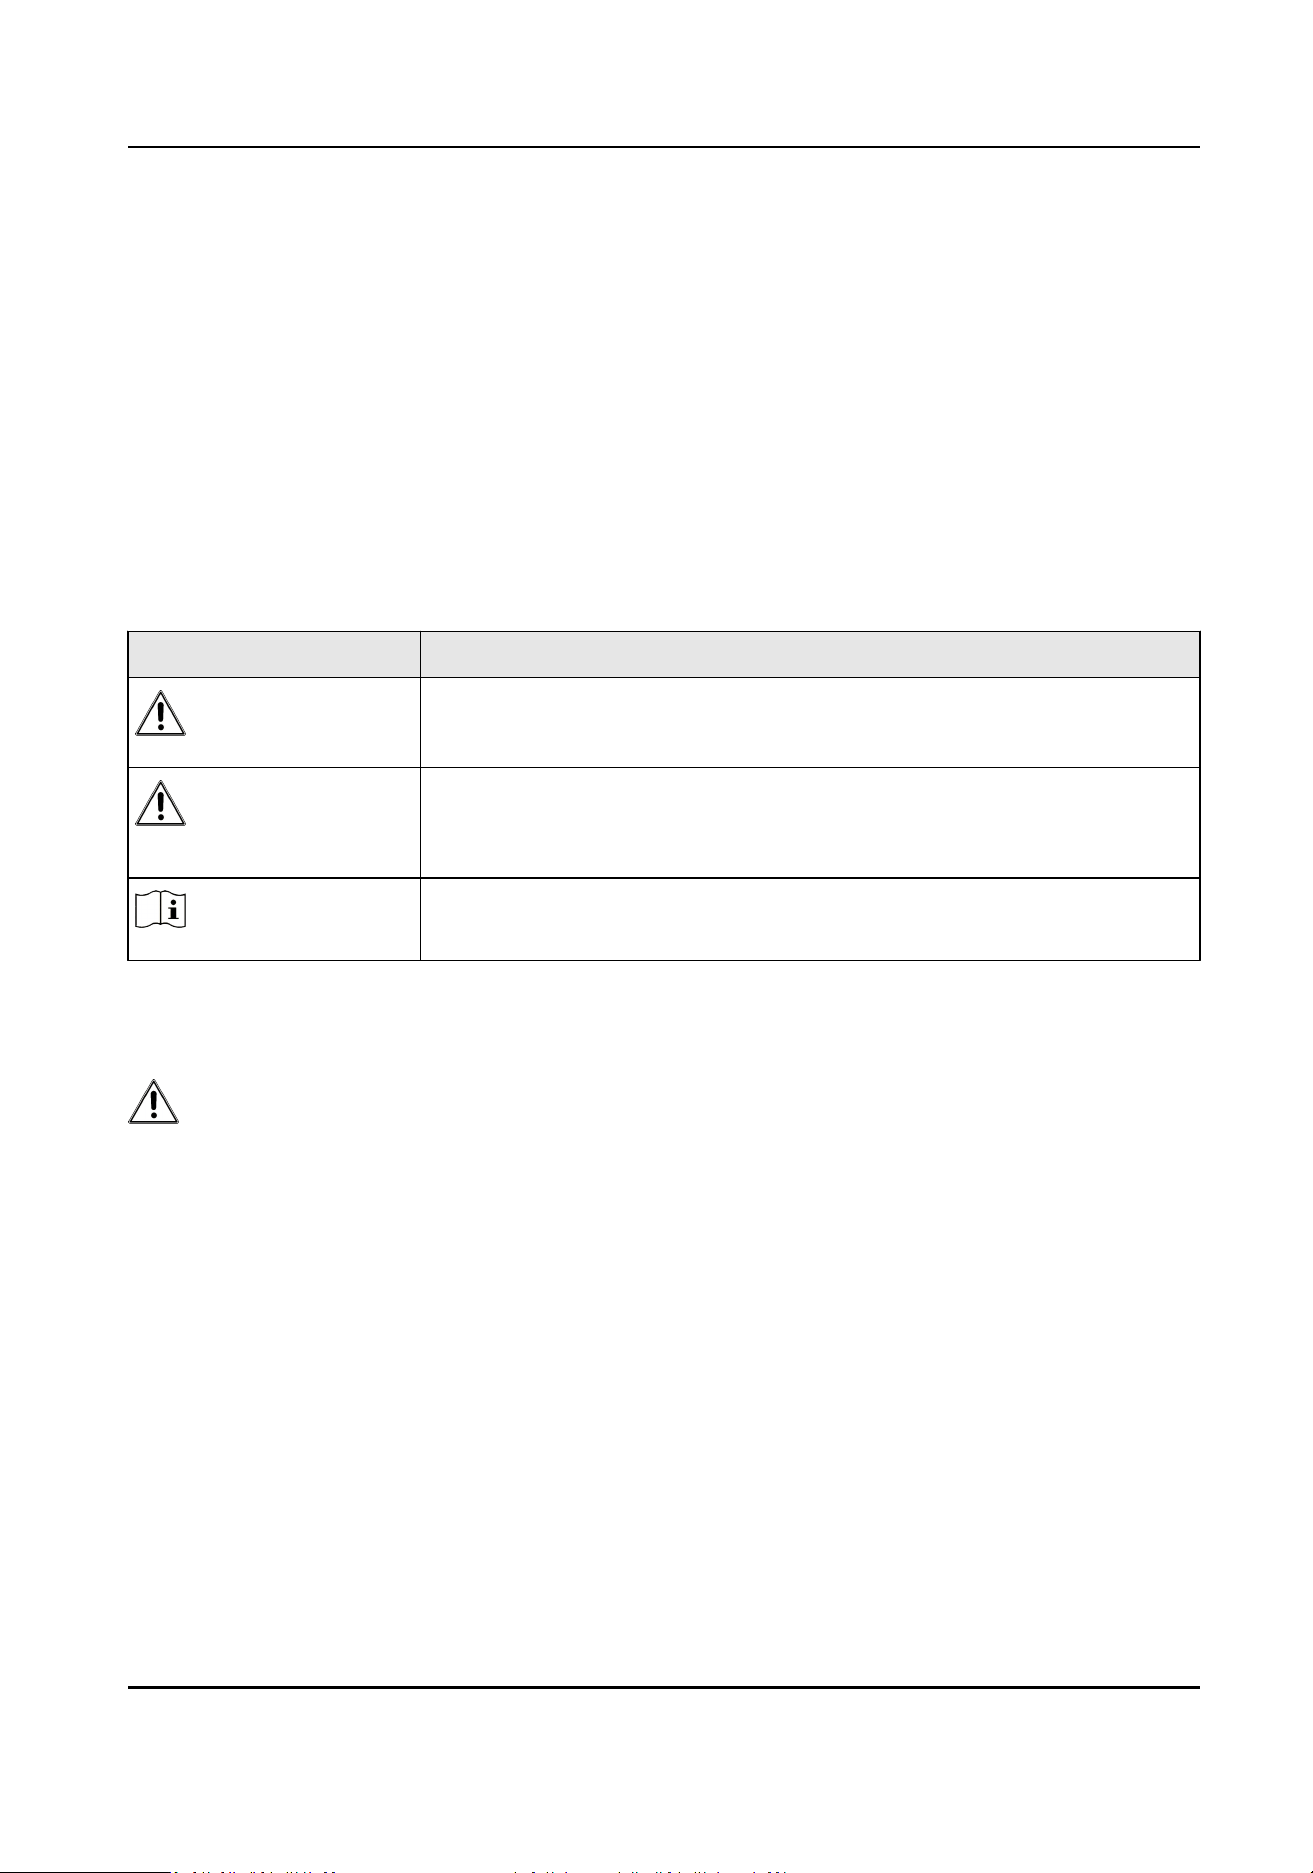
Symbol Convenons
The symbols that may be found in this document are dened as follows.
Symbol Descripon
Danger
Indicates a hazardous situaon which, if not avoided, will or could
result in death or serious injury.
Cauon
Indicates a potenally hazardous situaon which, if not avoided, could
result in equipment damage, data loss, performance degradaon, or
unexpected results.
Note
Provides addional informaon to emphasize or supplement
important points of the main text.
Safety Instrucon
Cauon
●
Proper conguraon of all passwords and other security sengs is the responsibility of the
installer and/or end-user.
●
In the use of the product, you must be in strict compliance with the electrical safety regulaons
of the naon and region. Please refer to technical specicaons for detailed informaon.
●
Input voltage should meet both the SELV (Safety Extra Low Voltage) and the Limited Power
Source with 100~240 VAC according to the IEC60950-1 standard. Please refer to technical
specicaons for detailed informaon.
●
Do not connect several devices to one power adapter as adapter overload may cause
over-
heang
or a re hazard.
●
Please make sure that the plug is
rmly connected to the power socket.
●
If smoke, odor or noise rise from the device, turn o the power at once and unplug the power
cable, and then please contact the service center.
LCD Monitor User Manual
v

Warning
●
The equipment must be connected to an earthed mains socket-outlet.
●
CAUTION: Risk of explosion if the baery is replaced by an incorrect type.
●
Improper replacement of the baery with an incorrect type may defeat a safeguard (for
example, in the case of some lithium
baery types).
●
Do not dispose of the
baery into re or a hot oven, or mechanically crush or cut the baery,
which may result in an explosion.
●
Do not leave the
baery in an extremely high temperature surrounding environment, which may
result in an explosion or the leakage of ammable liquid or gas.
●
Do not subject the baery to extremely low air pressure, which may result in an explosion or the
leakage of ammable liquid or gas.
●
Dispose of used baeries according to the instrucons.
●
Never place the equipment in an unstable locaon. The equipment may fall, causing serious
personal injury or death.
●
NEVER place items that might tempt children to climb, such as toys and remote controls, on the
top of the equipment or furniture on which the equipment is placed.
LCD Monitor User Manual
vi

Contents
Chapter 1 Introducon ............................................................................................................... 1
1.1 Overview ................................................................................................................................ 1
1.2 Key Features ........................................................................................................................... 1
1.3 Panel Buons ......................................................................................................................... 1
1.4 Rear Panel Interface ............................................................................................................... 2
1.5 Remote Control ...................................................................................................................... 3
1.5.1 Remote Control Panel ................................................................................................... 3
1.5.2 Remote Control Operaon ............................................................................................ 5
Chapter 2 Terminal
Operaons ................................................................................................... 6
2.1 Switch Signal Source .............................................................................................................. 6
2.2 Congure Image Parameters .................................................................................................. 6
2.3
Congure Audio Sengs ........................................................................................................ 9
2.4 Congure Screen ID ............................................................................................................. 10
2.4.1 Manually Congure Screen ID ..................................................................................... 10
2.4.2
Automacally Congure Screen ID ............................................................................. 10
2.5 Congure Overheat Alarm ................................................................................................... 11
2.6 Menu Interface Sengs ....................................................................................................... 12
2.7 Power
Sengs ..................................................................................................................... 12
2.8 System Maintenance ............................................................................................................ 13
Chapter 3 Client Operaons ...................................................................................................... 14
3.1 Log into the Client ................................................................................................................ 14
3.2
Congure Serial Port ............................................................................................................ 14
3.3 Startup/Shutdown ............................................................................................................... 14
3.4 Switch Input Source ............................................................................................................. 15
LCD Monitor User Manual
vii
Chapter 1 Introducon
1.1 Overview
The LCD monitor adopts Mstar ACE-5 auto-coloring and image-enhancing engine to improve image
contrast, detail, edge, etc. It is an ideal choice for nancial instuon, metro, train staon, airport
and exhibion.
1.2 Key Features
●
Up to 3840 × 2160
resoluon.
●
Adopts 3D digital comb lter and 3D noise reducon technology.
●
Programmable 12-bit RGB gamma
correcon.
●
Complete factory sengs.
●
Soware spread spectrum technology reduces EMI radiaon.
●
Fan-less design saves energy and reduces noise.
●
Supports one-touch quiescence, and high temperature alarm.
●
Soware update via USB interface.
●
3.5 mm audio input.
●
Supports 7 × 24 hours working mode.
●
Adopts 2 MACE color
correcon engines to improve image contrast, detail, edge, etc.
●
Provides mulple video and audio input interfaces, including DP, DVI, HDMI and VGA.
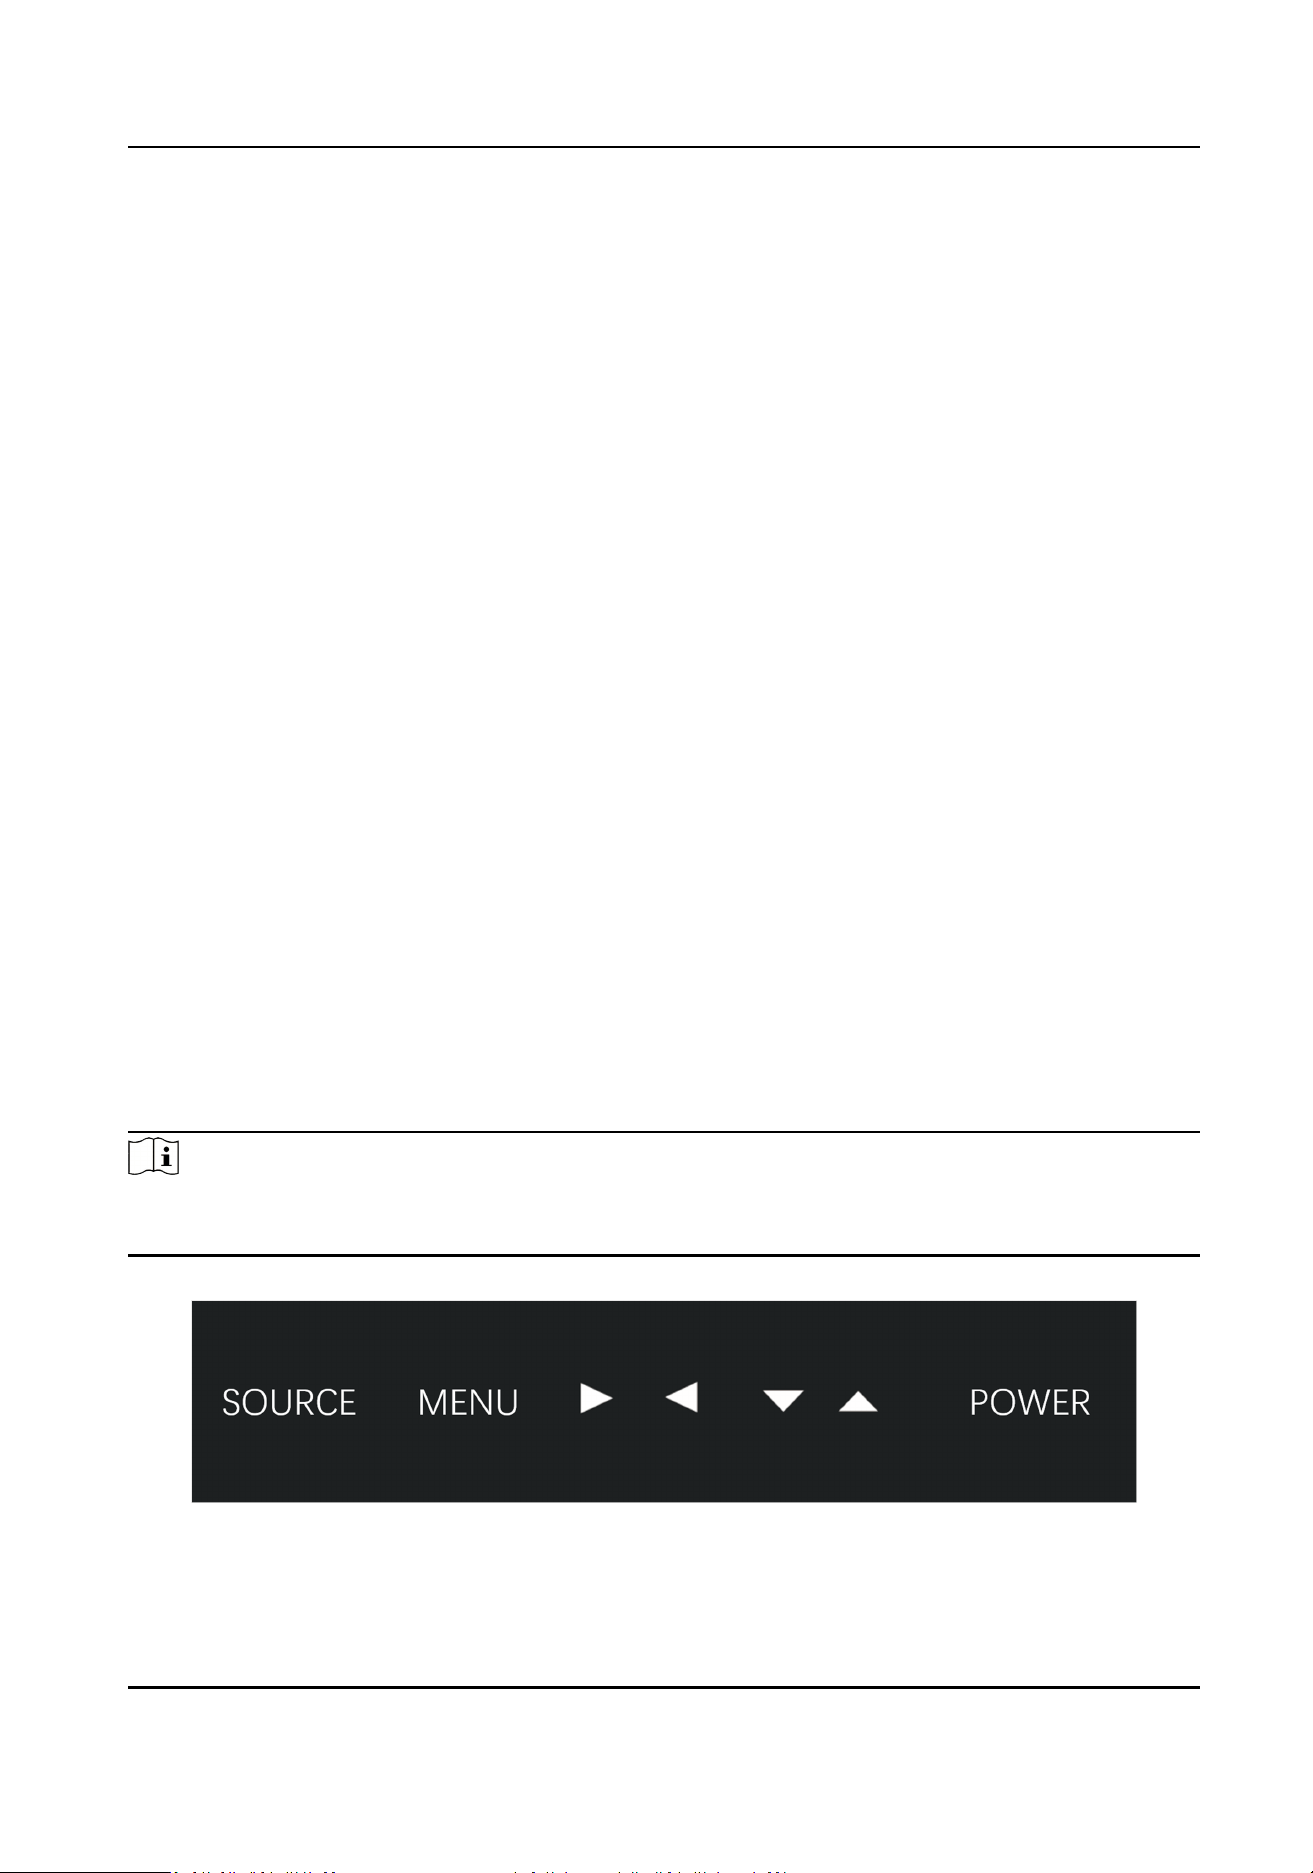
1.3 Panel
Buons
Panel buons are for illustraon only. See details in the following gure and table.
Note
Panel buons are enabled by default, you can enter Menu → Other Seng → Keypad to disable
panel buons.
Figure 1-1 Panel Buons
LCD Monitor User Manual
1
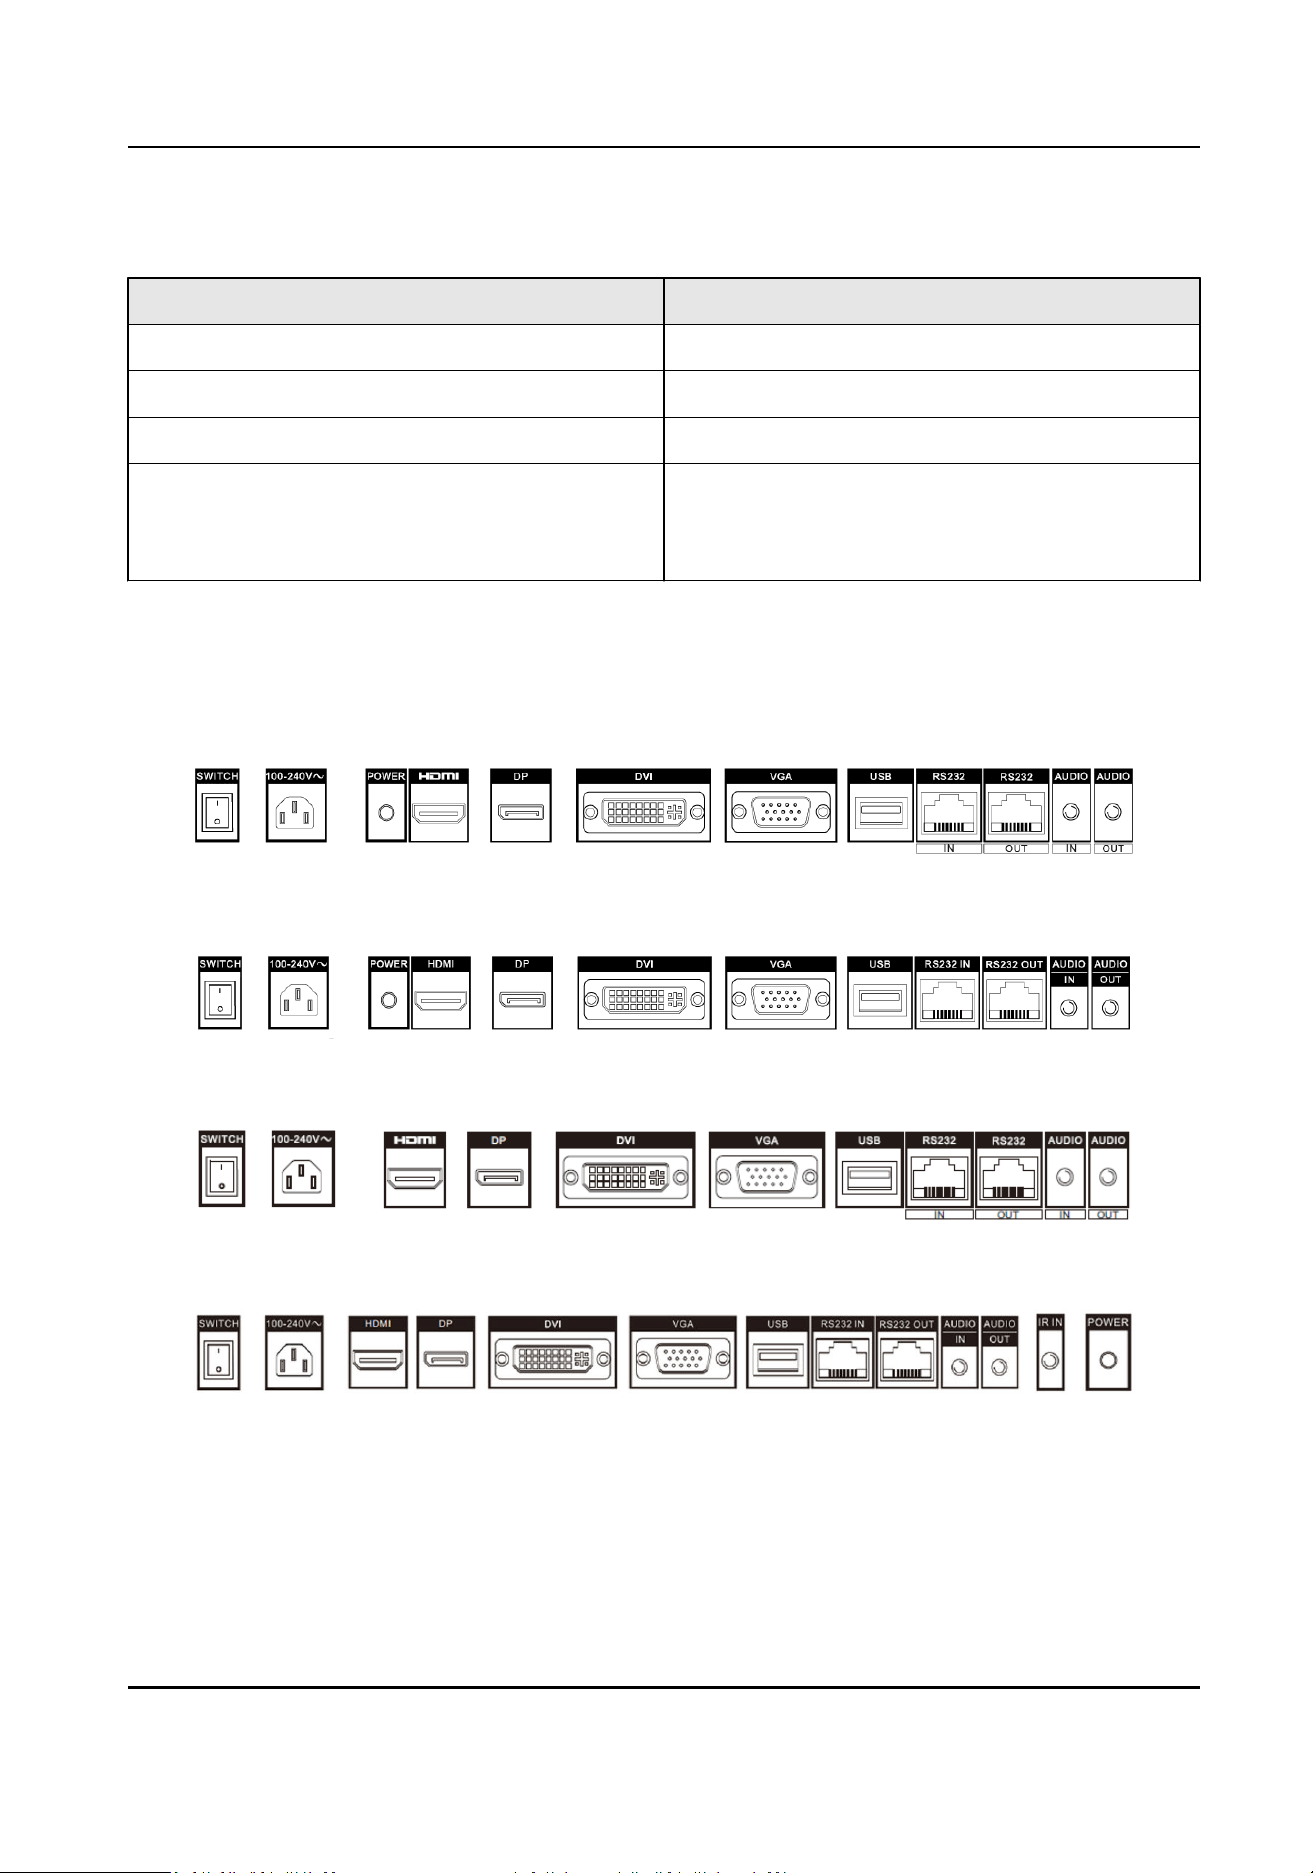
Table 1-1 Buons Descripon
Buon Descripon
SOURCE Enter Input Source page.
MENU Enter Menu page.
▲/▼/◄/► Move the cursor up/down/le/right.
POWER Press to conrm, or turn on the device.
Hold for more than 2 seconds to switch the
device to standby mode.
1.4 Rear Panel Interface
Please view the corresponding rear panel of your monitor.
Figure 1-2 Rear Panel of Device 1 (DS-D5043UL-A)
Figure 1-3 Rear Panel of Device 2 (DS-D5055UL-A)
Figure 1-4 Rear Panel of Device 3 (DS-D5065UL-A)
Figure 1-5 Rear Panel of Device 4 (DS-D5055UL-C)
LCD Monitor User Manual
2
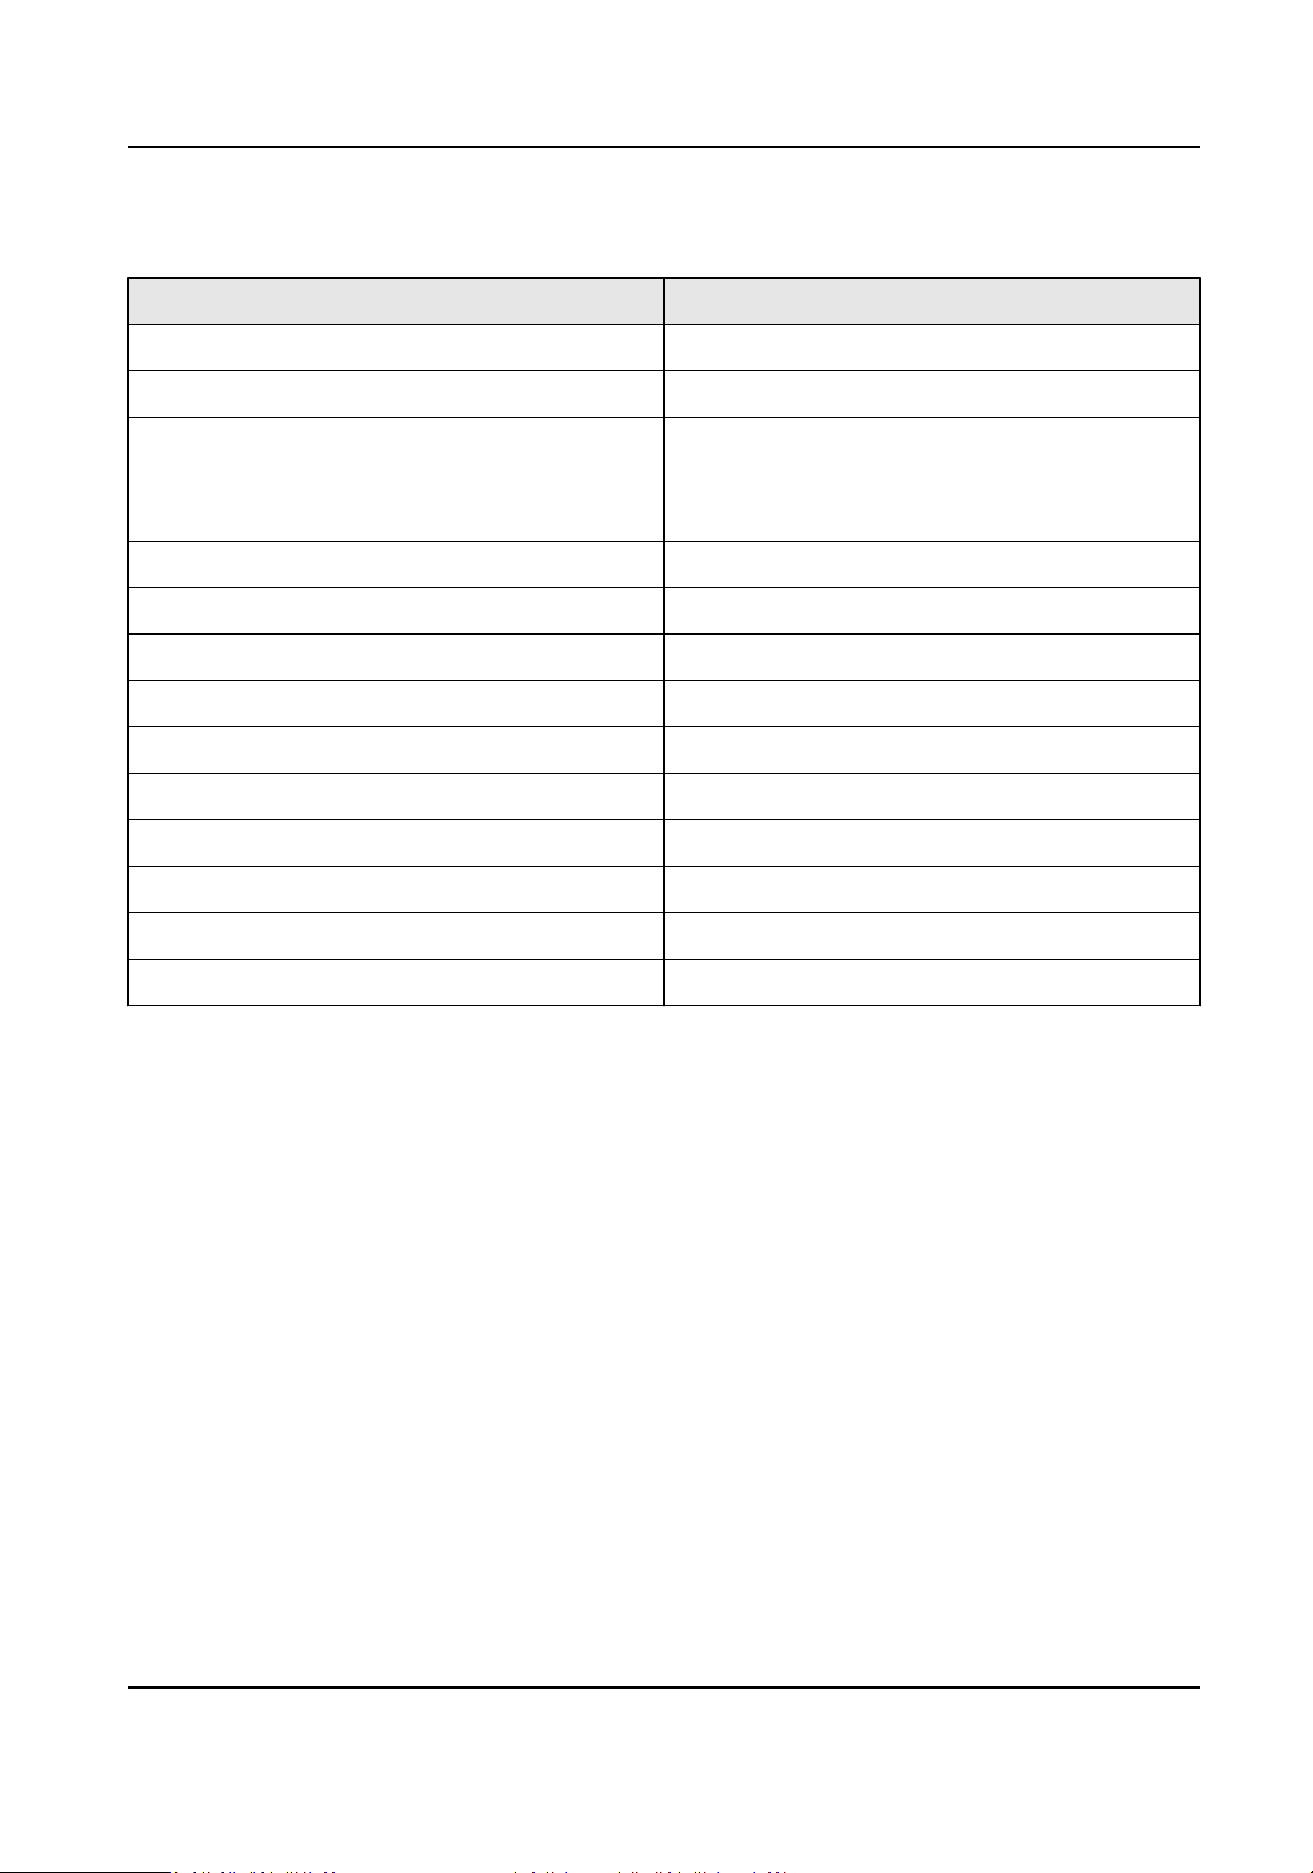
Table 1-2 Descripon of Rear Panel
Interface Descripon
SWITCH Power switch.
100-240V~ 100 to 240 VAC power supply.
POWER Working status indicator.
Turns red when the device is standby.
Turns green when the device is working.
HDMI HDMI digital signal input.
DP DP digital signal input
DVI DVI digital signal input.
VGA VGA analog signal input.
USB USB interface.
RS232 IN RS-232 serial port input.
RS232 OUT RS-232 serial port output.
AUDIO IN 3.5 mm audio input.
AUDIO OUT 3.5 mm audio output.
IR IN Infrared input.
1.5 Remote Control
1.5.1 Remote Control Panel
Refer to the following table for the remote control panel descripon.
LCD Monitor User Manual
3

Table 1-3 Descripon of Remote Control Buons
Appearance Key Funcon
POWER Power switch.
TEST Enter the aging test.
MUTE Turn o/on the sound.
0-9 Enter numbers to select the desired screen, or
enter the special menu such as factory menu, etc.
FREEZE Freeze the image.
PIC Image mode shortcut.
INFO View system informaon.
LIGHT Lighng mode.
▲/▼/◄/► Up/down/le/right direcon keys, select a
submenu or set menu parameters.
OK Conrm
+VOL- Adjust volume
MENU Enter/Exit main menu.
SOURCE Enter Input Source page.
Note
Buons of PLAY, STOP, PREV/NEXT, STOP, LIST, REPEAT, L/R, RETURN and +CH- are reserved for
use.
LCD Monitor User Manual
4
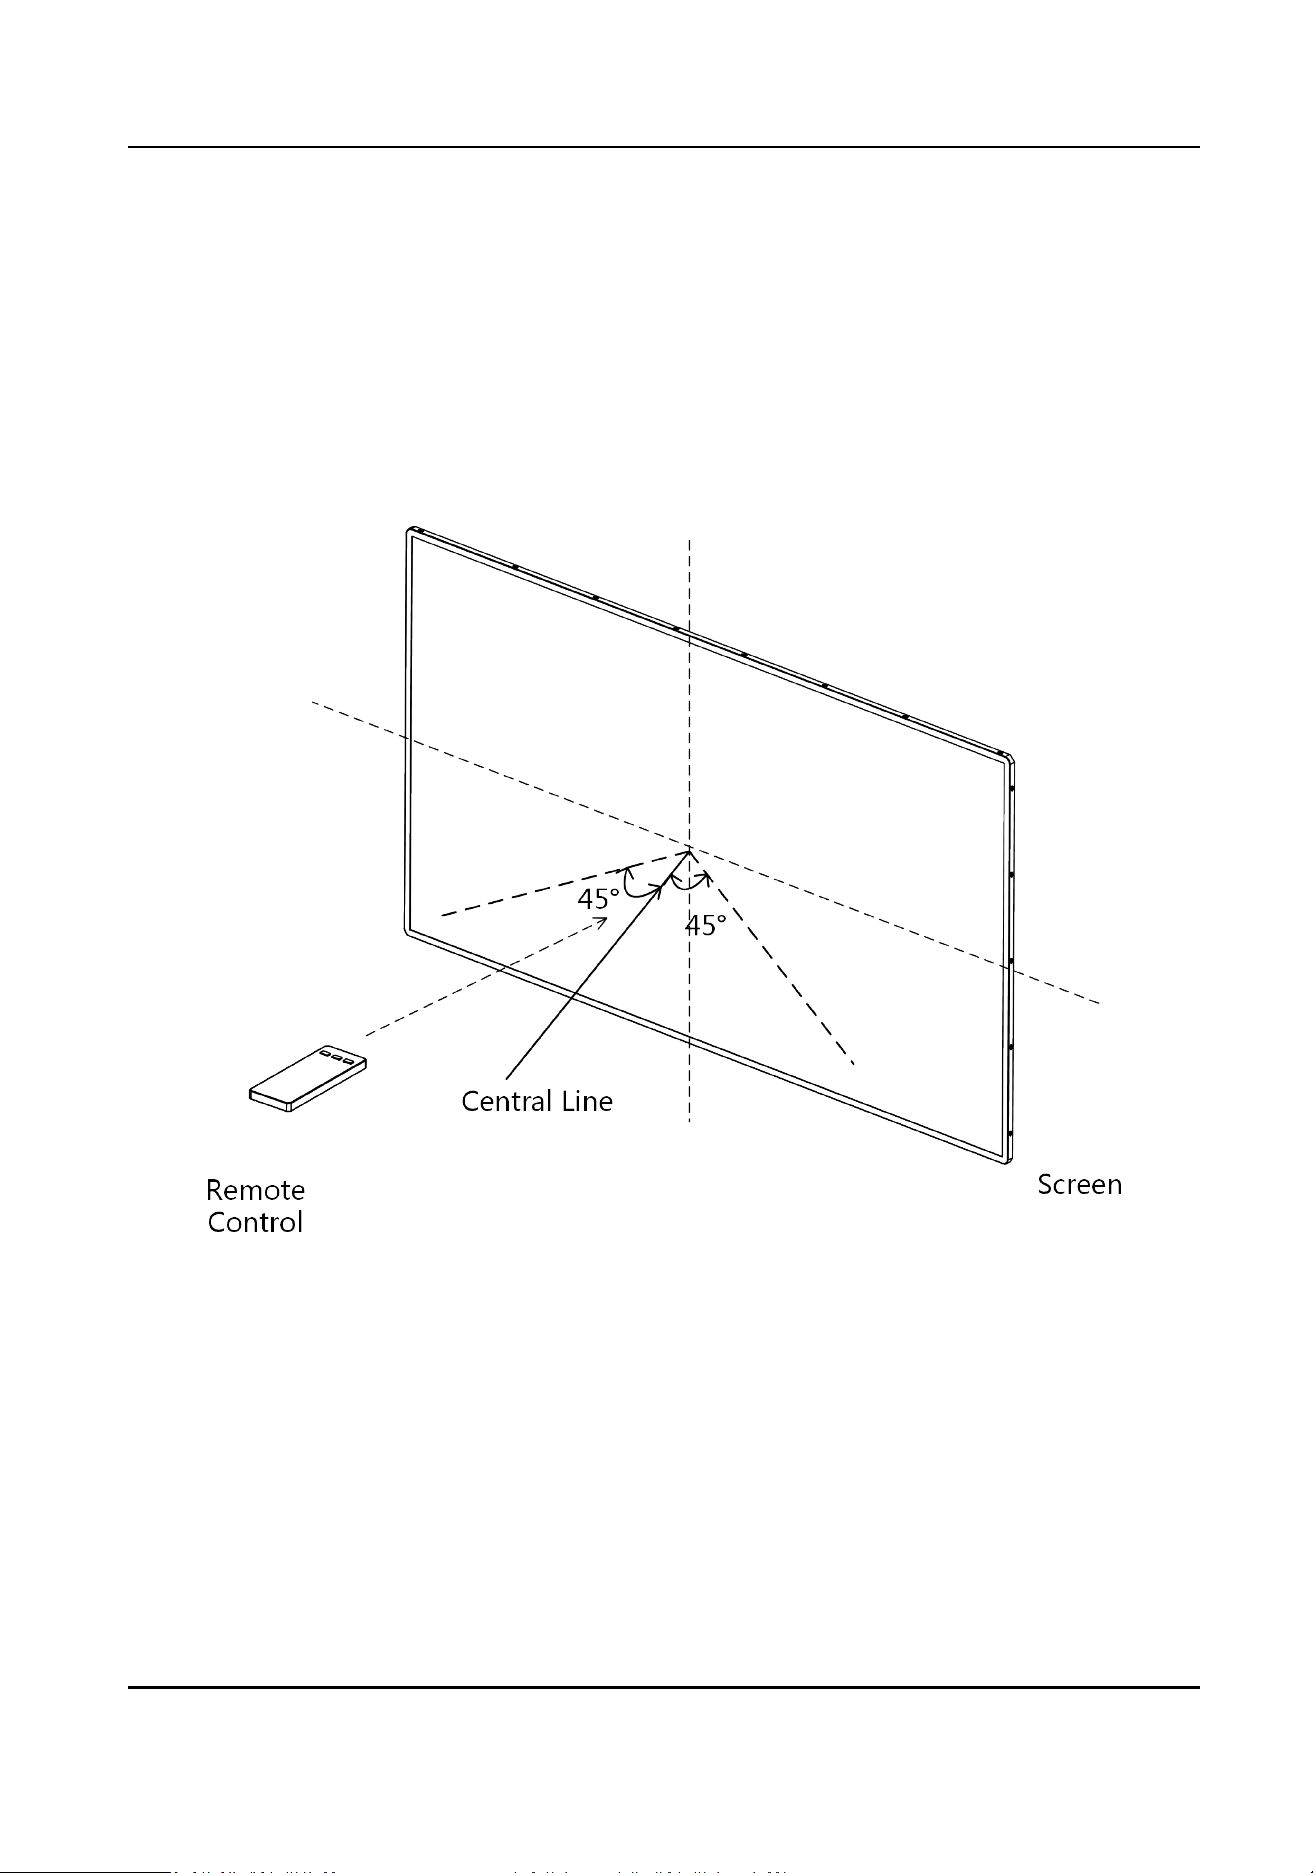
1.5.2 Remote Control Operaon
If the monitor has an IR receiver at the corner, you shall aim the remote control at the IR receiver.
Otherwise, you shall aim the remote control at screen center.
You should operate the remote control within an angle of ±45° when aiming at the IR receiver or
screen center. Otherwise, the screen may not respond.
In order to achieve
beer performance, it is recommended to keep the distance between remote
control and monitor within 5 meters.
Figure 1-6 Operaon of Remote Control
LCD Monitor User Manual
5

Chapter 2 Terminal Operaons
2.1 Switch Signal Source
The monitor can display input signal sources including HDMI, DVI, VGA and DP.
Steps
1.
Press SOURCE to enter Input Source page.
Figure 2-1 Input Source
2.
Press ▼ or ▲ to select the input source.
3.
Press OK to accomplish the input source
selecon.
2.2
Congure Image Parameters
Picture Mode
You can switch picture modes and adjust image parameters including contrast, brightness, color,
sharpness, and hue.
Enter Menu → Picture Mode → Picture Mode , and select the mode as your desire.
LCD Monitor User Manual
6
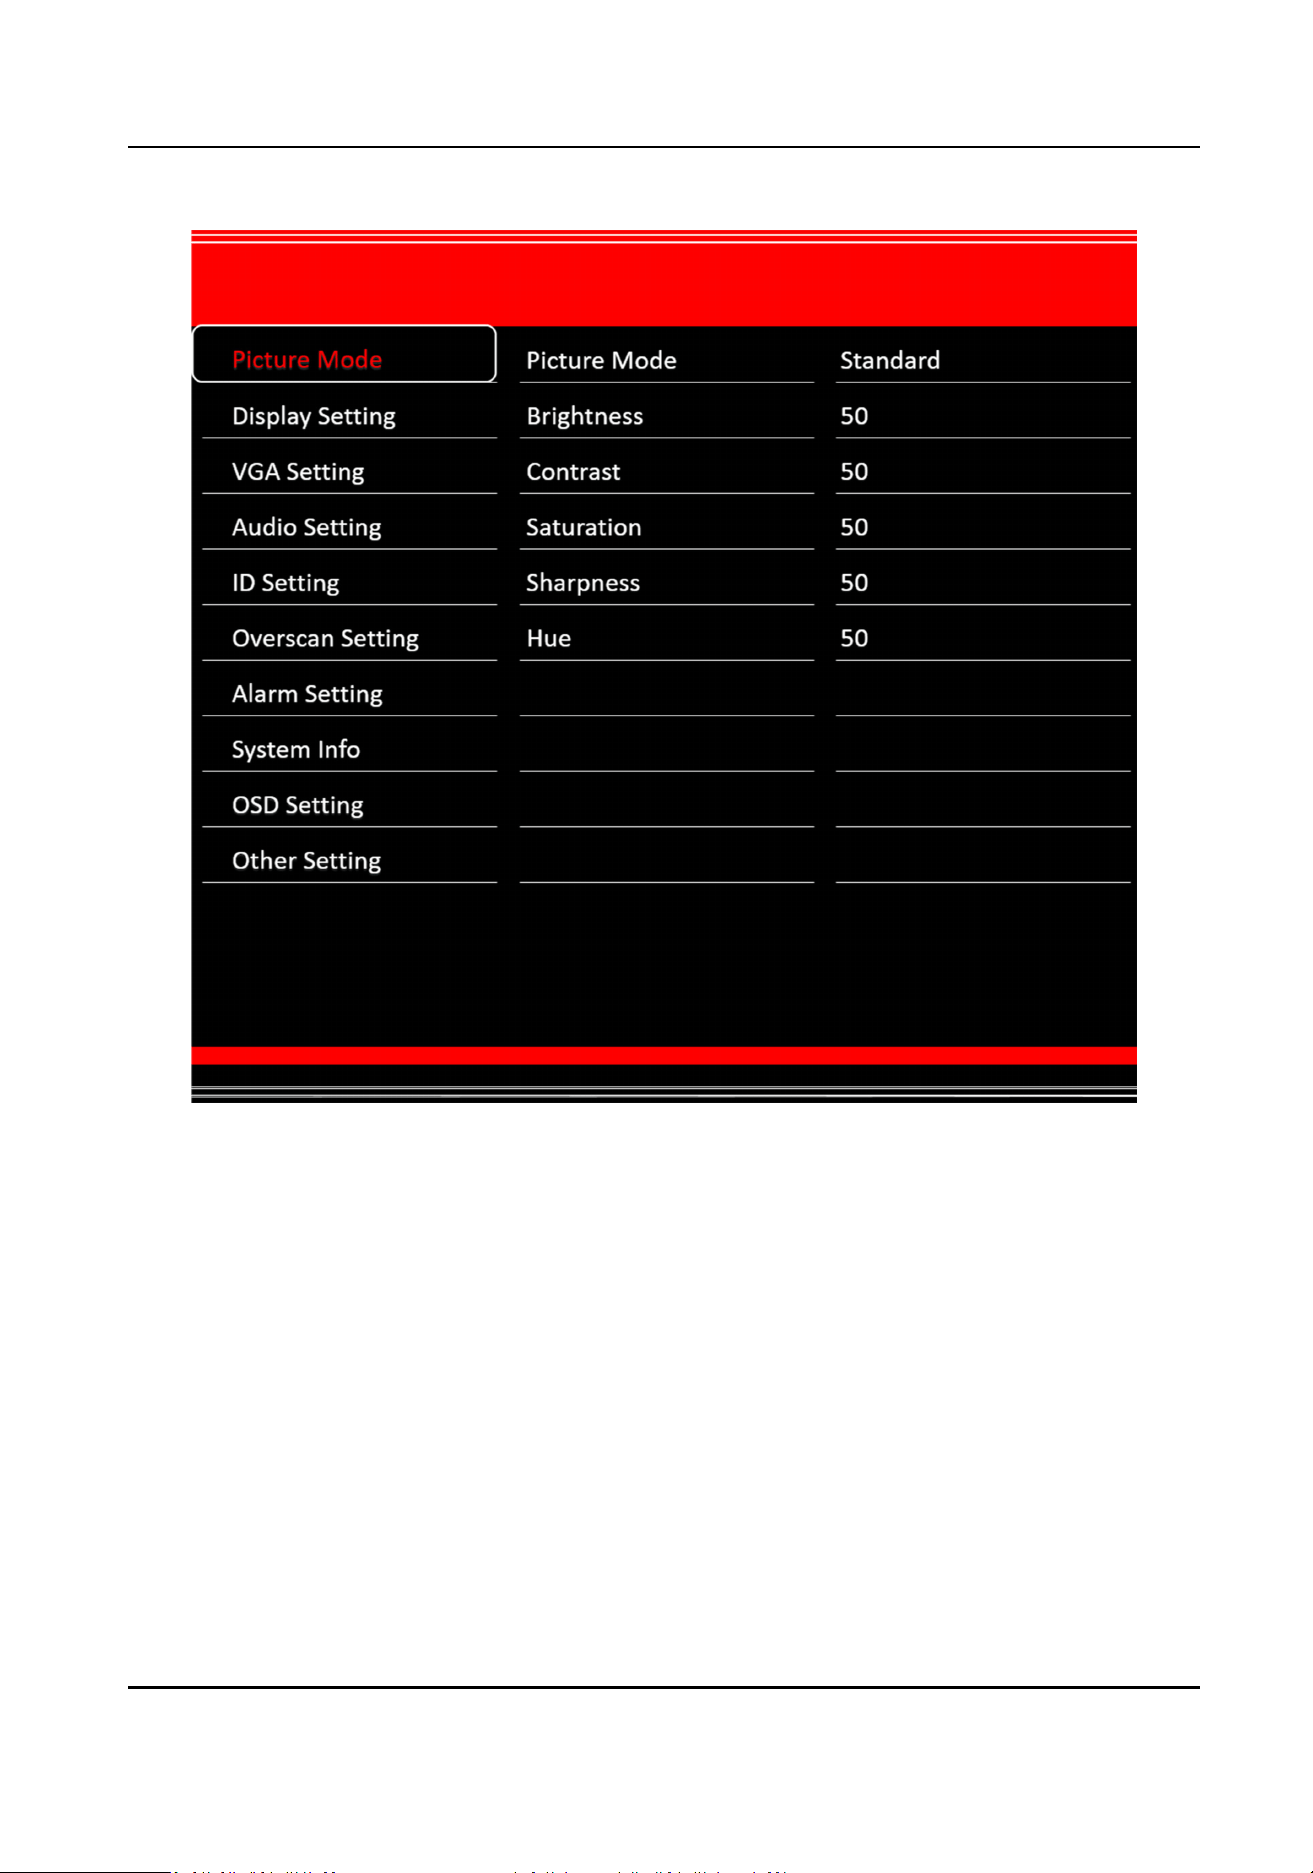
Figure 2-2 Picture Mode
Standard
Suitable for a normal environment.
So
Suitable for a dark room.
Dynamic
Suitable for a bright room.
User
Set the brightness, contrast, color, or sharpness to adjust display eect.
LCD Monitor User Manual
7
Note
Adjustable parameters vary depending on the input source you choose. If the parameter bar is
blue, it indicates that the parameter is unadjustable under the current input source.
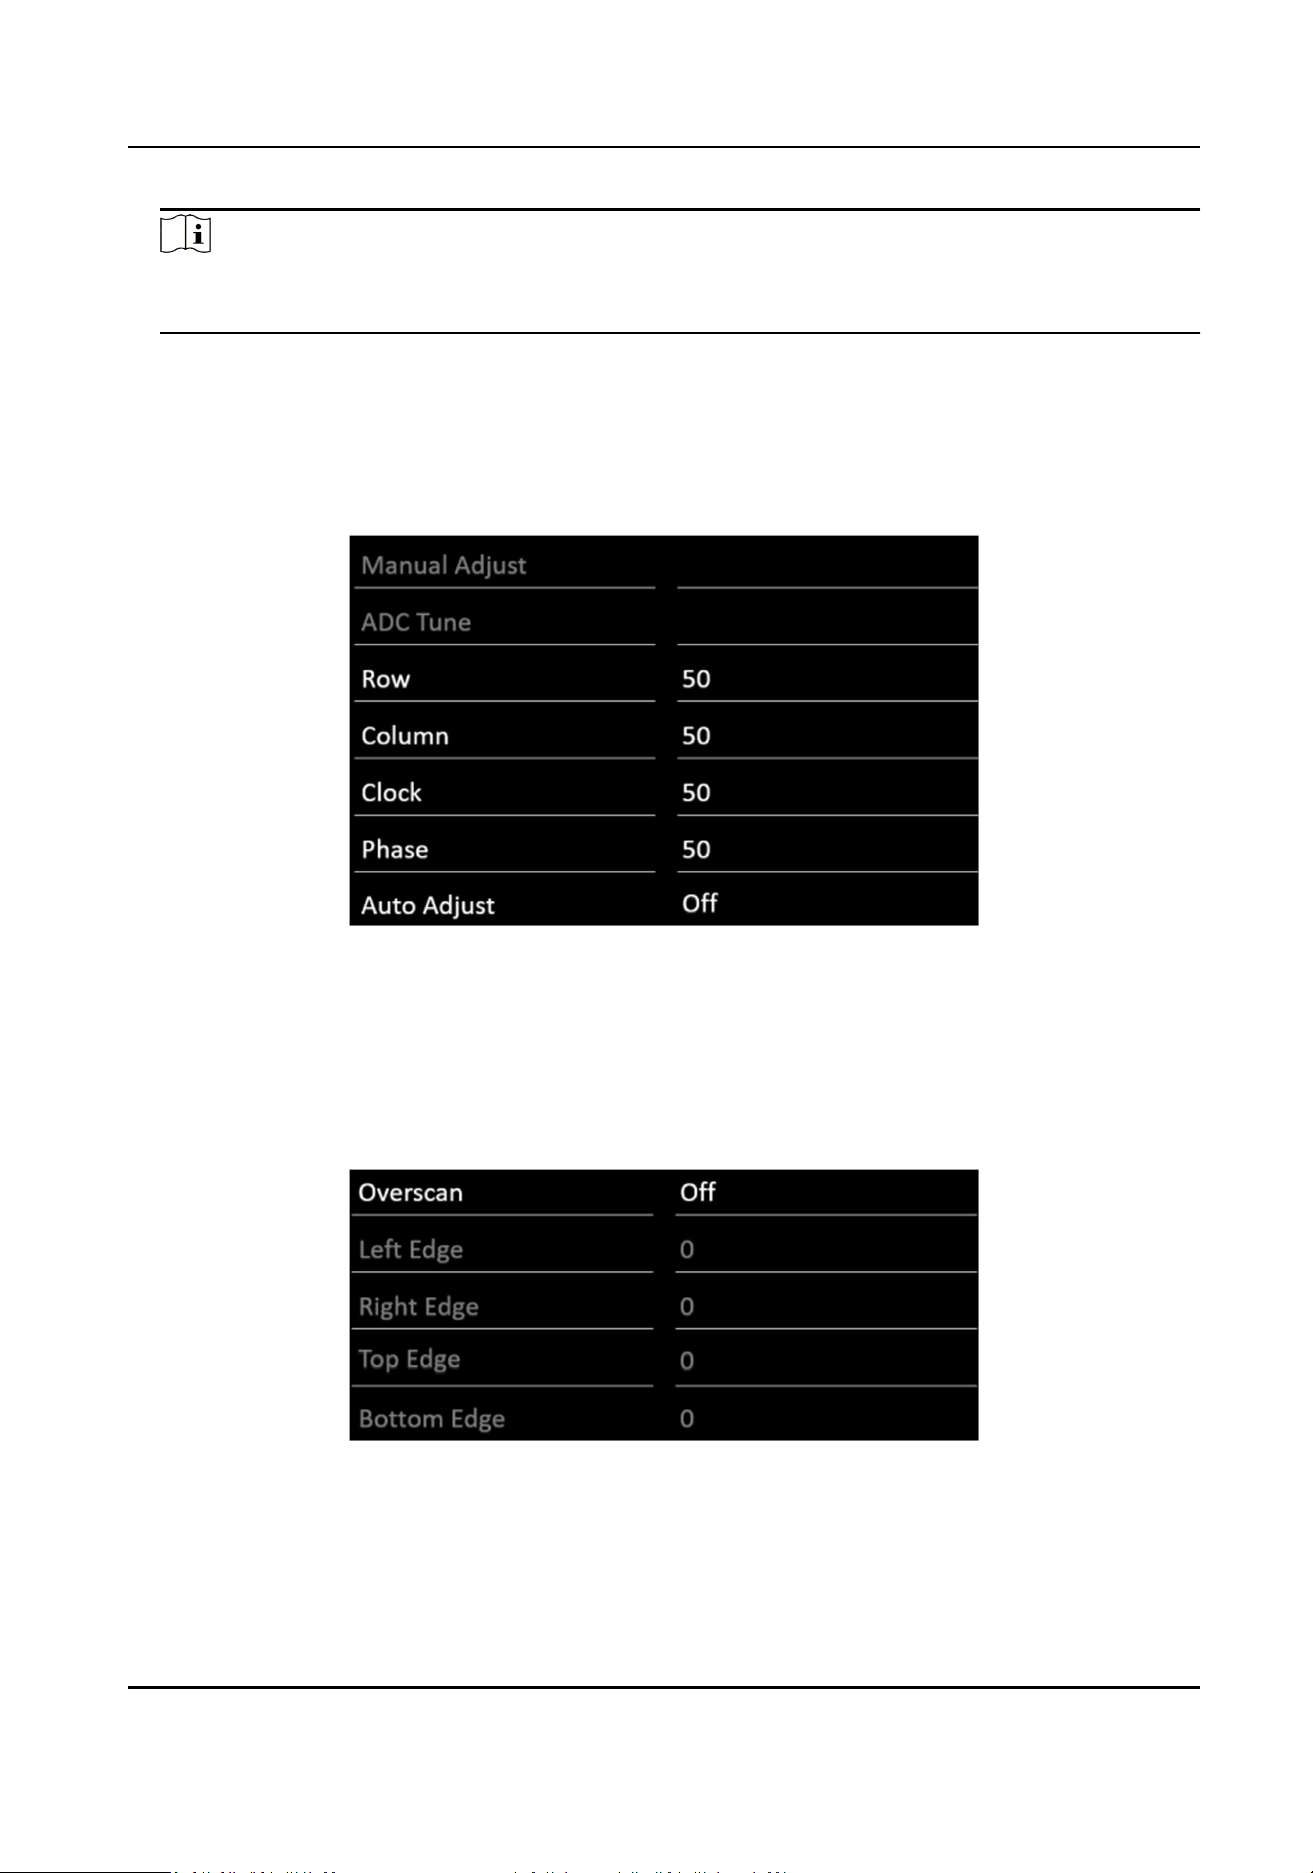
VGA Seng
When you select VGA as the input source, you can adjust VGA parameters to make the picture
show in the correct posion.
Enter Menu → VGA Seng to set the parameters as your desire.
Figure 2-3 VGA Parameter
Overscan
Seng
When there is black border, you can shield the borders for beer image quality.
Enter Menu → Overscan
Seng → Overscan to turn it on. You can set Le Edge, Right Edge, Top
Edge and Boom Edge from 0 to 100.
Figure 2-4 Overscan Seng
LCD Monitor User Manual
8
Note
The value of overscan is the pixel value of certain edge.
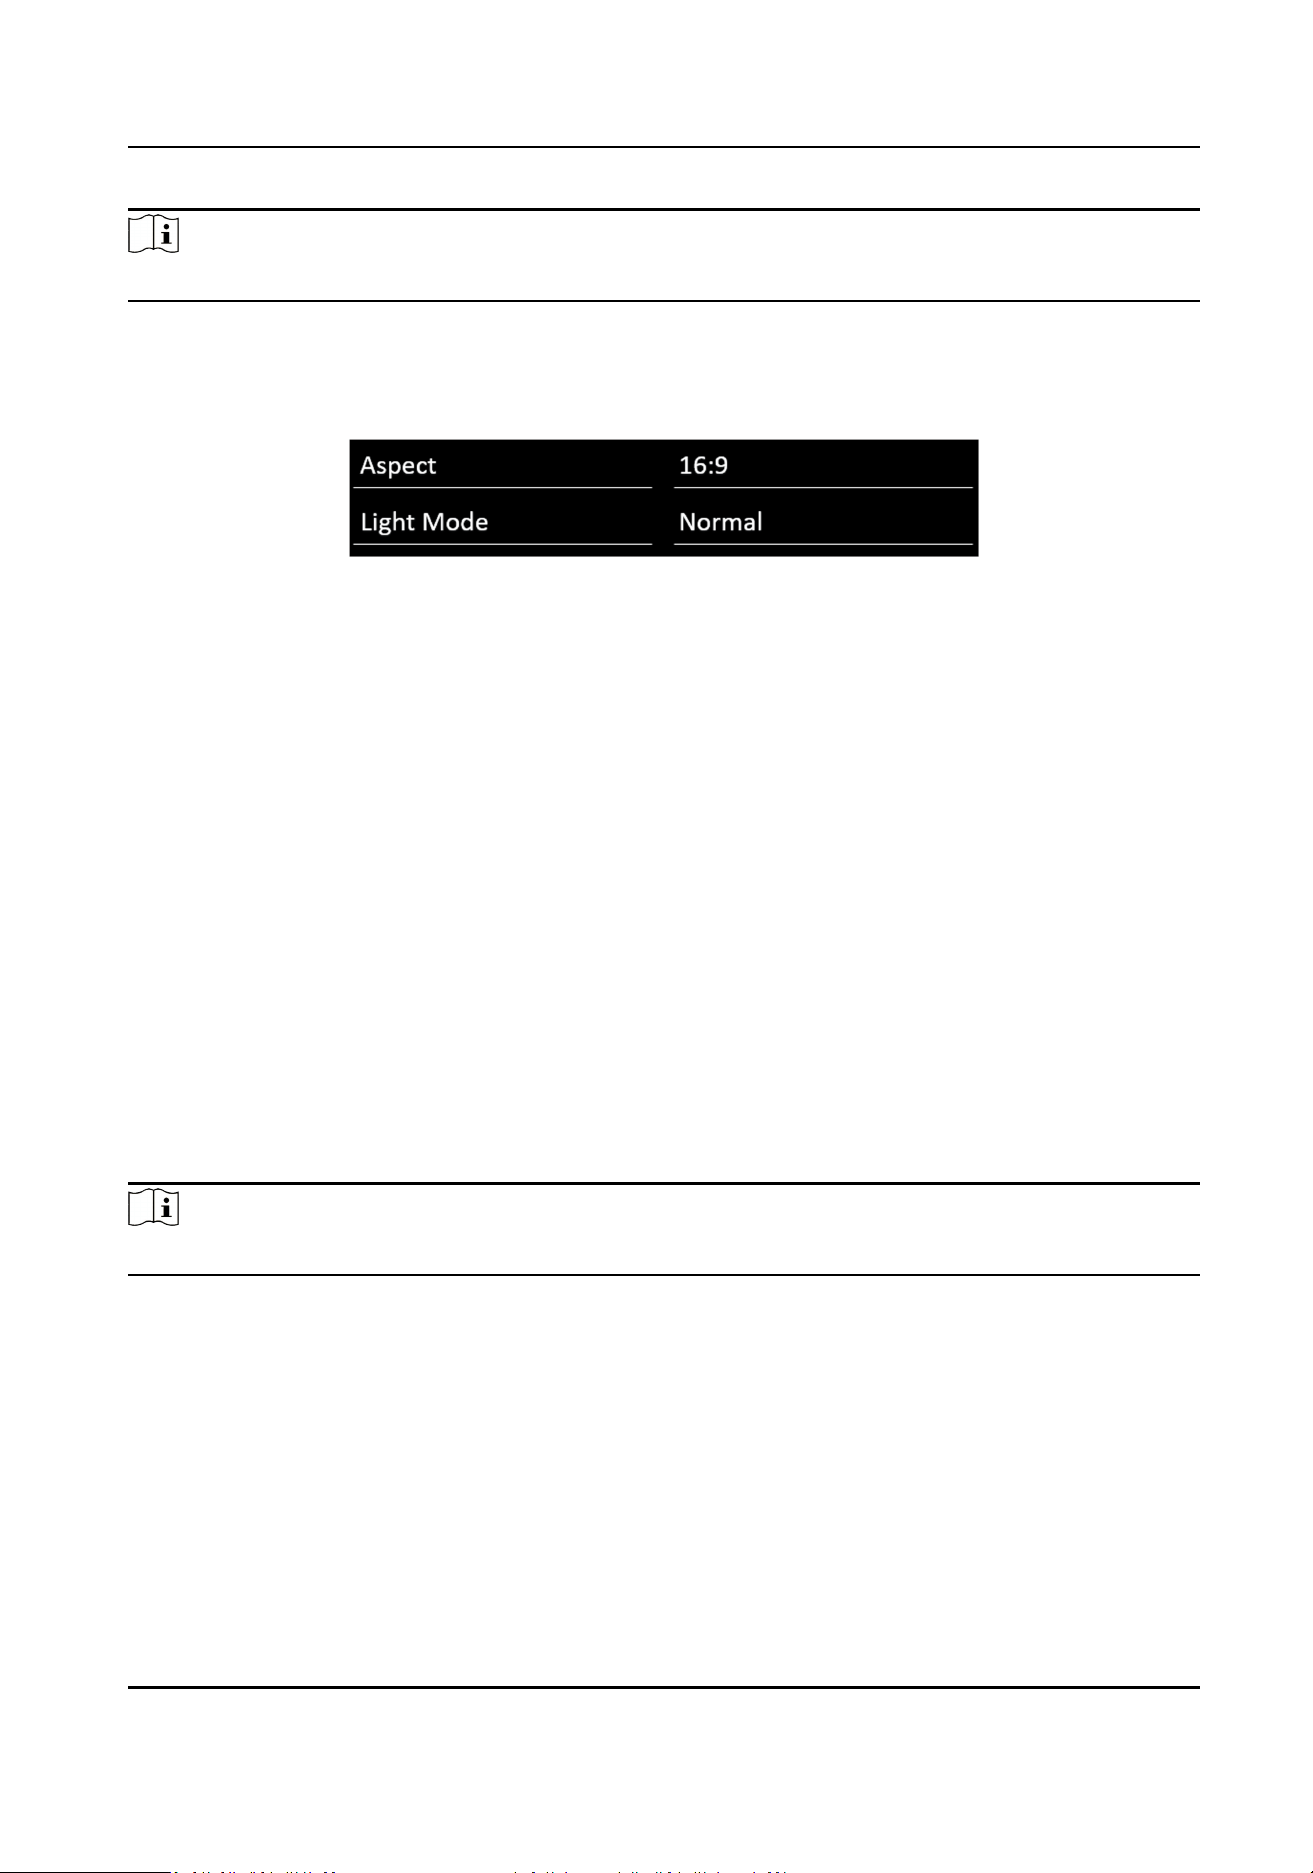
Aspect
Enter Menu → Display Seng . You can set Aspect as 16: 9, 4:3, or 1: 1 to adjust the display rao.
Figure 2-5 Aspect
Light Mode
You can adjust
Light Mode to adapt
dierent lighng condions.
Enter Menu → Display Seng .
Normal
Suitable for the normal light condion.
Night
Suitable for the night condion. The No. represents the intensity of the brightness. 1 means
weak, 2 means medium, and 3 means strong.
Sun
Suitable for the daylight
condion. The No. represents the intensity of the brightness. 1 means
weak, 2 means medium, and 3 means strong.
Image Freeze
Image freeze refers to freeze the current image on screen.
Enter Menu → Other Sengs , and then press ◄ or ►to set Image Freeze as Yes.
Note
Aer switching the input source, the image freeze is automacally disabled by default.
No Signal
When the monitor dose not have signal input for a long me, it will enter No Signal mode.
Enter Menu → Other
Sengs , and then press ◄ or ►to set No Signal as Blue, Black, or LOGO.
2.3
Congure Audio Sengs
You can switch the mute on/o, and adjust the volume/balance.
LCD Monitor User Manual
9
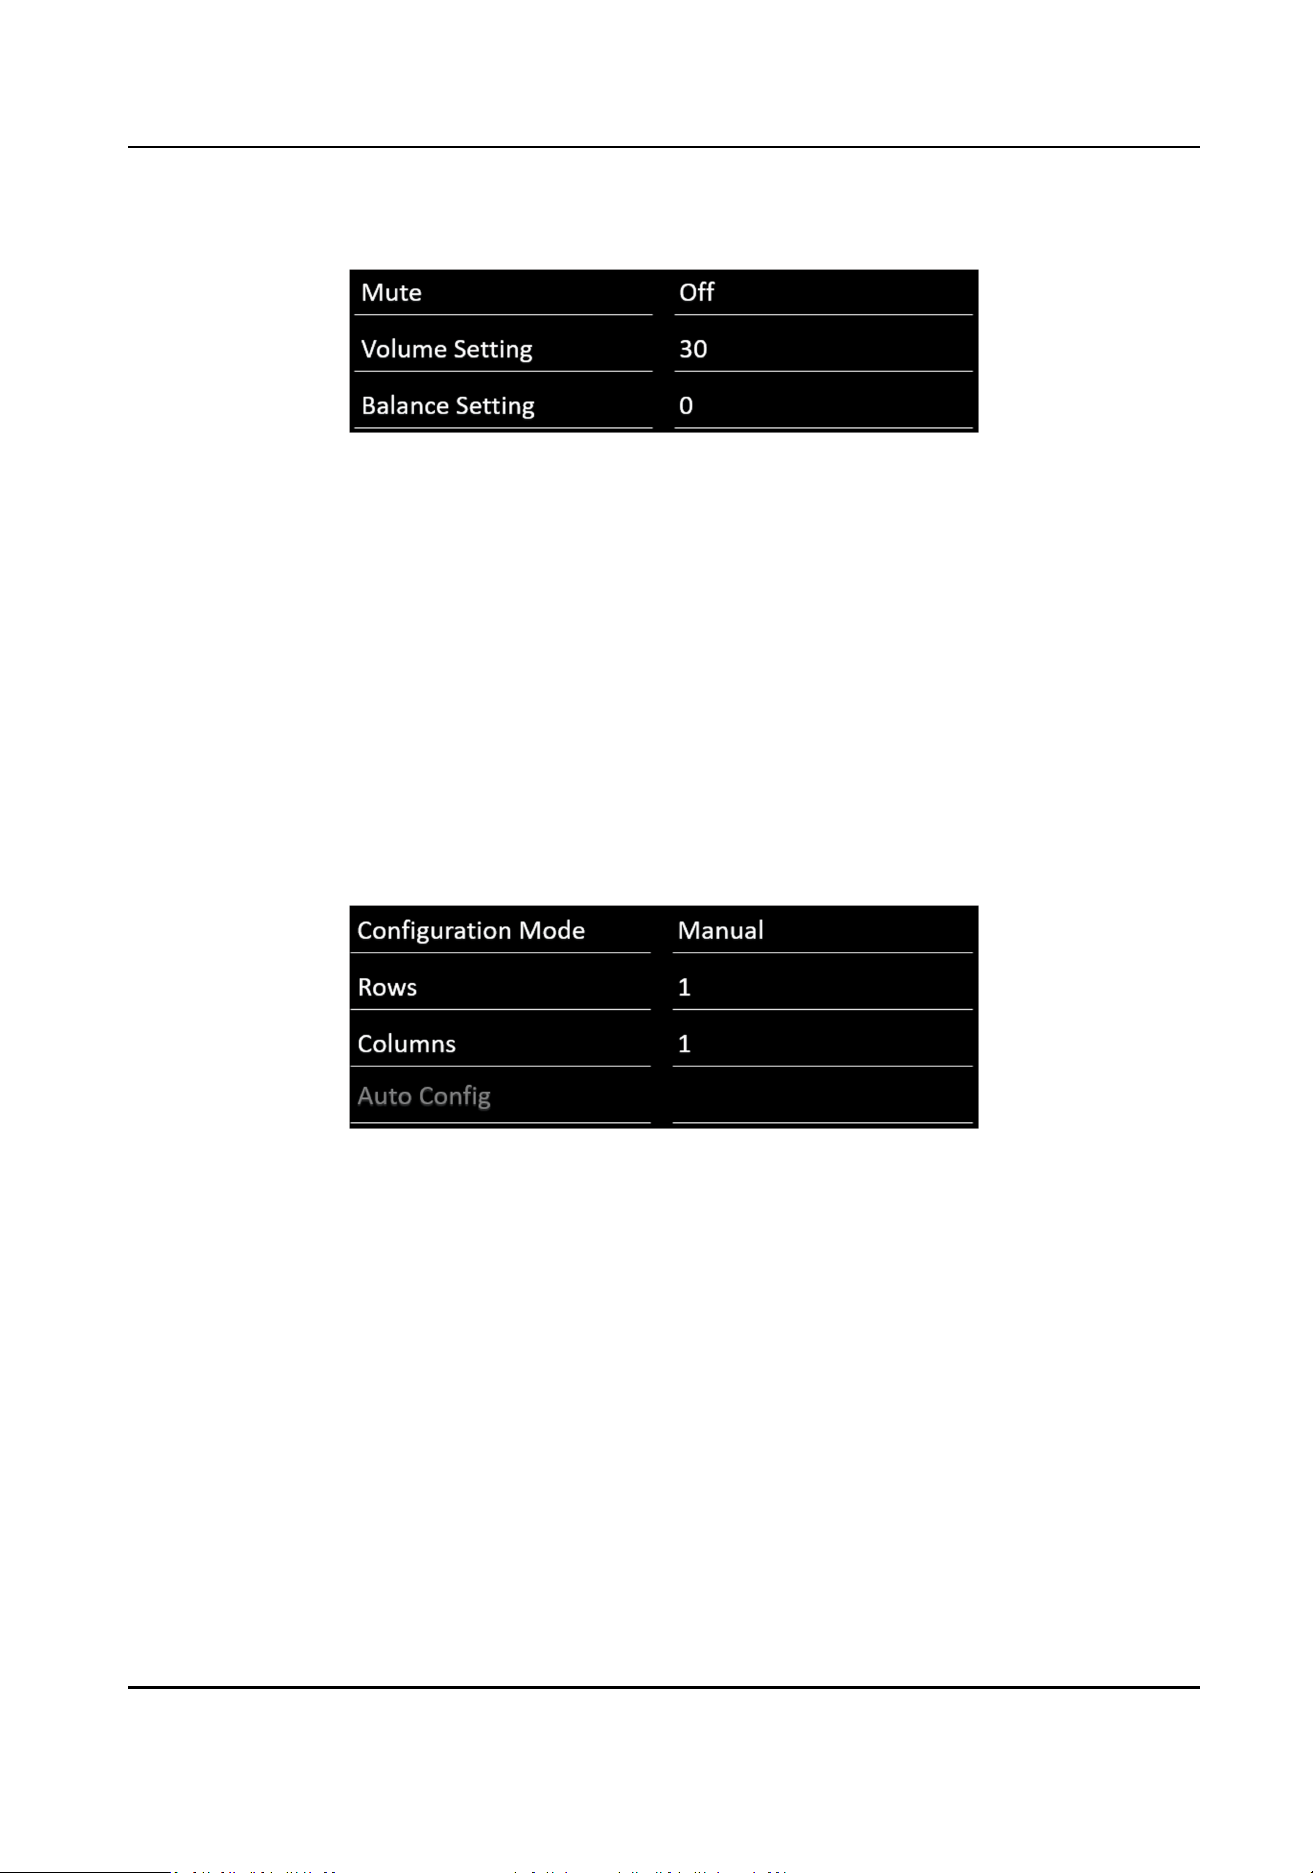
Enter Menu → Audio Seng , and then press ◄ or ► to set the mute, volume, and balance.
Figure 2-6 Audio
Sengs
2.4 Congure Screen ID
When you have a number of monitors, seng screen ID to monitors would help you to idenfy
each monitor.
2.4.1 Manually
Congure Screen ID
Steps
1.
Enter Menu → ID
Seng .
2.
Select Conguraon Mode as Manual.
Figure 2-7 Congure Screen ID (Manual)
3.
Set Rows and Columns as you required.
4.
Press OK.
Example
If you set Rows as 2, and Columns as 3, the screen ID would be 0203.
2.4.2
Automacally Congure Screen ID
Steps
1.
Enter Menu → ID Seng .
2.
Set Conguraon Mode as Auto.
LCD Monitor User Manual
10
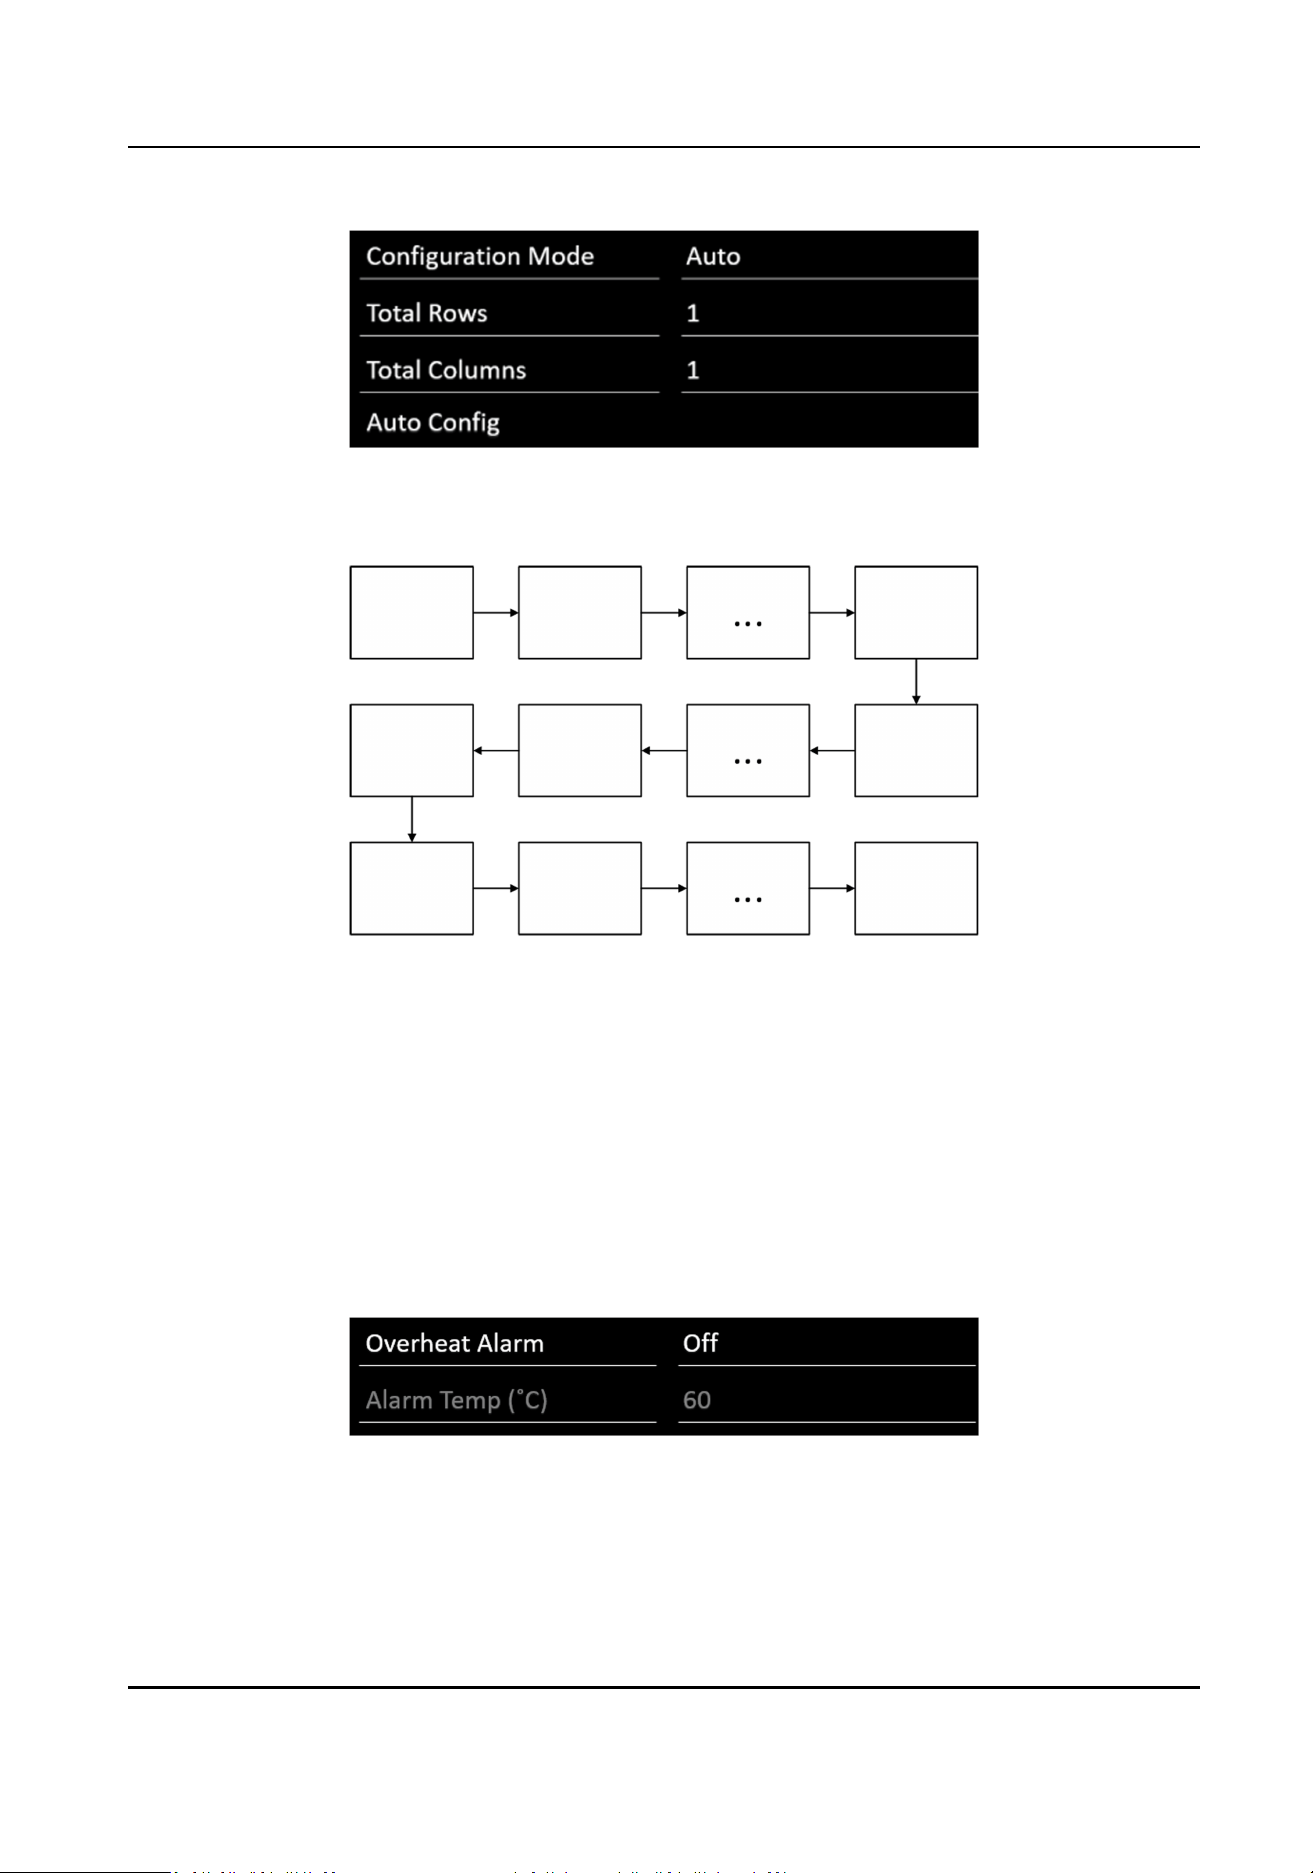
Figure 2-8 Congure Screen ID (Auto)
3.
Set Total Rows and Total Columns. The screen ID will be allocated as the order below.
Figure 2-9 Screen ID Order
4.
Select Auto Cong.
5.
Press OK.
2.5
Congure Overheat Alarm
When the board temperature exceeds or equals its set value, it will trigger an overheat alarm.
Steps
1.
Enter Menu → Alarm Seng .
Figure 2-10 Overheat Alarm
2.
Enable Overheat Alarm.
3.
Set Alarm Temp (° C) as your desire.
4.
Press OK.
LCD Monitor User Manual
11
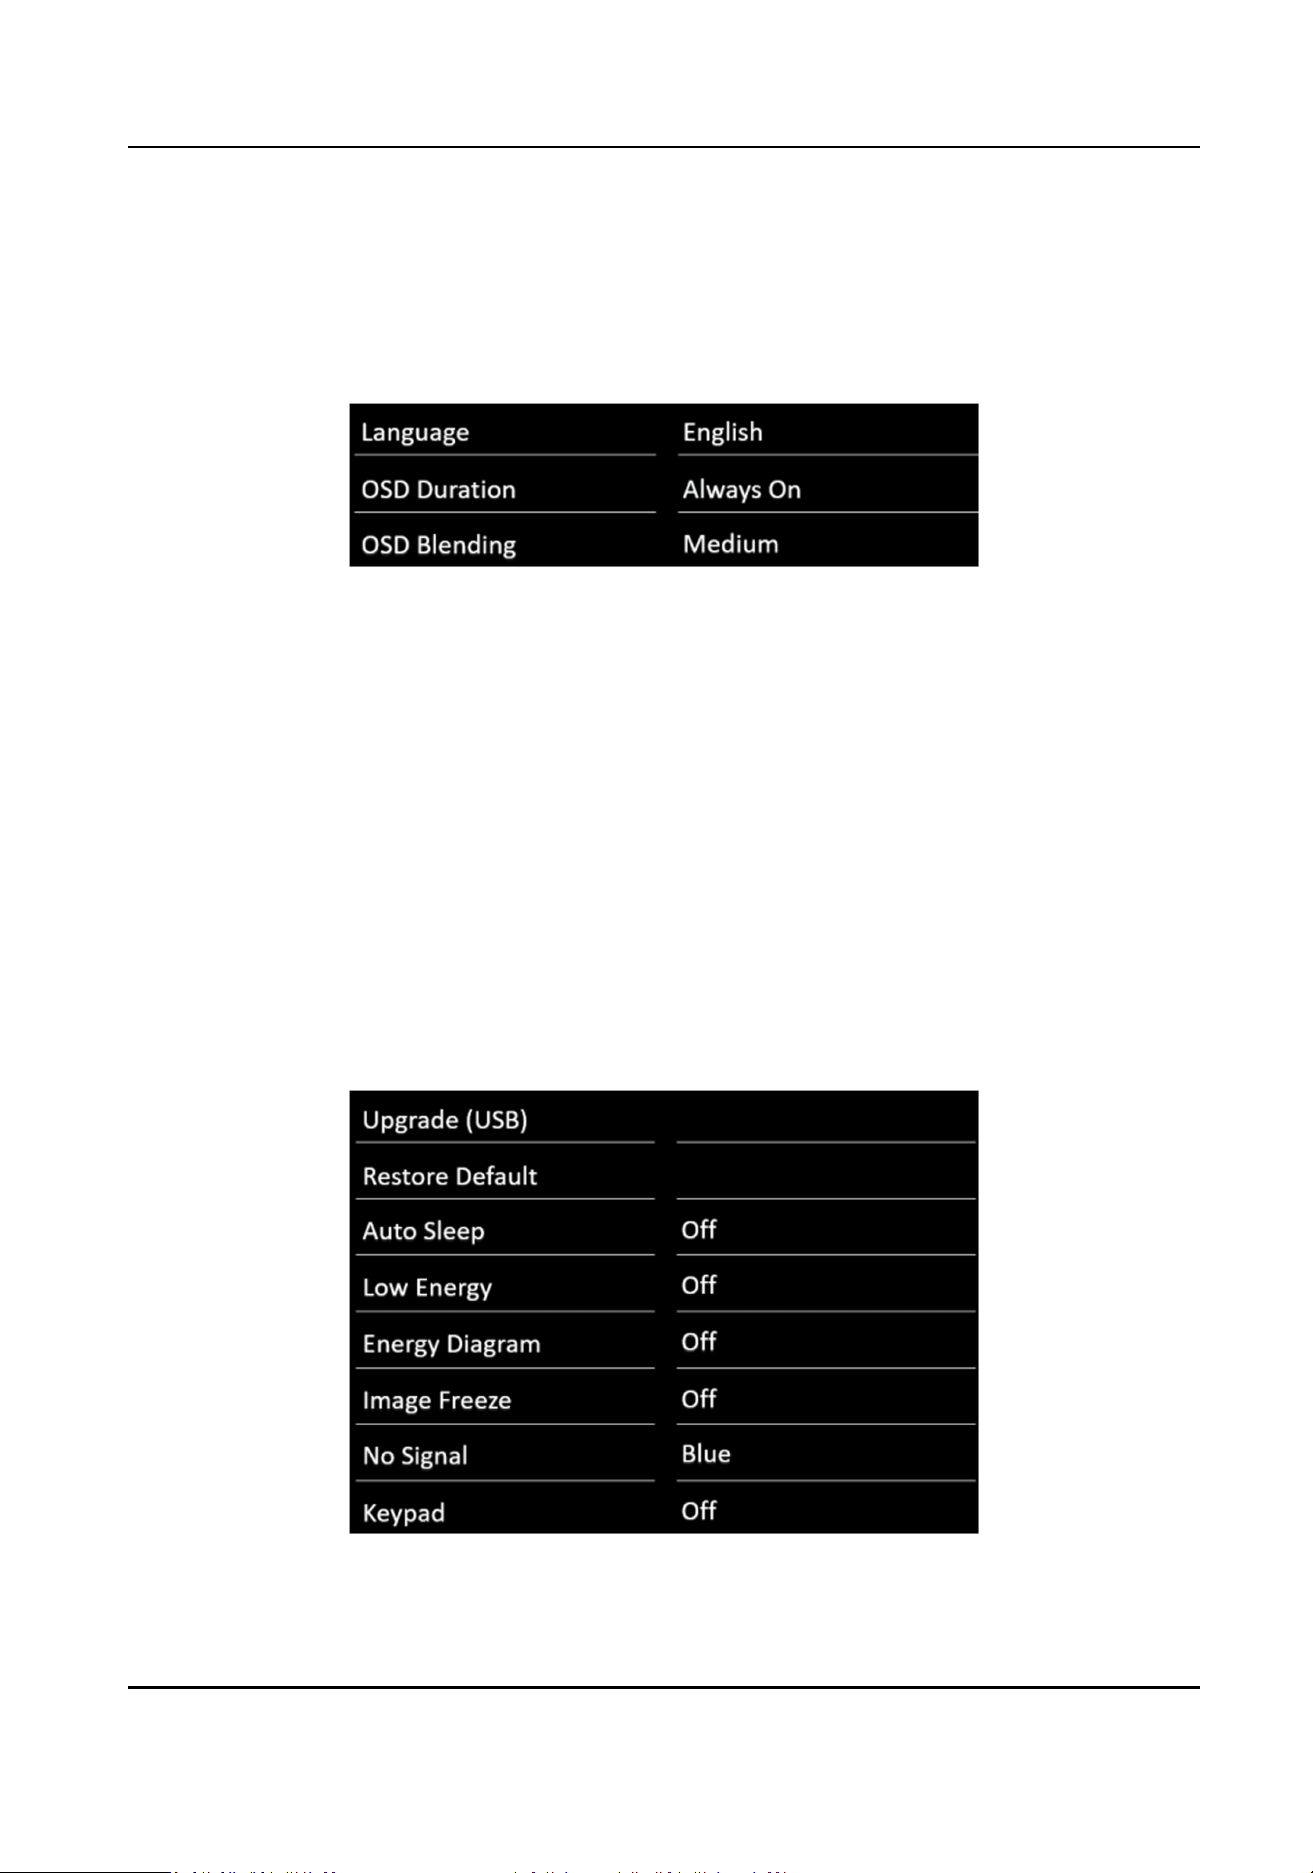
2.6 Menu Interface Sengs
You can set language, OSD duraon, and OSD blending.
Enter Menu → OSD Seng .
Figure 2-11 Menu Interface Sengs
Language
Chinese and English are available.
OSD Duraon
The OSD display me when you stopping operang the monitor.
OSD Blending
The OSD transparency.
2.7 Power
Sengs
You can set Auto Sleep, Low Energy and No Signal to make power plan.
Enter Menu → Other
Seng .
Figure 2-12 Power Sengs
LCD Monitor User Manual
12

Auto Sleep
When the monitor does not have signal input in a preset me, it will automacally go to sleep.
Low Energy
It reduces screen brightness and power consumpon to save power.
Energy Diagram
Energy diagram displays power
informaon on the top le of the screen.
Real-me Power
The current power
consumpon of the device.
Power Percentage
The rao of Real-me Power divided by the total power.
Accumulated Power
It sums all the power Low Energy mode has saved.
2.8 System Maintenance
You can view system informaon, upgrade system, restore default sengs, etc.
View System
Informaon
Enter Menu → System Info to view soware version, working me, device ID, and current
temperature..
Upgrade System
Enter Menu → Other Seng . Press Upgrade (USB) to upgrade system via USB interface.
Restore Default
Sengs
Enter Menu → Other Seng . Press Restore Default to restore all parameters to default sengs.
LCD Monitor User Manual
13

Chapter 3 Client Operaons
You can turn on/o the monitor, switch input signal through the ScreenControl client.
3.1 Log into the Client
Before You Start
Obtain the ScreenControl
soware from CD-ROM, and install it.
Steps
1.
Double-click the client
soware shortcut to open it.
2.
Select Control Mode as serial port.
3.
Select Screen Type as LCD-D50/4K.
4.
Select User Name as guest.
5.
Click Login to log into the client
soware.
3.2
Congure Serial Port
The client controls the screen by connecng the serial port.
Steps
1.
Click System Conguraon → Serial Port Conguraon .
2.
Set Serial Port according to the actual circumstance.
3.
Select Buad Rate as 9600.
4.
Click Open to connect the serial port.
5.
Oponal: Click Close to disconnect the serial port.
3.3 Startup/Shutdown
You can turn on/o the monitors via the client.
Before You Start
Congure the serial port, and see Congure Serial Port for details.
Steps
1.
Open the Screen Control page.
2.
Hold the mouse to draw a rectangle to select one or mulple virtual screens.
3.
Turn
on/o the monitors.
-
Right click to select Startup/Shutdown.
-
Click
to turn o the monitors. Or click to turn on the monitors.
LCD Monitor User Manual
14

3.4 Switch Input Source
You can switch the input source via the client.
Before You Start
Congure the serial port, and see Congure Serial Port for details.
Steps
1.
Open the Screen Control page.
2.
Hold the mouse to draw a rectangle to select one or
mulple virtual screens.
3.
Right click and select Switch Signal.
4.
Select the source according to your needs.
LCD Monitor User Manual
15

UD16448B-A