Loading ...
Loading ...
Loading ...
15
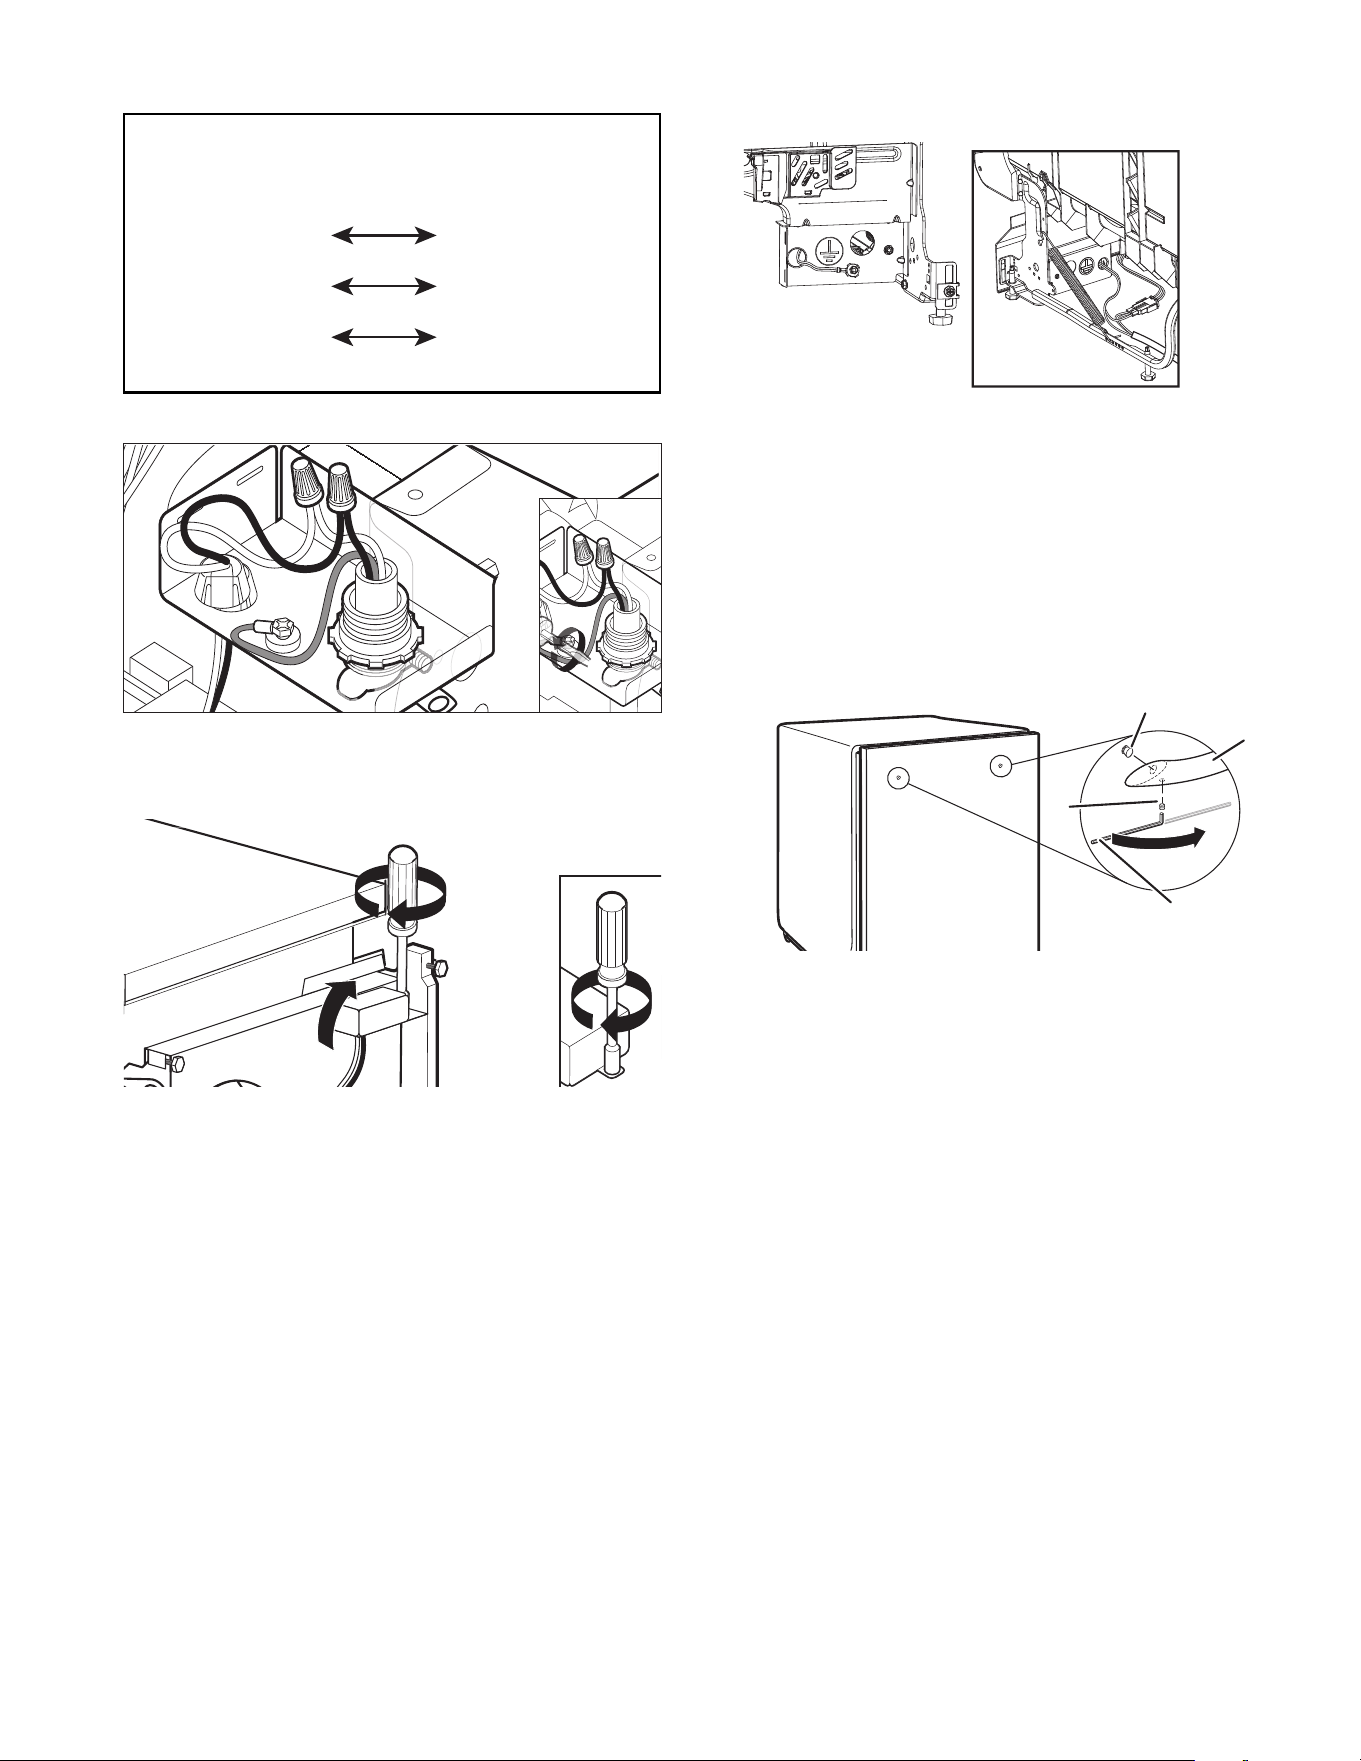
Wiring configuration
Power supply
wire:
Terminal box
wire:
white
white
black
black
ground wire
ground connector
27. Power cord – secure cord in strain relief
Tighten strain relief screws to secure cord.
28. Power cord – reinstall terminal box cover and
wires
Place wires inside terminal box. Insert tabs on left side of
cover. Make sure wires are tucked inside the box and not
pinched by the cover. Use a 1/4" hex-head socket, nut driver,
or Torx
®
T20
®
screwdriver, and the screw removed in step 22
to secure the terminal box cover.
If power cord supplied model, remove the first tie strap
closest to the plug to maximize the cord length. Do not
remove any other tie straps.
NOTE: Route power cord out the rear of the dishwasher. Do
not plug cord into an outlet until instructed to do so.
29. Factory Installed Power Cord (on some
models)
Select products include a factory installed power cord. For
these products, no wiring during install is required. A ground
wire to chassis connection is made inside the existing
terminal box, and the normal terminal box cover is not
included.
No connection or modification of wiring in that junction box is
required for these factory power cord models.
Install Door Handle (on some
models)
30. Install door handle
A
D
B
C
A. Setscrew (in
bottom of
handle)
B. Hex key
C. Handle
D. Mounting stud
IMPORTANT: Do not scratch the front panel during this
procedure. If door panel has a protective film, peel film back
past the point of the handle studs before installing handle.
Handle is easiest to install while unit is on its back.
Remove the door handle and hex key from the packaging.
Setscrews are already installed in the handle. Place handle
on mounting studs with the setscrews facing down. Push the
door handle tightly against the door. Insert the short end of
the hex key into the setscrews. Tighten the setscrews 1/4
turn past snug.
Retain hex key with Owner’s Manual.
Loading ...
Loading ...
Loading ...