Loading ...
Loading ...
Loading ...
10
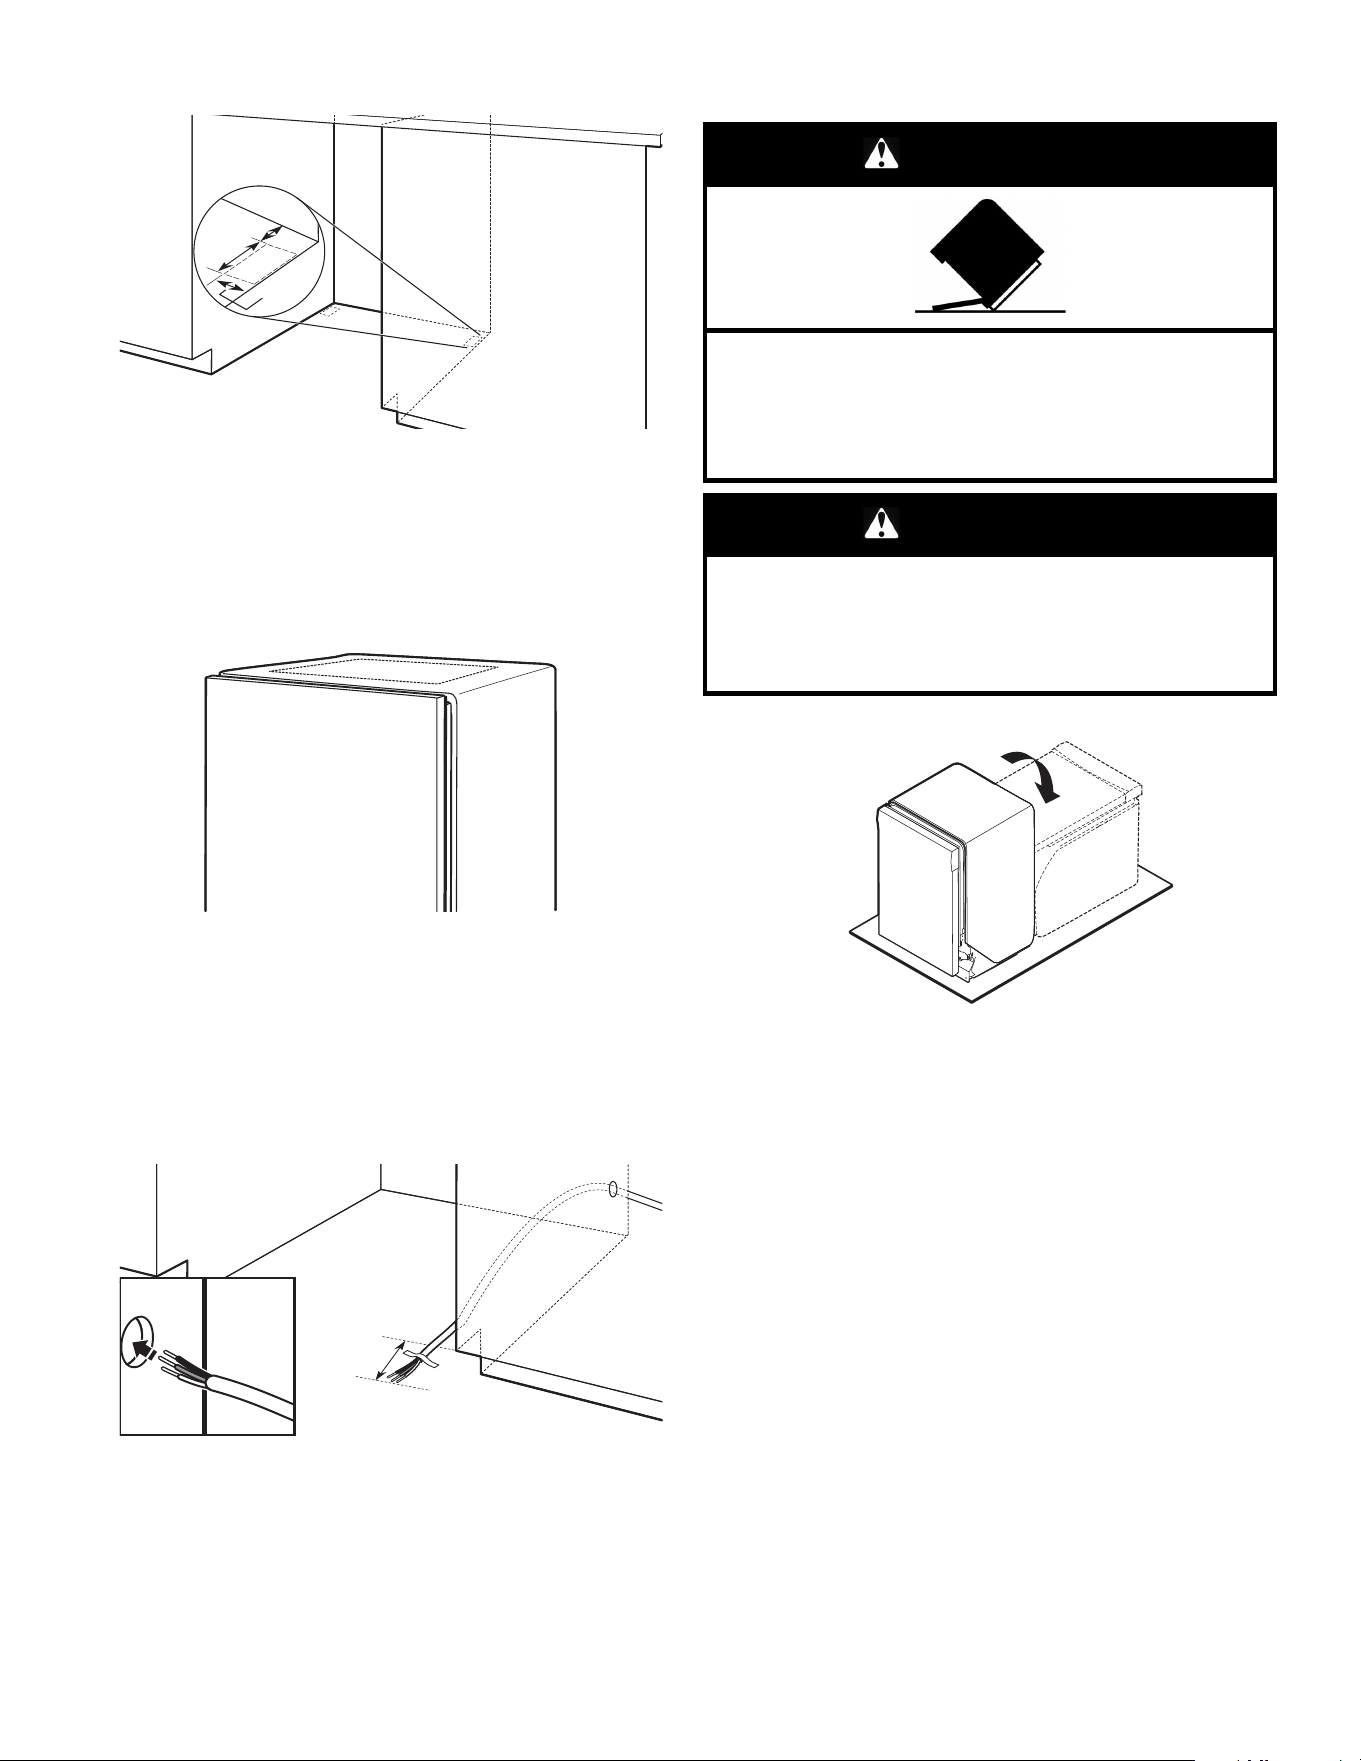
5. Built-up floors – add shims as needed
4"
101 mm
2¾"
70 mm
2"
50 mm
Built-up floors: If the kitchen floor is higher than the cabinet
opening’s floor—for example, the kitchen floor tile does not
extend into the cabinet opening—add shims, as needed, in
the area shown to bring the dishwasher up to 34" (864 mm)
below the countertop.
NOTE: Shims must be securely attached to floor to avoid
movement when the dishwasher is in use.
6. If installing into a 33
1
/
2
" (851 mm) opening
Cut insulation blanket along perforation for cabinet opening
height of 33
1
/
2
" (851 mm). For other cabinet opening heights,
do not cut the insulation blanket.
Electrical Connection
– For Direct Wire, begin with step 7
– For Power Cord, wait until step 22
– For Factory Installed Power Cord, begin with Step 29
7. Direct wire – route cable
6”
(152 mm)
If installing with direct wire, route the cable as shown.
Route cable from power supply through cabinet hole. (Cable
must extend to the right-front side of cabinet opening.) Tape
cable to the floor in area shown. This will prohibit cable from
moving when dishwasher is moved into cabinet opening.
NOTE: If removing a previous dishwasher with a power cord,
you will need to transfer the power cord to the new
dishwasher.
Prepare Dishwasher
WARNING
Tip Over Hazard
Do not use dishwasher until completely installed.
Do not push down on open door.
Doing so can result in serious injury or cuts.
WARNING
Excessive Weight Hazard
Use two or more people to move and install or uninstall
appliance.
Failure to do so can result in back or other injury.
8. Put dishwasher on its back
Helpful Tip: Place cardboard under dishwasher until installed
in cabinet opening to avoid damaging floor covering.
Using 2 or more people, grasp sides of dishwasher door
frame and place the dishwasher on its back.
Do not use the door panel as a worktable without first
covering it with a towel to avoid scratching the door panel.
NOTE: On some models, once the dishwasher is on its back,
pull on the door handle to remove it from the access panel.
Loading ...
Loading ...
Loading ...