Loading ...
Loading ...
Loading ...
23
CHANGING THE WATER AND AIR FILTERS
Your refrigerator is equipped with separate water and air
ltering systems. The water lter system lters all the water
used to produce ice. The air lter removes odors and impu-
rities from the refrigerator compartment.
NOTE
The control panel includes controls to monitor the
status of your water and air lters. See the Controls
section for more information.
About your advanced water lter
The lter system is tested and certi-
ed by NSF International to NSF/ANSI
Standards 42 and 53 for the reduction
of claims specied on the performance
data sheet.
Do not use with water that is microbiologically unsafe or of
unknown quality without adequate disinfection before or af-
ter the system. Systems certied for cyst reduction may be
used on disinfected waters that may contain lterable cysts.
• Rated Capacity - 240 gallons
• Rated service ow - .5 gallons per minute
• Maximum Rated Pressure - 100 pounds per square
inch
• Recommended Minimum Operating Pressure: 30
pounds per square inch
• Operating Temp.: Min. 33°F, Max. 100°F
Water lter
The water lter is located at the lower left side of the
fresh food compartment.
Replacing your water lter
In general, you should change the water lter every six
months to ensure the highest possible water quality. The
Water Filter Status light on the Touch Panel prompts you
to replace the lter after the six month time period has
elapsed. The water lter status light on this model is not
performance tested or certied by NSF.
If your refrigerator has not been used for a period of time
(during moving for example), change the lter before rein-
stalling the refrigerator.
It is not necessary to turn the water supply off to change
the lter. Be ready to wipe up any small amounts of water
released during the lter replacement.
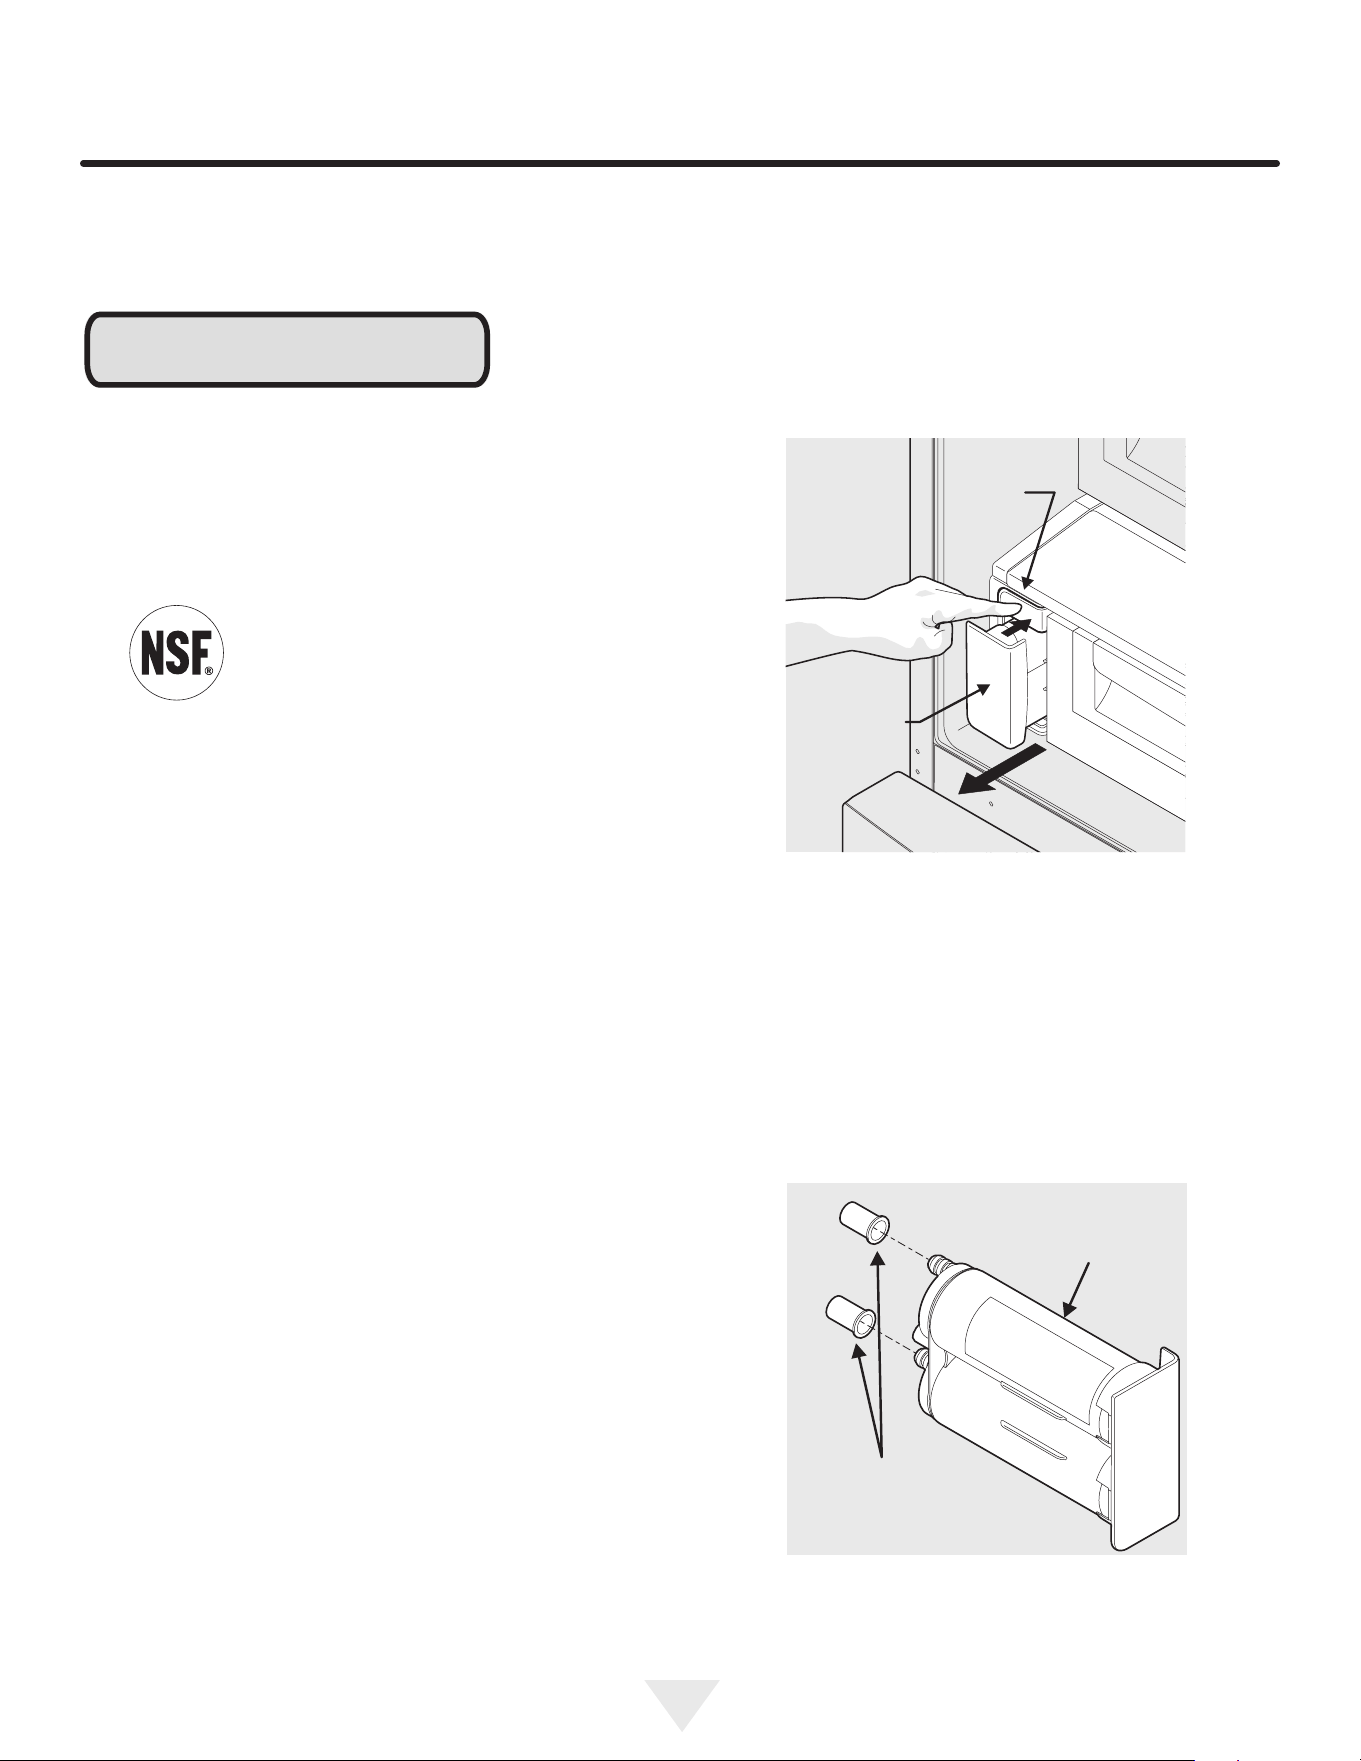
1. Push the lter release button above the cartridge to
disconnect it.
2. Slide the old water lter cartridge straight out of the
housing and discard it.
3. Unpack the new lter cartridge and remove the two pro-
tective caps covering the inlet and exit of the lter. Slide
the lter gently into the housing until it stops against the
snap-in connector at the back of the housing.
Push water lter button
Water lter
button
Water lter
cartridge
Replacement
water lter
Remove two
protective caps
Figure 49
Figure 50
Loading ...
Loading ...
Loading ...