Loading ...
Loading ...
Loading ...

AD1000 AD1000
76
OPERATINGTHEAIRDOCTOR
AD1000
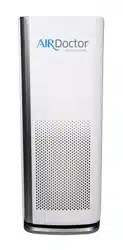
AIR PURIFIER
OPERATINGTHEAIRDOCTOR
AD1000
AIR PURIFIER
Before first use, remove filters and remove plastic bag from filters, then reinstall filters.
Then reinstall front cover.
Plug the unit into an electrical outlet. The unit will be ready to run. Read the following directions
to select desired settings.
AIR QUALITY MONITOR
Air Monitor
The AirDoctor comes with an Air Quality Monitor that continuously monitors the quality of
the air in the room. The LED light located on the front will light up according to the air quality.
The Air Quality Monitor is able to show 3 air quality levels.
BLUE = Good air quality / ORANGE = Fair air quality / RED = Poor air quality
You can choose to set the AirDoctor to “Auto”. This will enable the AirDoctor to adjust the
Fan speed according to the Air Quality. In Auto mode, the fan speed will be adjusted
as follows:
Good Air Quality = Low fan speed
Fair Air Quality = Medium fan speed
Poor Air Quality = High and Boost fan speed
CONTROL PANEL
1. Power Control
As soon as you press
the power button , the
AirDoctor will start in the
Auto mode. As soon as the
auto program has been
activated it will start up in
the high-speed mode, the
sensor will start to detect
the amount of particulate
in the air. As the particles
are detected, the AirDoctor
will select the purification
speed (fan speed) that
is appropriate to the
particulate contamination
in the room.
In most cases we recommend that you leave the AirDoctor in the Auto mode, for other
purication modes, see the next page.
2. Fan Speed Control
The AirDoctor has four different fan speed settings: Low, Medium, High, and Boost. Each
mode has its own indicator light which lights up when the setting is chosen. The speed
selected determines how rapidly you want to clean the air. The “LOW” and “MEDIUM”
settings are great for everyday use. The “HIGH” setting is great for areas with more airborne
contaminants (such as excessive smoke, pet dander, etc), or areas used frequently by allergy-
sufferers. The “BOOST” setting is best used for shorter bursts of time when you
want to rapidly purify the air.
3. Auto Mode
The AirDoctor is equipped with an air sensor to monitor the quality of your air. Simply press
the Auto button to activate the air monitoring system. The monitor will test the air quality
and automatically adjust the fan speed to remove the air contaminants. The top of the
display is equipped with LED lights to notify you of the air quality. RED color is for poor,
ORANGE for fair and BLUE for good quality air.
4. Dim Mode
If the LED lights are too bright, activate the “Dim Mode” to turn off the LED lights and
the lighted display.
5. Timer Control
The AirDoctor air purifier can be programmed to turn off after a preset amount of time. Press
the “TIME” button to program the timer. Each press will add one hour up to a total of 24
hours. Keeping the button pressed will automatically increase to 24 hours, 1 hour at a time.
6. ION Generator
Press the ION button to turn on the IONs. Press it again to turn the IONs off.
7. Clean Filter Indicator Light
The AirDoctor Clean Filter Indicator Light will turn on each time a filter needs to be replaced.
To reset the filter indicator, press the ION and DIM buttons together for 3 seconds. The CLEAN
FILTER light will flash 3 times and then turn off completely, indicating the unit has been reset.
8. 24-Hour Timer Display
Air Quality Monitor
CONTROL LOCK FEATURE
The AirDoctor has a Control Lock feature to prevent a person (child) or a pet from
interrupting the running mode by accident. When the control lock feature has been activated,
none of the buttons on the control panel will work. The only way to change any setting is to
deactivate the control lockout feature or to unplug the AirDoctor.
To activate control lock feature
•
Press “Timer” and “Ion” at the same time for 3 seconds
•
This may be done at anytime while the AirDoctor
is running, including on Dim mode
To deactivate control lock feature
•
“Timer” and “Ion” at the same time for 3 seconds
Loading ...
Loading ...
Loading ...