THIS INSTRUCTION BOOKLET CONTAINS IMPORTANT SAFETY INFORMATION. PLEASE READ AND KEEP FOR FUTURE REFERENCE.
EN FR
USER'S MANUAL/MANUEL DE L'UTILISATEUR
ES10113US-WH ES10113CA-WH
Portable Air Conditioner/ Climatiseur Portatif
EN
DE
FR
ES
IT
PL
With your inspiring rating, COSTWAY will be more consistent to offer you EASY
SHOPPING EXPERIENCE, GOOD PRODUCTS and EFFICIENT SERVICE!
Mit Ihrer inspirierenden Bewertung wird COSTWAY konsistenter sein, um Ihnen EIN
SCHÖNES EINKAUFSERLEBNIS, GUTE PRODUKTE und EFFIZIENTEN SERVICE zu
bieten!
Avec votre évaluation inspirante, COSTWAY continuera à fournir une EXPÉRIENCE
D’ACHAT PRATIQUE, des PRODUITS DE QUALITÉ et un SERVICE EFFICACE !
Con su calificación inspiradora, COSTWAY será más consistente para ofrecerle
EXPERIENCIA DE COMPRA FÁCIL, BUENOS PRODUCTOS y SERVICIO EFICIENTE.
Con la tua valutazione incoraggiante, COSTWAY sarà più coerente per offrirti ESPE-
RIENZA DI ACQUISTO FACILE, BUONI PRODOTTI e SERVIZIO EFFICIENTE!
Dzięki twojej opinii COSTWAY będzie mógł oferować jeszcze WYGODNIEJSZE
ZAKUPY, LEPSZE PRODUKTY i SPRAWNIEJSZĄ OBSŁUGĘ KLIENTA.
US office: Fontana UK office: Ipswich AU office: Truganina
DE office: Hamburg
FR office: Saint Vigor d'Ymonville
PL office: Gdańsk
/

02 03
Content
Notes
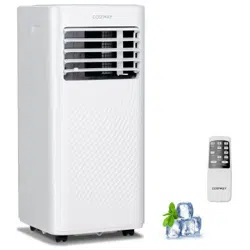
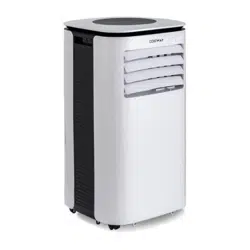
Thank you for choosing the luxurious and elegant portable
air conditioner. Please keep the manual for future reference,
and read the manual carefully before use.
* After the air conditioning is installed, ensure that the power plug is
intact and firmly plugged into the power outlet, and place the power
cord orderly to prevent someone from being tripped or pulling out the
plug.
* Do not put any object into the air inlet and outlet of the air
conditioning. Keep the air inlet and outlet free from obstructions.
* When drainage pipes are installed, ensure that the drainage pipes are
properly connected, and are not distorted or bended.
* While adjusting the upper and lower wind-guide strips of the air
outlet, pluck it with hands gently to avoid damaging wind-guide strips.
* When moving the machine, make sure that it is in an upright
position.
* The machine should stay away from gasoline, flammable gas, stoves
and other heat sources.
* Don't disassemble, overhaul and modify the machine arbitrarily,
otherwise it will cause a machine malfunction or even bring harm to
persons and properties. To avoid danger, if a machine failure occurs,
ask certified technician to repair it.
* Do not install and use the air conditioning in the bathroom or other
humid environments.
* Do not pull the plug to turn off the machine.
* Do not place cups or other objects on the body to prevent water or
other liquids from spilling into the air conditioning.
* Do not use insecticide sprays or other flammable substances near the
air conditioning.
* Do not wipe or wash the air conditioning with chemical solvents such
as gasoline and alcohol. When you need to clean the air conditioning,
you must disconnect the power supply, and clean it with a half-wet soft
cloth. If the machine is really dirty, scrub with a mild detergent.
* The appliance can be used by children aged from 8 years and above
and persons with reduced physical, sensory or mental capabilities if
they have been given supervision or instruction concerning use of the
appliance in a safe way and understand the hazards involved. Children
shall not play with the appliance. Cleaning and maintenance shall not
be made by children without supervision.
* The air conditioning is only suitable for indoor use, and is not suitable
for other applications.
* Follow local grid interconnection rules while installing the air
conditioning and ensure that it is properly grounded. If you have any
question on electrical installation, follow the instructions, and if
necessary, ask a professional electrician to install it.
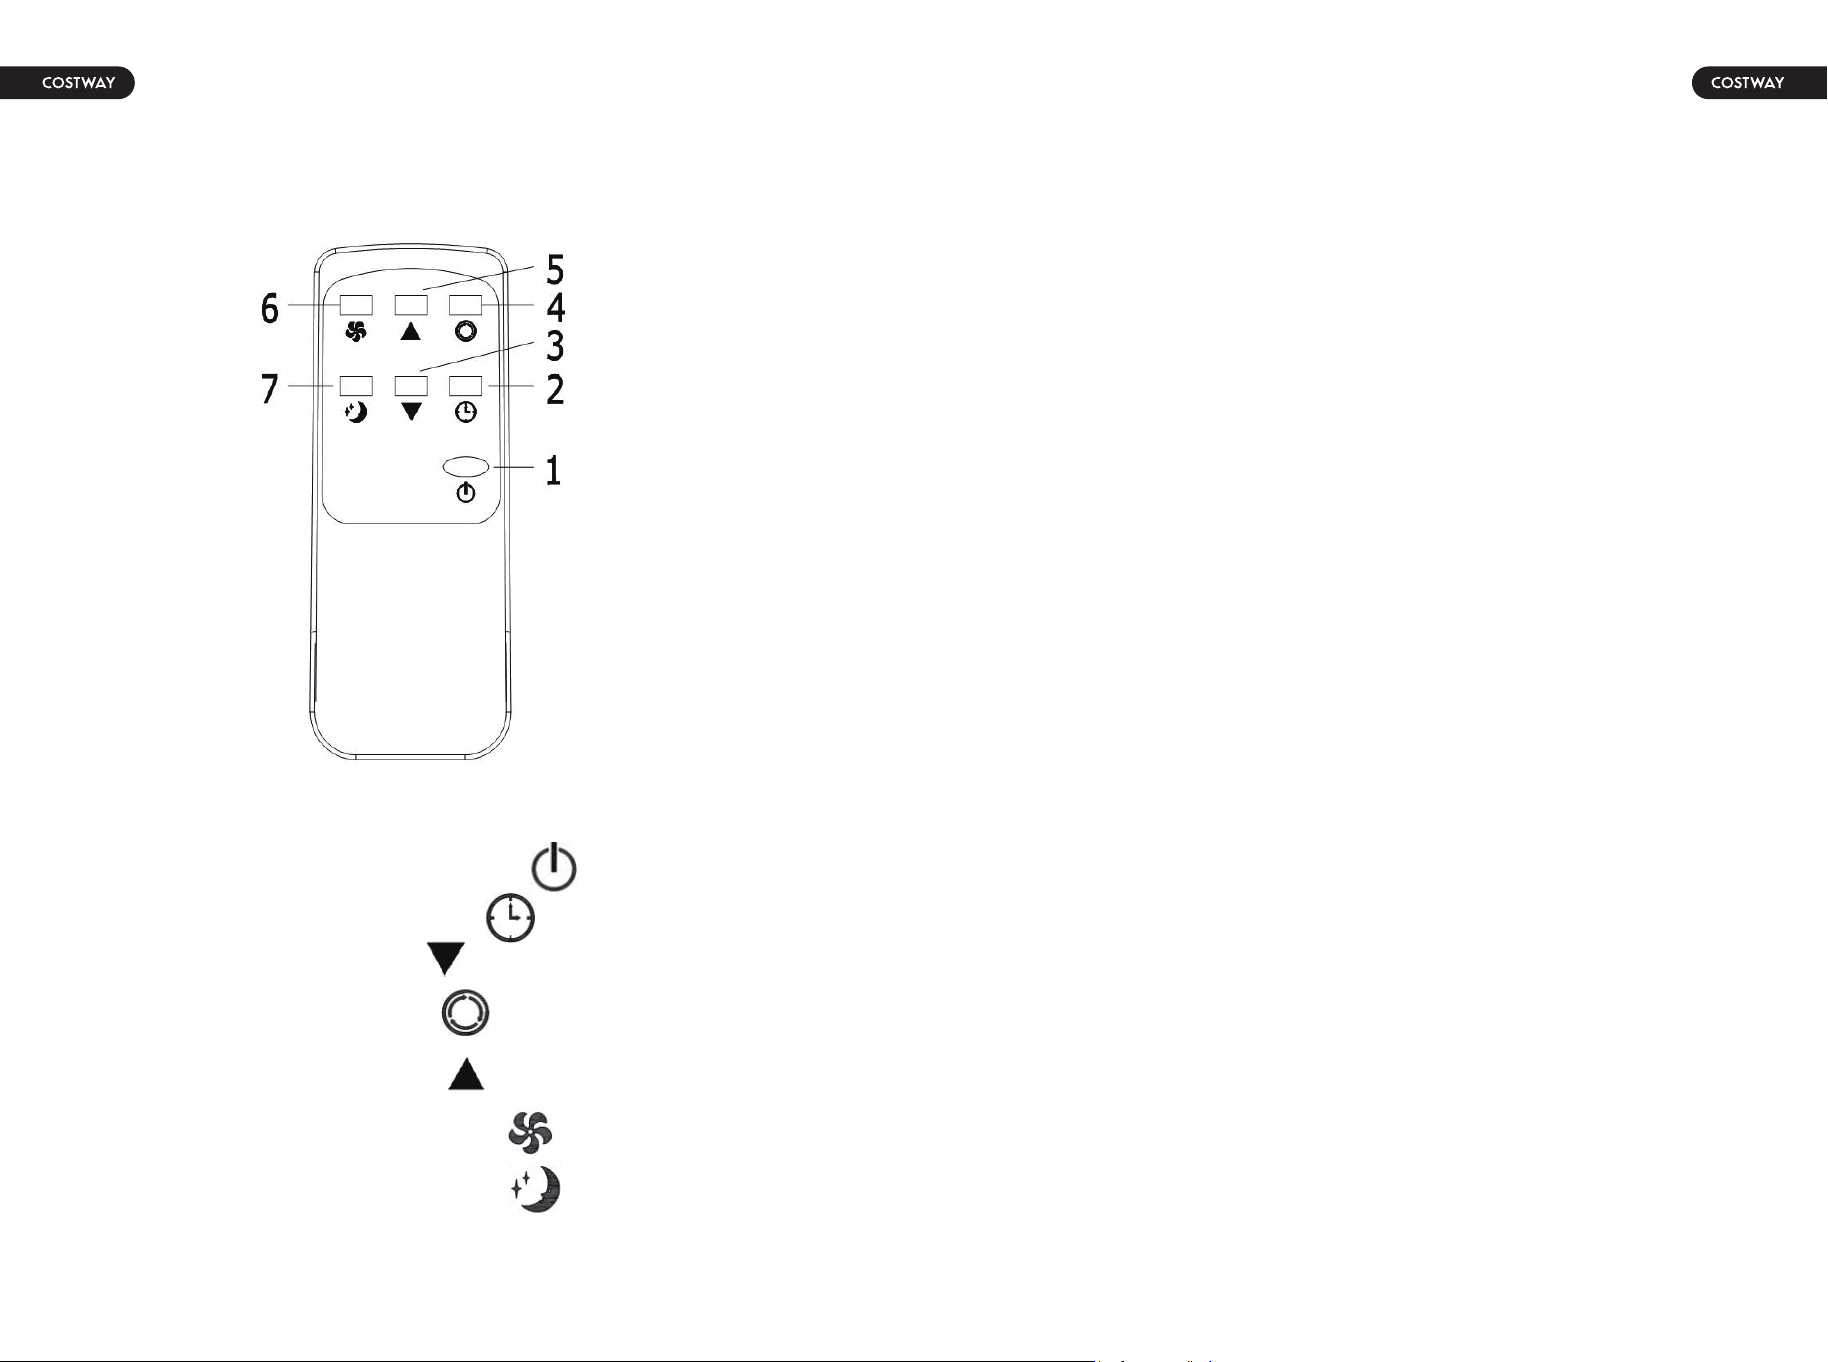
* Place the machine in a flat and dry place and keep a distance of above
50cm/20” between the machine and the surrounding objects or walls.
I. Notes
II. Features and Components
III. Installation and Adjustment
IV. Control Setting
V. Drainage Instructions
VI. Maintenance
VII. Troubleshooting
VIII. Appendix
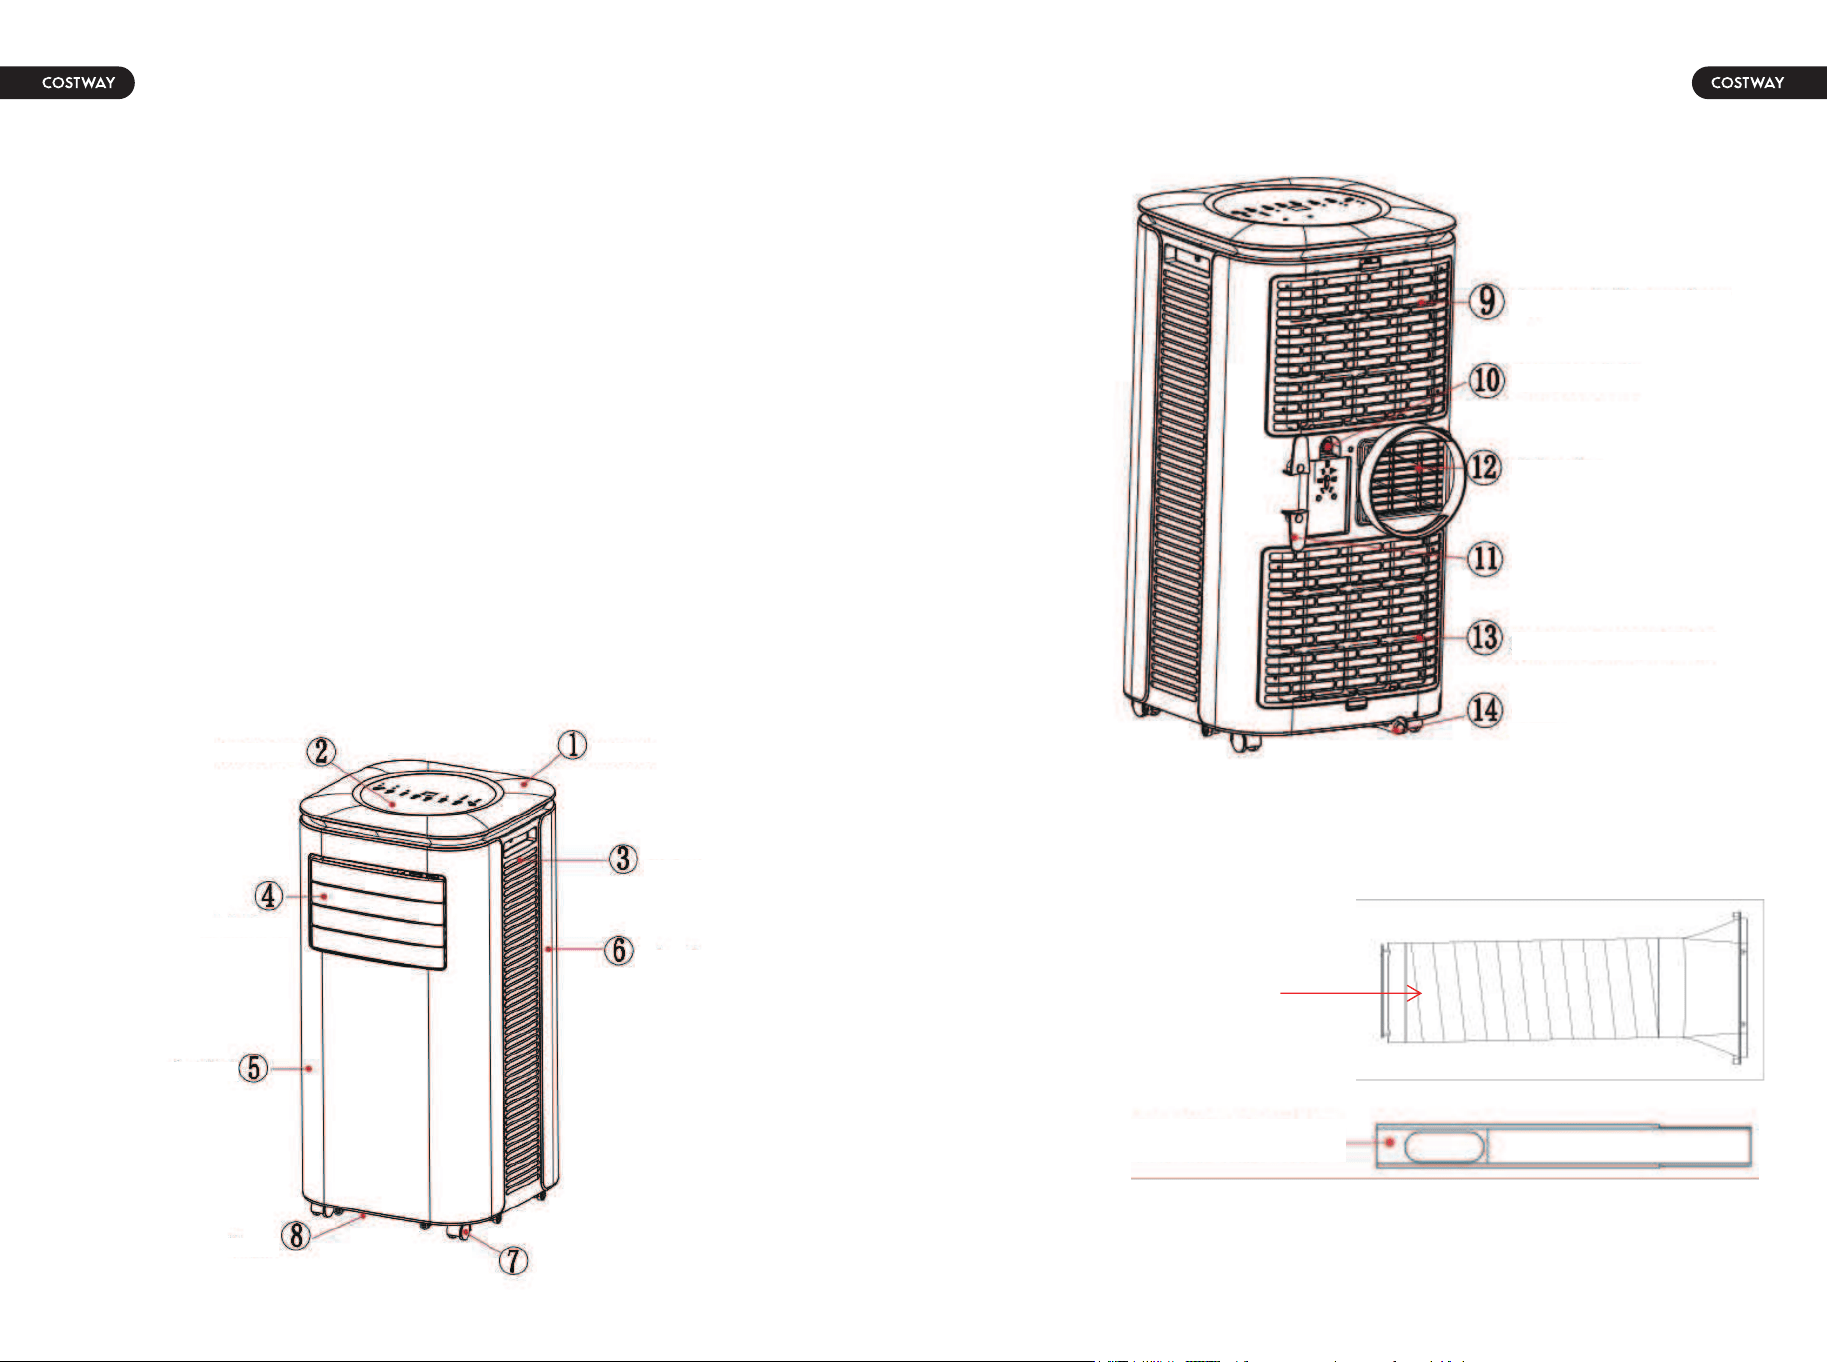
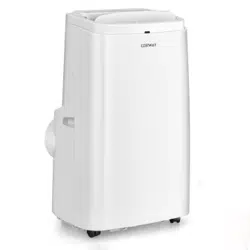
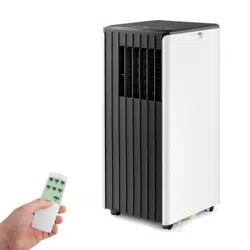
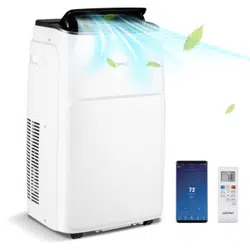
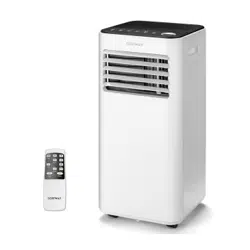
Features and Components
1. Features
New look, compact structure, streamlined machine, aristocratic
atmosphere.
With cooling,dehumidification and fan function, Continuous Water
Drainage Functions.
LED displays the control panel. The machine is beautiful and elegant.
High-quality remote control is equipped to facilitate operation. It adopts
a user-friendly remote control design.
Outdoor interface is set high to facility assembly and keep the smooth
flow of the heat pipe.
Air filtration capability.
Timing switch function,
Protection function of automatically restarting the compressor after
three minutes, a variety of other protection functions.
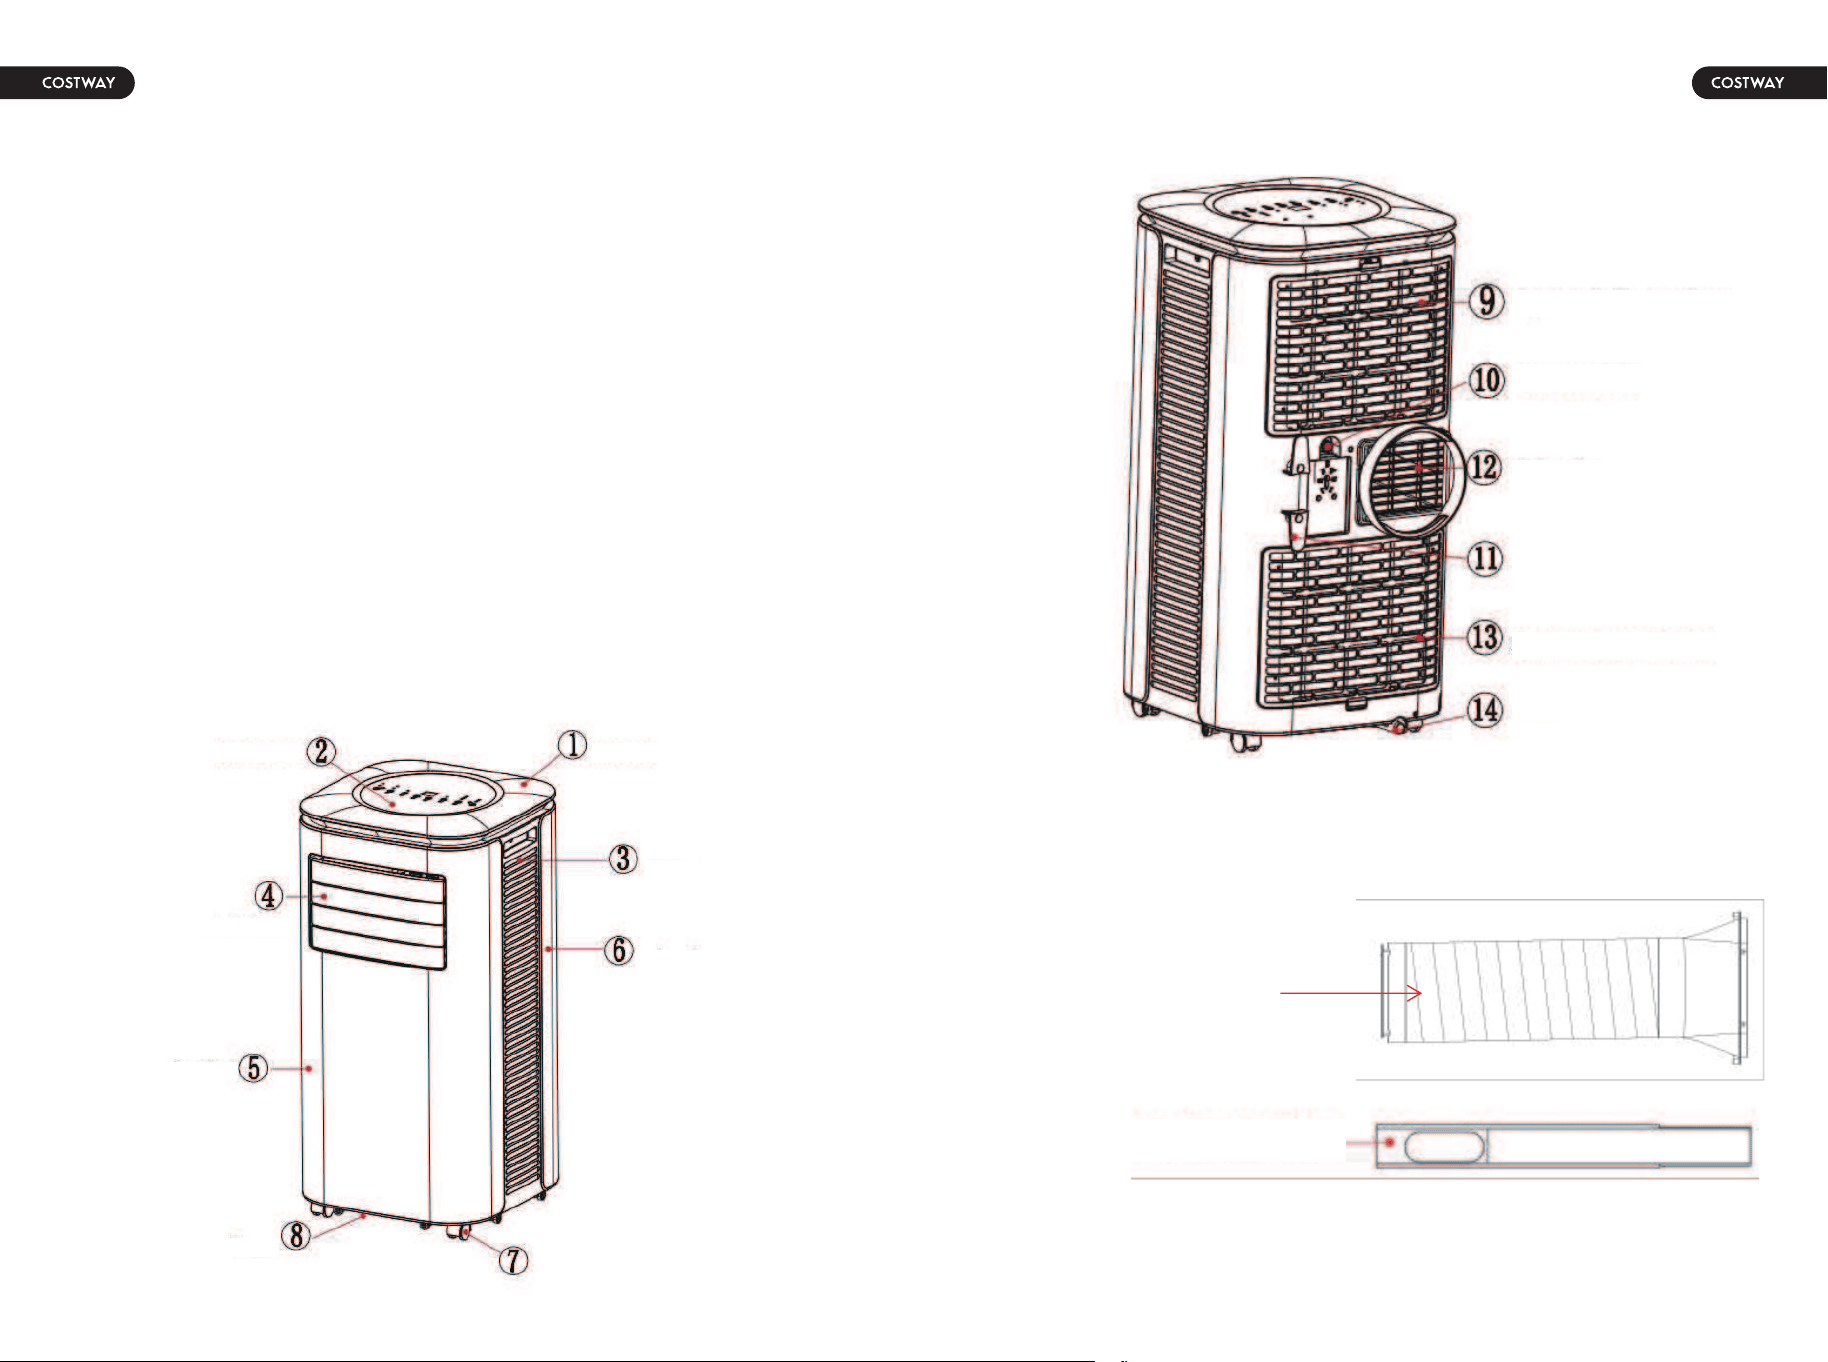
Components
Exhaust Pipe Assembly
Exhaust Pipe Assembly
Control Panel
Wind guide Bar
Front Panel
Base Panel
Caster
Back Panel
Side Panel
Top Cover
Evaporator air
inlet screen frame
Continuous drain
Exhaust air
Wrapping post
Outfall
Condenser air inlet
mesh frame
04 05
Installation and Adjustment
Fig.4
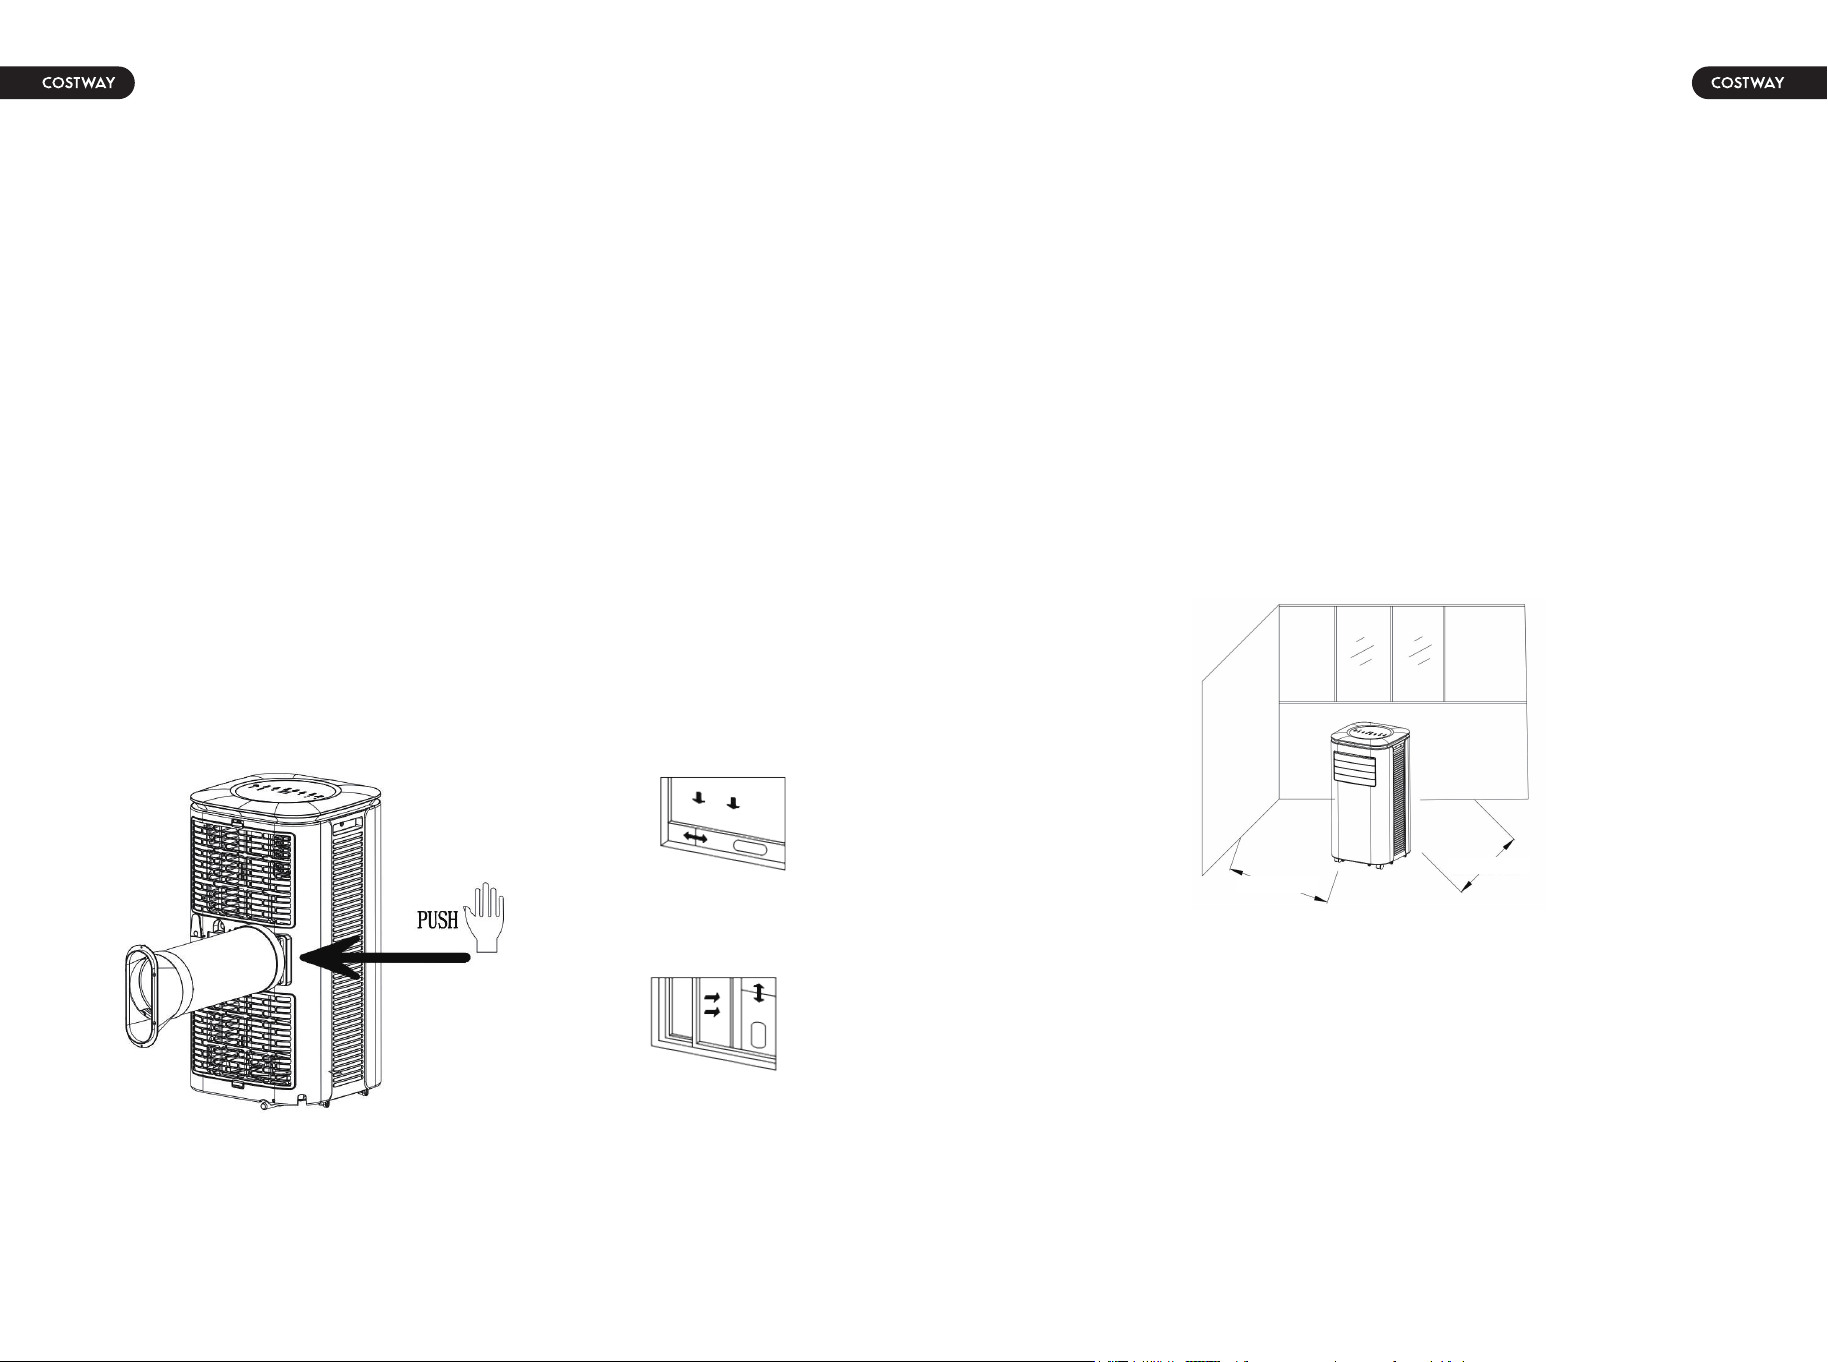
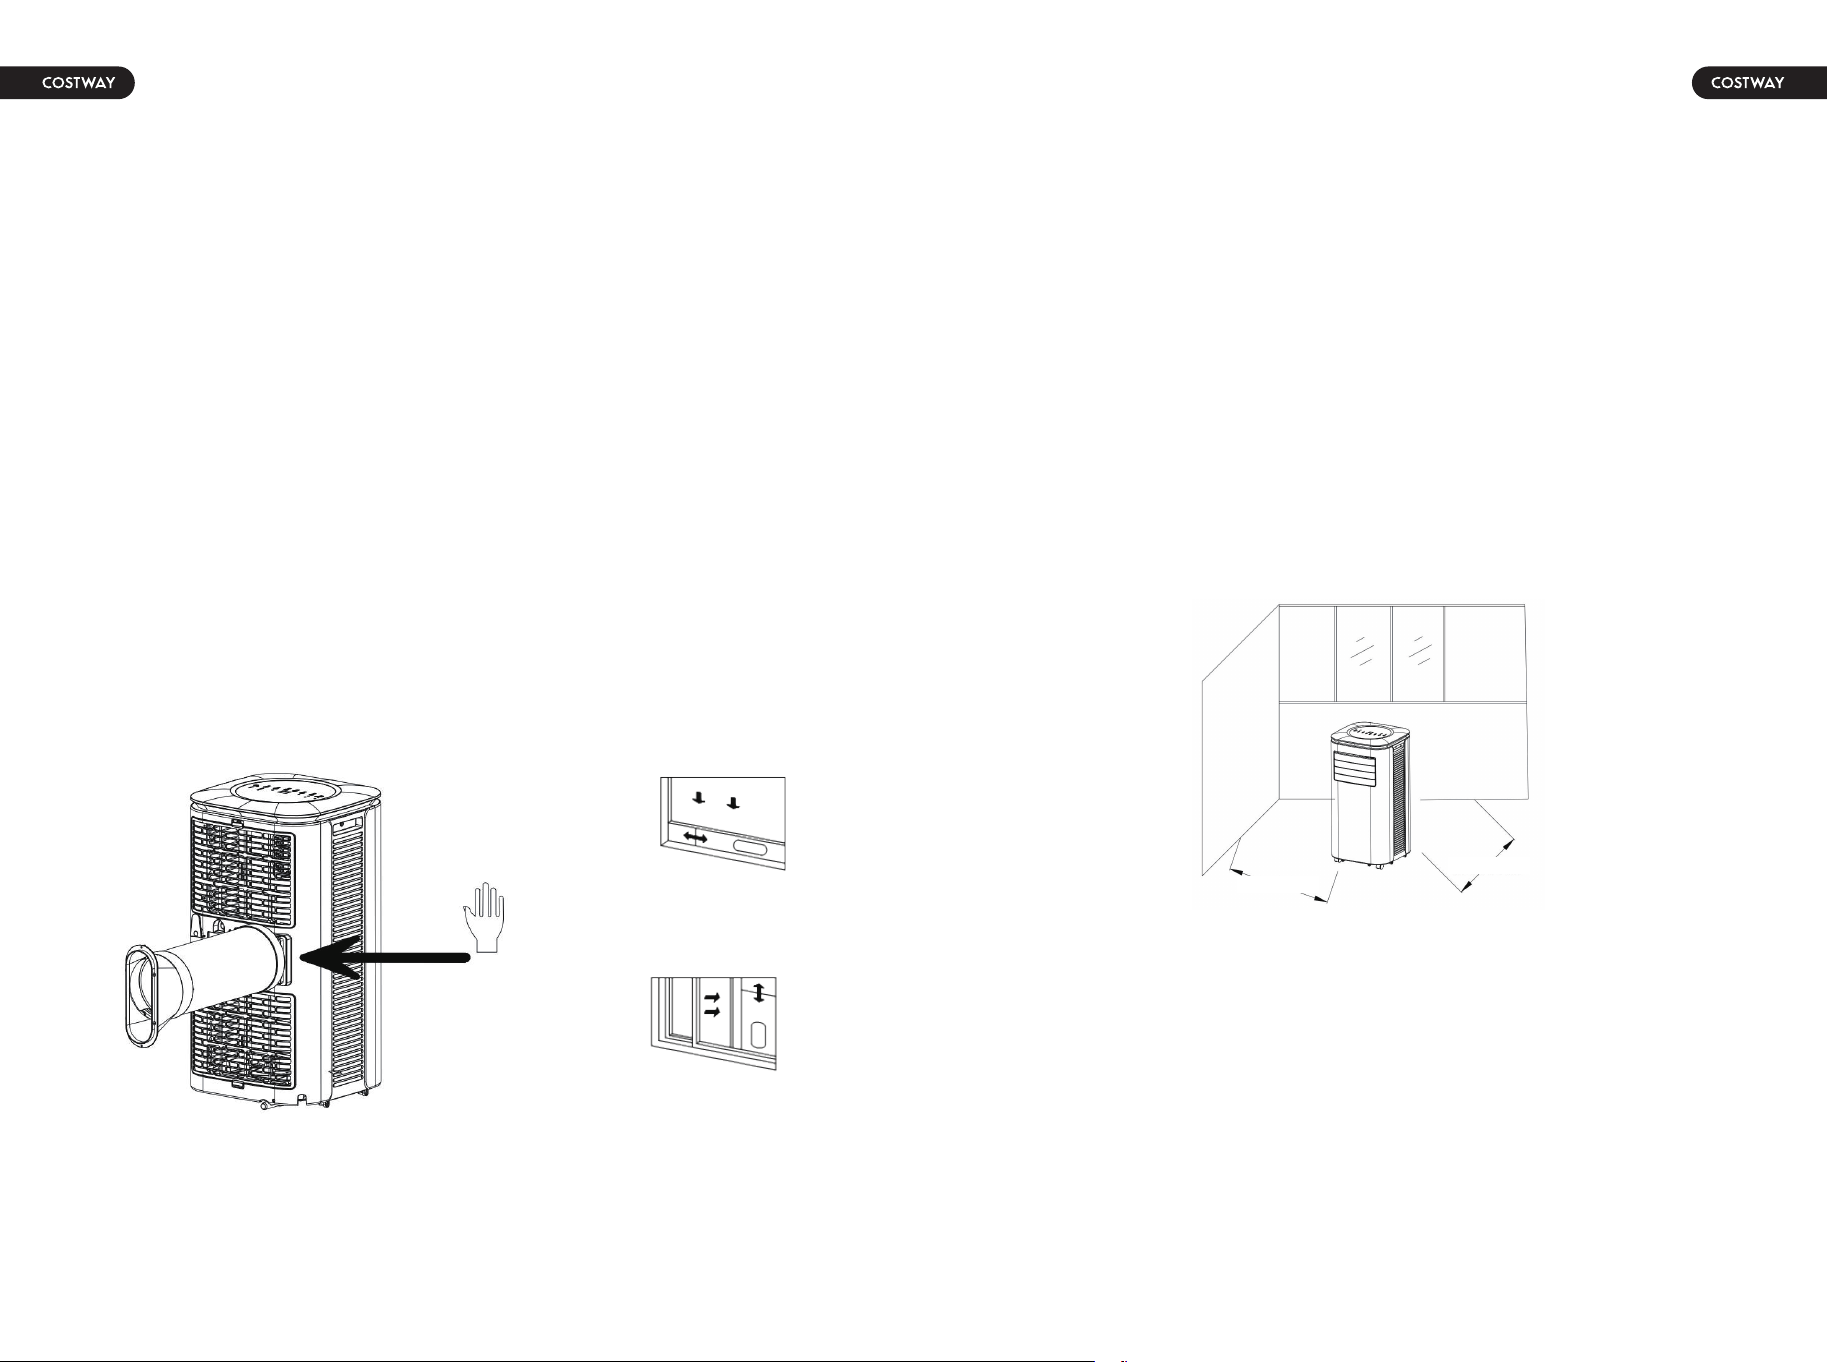
1. Installation:
Warning: before using the mobile air conditioning,
keep it upright for at least two hours.
The air conditioning can be easily moved in the room. In the moving
process, ensure that the air conditioning is in the upright position
and the air conditioning should be placed on a flat surface. Do not
install and use the air conditioning in the bathroom or other humid
environments.
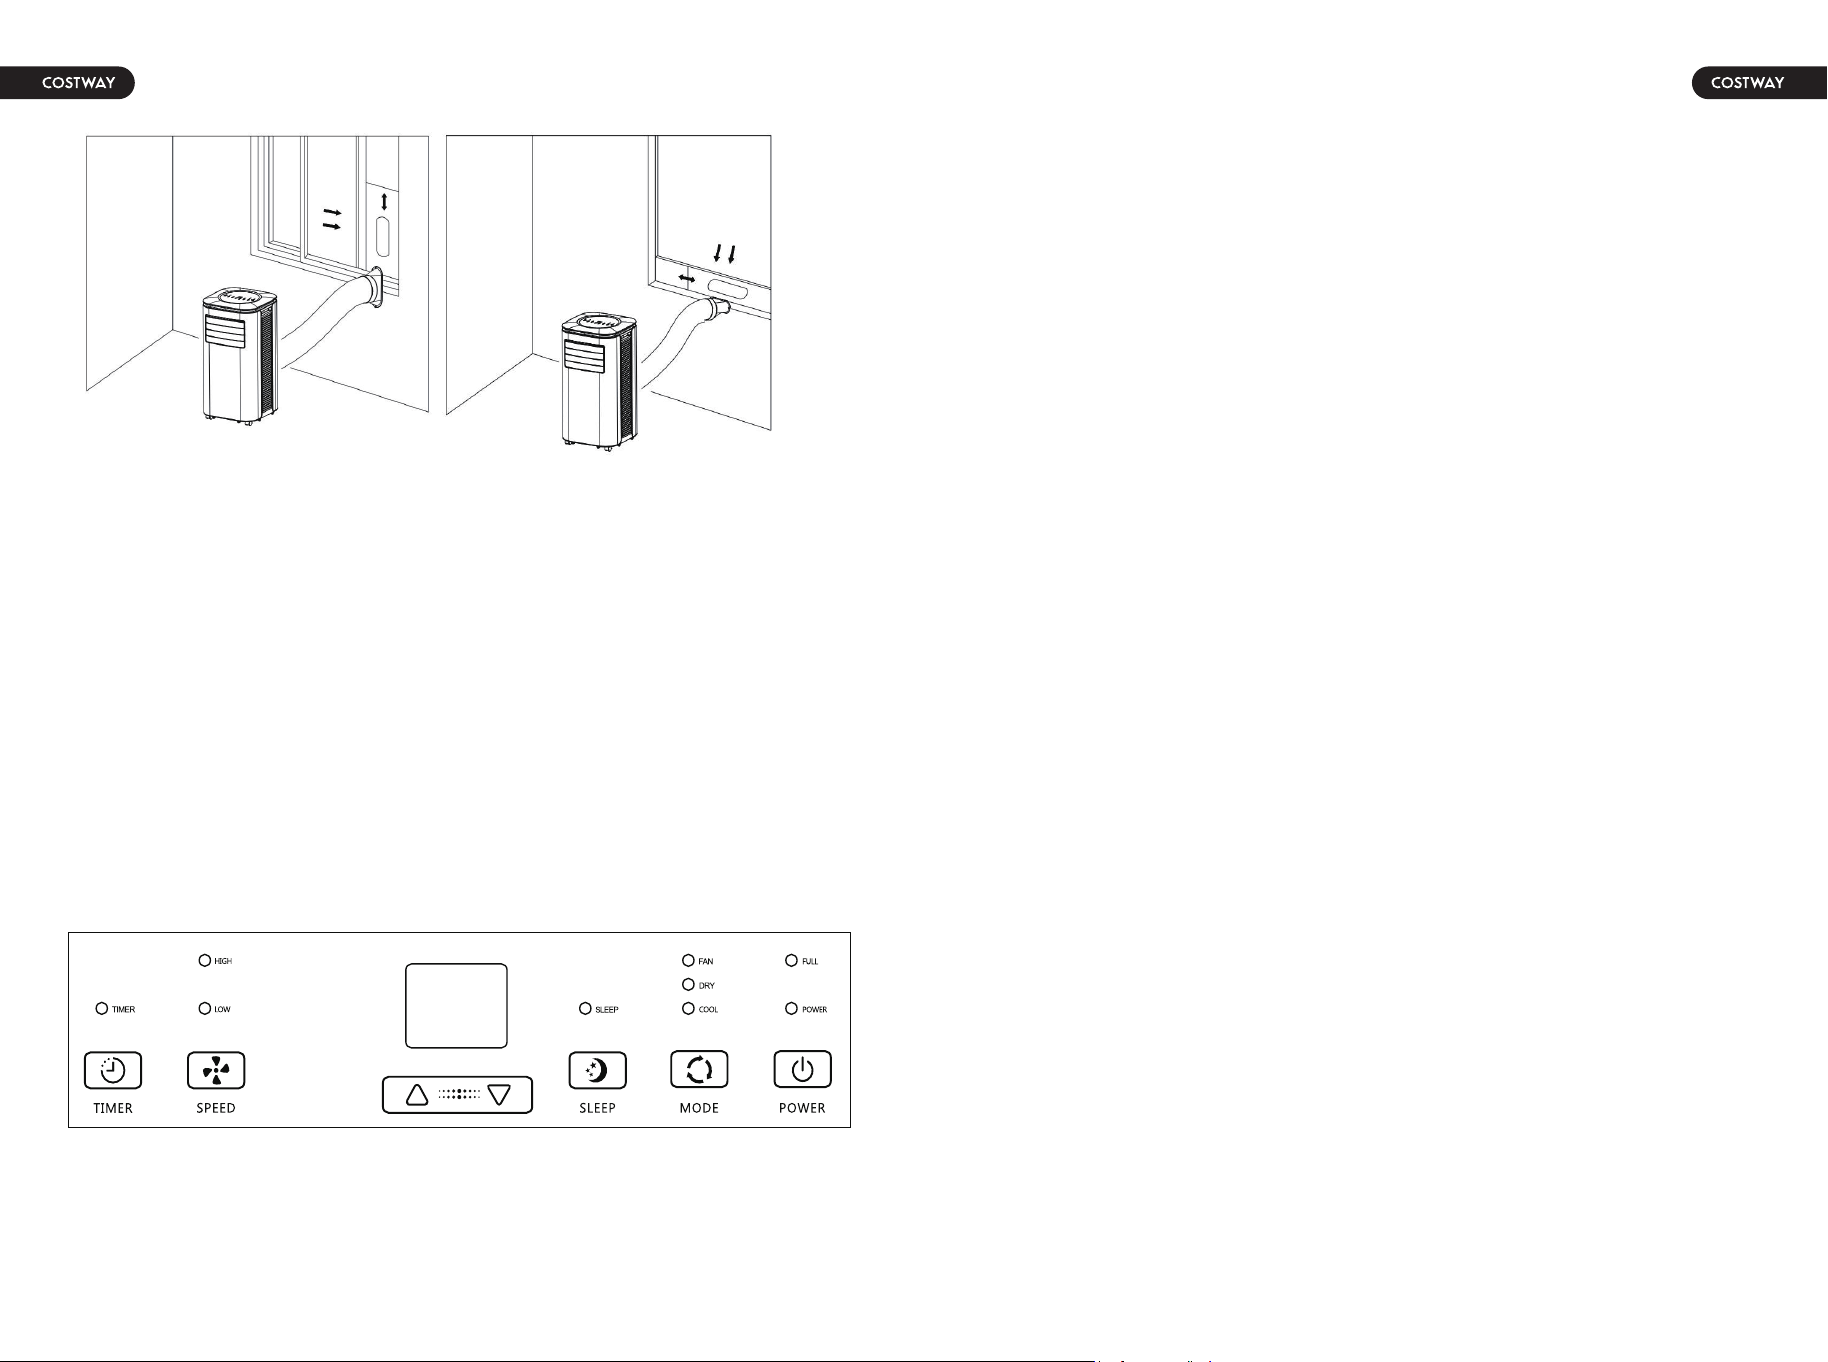
1.1 Install the pipe assembly (as shown in Fig.1): screw the pipe
assembly (exhaust fitting end) into the exhaust port on the rear
panel.
1.2 Install the window sealing plate assembly
1) Half open the window, and mount the window sealing plate
assembly to the window (as shown in Fig.2 and Fig.3); the assembly
can be placed in horizontal and vertical direction.
2) Pull various components of the window sealing plate assembly
open, adjust their opening distance to bring both ends of the
assembly into contact with the window frame, and fix various
components of the assembly.
1.3 Install the body
1) Move the machine with installed pipe and fittings to the window,
and the distance between the body and walls or other objects shall
be least 50cm/20” (as shown in Fig.4).
2) Elongate the exhaust pipe and snap the flat end of the exhaust
pipe joints into the hole of the window sealing plate assembly (as
shown in Fig.5 and Fig.6).
Notes:
1. The flat end of the exhaust pipe joints must be snapped into
place.
2. The pipe cannot be distorted nor has substantial turning (more
than 45 °). Keep the ventilation of the exhaust pipe not blocked.
Fig.1
Fig.2
Fig.3
06 07
50cm/20”
50cm/20”
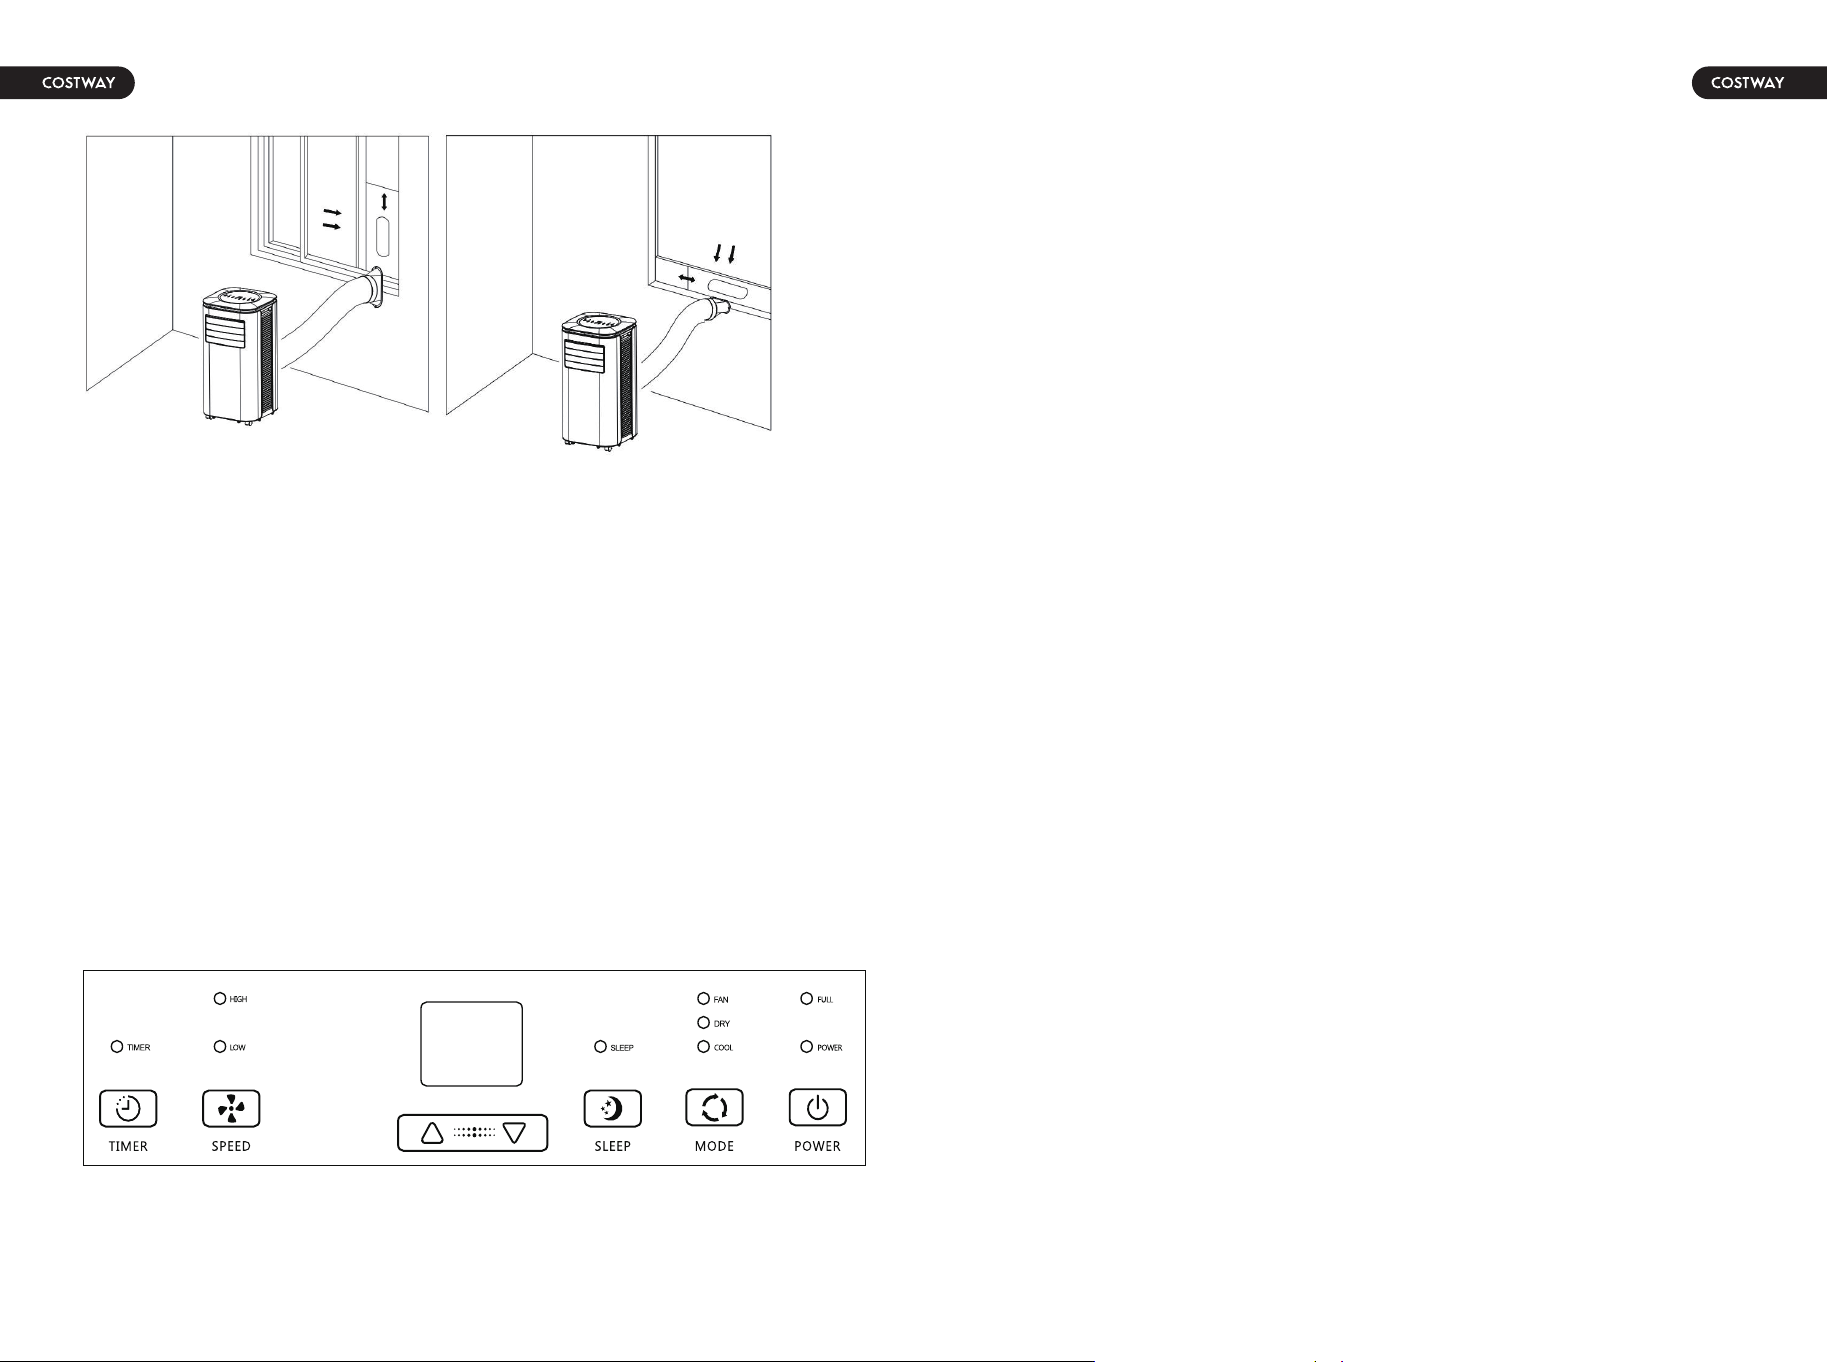
Control Panel Setting
Important Notice
1. Power Key 2. Mode Selection Key 3. Sleep Key 4. Down Key
5. Up Key 6.Fan Speed Selection Key 7. Timer Key
I. Operating instructions:
LED Control Panel is as follows:
Fig.5 Fig.6
The length of the exhaust hose shall be 280mm-1500mm/ 11”-59”,
and this length is based on the specifications of the air conditioning. Do
not use extension tubes or replace it with other different hoses, or this
may cause a malfunction. Exhaust host must be not blocked; otherwise
it may cause overheating.
08 09
1: When the machine is powered on for the first time, the buzzer will play
power-on music, and then the machine will get into standby status.
2: Power Key: press the key to turn on and turn off the machine. In the
case of power on, press the key to turn off the machine; in the case of
power off, press the key to turn on the machine.
3: Mode Selection Key: In the case of power on, press the key to switch
between cool → fan → dry mode.
4: Up Key and Down Key: press the two keys to change the setting
temperature or setting time, operate as follows:
While setting temperature, press up key or down key to select the
required temperature (not available in fan or dry mode). While setting
time, press up key or down key to select the required time. 5: Wind
Speed Selection Key:
In cooling and fan mode, press the key to select high,low wind speed
operation. But limited by anti-cold conditions, under certain conditions, it
may not run according to the set wind speed.
In dehumidifying mode, pressing the key is invalid, and the fan will
forcibly choose low wind speed operation.
6: Timer Key:
In the case of power on, press the key to close timer; in the case of
power off, press the key to open timer.
Press the key, when the timer symbol flashes, press up and down key to
select the required timer value.
Timer values can be set in 1-24 hours and the timer value is adjusted up
or down by one hour.
7: Sleep Mode:
In the cooling mode, press the UP and Fan Key to turn on the sleep
mode,then the unit will work quietly in energy-saving mode.
Note:
1. Do not turn on the sleep mode in the dry or Fan mode!
2. The waterfull lamp will turn on and buzzer will alarm for several
second, the compressor will stop to work when the inner unit chassis
water is full.
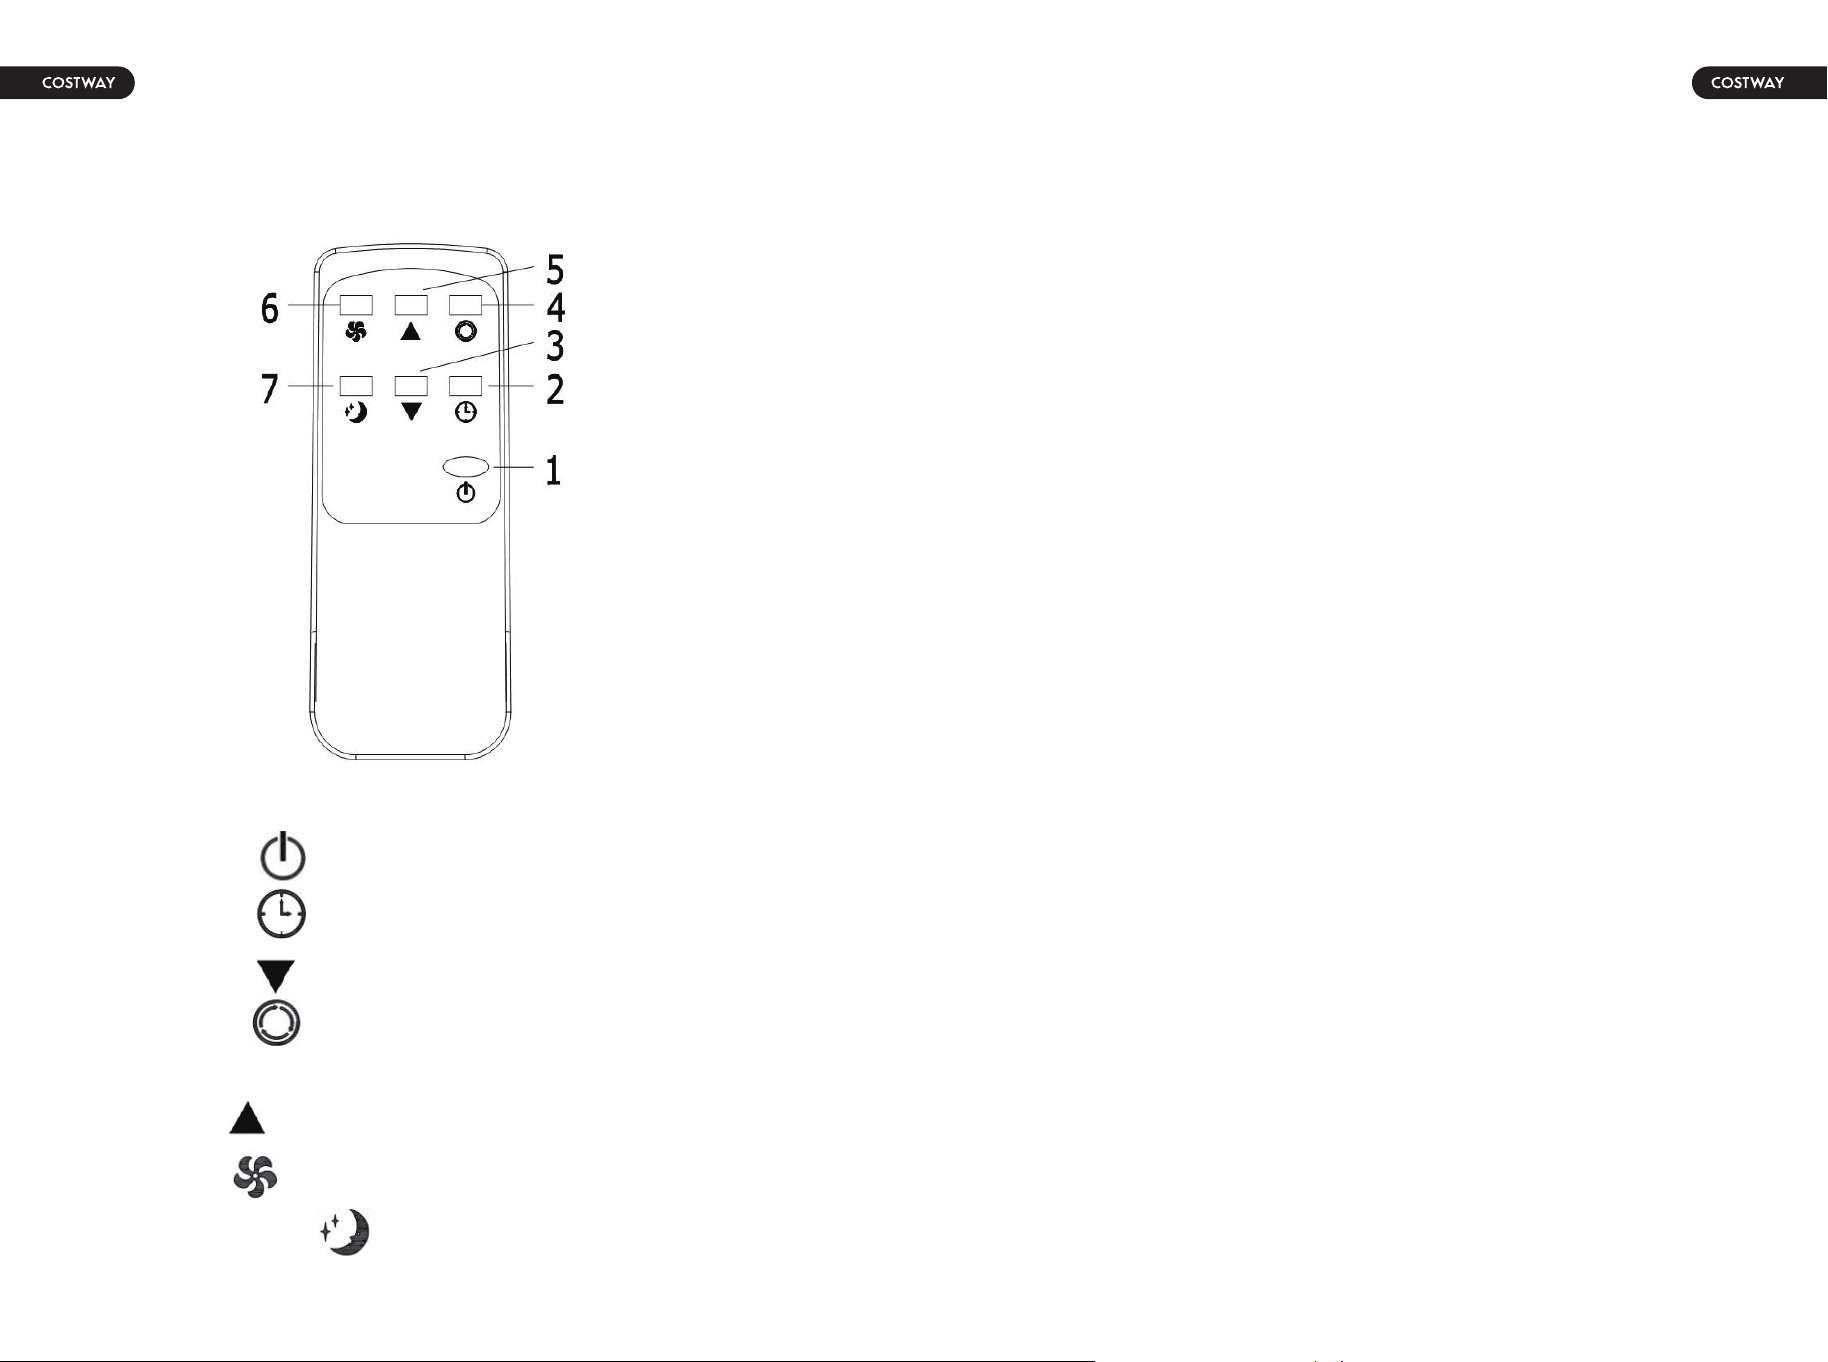
Instructions of key operation of the high-quality remote control are as
follows:
1. Power: Press the key to turn on or turn off the machine.
2. Timer: press the key to set time.
3. Down: press the key to reduce temperature and timing setting.
4. Mode: press the key to switch between cooling, fan,
dehumidifying mode.
5. Up: press the key to increase temperature and timing setting.
6. Fan: press the key to select high, low wind speed.
7. Sleep Mode: Press the key to turn on the sleep mode.
3.1 Frost Protection Function:
In cooling, dehumidifying or energy-saving mode, if the temperature
of the exhaust pipe is too low, the machine will automatically enter
protection status; if the temperature of the exhaust pipe rises to a
certain temperature, it can automatically revert to normal operation.
3.2 Overflow Protection Function:
When water in the water pan exceeds the warning level, the machine
will automatically sound an alarm, and the "FULL" indicator light will
flash. At this point, you need to move the drainage pipe connected
the machine or the water outlet to sewer or other drainage area for
drainage(refer to Drainage Instructions at the end of this chapter for
detail) for details. After the water is emptied, the machine will
automatically return to the original state.
3.3 Automatic Defrosting (cooling mode has this function):
The machine has automatic defrosting function.
3.4. Protection Function of the Compressor
To increase the service life of the compressor, it has a 3-minute delay
start protection function after the compressor is turned off.
II. Operating Instructions of the Remote Control
III. A Variety of Protection Functions
The remote control panel is as follows:
10 11

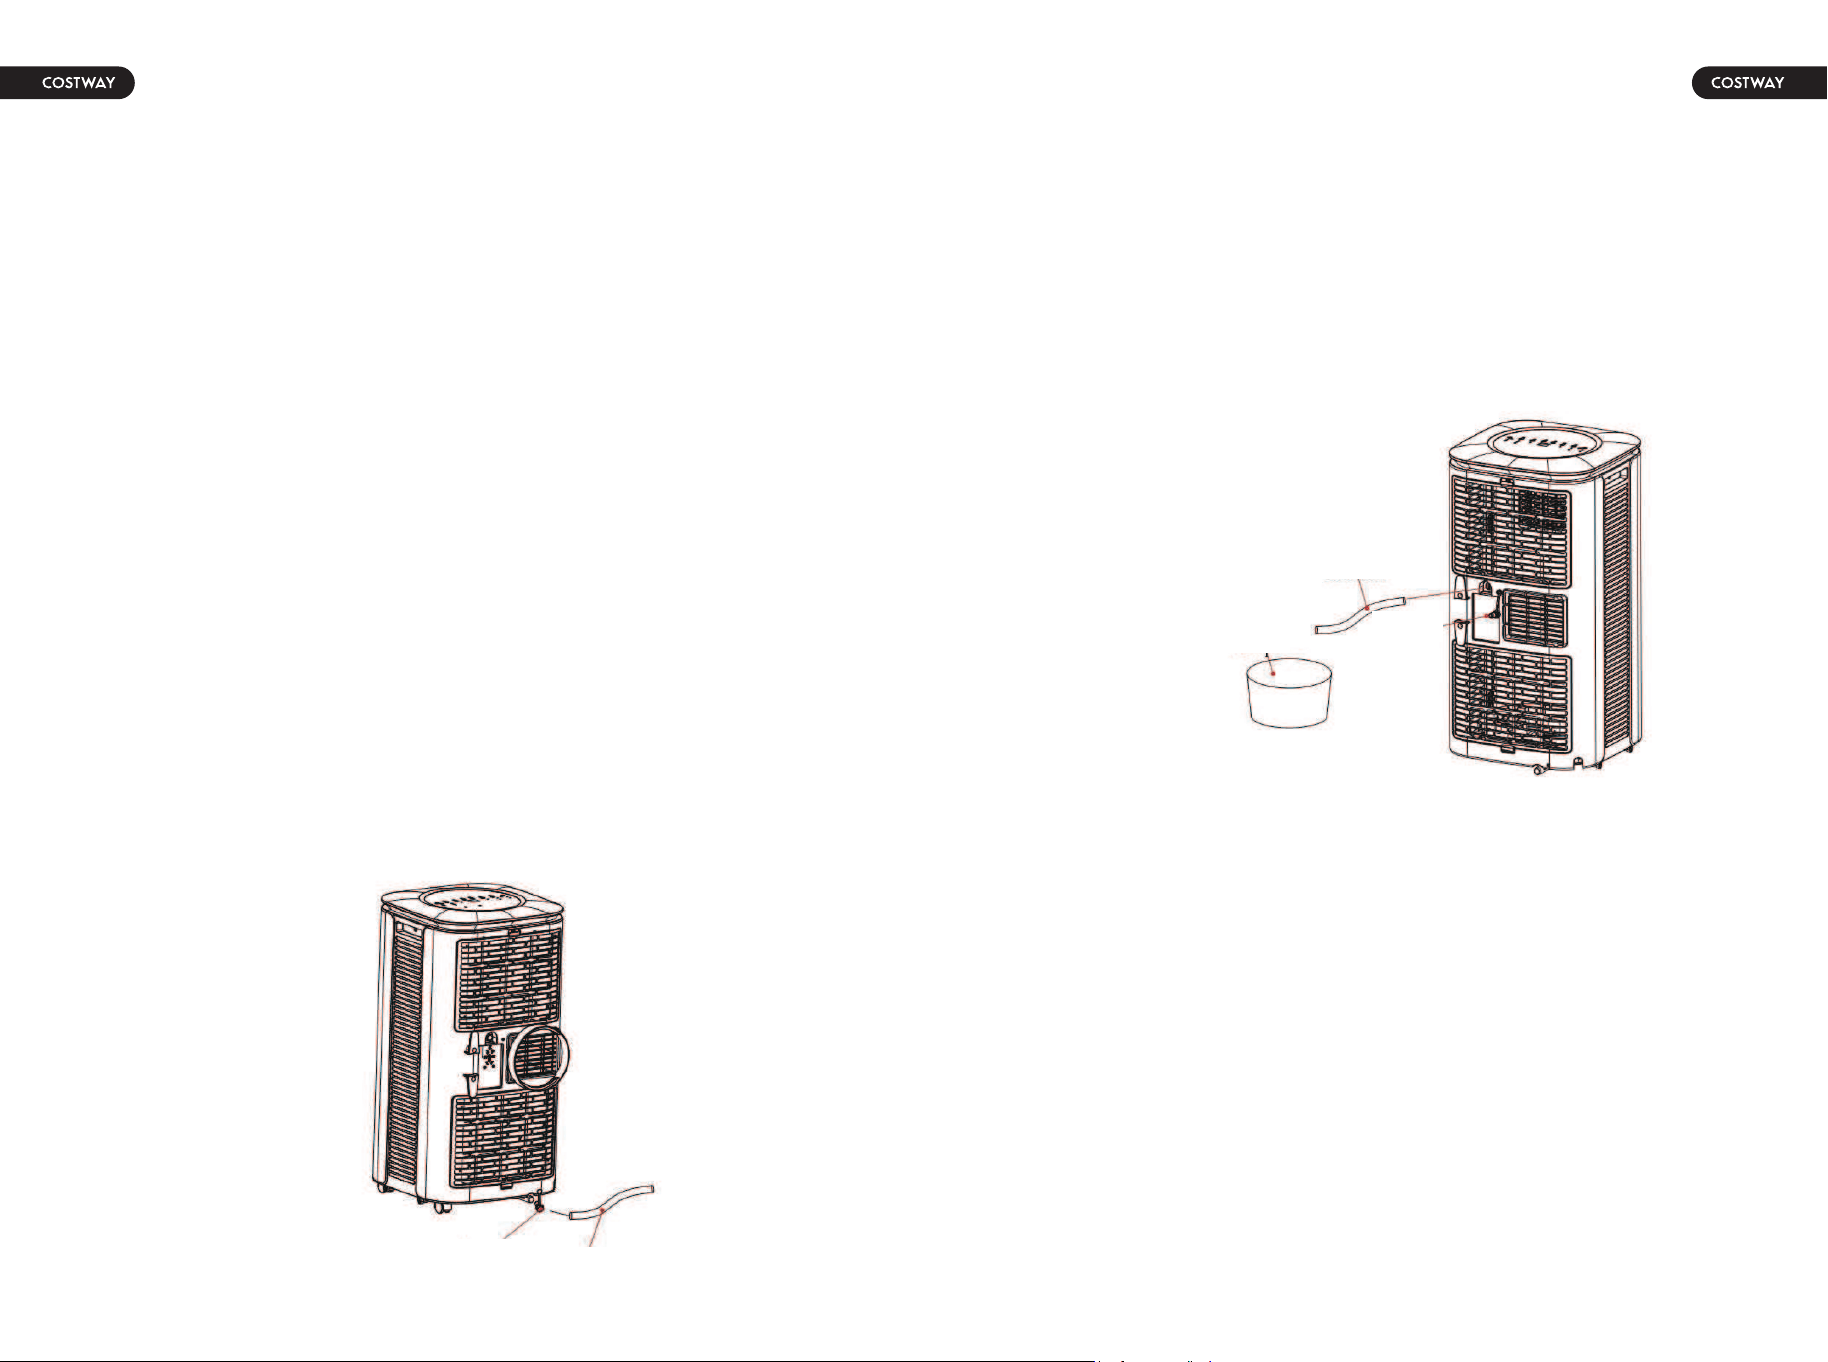
2. Continuous drainage (Optional) (only applicable to
dehumidifying mode), as shown in figure:
1) Unplug the water plug on.
2) Set the drainage pipe into the water outlet.
3) Connect the drainage pipe to the bucket.
1. Manual drainage:
1) When the machine stops after the water is full, turn off the machine
power and unplug the power plug.
Notes: Please move the machine carefully, so as not to spill the water in
the water pan at the bottom of the body.
2) Place the water container below the side water outlet behind the
body.
3) Unscrew the water plug, the water will automatically flow into the
water container.
Notes:
1. Keep the water plug properly.
2. During drainage, the body can be tilted slightly backwards.
3. If the water container cannot hold all the water, before the water
container is full, stuff the water outlet with the water plug as soon as
possible to prevent water from flowing to the floor or the carpet.
4) When the water is discharged, stuff the water plug up.
Notes:
1. Restart the machine after the water plug is installed, otherwise
condensate water of the machine will flow to the floor or the carpet.
Drainage Instructions
12 13

1. Clean the surface
Clean with surface of machine with a wet soft cloth. Don't use
chemicals, such as benzene, alcohol, gasoline, etc.; otherwise,
the surface of the air conditioning will be damaged or even the
whole machine will be damaged.
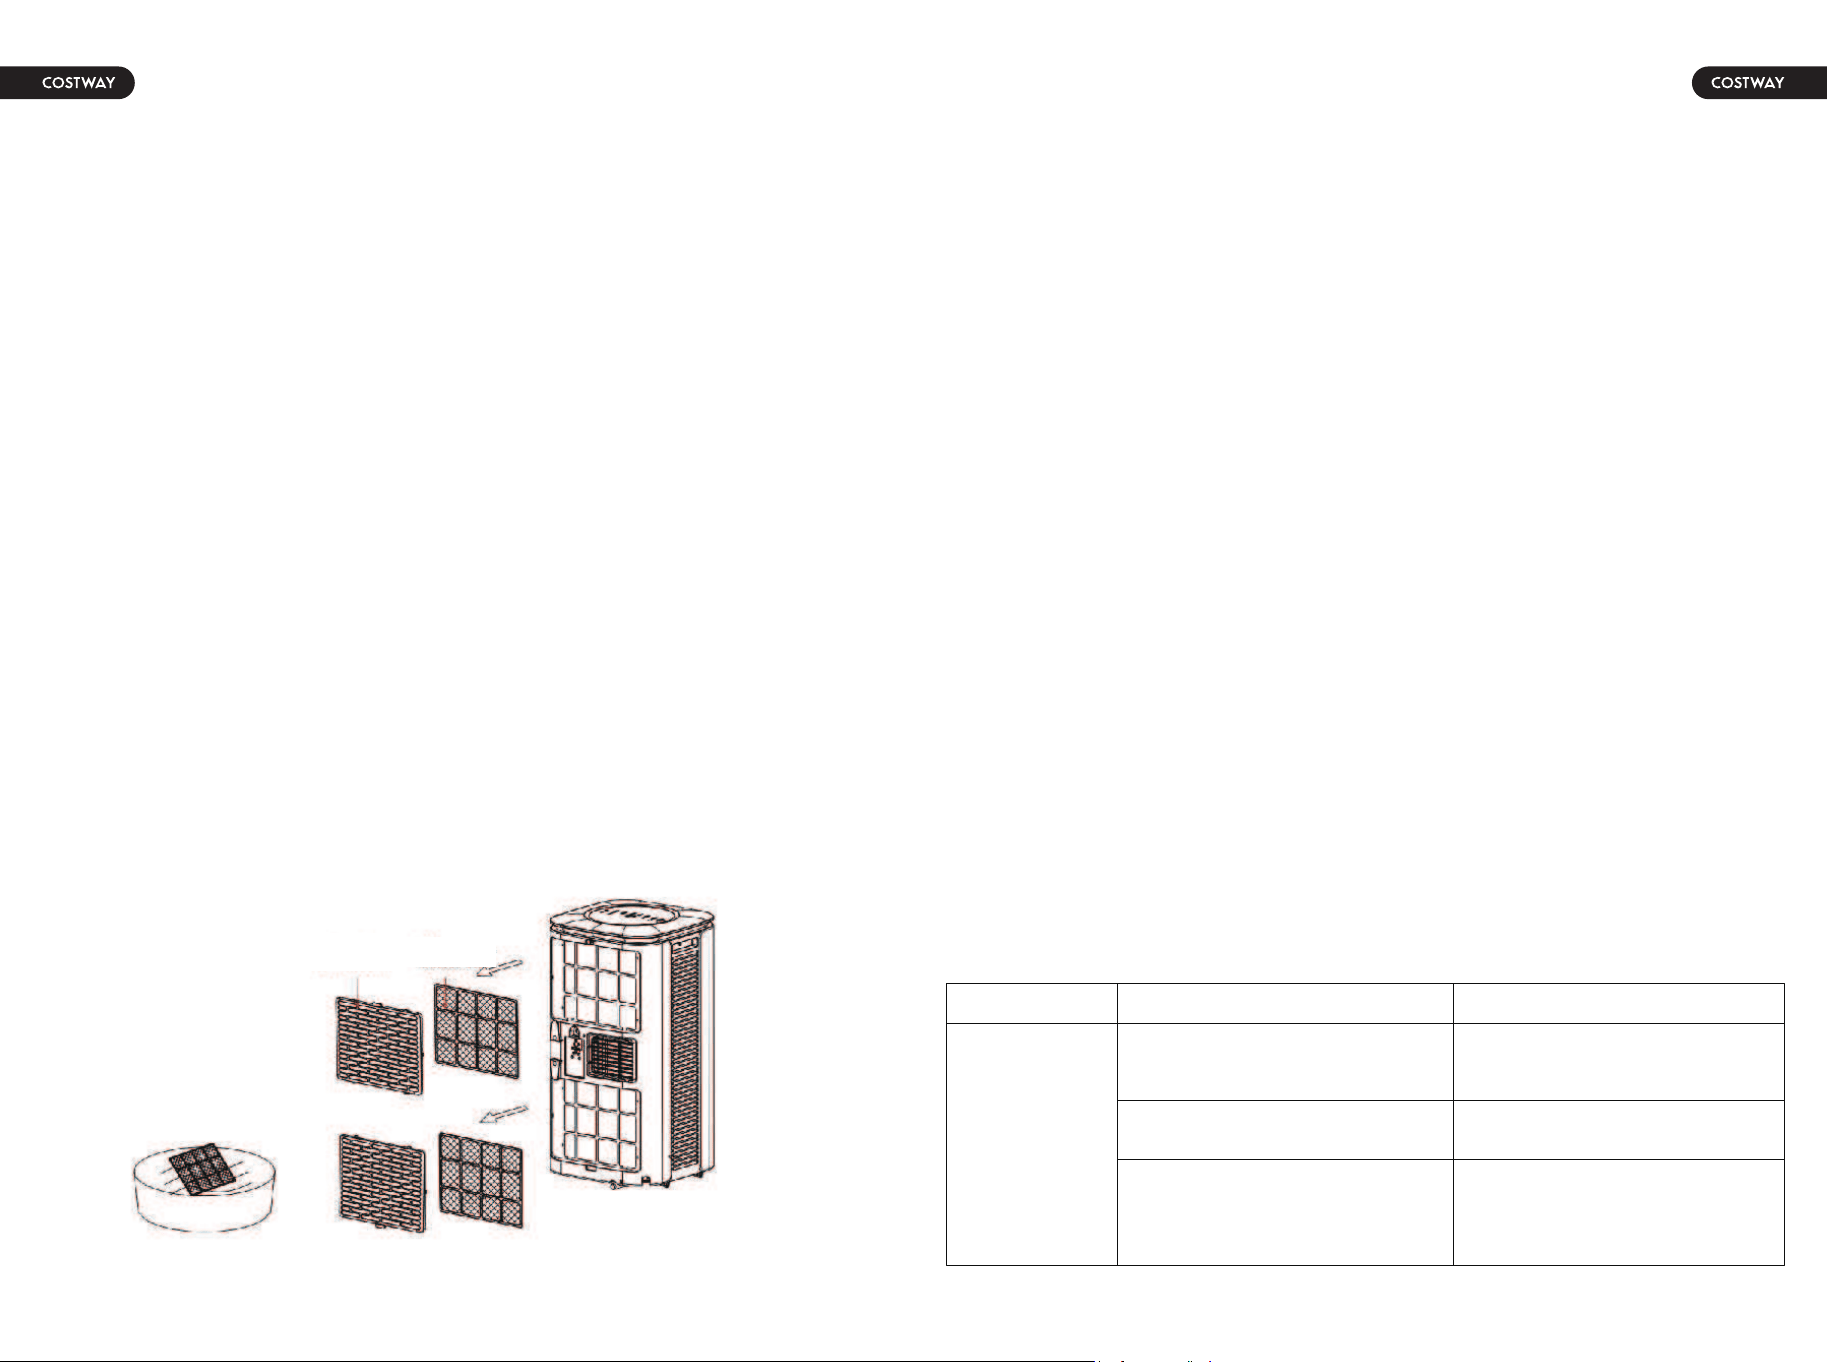
2. Clean the filter screen
If the filter screen is clogged with dust, and the effectiveness of
the air conditioning is reduced, be sure to clean the filter screen
once every two weeks.
2.1: Clean the upper filter screen frame
1) Clasp the wedging block of the EVA filter screen frame with
hands. Force down from the outside to remove the EVA filter
screen frame. Unscrew four screws fixing the EVA filter screen
and the rear housing to remove the EVA filter screen (as shown
in the above figure) .
2) Put the EVA filter screen into warm water with neutral
detergent (about 40℃ / 104℉) and dry it in the shade after
rinsing clean.
Unit Storage:
1: Unscrew the drainage cover, unplug the water plug, and discharge
the water in the water pan into other water containers or directly tilt
the body to discharge the water into other containers.
2: Turn on the machine, adjust it to low-wind ventilation mode, and
maintain this state until the drainage pipe becomes dry, so as to keep
the inside of the body in a dry state and prevent it from mildewing.
3: Turn off the machine, unplug the power plug, and wrap the power
cord around the wrapping post; install the water plug and the
drainage cover.
4: Remove the exhaust pipe and keep it properly.
5: Cover the air conditioning with a plastic bag. Put the air
conditioning in a dry place, keep it out of the reach of children, and
take dust control measures.
6: Remove batteries of the remote control and keep them properly.
Note: ensure that the body is placed in a dry place and keep all
machine components properly.
Maintenance
Cleaning: before cleaning and maintenance, turn
off the machine and unplug the plug.
Troubleshooting
Do not repair or disassemble the air conditioning by yourself.
Unqualified repair will cause damage to users or their properties.
Problems Reasons Solutions
The air
conditioning
does not
work.
There is no electricity.
Discharge the water inside.
Turn it on after connecting it
to a socket with electricity.
Recommend to use the
machine in at the
temperature of
7-35 ℃ (44-95 ℉).
The overflow indicator
displays "FL".
The ambient temperature is
too low or too high
14 15
Appendix
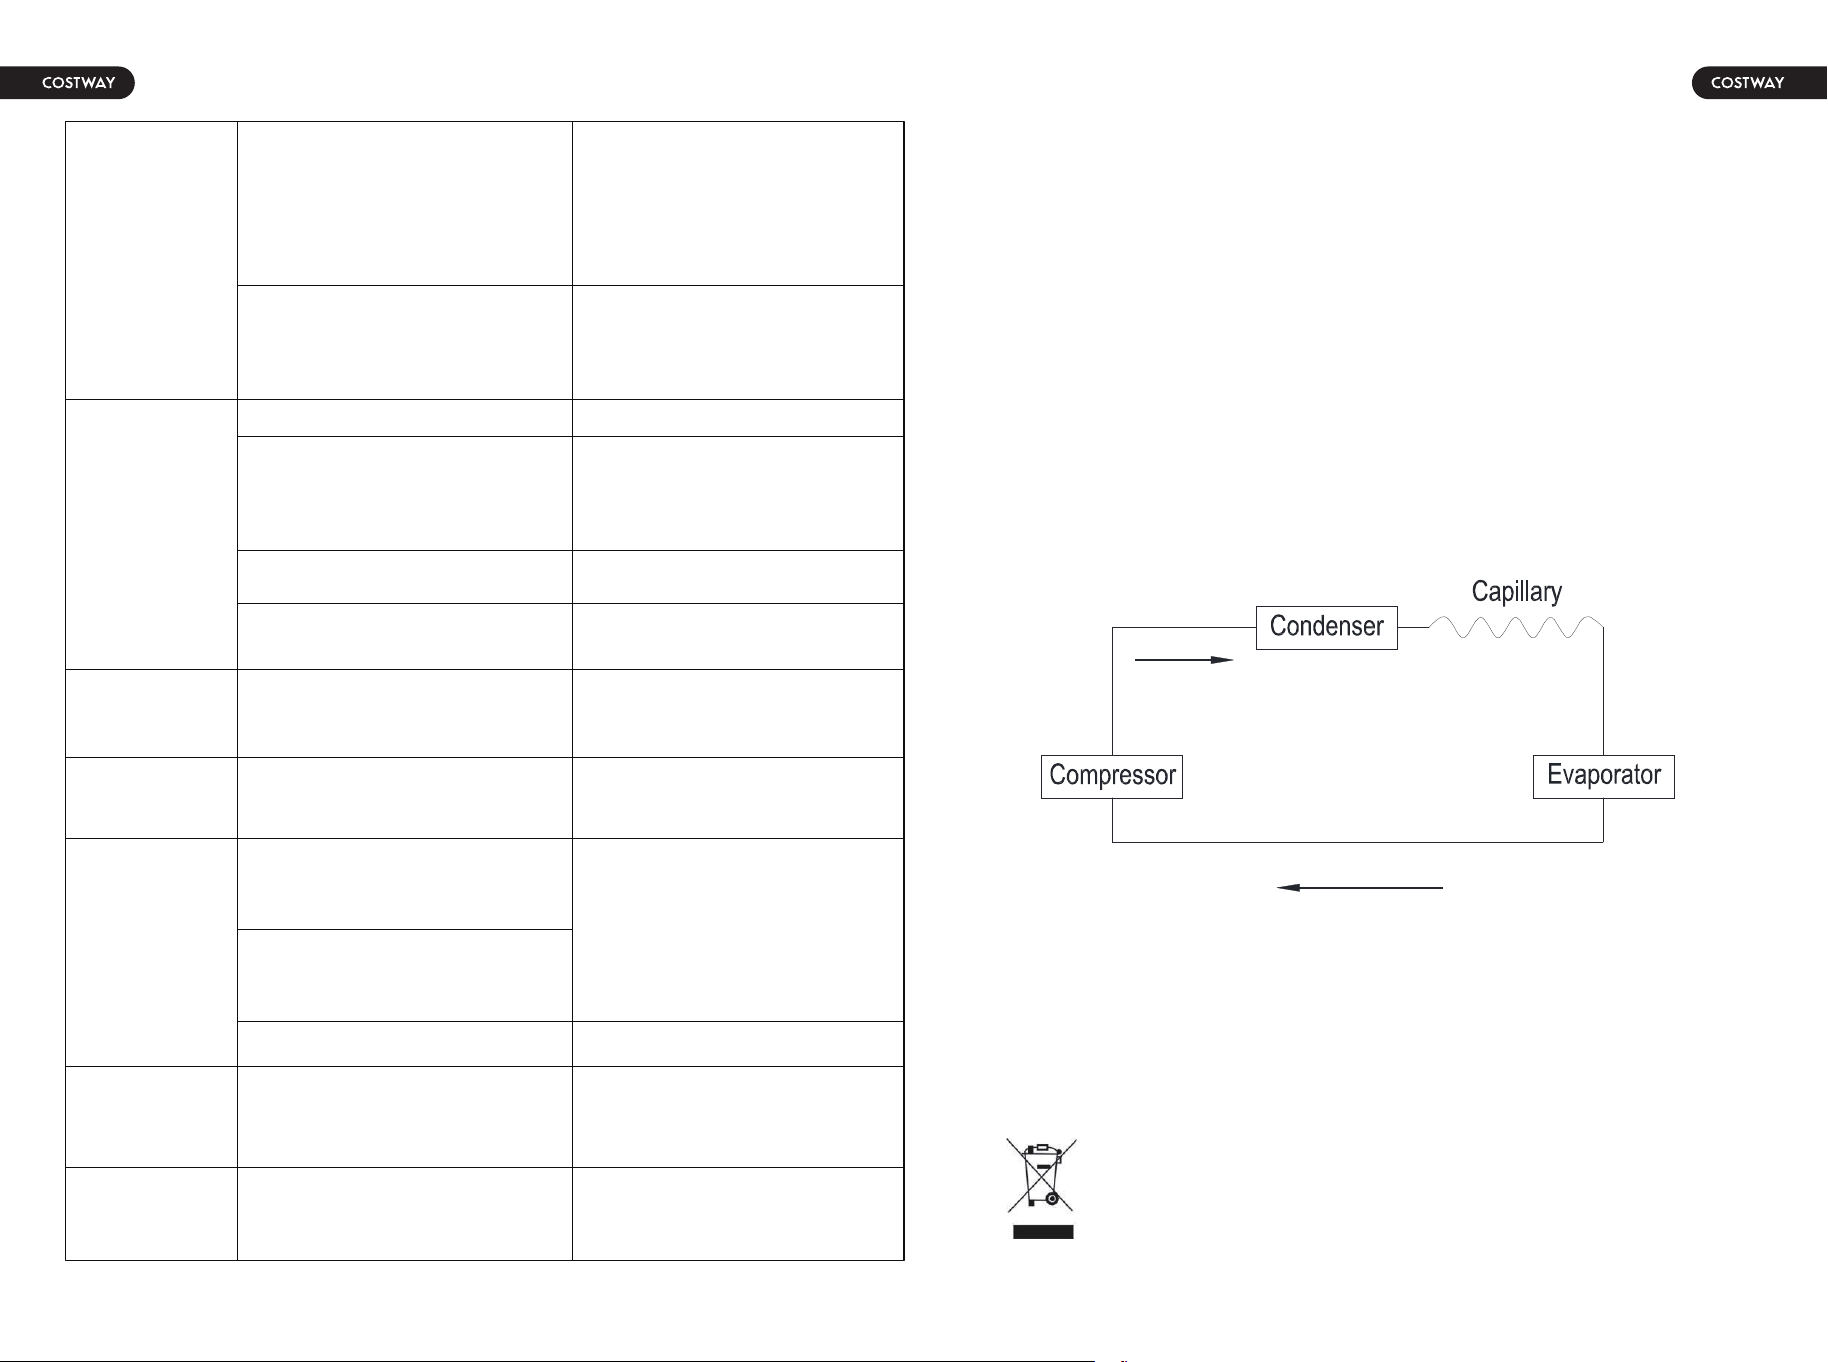
Fuse Parameters
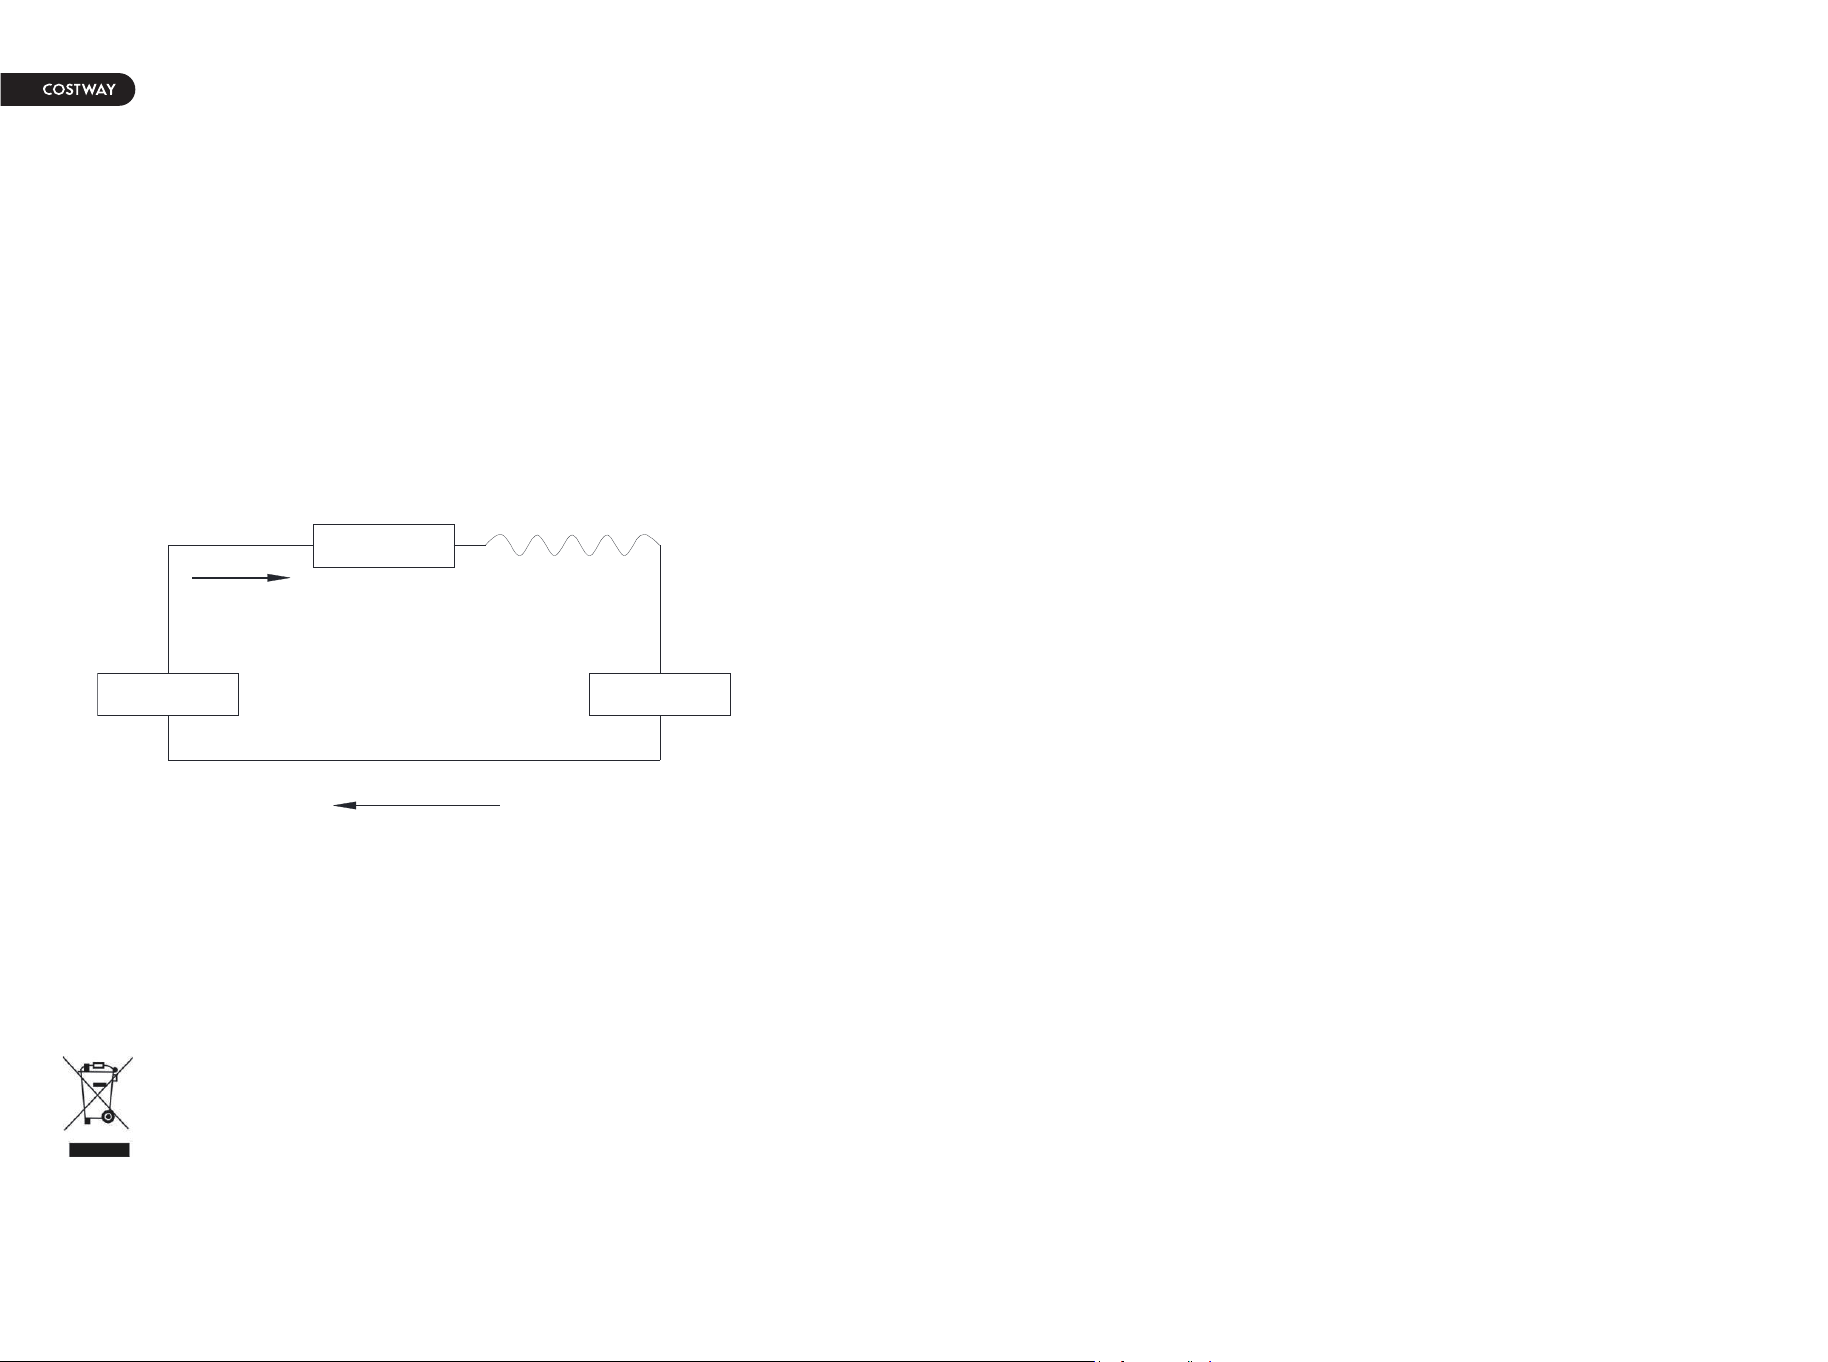
Schematic Diagram for Cooling Only model
Note: If problems not listed in the table occur or recommended
solutions do not work, please contact the professional service
organization.
All the technical and specific parameters,please refer to product
nameplate.
Due to continuous improvement,we reserve the right to change
some design without any notice.
Treatment: Don't put the abandoned machine with other
unsorted waste together. Such waste shall be placed
separately for other special use.
Type:5ET or SMT
Voltage:250V
Current: 3.15A
The cooling
effect is not
good
Big Noise
Compressor
does not work.
Displays 'E2'.
Displays 'E1'
The remote
control does
not work.
Change the set temperature.
In cooling mode, the room
temperature is lower than
the set temperature; in
heating mode, the room
temperature is higher than
the set temperature.
Doors or windows are open;
there are a lot of people; or
in cooling mode, there are
other sources of heat.
The air conditioning is not
placed on a flat surface.
Overheat protection starts.
The distance between the
machine and the remote
control is too far.
The pipe temperature
sensor is abnormal.
The room temperature
sensor is abnormal.
The remote control is not
aligned with the direction of
the remote control receiver.
Batteries have run down.
Check the pipe
temperature sensor and
related circuitry.
Check the room
temperature sensor and
related circuitry.
Let the remote control get
close to the air
conditioning, and make
sure that the remote
control directly faces to the
direction of the remote
control receiver.
Replace batteries.
Put the air conditioning on a
flat and hard place (to
reduce noise).
Wait for 3 minutes until the
temperature is lowered, and
then restart the machine.
Close doors and windows,
and add new air
conditioning.
In dehumidification mode,
the ambient temperature is
low.
There is direct sunlight.
The filter screen is dirty.
Clean or replace the
filter screen.
Clear obstructions.
The air inlet or outlet is
blocked.
Pull the Curtain.
The machine is placed in a
room with an ambient
temperature of greater
than 17 ℃(62 ℉).
16 17

18 19
Contenu
Remarques
Merci d'avoir choisi le climatiseur portable luxueux et
élégant.Veuillez conserver le manuel pour référence future
et lire attentivement le manuel avant utilisation.
*Une fois la climatisation installée, assurez-vous que la fiche
d'alimentation est intacte et fermement branchée dans la prise de
courant, et placez le cordon d'alimentation en ordre pour éviter que
quelqu'un ne trébuche ou ne débranche la fiche.
*Ne mettez aucun objet dans l'entrée et la sortie d'air de la
climatisation. Gardez l'entrée et la sortie d'air libres de toute
obstruction.
*Lorsque les tuyaux de drainage sont installés, assurez-vous que les
tuyaux de drainage sont correctement connectés et ne sont pas
déformés ou pliés.
*Lors du réglage des bandes de guidage du vent supérieures et
inférieures de la sortie d'air, arrachez-la délicatement avec les mains
pour éviter d'endommager les bandes de guidage du vent.
*Lorsque vous déplacez la machine, assurez-vous qu'elle est en
position verticale.
*La machine doit rester à l'écart de l'essence, des gaz inflammables,
des cuisinières et autres sources de chaleur.
*Ne démontez pas, ne révisez pas et ne modifiez pas la machine de
manière arbitraire, sinon cela provoquera un dysfonctionnement de la
machine ou même des dommages aux personnes et aux biens. Pour
éviter tout danger, en cas de panne de la machine, demandez à un
technicien certifié de la réparer.
*N'installez pas et n'utilisez pas la climatisation dans la salle de bain ou
dans d'autres environnements humides.
*Ne tirez pas sur la prise pour éteindre la machine.
*Ne placez pas de tasses ou d'autres objets sur le corps pour éviter
que de l'eau ou d'autres liquides ne se répandent dans la climatisation.
*N'utilisez pas de sprays insecticides ou d'autres substances
inflammables à proximité de la climatisation.
*Ne pas essuyer ou laver la climatisation avec des solvants chimiques
tels que l'essence et l'alcool. Lorsque vous devez nettoyer la
climatisation, vous devez débrancher l'alimentation électrique et la
nettoyer avec un chiffon doux à moitié humide. Si la machine est
vraiment sale, frottez avec un détergent doux.
*L'appareil peut être utilisé par des enfants âgés de 8 ans et plus et
des personnes ayant des capacités physiques, sensorielles ou mentales
réduites s'ils ont reçu une supervision ou des instructions concernant
l'utilisation de l'appareil en toute sécurité et comprennent les risques
encourus. Les enfants ne doivent pas jouer avec l'appareil. Le
nettoyage et l'entretien ne doivent pas être effectués par des enfants
sans surveillance.
*La climatisation ne convient qu'à une utilisation en intérieur et ne
convient pas à d'autres applications.
*Suivez les règles d'interconnexion au réseau local lors de l'installation
de la climatisation et assurez-vous qu'elle est correctement mise à la
terre. Si vous avez des questions sur l'installation électrique, suivez les
instructions et, si nécessaire, demandez à un électricien professionnel de
l'installer.
*Placez la machine dans un endroit plat et sec et maintenez une distance
supérieure à 50 cm/20” entre la machine et les objets ou murs
environnants.
I. Remarques
II. Caractéristiques et Composants
III. Installation et Réglage
IV. Réglage de Contrôle
V. Instructions de Vidange
VI. Maintenance
VII. Dépannage
VIII. Appendice
Caractéristiques et Composants
1. Caractéristiques
Nouveau look, structure compacte, machine profilée, atmosphère
aristocratique.
Avec fonction de refroidissement, de déshumidification et de ventilateur,
fonctions de drainage continu de l'eau.
La LED affiche le panneau de commande. La machine est belle et
élégante. Une télécommande de haute qualité est équipée pour faciliter
le fonctionnement. Il adopte une conception de télécommande
conviviale.
L'interface extérieure est réglée haut pour l'assemblage de l'installation
et maintient le flux régulier du caloduc.
Capacité de filtration de l'air.
Fonction de minuterie.
Fonction de protection de redémarrage automatique du compresseur
après trois minutes, une variété d'autres fonctions de protection.
Composants
Ensemble de Tuyau
D'échappement
Assemblage de la Palette
D'étanchéité de Fenêtre
Panneau de
Commande
Barre de Guidage
du Vent
Panneau Avant
Bac de Fond
Roulette
Panneau Arrière
Panneau Latéral
Couvercle Supérieur
Cadre de Tamis D'entrée
D'air de L'évaporateur
Vidange Continue
Air D'échappement
Poste D'emballage
Déversoir
Cadre en Maille
D'entrée D'air du
Condenseur
20 21
Installation et Réglage
Fig.4
1. Installation :
Attention : avant d'utiliser la climatisation mobile,
maintenez-la debout pendant au moins deux heures.
La climatisation peut être facilement déplacée dans la chambre.
Dans le processus de déplacement, assurez-vous que la
climatisation est en position verticale et que la climatisation doit être
placée sur une surface plane. N'installez pas et n'utilisez pas la
climatisation dans la salle de bain ou dans d'autres environnements
humides.
1.1 Installez l'ensemble de tuyaux (comme illustré à la Fig.1) :
vissez l'ensemble de tuyaux (extrémité du raccord d'échappement)
dans l'orifice d'échappement sur le panneau arrière.
1.2 Installer l'ensemble de plaque d'étanchéité de fenêtre
1) Ouvrez à moitié la fenêtre et montez l'assemblage de la plaque
d'étanchéité de la fenêtre sur la fenêtre (comme indiqué sur les
Fig.2 et Fig.3) ; l'ensemble peut être placé dans le sens horizontal et
vertical.
2) Ouvrez divers composants de l'assemblage de la plaque
d'étanchéité de la fenêtre, ajustez leur distance d'ouverture pour
amener les deux extrémités de l'assemblage en contact avec le
cadre de la fenêtre et fixez divers composants de l'assemblage.
1.3 Installer le corps
1) Déplacez la machine avec les tuyaux et les raccords installés vers
la fenêtre, et la distance entre le corps et les murs ou autres objets
doit être d'au moins 50 cm/20” (comme indiqué sur la Fig.4).
2) Allongez le tuyau d'échappement et enclenchez l'extrémité plate
des joints du tuyau d'échappement dans le trou de la plaque
d'étanchéité de la fenêtre (comme illustré sur les Fig.5 et Fig.6) .
Remarques :
1. l'extrémité plate des joints du tuyau d'échappement doit être
enclenchée.
2. Le tuyau ne peut pas être déformé ni avoir une rotation importante
(plus de 45°). Gardez la ventilation du tuyau d'échappement non
bloquée.
Fig.1
Fig.2
Fig.3
22 23
50cm/20”
50cm/20”
Pousser
Réglage du Panneau de Commande
Avis Important
1. Touche Marche/Arrêt 2. Touche de Sélection de Mod 3. Touche Veille
7. Touche de Minuterie
4. Touche Bas
5. Touche Haut
6. Touche de Sélection de la
Vitesse du Ventilateur
I. Mode D'emploi :
Le panneau de commande LED est le suivant :
Fig.5 Fig.6
La longueur du tuyau d'échappement doit être de 280mm-1500mm/
11”-59”, et cette longueur est basée sur les spécifications de la
climatisation. N'utilisez pas de tubes de rallonge et ne les remplacez
pas par d'autres tuyaux différents, car cela pourrait provoquer un
dysfonctionnement. L'hôte d'échappement ne doit pas être bloqué ;
sinon cela peut provoquer une surchauffe.
1: Lorsque la machine est allumée pour la première fois, le buzzer jouera de
la musique de mise sous tension, puis la machine passera en état de veille.
2: Touche D'alimentation: appuyez sur la touche pour allumer et éteindre la
machine. En cas de mise sous tension, appuyez sur la touche pour éteindre
la machine ; en cas de mise hors tension, appuyez sur la touche pour
allumer la machine.
3: Touche de Sélection de Mode : En cas de mise sous tension, appuyez sur
la touche pour basculer entre le mode refroidissement → ventilateur → sec
.
4: Touche Haut et Touche Bas : appuyez sur les deux touches pour modifier
la température de réglage ou l'heure de réglage, procédez comme suit :
Pendant le réglage de la température, appuyez sur la touche haut ou bas
pour sélectionner la température souhaitée (non disponible en mode
ventilateur ou sec).
Pendant le réglage de l'heure, appuyez sur la touche haut ou bas pour
sélectionner l'heure souhaitée.
5: Touche de Sélection de la Vitesse du Vent :
En mode refroidissement et ventilateur, appuyez sur la touche pour
sélectionner le fonctionnement à vitesse de vent élevée ou faible. Mais
limité par les conditions anti-froid, dans certaines conditions, il peut ne pas
fonctionner selon la vitesse du vent réglée. En mode sec, l'appui sur la touche n'est pas v
fonctionnement à faible vitesse du vent.
6 : Touche de Minuterie:
En cas de mise sous tension, appuyez sur la touche pour fermer la minuterie
; en cas de mise hors tension, appuyez sur la touche pour ouvrir la
minuterie. Appuyez sur la touche , lorsque le symbole de la minuterie
clignote, appuyez sur les touches haut et bas pour sélectionner la valeur de
la minuterie requise. Les valeurs de la minuterie peuvent être réglées sur 1
à 24 heures et la valeur de la minuterie est ajustée vers le haut ou vers le
bas d'une heure.
7 : Mode Veille :
En mode refroidissement, appuyez sur la touche haut et ventilateur pour
activer le mode veille, puis l'unité fonctionnera silencieusement en mode
d'économie d'énergie.
Noter:
1. N'activez pas le mode veille en mode sec ou Ventilation !
2. Le voyant de remplissage d'eau s'allumera et le buzzer sonnera
pendant plusieurs secondes, le compresseur s'arrêtera de fonctionner
lorsque l'eau du châssis de l'unité intérieure sera pleine.
24 25
Les instructions d'utilisation des touches de la télécommande de haute
qualité sont les suivantes :
1. Alimentation : Appuyez sur la touche pour allumer ou éteindre
la machine.
2. Minuterie : appuyez sur la touche pour régler l'heure.
3. Bas : appuyez sur la touche pour réduire la température et le
réglage de la durée.
4. Mode : appuyez sur la touche pour basculer entre les modes
refroidissement, ventilateur et sec .
5. Haut : appuyez sur la touche pour augmenter la température et
le réglage du temps.
6. Ventilateur : appuyez sur la touche pour sélectionner une
vitesse de vent élevée ou faible.
7. Mode Veille : appuyez sur la touche pour activer le mode veille.
3.1 Fonction de Protection Contre le Gel :
En mode refroidissement, sec ou économie d'énergie, si
la température du tuyau d'échappement est trop basse, la machine
entrera automatiquement en état de protection ; si la température du
tuyau d'échappement atteint une certaine température, il peut
automatiquement revenir à un fonctionnement normal.
3.2 Fonction de Protection Contre les Débordements :
Lorsque l'eau dans le bac à eau dépasse le niveau d'avertissement, la
machine déclenche automatiquement une alarme et le voyant «
FULL» clignote. À ce stade, vous devez déplacer le tuyau de drainage
connecté à la machine ou la sortie d'eau à l'égout ou à une autre zone
de drainage pour le drainage (reportez-vous aux instructions de
drainage à la fin de ce chapitre pour plus de détails). Une fois l'eau
vidée, la machine revient automatiquement à son état d'origine.
3.3 Dégivrage Automatique (le mode refroidissement a cette
fonction):
La machine a une fonction de dégivrage automatique.
3.4. Fonction de Protection du Compresseur
Pour augmenter la durée de vie du compresseur, il dispose d'une
fonction de protection contre le démarrage différé de 3 minutes après
l'arrêt du compresseur.
II. Instructions D'utilisation de la Télécommande III. Une Variété de Fonctions de Protection
Le panneau de commande à distance est le suivant :
26 27
2. Drainage continu (facultatif) (uniquement applicable
au mode de déshumidification), comme indiqué sur la
figure :
1) Débranchez le bouchon d'eau.
2) Placez le tuyau de drainage dans la sortie d'eau.
3) Connectez le drainage
1. Vidange manuelle :
1) Lorsque la machine s'arrête une fois que l'eau est pleine, éteignez la
machine et débranchez la prise d'alimentation.
Remarques : veuillez déplacer la machine avec précaution, afin de ne
pas renverser l'eau dans le bac à eau au bas du corps.
2) Placez le réservoir d'eau sous la sortie d'eau latérale derrière le
corps.
3) Dévissez le bouchon d'eau, l'eau s'écoulera automatiquement dans le
réservoir d'eau.
Remarques:
1. Gardez le bouchon d'eau correctement.
2. Pendant le drainage, le corps peut être légèrement incliné vers
l'arrière.
3. Si le réservoir d'eau ne peut pas contenir toute l'eau, avant que le
réservoir d'eau ne soit plein, remplissez la sortie d'eau avec le bouchon
d'eau dès que possible pour empêcher l'eau de s'écouler sur le sol ou le
tapis.
4) Lorsque l'eau est évacuée, rebouchez le bouchon d'eau.
Remarques:
1. Redémarrez la machine après avoir installé le bouchon d'eau, sinon
l'eau de condensation de la machine s'écoulera sur le sol ou le tapis.
Instructions de Vidange
28 29
raccorder le tuyau
bac à eau
tuyau de
vidange
bouchon en
caoutchouc
bouchon en
caoutchouc
1. Nettoyer la surface
Nettoyer avec la surface de la machine avec un chiffon doux et
humide. N'utilisez pas de produits chimiques, tels que le
benzène, l'alcool, l'essence, etc. ; sinon, la surface de la
climatisation sera endommagée ou même toute la machine sera
endommagée.
2. Nettoyez le tamis du filtre
Si le tamis du filtre est obstrué par la poussière et que l'efficacité
de la climatisation est réduite, assurez-vous de nettoyer le tamis
du filtre une fois toutes les deux semaines.
2.1 : Nettoyez le cadre supérieur de la crépine du filtre
1) Serrez le bloc de calage du cadre du tamis filtrant EVA avec
les mains. Forcez vers le bas de l'extérieur pour retirer le cadre
de l'écran du filtre EVA. Dévissez les quatre vis fixant l'écran du
filtre EVA et le boîtier arrière pour retirer l'écran du filtre EVA
(comme indiqué sur la figure ci-dessus).
2) Mettez l'écran du filtre EVA dans de l'eau tiède avec un
détergent neutre (environ 40℃ / 104℉) et séchez-le à l'ombre
après le rinçage.
Unité de stockage :
1: Dévissez le couvercle de drainage, débranchez le bouchon d'eau et
évacuez l'eau du bac à eau dans d'autres récipients d'eau ou inclinez
directement le corps pour évacuer l'eau dans d'autres récipients.
2: Allumez la machine, réglez-la en mode de ventilation par vent
faible et maintenez cet état jusqu'à ce que le tuyau de drainage
devienne sec, de manière à maintenir l'intérieur du corps dans un état
sec et à l'empêcher de moisir.
3: Éteignez la machine, débranchez la prise d'alimentation et enroulez
le cordon d'alimentation autour du poteau d'emballage ; installer le
bouchon d'eau et le couvercle de drainage.
4: Retirez le tuyau d'échappement et conservez-le correctement.
5: Couvrez la climatisation avec un sac en plastique. Placez la
climatisation dans un endroit sec, gardez-la hors de portée des
enfants et prenez des mesures de contrôle de la poussière.
6: Retirez les piles de la télécommande et conservez-les
correctement.
Remarque : assurez-vous que le corps est placé dans un endroit sec
et conservez correctement tous les composants de la machine.
Maintenance
Nettoyage : avant le nettoyage et l'entretien,
éteignez la machine et débranchez la prise.
Dépannage
Ne pas réparer ou démonter la climatisation par vous-même. Une
réparation non qualifiée causera des dommages aux utilisateurs ou à
leurs propriétés.
Problèmes Raisons Solutions
La
climatisation
ne fonctionne
pas.
Il n'y a pas d'électricité.
Videz l'eau à l'intérieur.
Allumez-le après l'avoir
connecté à une prise avec
électricité.
Il est recommandé
d'utiliser la machine à
une température de
7-35 ℃ (44-95 ℉).
L'indicateur de débordement
affiche « FL ».
La température ambiante est
trop basse ou trop élevée.
30 31
Boîte de filtre
Filet de filtre

Remarque : Si des problèmes non répertoriés dans le tableau
surviennent ou si les solutions recommandées ne fonctionnent pas,
veuillez contacter l'organisation de service professionnel.
L'effet de
refroidissement
n'est pas bon.
Gros bruit.
Le compresseur
ne fonctionne
pas.
Affiche 'E2'.
Affiche 'E1'
La
télécommand
e ne
fonctionne
pas.
Modifiez la température de
consigne.
En mode refroidissement, la
température ambiante est
inférieure à la température
réglée ; en mode chauffage,
la température ambiante est
supérieure à la température
réglée.
Les portes ou les fenêtres sont
ouvertes ; Il y a beaucoup de
personnes; ou en mode
refroidissement, il existe
d'autres sources de chaleur.
La climatisation n'est pas
placée sur une surface plane.
La protection contre la
surchauffe démarre.
La distance entre la machine
et la télécommande est trop
importante.
Le capteur de température
du tuyau est anormal.
Le capteur de température
ambiante est anormal.
La télécommande n'est pas
alignée avec la direction du
récepteur de télécommande.
Les piles sont épuisées.
Vérifiez le capteur de
température du tuyau et
les circuits associés.
Vérifiez le capteur de
température ambiante et
les circuits associés.
Laissez la télécommande
s'approcher de la
climatisation et assurez-vous
que la télécommande est
directement orientée vers le
récepteur de la
télécommande.
Remplacez les piles.
Placez la climatisation sur
un endroit plat et dur (pour
réduire le bruit).
Attendez 3 minutes jusqu'à ce
que la température baisse,
puis redémarrez la machine.
Fermez les portes et les
fenêtres et ajoutez une
nouvelle climatisation.
En mode déshumidification,
la température ambiante
est basse.
Il y a la lumière directe
du soleil.
Le tamis du filtre est sale.
Nettoyez ou remplacez le
tamis du filtre.
Dégagez les obstacles.
L'entrée ou la sortie d'air est
bloquée.
Tirez le rideau.
La machine est placée dans
une pièce avec une
température ambiante
supérieure à 17 ℃ (62 ℉).
32 33
Annexe
Paramètres de Fusible
Schéma de Principe pour le Modèle de
Refroidissement Uniquement
Tous les paramètres techniques et spécifiques, veuillez vous référer
à la plaque signalétique du produit. En raison de l'amélioration
continue, nous nous réservons le droit de modifier certains modèles
sans préavis.
Traitement : Ne pas mettre la machine abandonnée avec
d'autres déchets non triés. Ces déchets doivent être placés
séparément pour d'autres usages spéciaux.
Type : 5ET ou SMT
Tension : 250V
Courant : 3,15A
Condenseur
Compresseur
Évaporateur
Capillaire
34