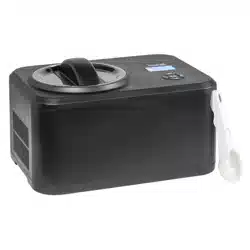
Baridi 1L Ice Cream Maker with Fast Freeze & Yoghurt
Function - Black
Model No. DH238
Thank you for purchasing a Dellonda product. Manufactured to a high standard, this product will, if used according to these instructions, and properly
maintained, give you years of trouble free performance.
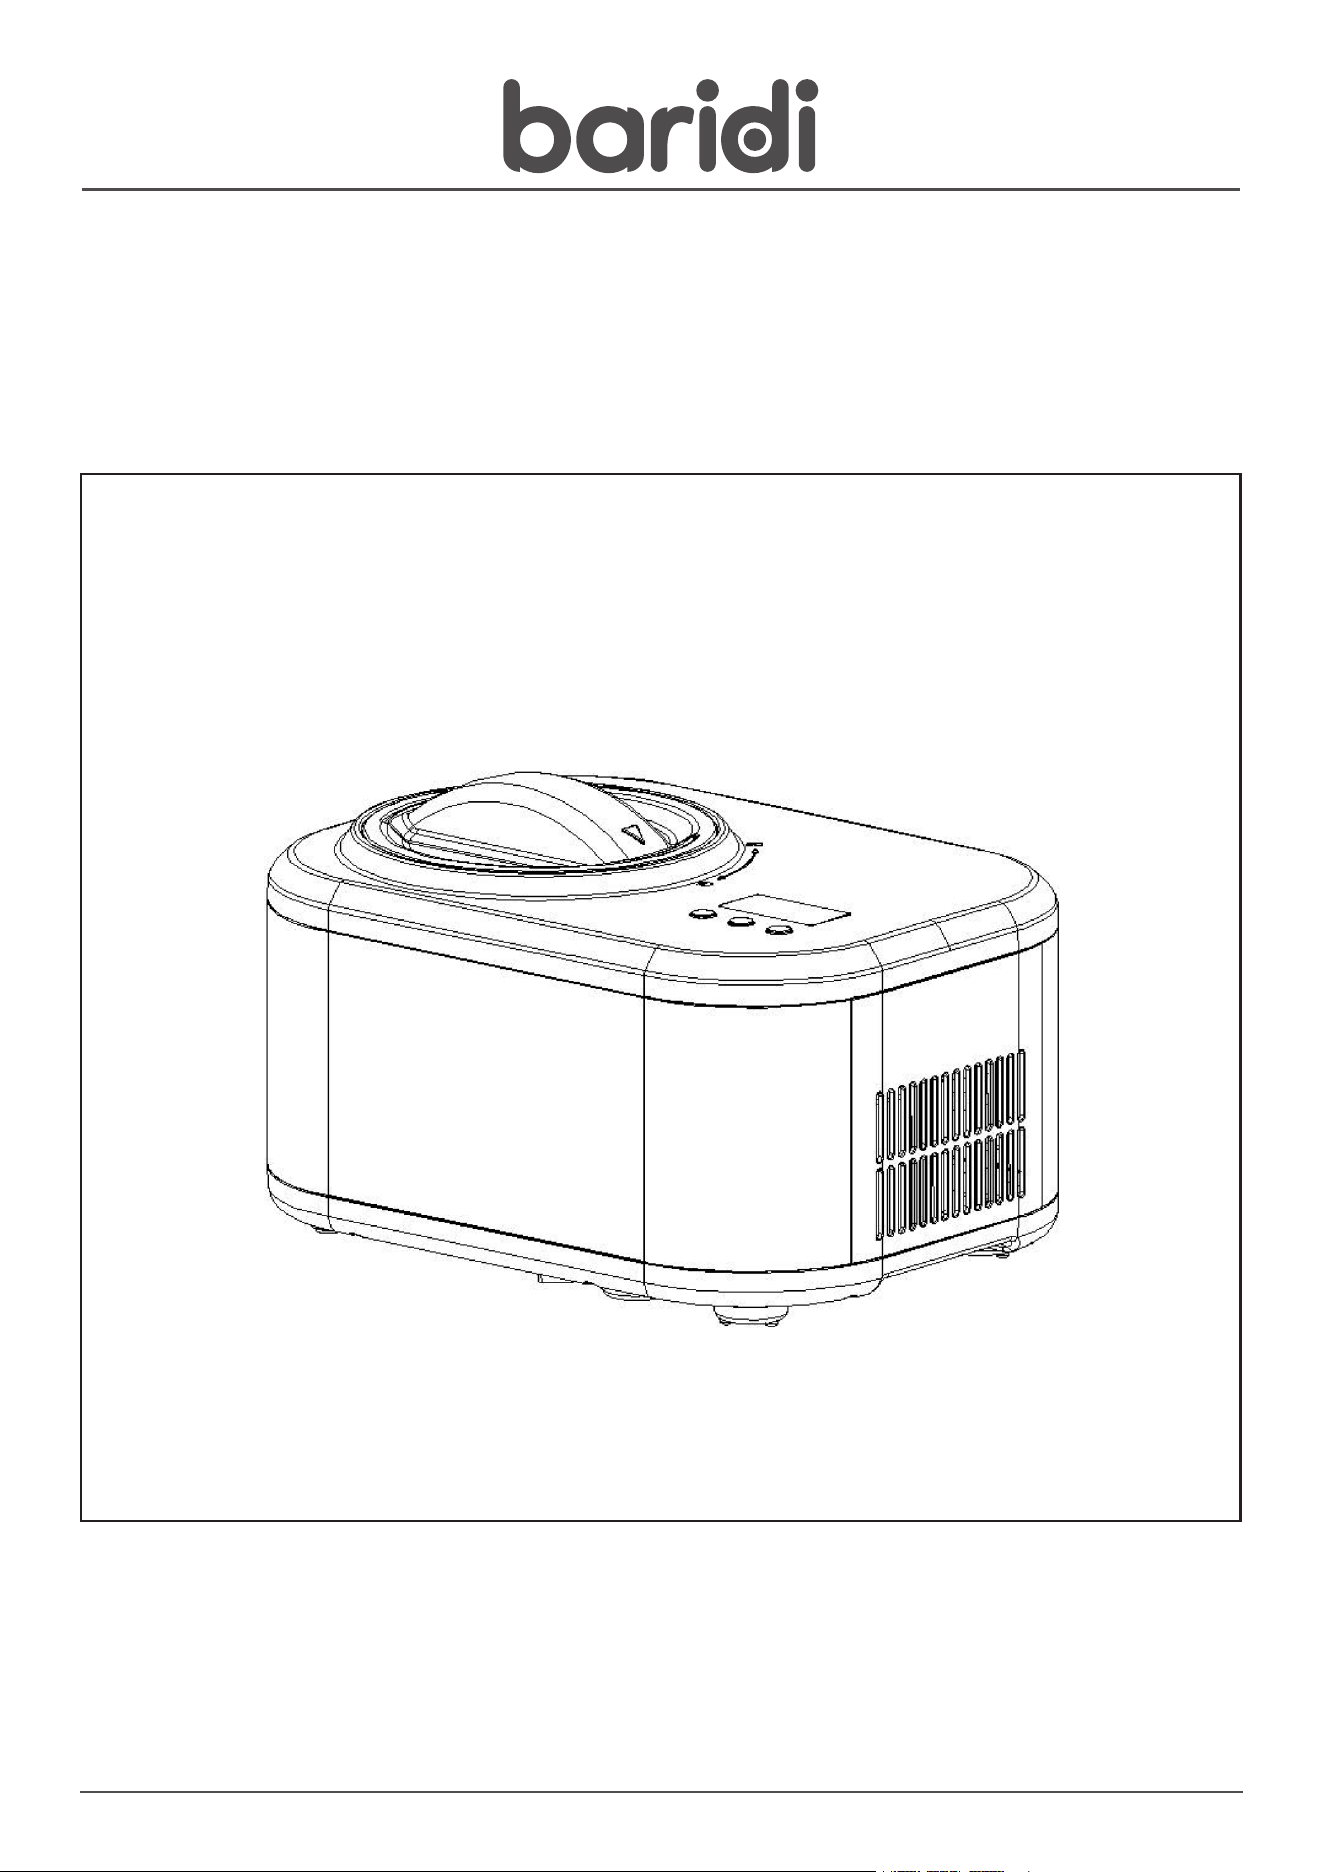
LINE
DRAWING
www.dellonda.co.uk
DH238 Issue:3 08/05/24
2
Important Information
Please read these instructions carefully and note any safe operational requirements, warnings & cautions. Use the product correctly and with
care for the purpose for which it is intended. Failure to do so may cause damage and/or personal injury and will invalidate the warranty. Keep
these instructions safe for future use.
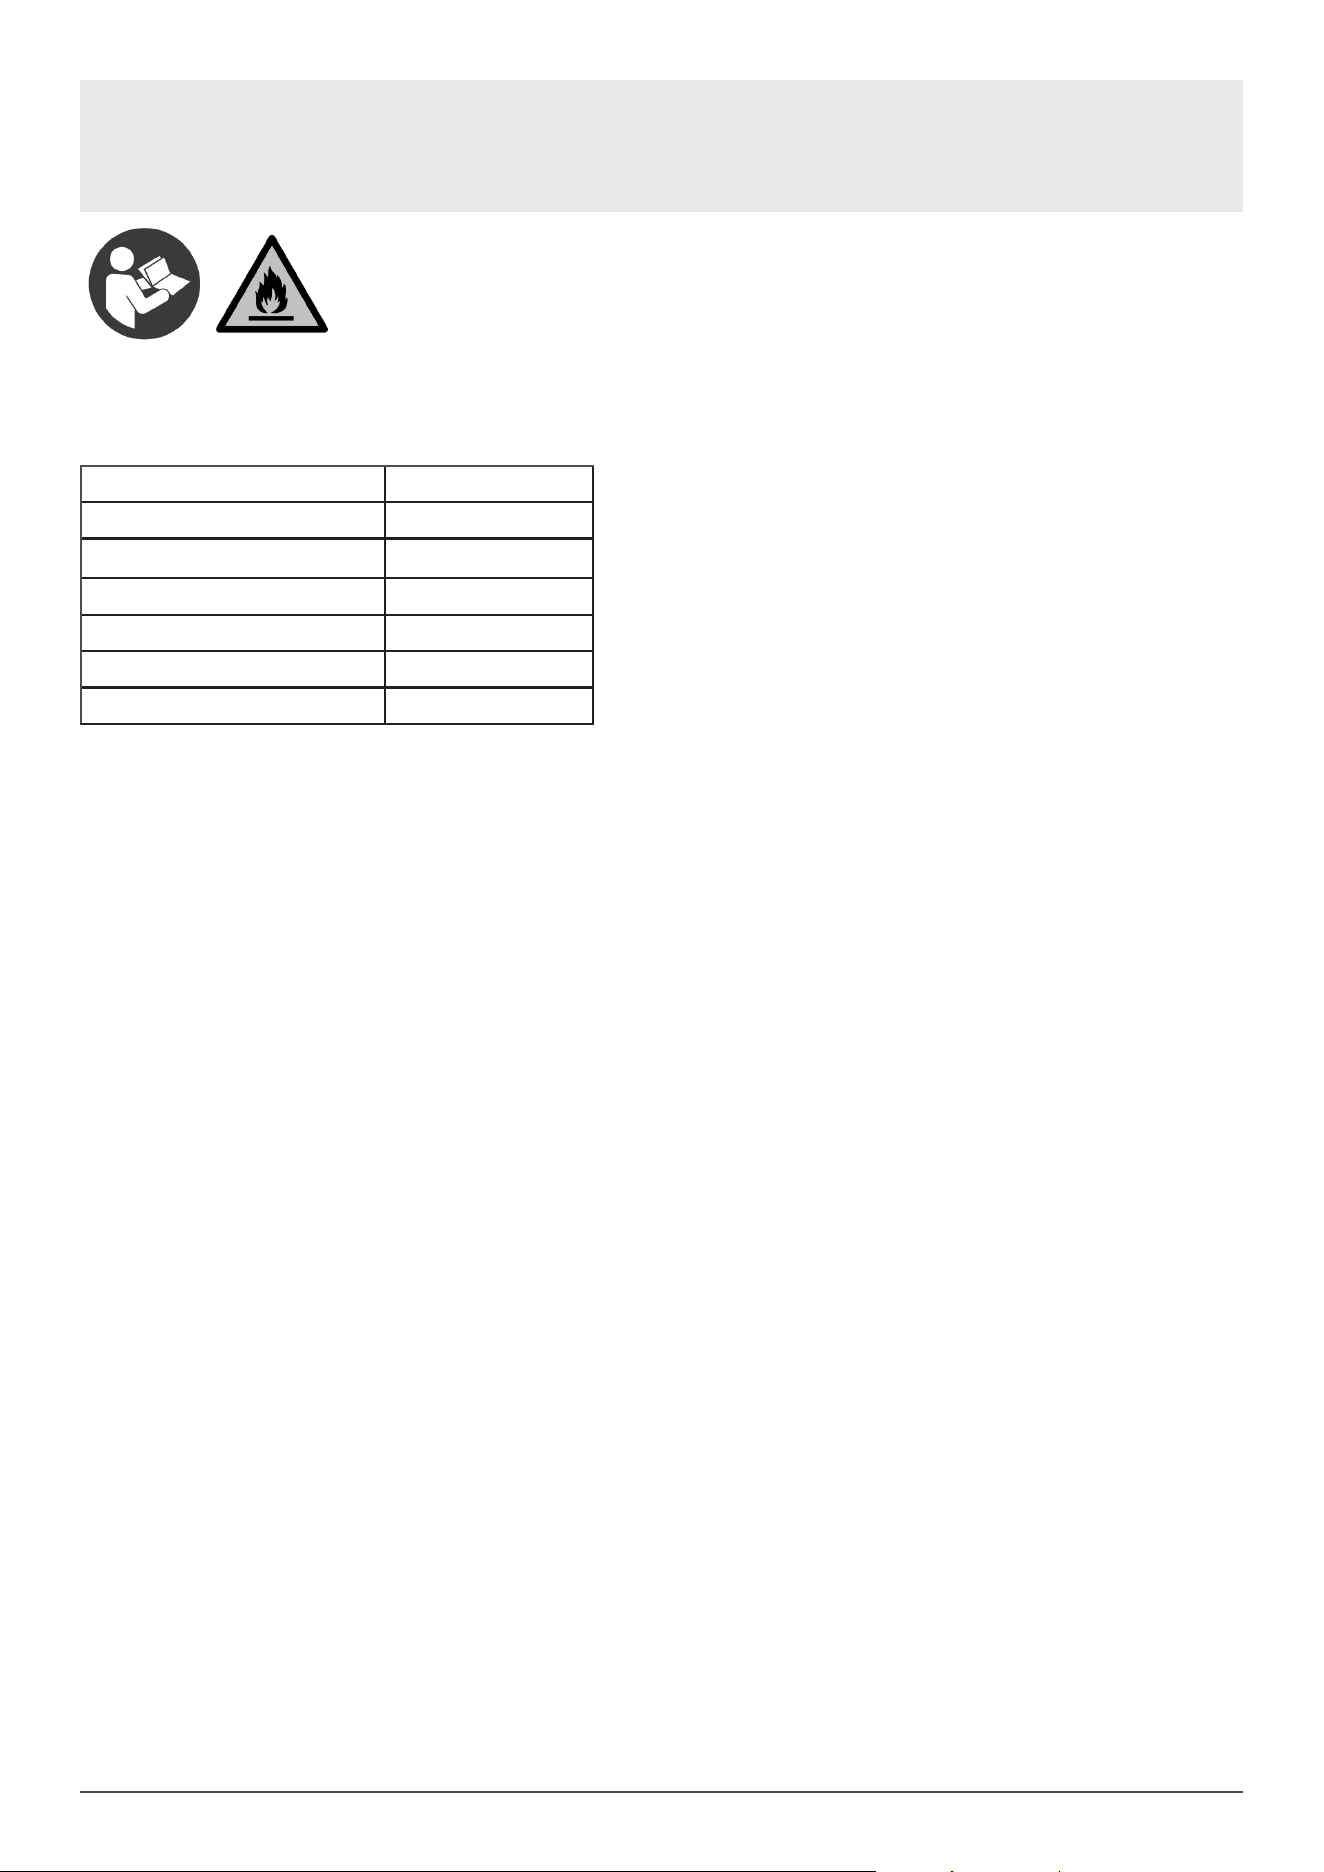
Refer to
instruction
manual
Warning:
ammable
Capacity 1L
Cooling Range -18 to -35°C
Energy Rating G
Nett Weight 7.5kg
Product Dimensions (W x D x H) 23 x 35.5 x 26cm
Supply 220-240V - 50Hz
Vesicant Cyclopentane (C5 H10)
Specication
Safety Instructions
ELECTRICAL SAFETY
WARNING! It is the user’s responsibility to check the following:
9 Check all electrical equipment and appliances to ensure that they are safe before using. Inspect power supply leads, plugs and
all electrical connections for wear and damage. Sealey recommend that an RCD (Residual Current Device) is used with all electrical
products.
Electrical safety information. It is important that the following information is read and understood:
9 Ensure that the insulation on all cables and on the appliance is safe before connecting it to the power supply.
9 Regularly inspect power supply cables and plugs for wear or damage and check all connections to ensure that they are secure.
Important:Ensurethatthevoltageratingontheappliancesuitsthepowersupplytobeusedandthattheplugisttedwiththe
correct fuse.
8 DO NOT pull or carry the appliance by the power cable.
8 DO NOT pull the plug from the socket by the cable.
8 DO NOT usewornordamagedcables,plugsorconnectors.Ensurethatanyfaultyitemisrepairedorisreplacedimmediatelybya
qualiedelectrician.
If the cable or plug is damaged during use, switch off the electricity supply and remove from use. If the supply cord is damaged it must
bereplacedbythemanufacturer,itsserviceagentorsimilarlyqualiedpersonsinordertoavoidahazard.
Ensurethatrepairsarecarriedoutbyaqualiedelectrician.
GENERAL SAFETY
• Children from age 8 years and above, persons with reduced physical, sensory, or mental capabilities those with lack of experience and
knowledge can use the appliance, if they have been given supervision or instruction concerning use of the appliance in a safe way to
understand the hazards involved.
• Children shall NOT play with the appliance.
• Cleaning and user maintenance on the appliance shall not be made by children without supervision.
• The appliance shall be disconnected from its power source during service and when replacing parts and, if that the removal of the plug
is foreseen, it shall be clearly indicated that the removal of the plug has to be such that an operator can check from any of the points to
which he has access that the plug remains removed.
8 DO NOT storeexplosivesubstancessuchasaerosolcanswithaammablepropellantinthisappliance.
• Children aged from 3 to 8 years are allowed to load and unload refrigerating appliances.
• Thisapplianceisintendedtobeusedinhouseholdandsimilarapplicationssuchas–staffkitchenareasinshops,ofcesandother
working environments; – farm houses and by clients in hotels, motels and other residential type environments:
bed and breakfast type environments catering and similar non-retail applications.
• To avoid contamination of food, please respect the following instructions:
Clean regularly surfaces that can come in contact with food and accessible drainage systems.
WARNING! When positioning the appliance, ensure the supply cord is not trapped or damaged.
WARNING! DO NOT locate multiple portable socket-outlets or portable power supplies at the rear of the appliance.
8 DO NOT expose to rain.
WARNING! Keep ventilation openings, in the appliance enclosure or in the built-in structure, clear of obstruction.
WARNING! DO NOT use mechanical devices or other means to accelerate the defrosting process, other than those recommended by
the manufacturer.
WARNING! DO NOT damage the refrigerant circuit.
WARNING! DO NOT use electrical appliances inside the food storage compartments of the appliance, unless they are of the type
recommended by the manufacturer.
3
• CAUTION:riskofre/Flammablematerials
• The refrigerant isobutene (R600a) is contained within the refrigerant circuit of the appliance, a natural gas with a high level of
environmentalcompatibility,whichisneverthelessammable.Duringtransportationandinstallationoftheappliance,ensurethatnoneof
the components of the refrigerant circuit becomes damaged.
• If the refrigerant circuit should be damaged:
• Avoidopenamesandsourcesofignition.
• Thoroughly ventilate the room in which the appliance is situated.
• Theplugmustberemovedbeforecleaning,maintainingorllingtheappliance.
8 DO NOTupendthisproductorinclineitovera45℃angle.
• To protect against risk of electric shock, do not pour water on: cord, plug or ventilation openings, immerse the appliance in water or any
other liquid.
• Unplug the appliance after using or before cleaning.
• Keep the appliance 8cm from other objects to ensure the good heat dissipation.
8 DO NOT use the accessories which are not recommended by Manufacturer.
8 DO NOT usetheapplianceneartoopename,hotplatesorstoves.
8 DO NOT switch on the power button frequently (ensure 5 min. interval at least) to avoid damaging the compressor.
• DO NOTinsertmetalorotherobjectsintotheappliancetoavoidreandshortcircuit.
• When removing the ice cream, do not knock the barrel or edge of barrel to protect the barrel from damage.
8 DO NOT switch on the power before installing the barrel or blender blade.
• Thestartingtemperatureoftheingredientsis20±3℃.Donotputtheingredientsintofreezerforpre-freeze,asitwillmaketheblender
blade block before the ice cream has been made.
8 DO NOT remove the blender blade when the appliance is working.
8 DO NOT use outdoors.
• Never clean with scouring powders or hard implements.
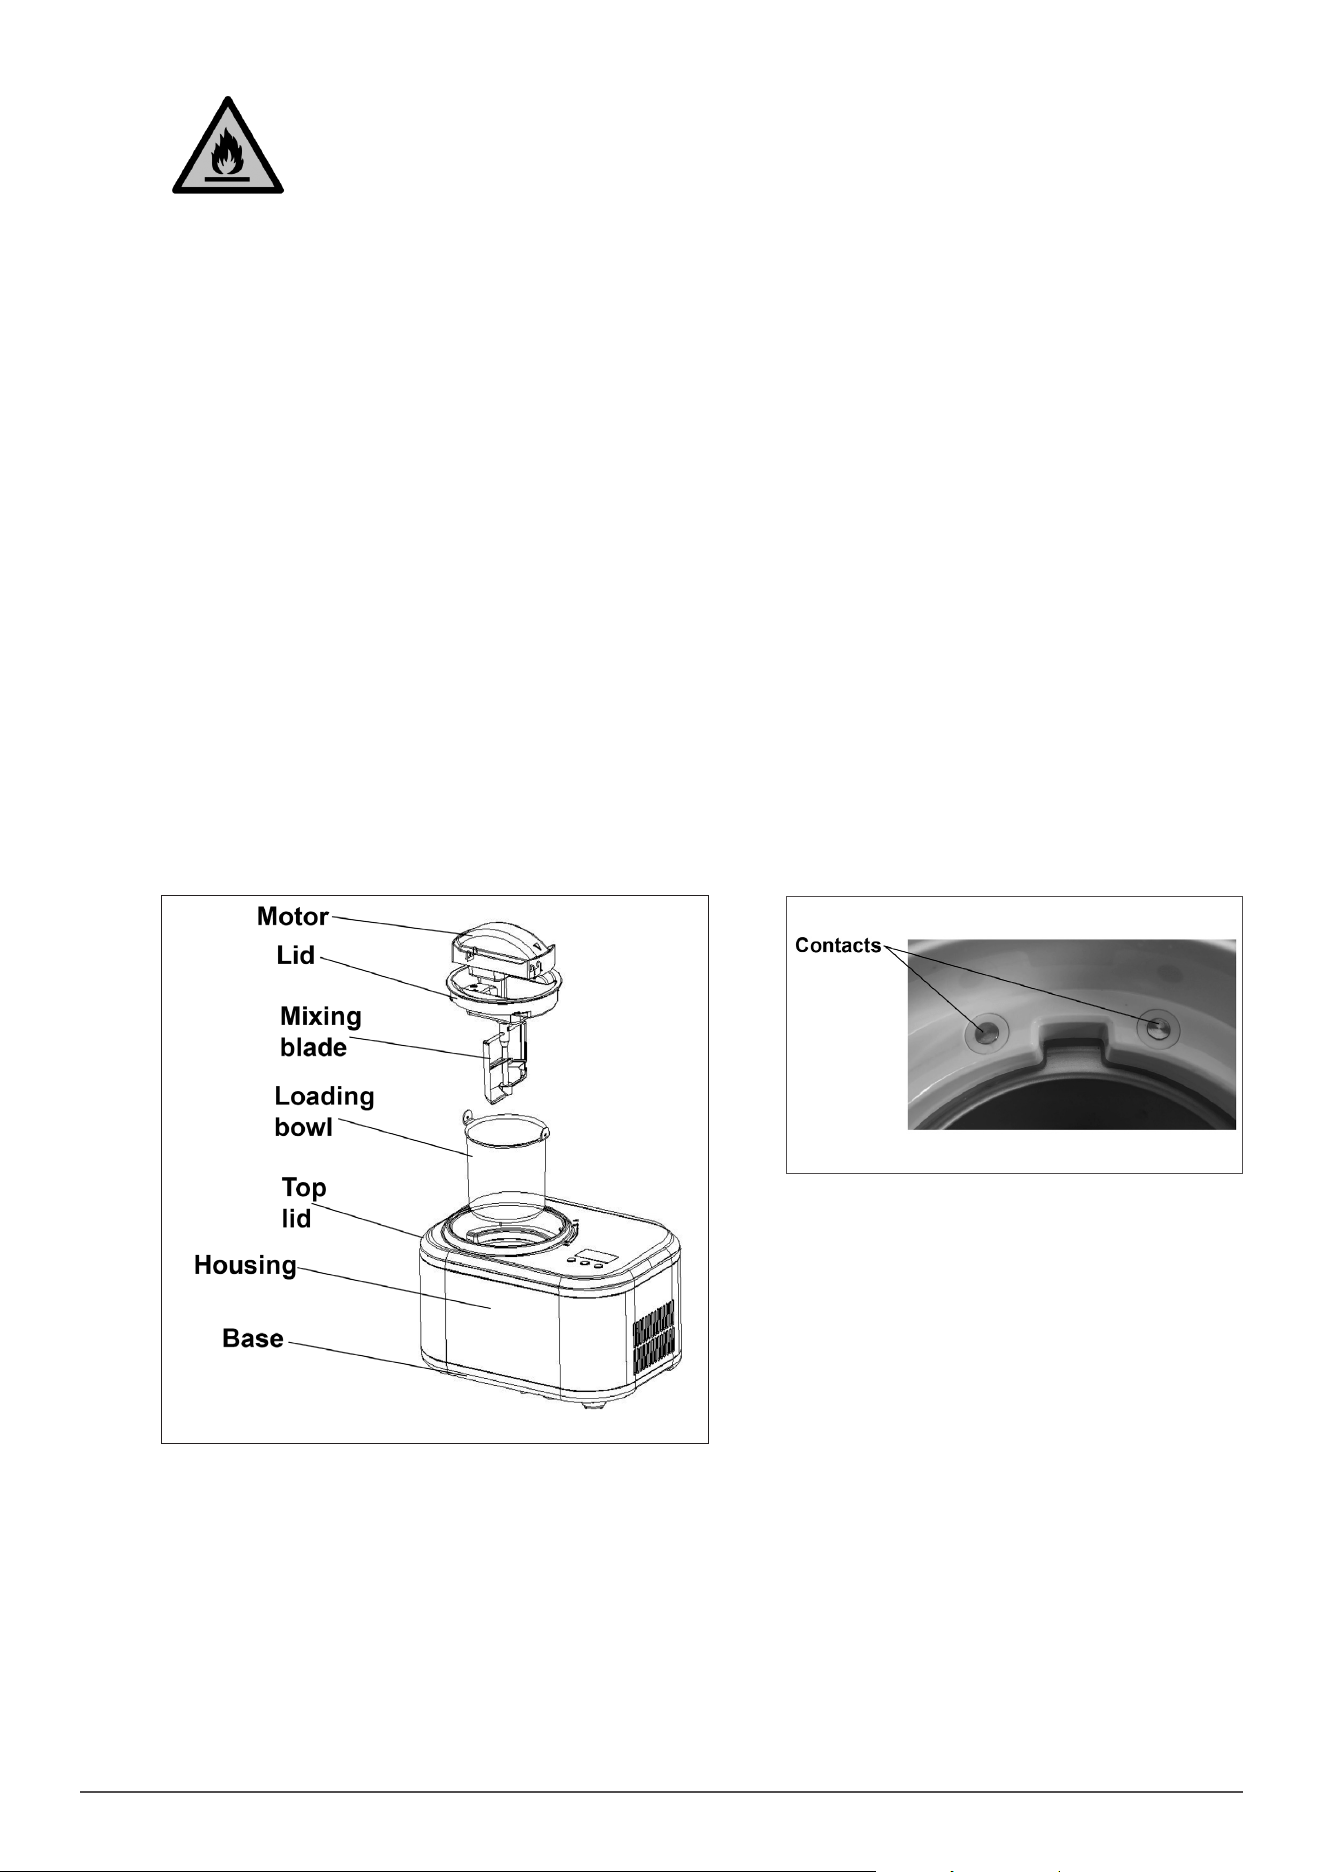
• There are two round metal contacts on the transparent lid, (on the upper cover). When using, wipe away water on the transparent cover
and on the contacts in the body.
• When the machine is in use, the two contacts need to be dry because water presence will lead to power failure of the motor. Disconnect
from mains supply, wipe out the water, and restart the appliance.
Features
4
Operation
• Plug into mains supply.
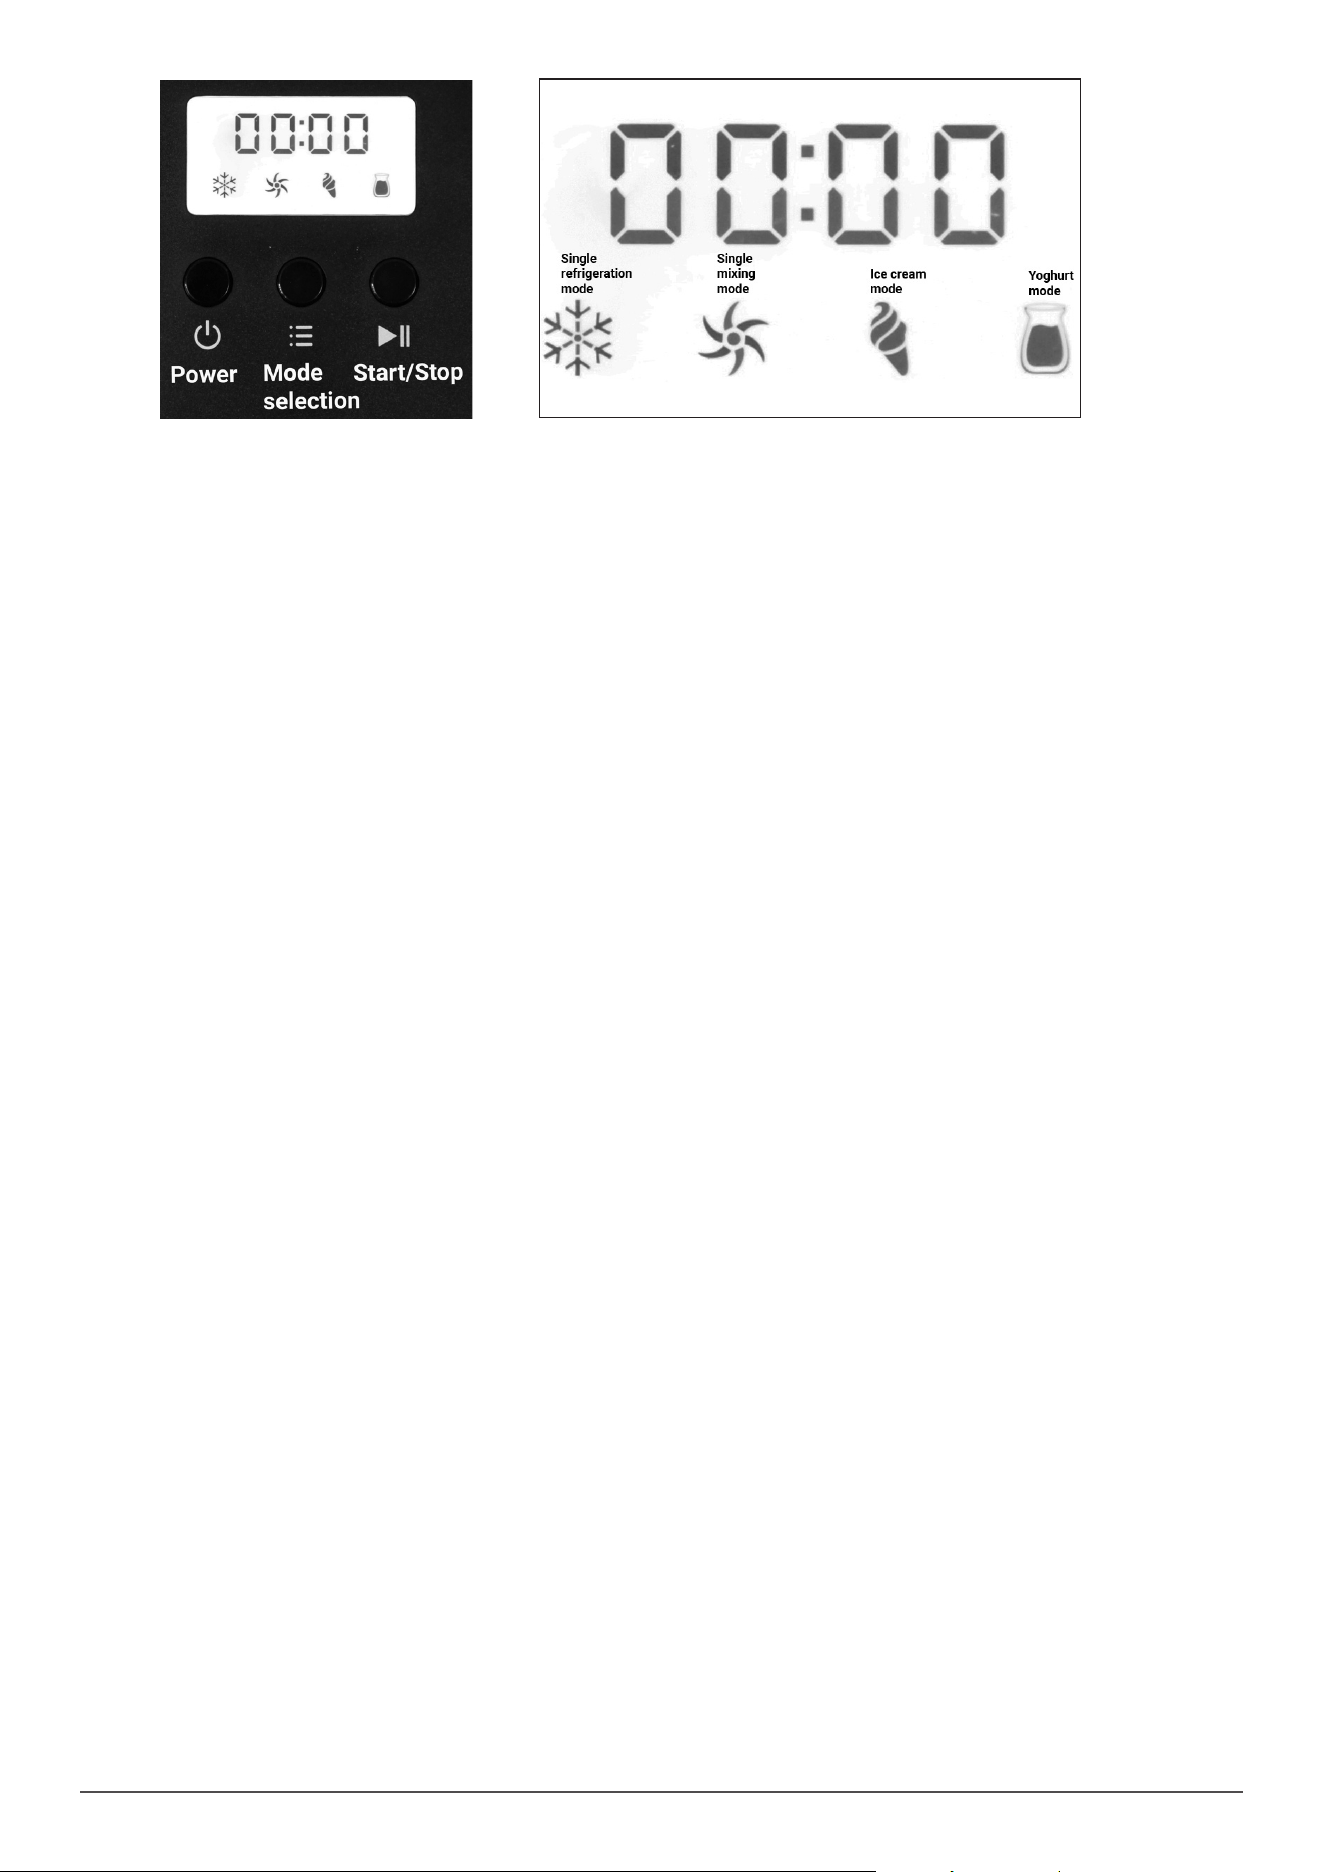
• FUNCTION OF THE BUTTONS:
• POWER BUTTON
• Plug into mains supply, press the power button to turn on the machine. Press button again to turn off the machine.
• MODE SELECTION BUTTON
• Ice cream is the default selection. Press again to cycle to single refrigeration, single mixing and ice cream. In working mode this button is
non operational.
• START/STOP BUTTON
• Press the START button to select the required mode and press again to stop the machine. Note: Refrigeration will be turned off after a
delay of 1 minute.
• MODE DESCRIPTIONS
• ICE CREAM MODE
• After selecting the ice cream mode, press the start/stop button to start ice cream making.
• If the button is pressed halfway, it will be suspended, the mixing motor will stop working, and the refrigeration function will stop working
after 1 minute. If the start/stop button is pressed again within 1 minute, the machine will enter the working state again.
• If there is no operation, the machine will return to the standby state.
• Whentheicecreamisnished,therewillbe10shortbeepsanditwillentertheinsulationfunctionautomatically,for60minutesintotal.
See Keep Made Ice Cream Cool Section.
• After the insulation is completed, the buzzer will sound 10 times and the machine will enter the standby state. (The icons of each mode
will be on for a long time, and the countdown will return to zero).
• SINGLE MIXING MODE
• After selecting the mixing mode, press the start/stop button to start. The default time is 30 minutes.
• If the start/stop button is pressed halfway, the single mixing function will be suspended.
• If the start/stop button is pressed again within 1 minute, the machine will enter the working state again. If there is no operation, the
machine will return to the standby state.
•
After the 30 minute countdown is completed, there will be 10 beeps to remind that the mixing is completed, and the machine will enter the
standby mode. The icons of each mode will be on for a long time, and the countdown will return to zero.
• SINGLE REFRIGERATION MODE
• Single refrigeration mode is a stand alone function if the user would like to cool the contents of the bowl only.
• YOGURT MODE
• Select yogurt mode, factory setting is 8 hours, display “08H”.
• Press START/STOP button, compressor, mixing motor and cooling fan start, yogurt icon on the screen will be on for a long time, other
icons will be off.
• After the machine completes the yogurt mode, the machine automatically enters the refrigeration mode, and the screen will display
“COOL”.
•
The compressor and fan motor start to work for 15 minutes, then whenever the temperature sensor detects that the temperature is higher
thanorequalto9℃,thecompressorandfanmotorwillworkfor4minutes.
• If there is no other operation, the machine will stay in refrigeration mode and will not shut down automatically.
• KEEP MADE ICE CREAM COOL FUNCTION
• When the ice-cream making is completed but the ice cream is required to be kept cool, the compressor will automatically turn off for
10 minutes and turn on for 6 minutes, to maintain the fresh taste and taste of the ice-cream.
• Theholdingtimeis1hour.Duringthisperiod,theindicatorlightoficecreammodeisashinggreen.Whentheicecreammodeis
nished,thereare10shortbeeps,andtheindicatorlightashesred,andthemachineisinstandbymode.
• MOTOR SELF-PROTECTION FUNCTION
• The motor has overcurrent protection function. For example, when the hardness of ice cream reaches the set value, it will stop
automatically.
• COMPRESSOR SELF PROTECTION FUNCTION
• After the compressor stops, the restart time must be greater than or equal to 3 minutes. If the restart time is less than 3 minutes, it will
start automatically after 3 minutes.
• CONTROLLING THE VOLUME OF THE INGREDIENTS
• Toavoidoverowandwaste,pleasemakesurethattheingredientsdonotexceed60%ofcapacityoftheremovablebowl(Icecream
expands when being formed).
• Yogurtisrecommendednottoexceed80%oftheinnerbarrelvolume.
• HOW TO MAKE ICE CREAM
• NOTE: Please thoroughly clean all parts that will contact with ice cream before use, including: cooling bowl, loading bowl, mixing fan
blade, transparent lid, etc.
• Before cleaning, you must ensure that the power cord plug is disconnected from the outlet. When making ice cream, keep the machine
atonalevelsurfacetoensurethatthecompressorofthemachineisworkingproperly.
Control Panel
Menu
5
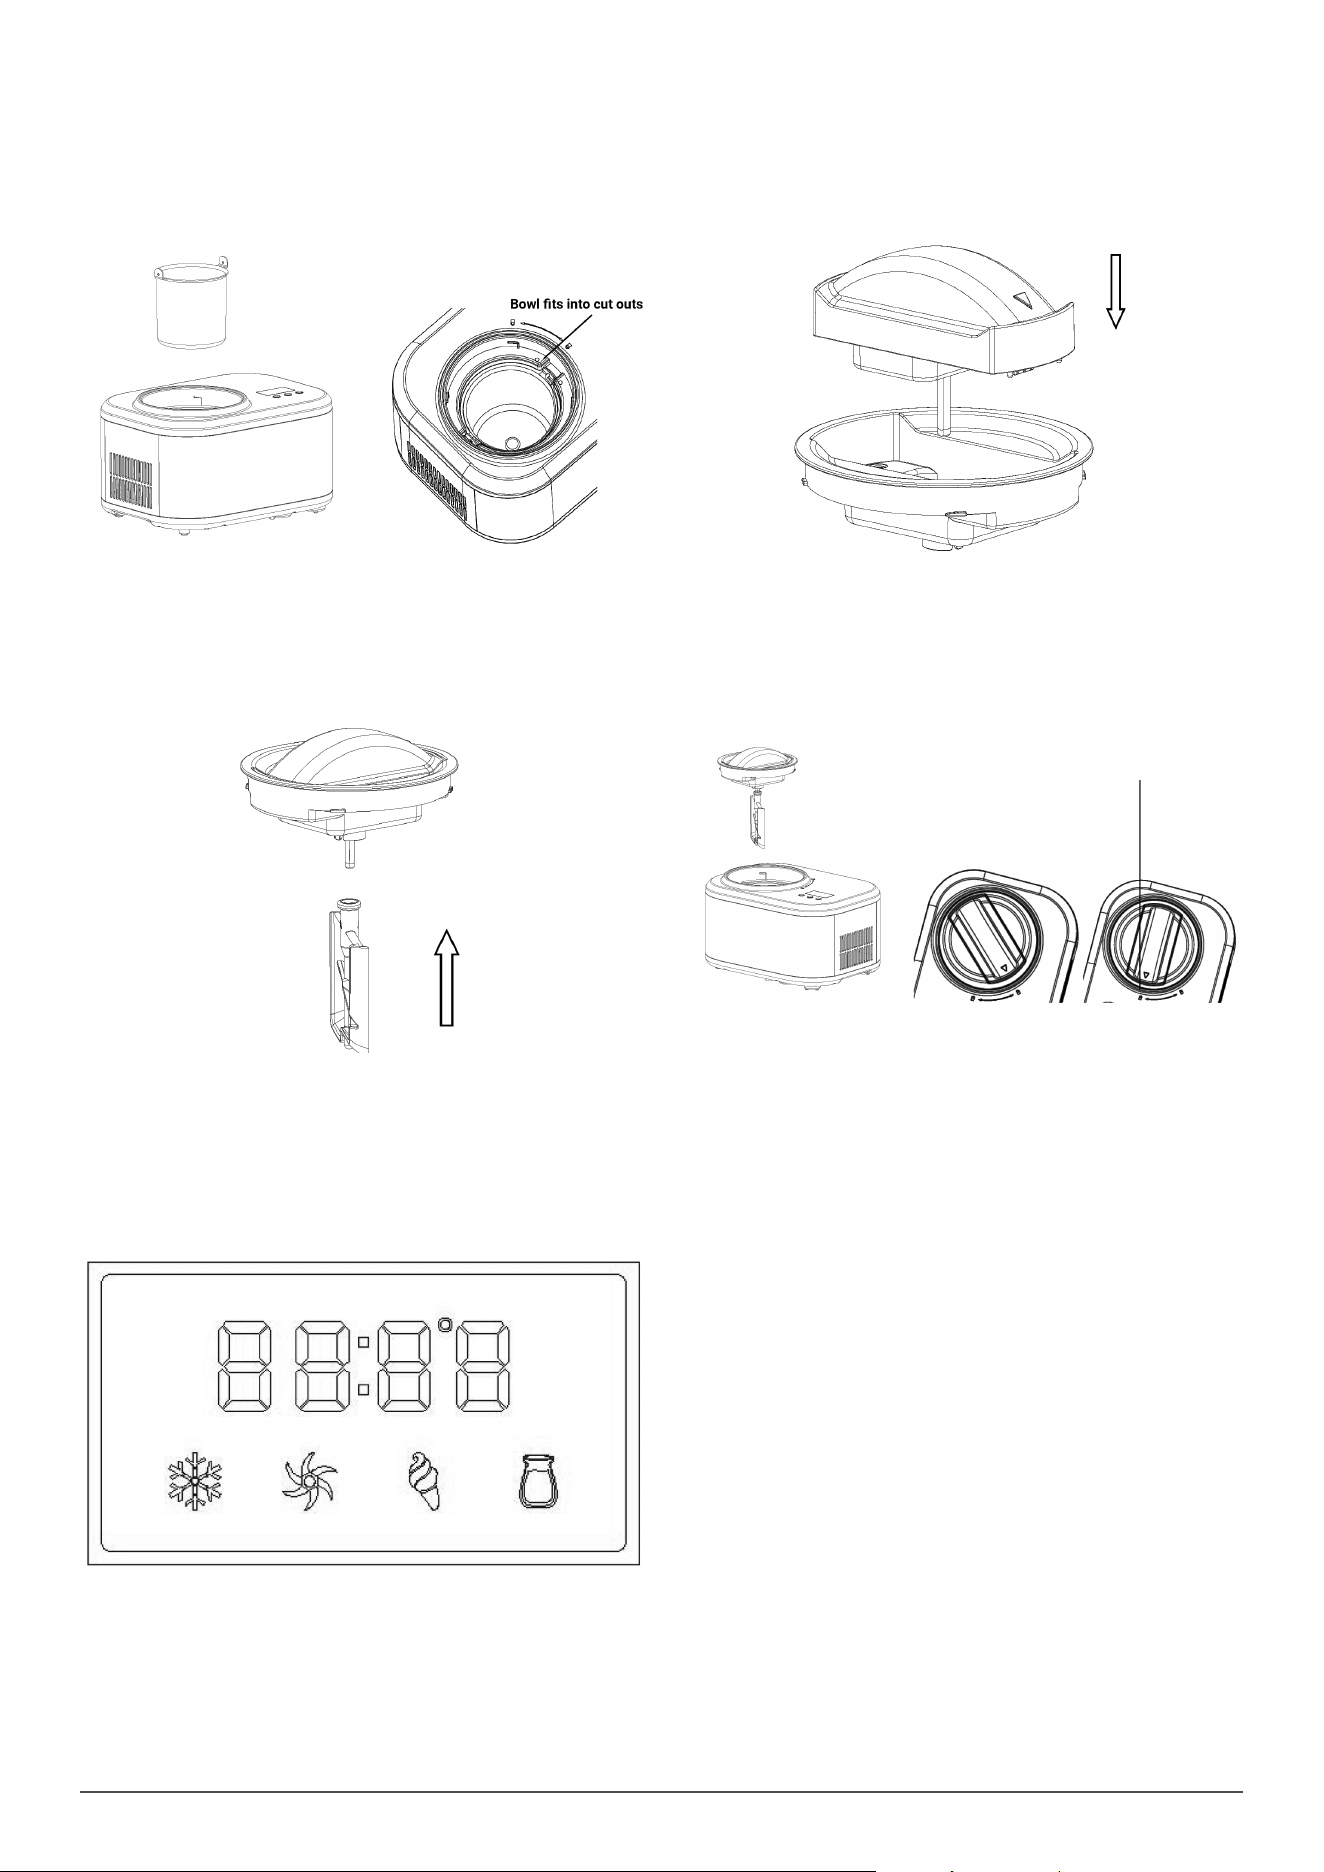
• Step 2.
• Then put the loading bowl into the ice cream machine,
both ends of the loading bowl handle shall be aligned
with the groove of the upper cover.
• Step 4.
• Install the mixing fan blade.
• Step 3.
• Install the transparent lid and motor assembly.
• Step 5.
• Put the components installed in step 4 into the ice cream
machine.
• Make sure that the centre of the convex hull of the loading
bowl and the motor components of the mixing fan
blade are inline, lock the components clockwise, and make
sure that the triangle mark on the components rotates to the
“LOCK” mark.
• Step 6.
• Plug in the power supply, press the Power button, the
machinestarts,theicecreammodeiconashes,pressthe
Start/Stop button, the ice cream mode icon will light up and
the ice cream program will start.
• Step 7.
• Whentheicecreamprogrammehasnished,touchthe
power button and the machine will shut down.
• To make an ice cream:
• Step 1.
• Pour the prepared recipe ingredients in proportion into the removable bowl.
• Make according to the following formula. (Ice cream will be made within 60 minutes).
• Cream: 180g
• Powdered Milk: 120g
• Water: 200g

6
• Step 8.
• Turn the transparent lid and motor components anticlockwise.
• Whilst removing, there will be a slight friction sound, which is normal.
• When the triangle mark is aligned with the unlocking mark, take out the components and then take out the loading bowl.
HOW TO MAKE YOGHURT
• Add the raw materials into the container according to the following proportions and mix well.
• Formula 1: 600 ml cold storage fresh milk + starter or 50 ml cold storage pure yoghurt.
• Formula 2: 600 ml sterile pure milk + starter or 50 ml cold storage pure yoghurt,
• Formula 3: 600 ml milk (which is made from milk powder) + starter or 50 ml cold storage pure yoghurt.
NOTES:
• Before adding the above ingredients, please check whether they are date expired or deteriorated.
• The addition amount of lactic acid bacteria starter is in accordance with the instructions of starter.
• Whenllingmilkpowder,pleasemixaccordingtotheproportionmarkedonthemilkpowder,oraccordingtotheproportionof150mlmilk
powder + 450ml water.
• The fermentation time will be affected by the environment temperature and the initial temperature of raw materials, so the fermentation
time should be extended when the environmental temperature is low or the milk is refrigerated.
• SUGGESTION: the active lactic acid bacteria starter is preferred as the fermentation source, and the commercially available pure yoghurt
or the last self-made pure yoghurt can also be used as the fermentation source when the starter is inconvenient to purchase.
FERMENTATION STEPS:
• Pluginthemachine,pressthepowerbutton,themachinestarts,thedefaulticecreammodeiconwillash,pressthemodeselection
button to select the yoghurt function, press the START/STOP button, the yoghurt mode icon will be on for a long time, and start to make
yoghurt.
RETAIN FRESHNESS:
• Recently fermented yoghurt can be eaten immediately, but the yoghurt has not reached the best taste at this time.
• For those who do not like refrigerated food, it can be seasoned and eaten at this time.
• 1.Afteracidication,themachinestopsworking,andautomaticallyenterstherefrigerationmodetokeeptheyoghurtfreshafter2
minutes.Therefrigerationtemperatureofyoghurtis2℃-8℃.(Aslongasthemachineisnotshutdown,themachineisalwaysinthe
refrigeration mode).
• 2.Thefermentedyoghurtcanbedirectlyputintotherefrigeratortogetherwiththecontainerforcoldstoragepurication.Theavourand
taste are slightly worse.
NOTE: Yoghurt should not be refrigerated for more than 10 days, and it is best to eat within 3 days, because the activity of lactic acid bacteria
in yoghurt is the highest during this period.
TIPS:
• 1. If a large amount of gas and odour are produced after fermentation, it means that the water source or milk powder is polluted and
should be discarded. If the sour taste appears and white yellow lustre “jellied beancurd” shape, it means that the fermentation is good.
• 2. Too long fermentation time will produce a large number of derivative liquid (light yellow liquid) with sour taste, which is a normal
phenomenon. You can drink the derivative liquid separately (the derivative liquid contains rich lactic acid, vitamin B and other nutrients) or
stir it for consumption.
• 3. Full fat milk powder or fresh milk is suitable for developing children, and low-fat or skim milk powder or fresh milk should be used for
overweightchildrenorobesepeopletomaintaintheirgure(milkaddedwithfructosecanacceleratefermentation,avoidusingavoured
milk).
Maintenance
WARNING! Remove from mains supply before performing maintenance or cleaning.
• 1) Take out the mixing blade, wipe it with a dampened cloth.
• 2) Take out the removable bowl, clean it with a dampened soft cloth.
• 3)Wipethetransparentlidandrelllidwithadampenedcloth.
• 4) Wipe the body with a dampened cloth. DO NOT pour water on cord, plug and ventilation, immerse the appliance in water or any other
liquid.
• 5) Dry thoroughly with a dry cloth.
Troubleshooting
No. Problem Reason Resolution
1 Difculttotakeoutloadingbowlaftertheice
creamisnished.
There are water drops between the refrigeration
barrel and the loading bowl that are not wiped
clean, resulting in freezing.
Wait 3-8 minutes before taking out
the ice cream bucket.
2 The transparent lid is lifted to the mixing fan
blade, and it cannot be stuck in place
The mixing fan blades not in place, and pay
attention to the alignment of the convex hull at the
bottom.
Put the mixing fan in place and
rotate the transparent cover in
place.
3 The loading bowl can not be placed in the
cold bucket.
Deformation caused by improper use of loading
bowl.
Buy a new loading bowl.
4 At the beginning of making ice cream, the
mixing fan becomes seriously scratched or
jammed.
Deformation caused by improper use of loading
bowl
Buy a new loading bowl.

Dellonda Limited, Sole UK Distributor of Baridi
Kempson Way, Suffolk Business Park, Bury St Edmunds, Suffolk. IP32 7AR
01284 757575 suppor[email protected] www.dellonda.co.uk
Environment Protection, Waste Electrical and Waste Electronic Equipment Regulations
(WEEE)
Recycle unwanted packaging materials. When this product is no longer required, or has reached the end of its useful life, please dispose
ofinanenvironmentallyfriendlyway.Drainanyuids(ifapplicable)intoapprovedcontainers,inaccordancewithlocalwasteregulations.
Please note that this product contains one or more batteries. It is our policy to continually improve products and we reserve the right to
alterdata,specicationsandpartswithoutpriornotice.Noliabilityisacceptedforincorrectuseofthisproduct.Guaranteeis12months
from purchase date, proof of which is required for any claim.