
BUTANE INDEXING SOLDERING IRON KIT
3-IN-1
MODEL NO: AK2971
Thank you for purchasing a Sealey product. Manufactured to a high standard, this product will, if used according to these
instructions, and properly maintained, give you years of trouble free performance.
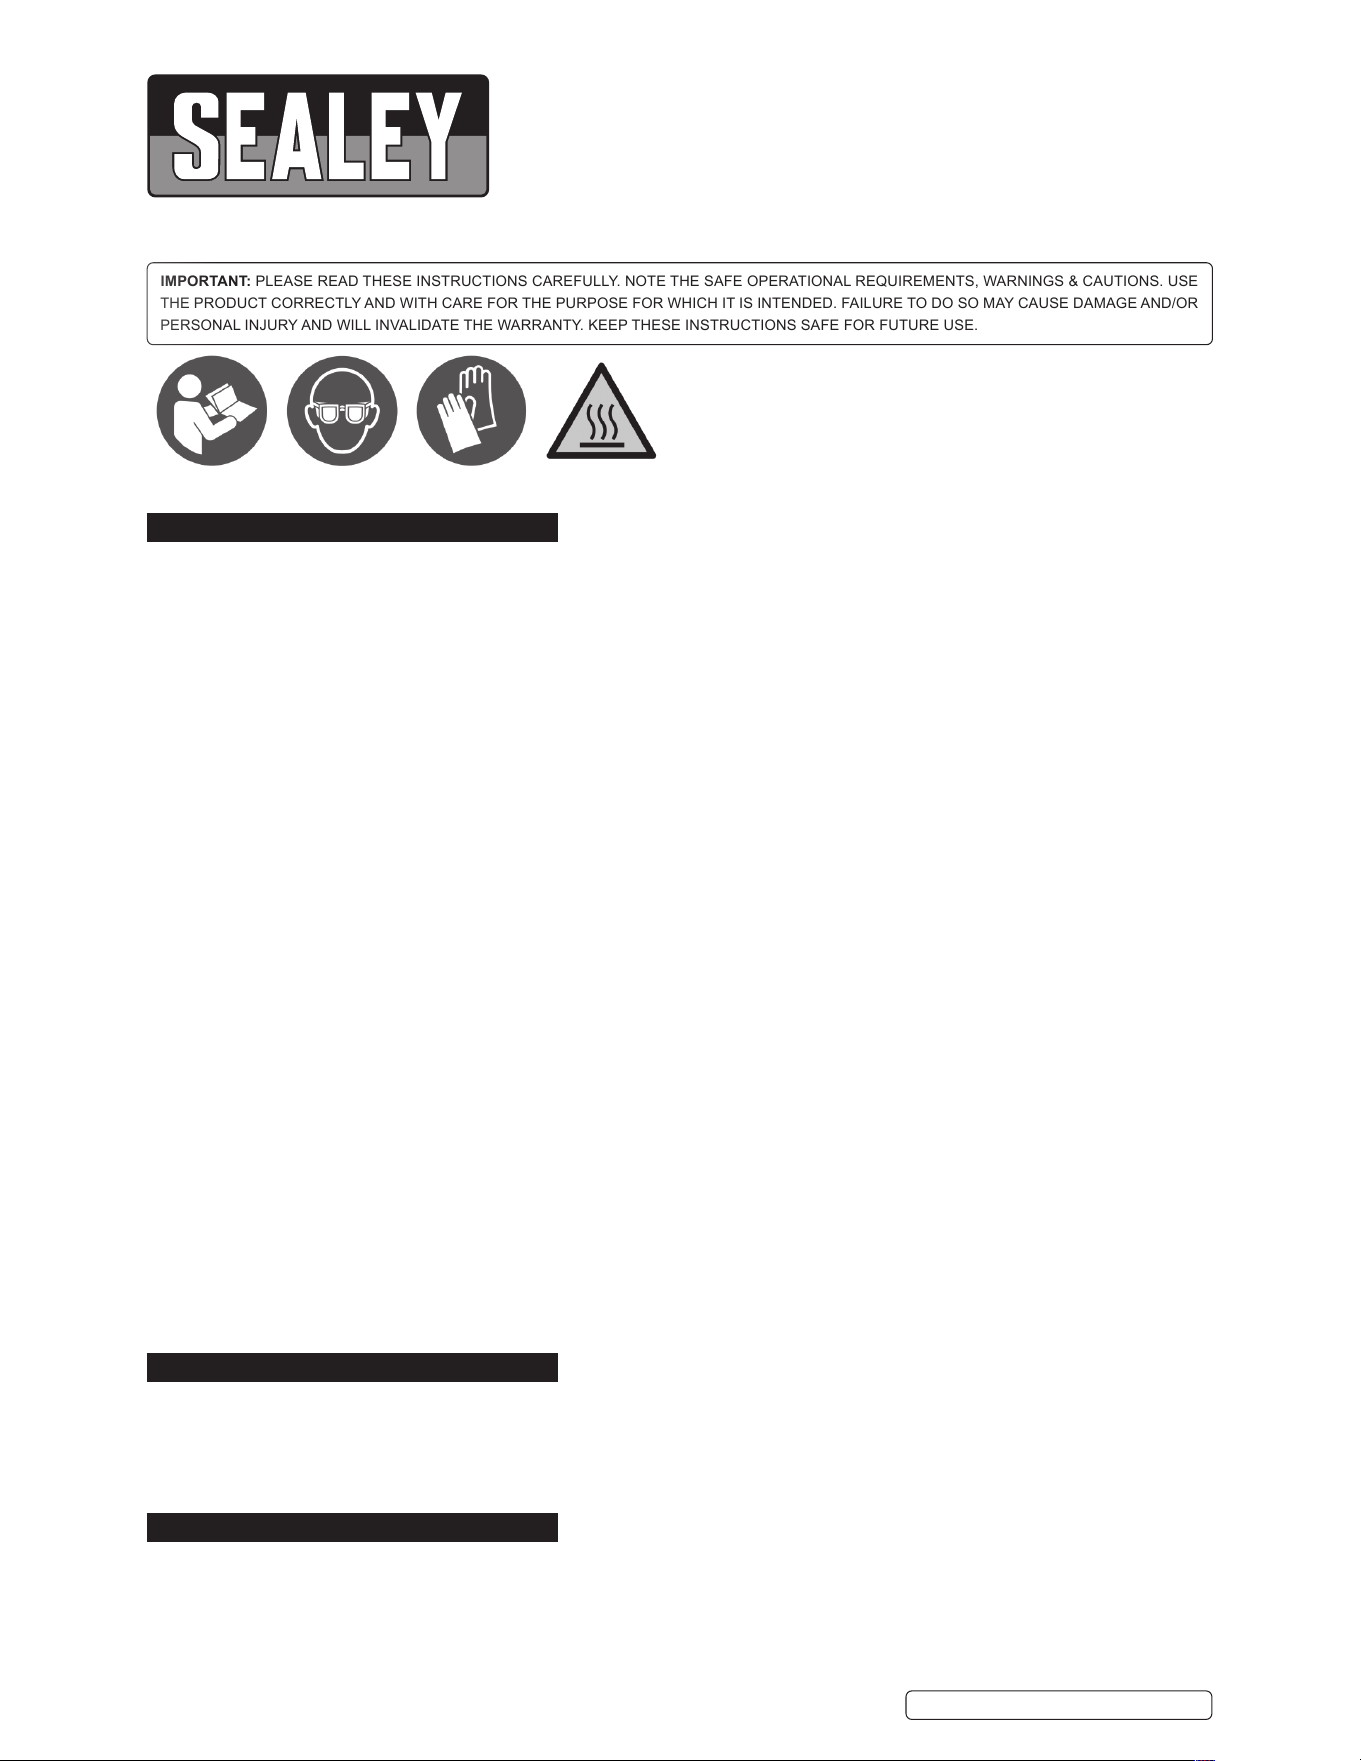
IMPORTANT: PLEASE READ THESE INSTRUCTIONS CAREFULLY. NOTE THE SAFE OPERATIONAL REQUIREMENTS, WARNINGS & CAUTIONS. USE
THE PRODUCT CORRECTLY AND WITH CARE FOR THE PURPOSE FOR WHICH IT IS INTENDED. FAILURE TO DO SO MAY CAUSE DAMAGE AND/OR
PERSONAL INJURY AND WILL INVALIDATE THE WARRANTY. KEEP THESE INSTRUCTIONS SAFE FOR FUTURE USE.
1. SAFETY
WARNING! Ensure Health & Safety, local authority, and general workshop practice regulations are adhered to when using this
equipment,makesureyouknowwhe rethenea restreextinguisheris.
WARNING!Alwayswearapprovedeye/faceprotectionwhenopera tingthet orch.
WARNING! DO NOTusethetorchifyounoticeth atitisdamagedoriftherecouldbeagasleakfromit.
WARNING!Butanegasisextremelyammable,handlewithcare.
WARNING!Alwayspointthetorchawayfromtheeyesandbodywhenignitinganddur ingoperation.
WARNING! DO NOT put the torch down when it is lit, DO NOTleaveitunattended.
WARNING!Theameisnoteasilyvisibleinbright daylight.
WARNING!Ensuretheameiscompletelyextinguishedafteruse.DO NOTusewatertocoolthetorchdown.
WARNING!Onlyuseinawellventilatedarea.
8 DO NOTuse thetorchinanareawherepaintfumes,solventsorotherammablesolids,liquidsorgasesposeapotentialhazard.
Keepammablematerialawayfromthetorchwhenoperating.
8 DO NOTope ratethetorchwhenyouaretiredorundertheinuenceofalcohol,drugsorintoxicati ngmedicat ion.
8 DO NOThol danyworkpiecebyhand.
8 DO NOTtou chtheworkpiececlosetotheheatedareaasitwillbeveryhot.Allowtocool.
8 DO NOTope ratethetorchifitisdamagedasthismaycausefailureand/orpossiblepersonalinju ry.
8 DO NOTtou chthetopofthetorchduring orimmediatelyafteruse,asitwillbeveryhot.Allowtocool.
8 DO NOTall owchildrentooperatethetorch.
9 Afteruse,allowthetorchtocoolbeforestoringit.
9 Whennotinuse,storeawayfromdirectsunlightinasafe,dry,childprooflocation.
8 DO NOTsto reatover40°C,suchasinacarinhot weather.
8 DO NOTmodifytheappliance.
9 Whenlled,itwillcontainammablegasunderpressu re.
8 DO NOTpunctureorputinre.
9 Makesurethereisobeforerelling.
8 DO NOTkeeplitformorethan5minutes.
9 Allowthemicrotorchtocooldownbeforestorage.Stor ingtheapplianceinwellventilatedareaandensurethe ameisoverafterthe
operation.
9 UseonlySealeyorigina lspareparts.
8 DO NOTusetorchasacigarettelighter.
9 Beextracarefulwhenusingthetorchoutdoorsonsunnyorwindydays.Windmaycarrythetorch’sheatbacktowardyou orother
areaswhicharenotintendedtobeheated.
9 Alwayschecktomakesurenounintendedpartsormaterialsarebeingheat ed.
9 Wheneverthereisapossibilitythatunintendedmaterialhasbe enheated,waitatl easttwohoursbeforeleavingthearea.
8 DO NOTinhalesolderingfumes.
9 Followrellingprocedu retoavoidseriousaccidents.
2. INTRODUCTION
Oneo facomprehensiverangeofPremierHandTools,suitablefordailyprofessionaluse.3-in-1devicethatcanbeusedforheating,soldering
andshrinking.Fittedwithindexingheadforthreedierentpositionsaswellasmagneticstand.Poweredbybutane(lighterfue l)andfeatures
a piezoelectric ignition switch. Viewing window at bottom of device to monitor fuel . Flame temper ature 1300°C, solderi ng temperature 450°C
andhotairtemperature600°C(Approximately).60-75Minuteruntimewith30mlfuelcapacity.KitIncludes;solderingiron,chiseltip,anviltip,
needletip,hotknife,deectornozzle,leadfreesolder,cleansings pongeandtipholder.
3. SPECIFICATION
Model No:.... ....................... ....................... ............... AK2971
Temperature range:.................................... ......... 450-1300
o
C
AK297 1Issue 104/01 /2023
Original Language Version
© Jack Sealey Limited
Refer to
instructions
Hot surfaces Wear eye
protection
Wear protective
gloves
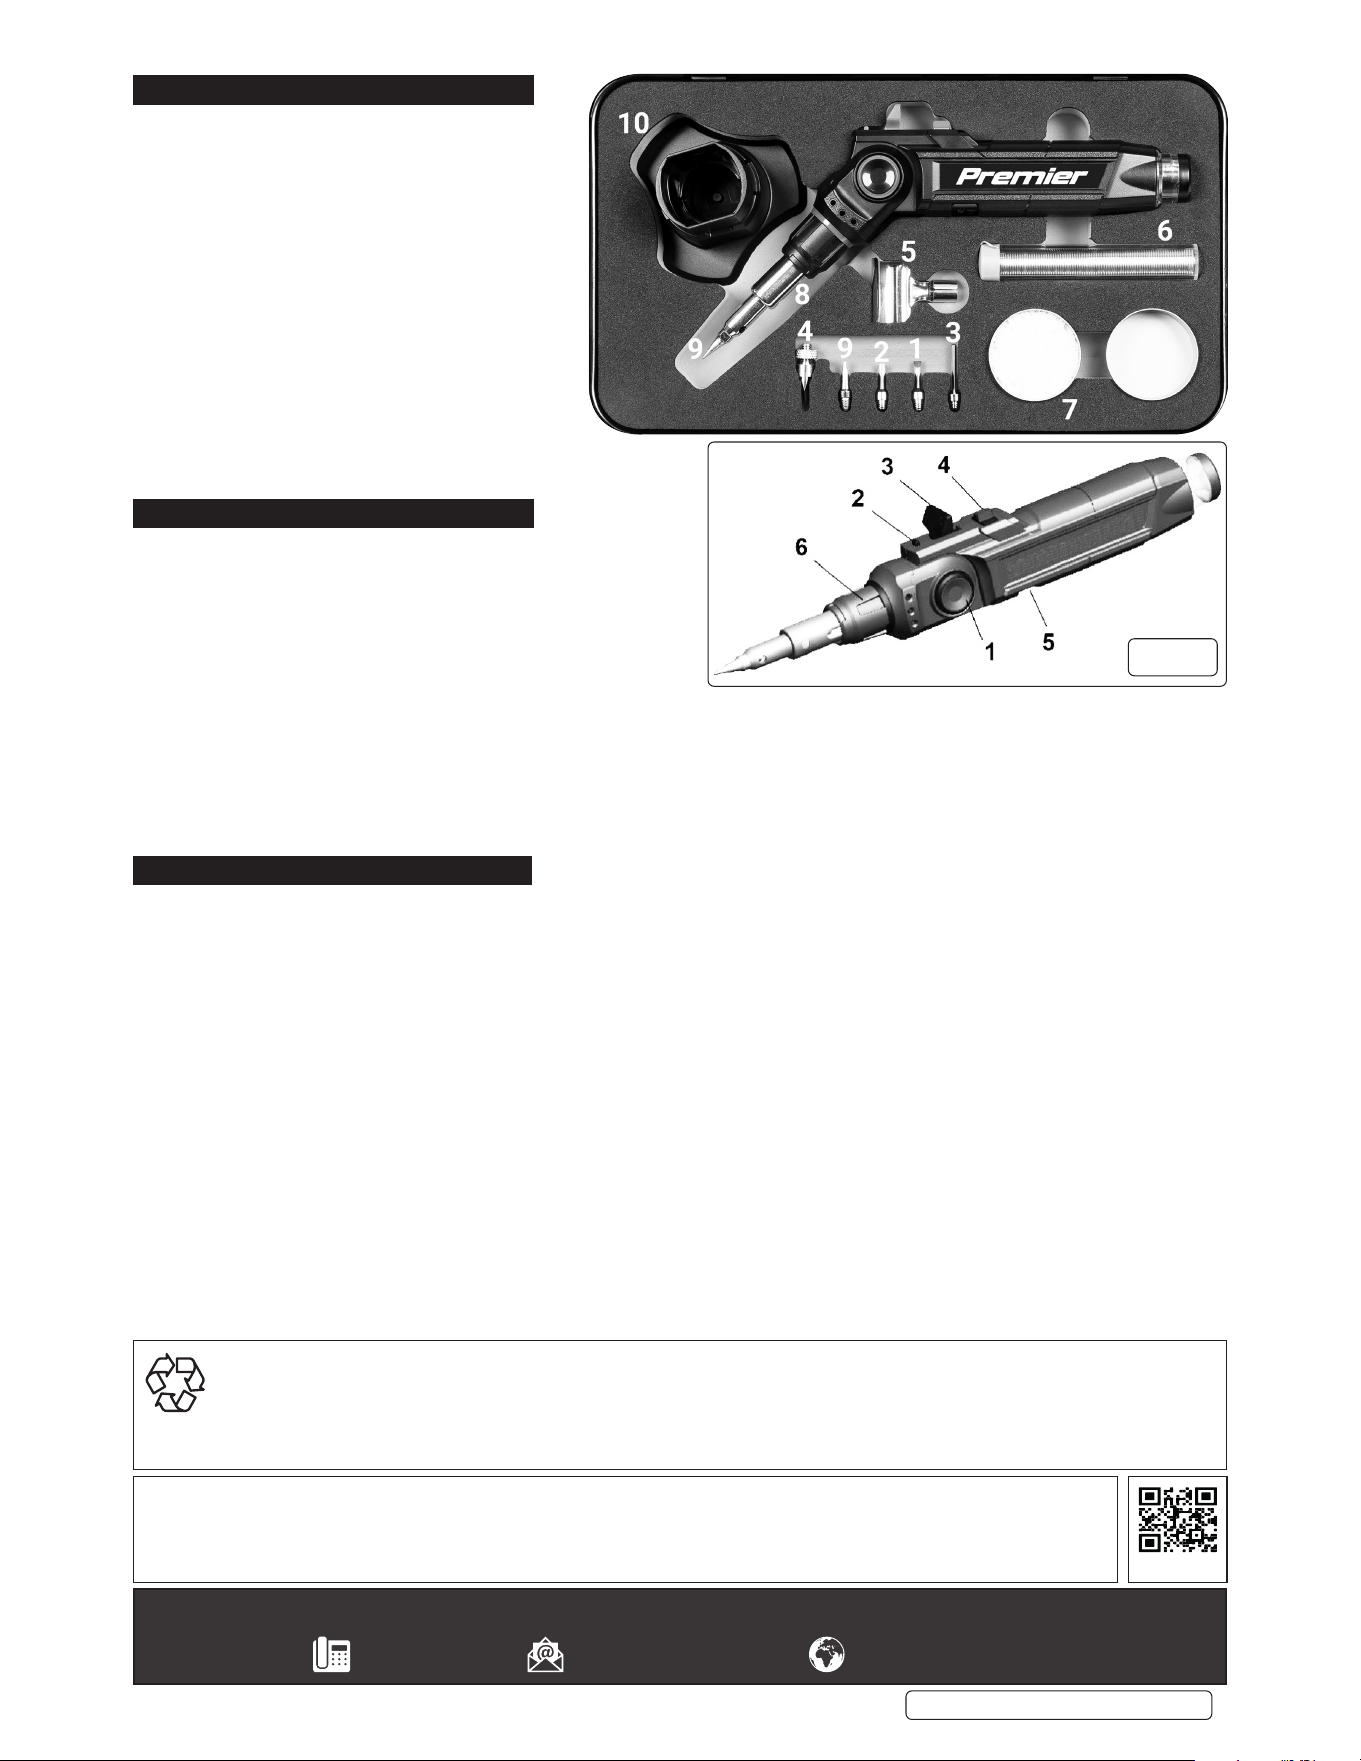
4. CONTENTS
Chise lTip(1)
Anvil Tip(2)
Needl eTip(3)
Hot Kni fe(4)
HeatShrinkDeectorNozzle(5)
LeadFreeSolde r(6)
Solde ringSponge(7)
TipHolder/C ap(8)
Point edTip(9)
Stand (10)
5. OPERATION
5.1. Thetipof theappliancecanbeadjustedto3dierentde grees
ofangle.Presstheinclineadjustmentb utton(g.1.1)and
positiont heapplianceheadaccording tothedesiredinclination.
5.2. Pressthesafetylockbutton( g.1.2)andatthesametimelower
theignitionlever(g.1.3)usingyourthumb.
Thisactio nwillignitetheappliance.
NOTE: Thebutaneamemaybebarelyvisibleincertainlightconditions.
5.3. Holdtheignitionlever(g.1.3)andreleasethesafetylockbutton(g.1.2).
5.4. Movethecontinuousameswitch (g.1.4)totherightforaconstantame.
5.5. Adjusttheamepowerbymoving theadjustmentlever(g.1.5)totherighttoincreasethepowerortothelefttodecreas eit.
5.6. Toswitchotheappl iance,movethecontinuousameswitch(g.1.4)totheleft,thiswillcutothegassupplyandextinguishthe
ame.
5.7. Ensureameisextinguishedandgasisoaftereachuse.
5.8. Stoptheoperationevery5minutestocoolthetool.
6. MAINTENANCE
6.1. REFILL
6.1.1. Fillonlywithbutanegas.Itmaybehazardoustoattempttollwithothertypesofgas.
6.1.2. Rellinawell-ventilatedarea, awayfrom ame,combustiblematerialsandotherpersons.
6.1.3. Pleasemakesurethereisobeforerelling.
6.1.4. Placingthesolderingironinan upside-downposition,Insertthegascanisterintothetorchrellingvalve.
6.1.5. Fillslowly.DO NOToverll.WhengasstartstoFlowout,stoplling
6.1.6. Afterlling,wipelighterandhandsdrybeforeigniting.
6.1.7. Afterrellingoperationthegastakessomeminutestostabilize.
6.1.8. Fornextrelling,letthetorchcooldownfor5Minutesbeforellingthetank.
6.2. REPLACEMENT OR INSTALLATION OF INSERTS
WARNING!ALWAYSLEAVETOCOOLCOMPLETELYTHETOOLBEFORETOREMOVEORREPLACETHEINSERTS.
6.2.1. Besuretousetheinsertrightforthejobyouwant.
6.2.2. Useonlytheinsertsthattperfectlyonthetool.TheinsertsthatDO NOTtperfectlycanresultinuncontrolledanddangerous
ame.Removethetipbyturningtheringnut(g.1.6)anticlockwise.Removethetipandinstallthedesiredone. Tightenwiththe
ringnut(g.1.6)byturningitclockwise.
6.2.3. Tightentheinsertssecurely.Forthecompletelyheatingoftheinsertsitisnecessarytowaitfor25seconds.
6.3. CLEANING
6.3.1. Turnothesolderingironandletitcoolcompletelybeforecleaning.
6.3.2. Theoutsideunitcanbecleanedwithadampclothwithalittlemilddetergent.
6.3.3. Cleanthetiponthespongewhenitisstillwarm.
Original Language Version
© Jack Sealey Limited
AK297 1Issue 104/01 /2023
Sealey Group, Kempson Way, Suffolk Business Park, Bury St Edmunds, Suffolk. IP32 7AR
01284 757500 sales@sealey.co.uk www.sealey.co.uk
ENVIRONMENT PROTECTION
Recycleunwantedmaterialsinsteadofdisposingofthemaswaste.Alltools,accessoriesandp ackagingsh ouldbesorted, takento
arecyclingcentreanddisposedofinamanne rwhichiscompatiblewiththeenvironment.Whentheproductbecomescomplet ely
unserviceableandrequir esdisposal,drainanyfluids( ifapplicable)intoappr ovedcontainersand disposeoftheproductandfluids
accordingtolocalregulations.
Note:Itisourpolicytocontinuallyimproveproductsandassuchwereservetherighttoalterdata,specificationsandcomponentparts
withoutpriornotice.
Important:NoLiabilityisacceptedforincorrectuseofthisproduct.
Warranty:Guaranteeis12monthsfrompurchasedate,proofofwhichisrequiredforanyclaim.
REGISTER YOUR
PURCHASE HERE
g.1