USER MANUAL
Warning notices: Before using this product, please read this manual carefully and keep it for future reference.
The design and specifications are subject to change without prior notice for product improvement. Consult
with your dealer or manufacturer for details.
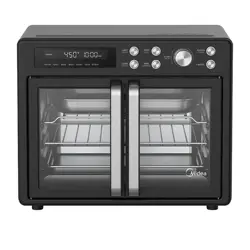
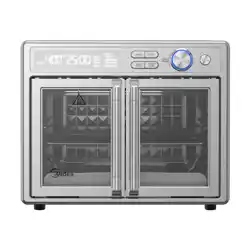
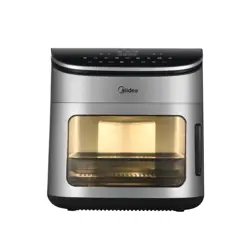
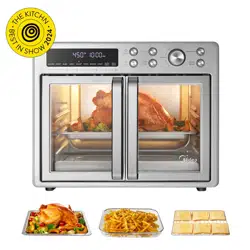
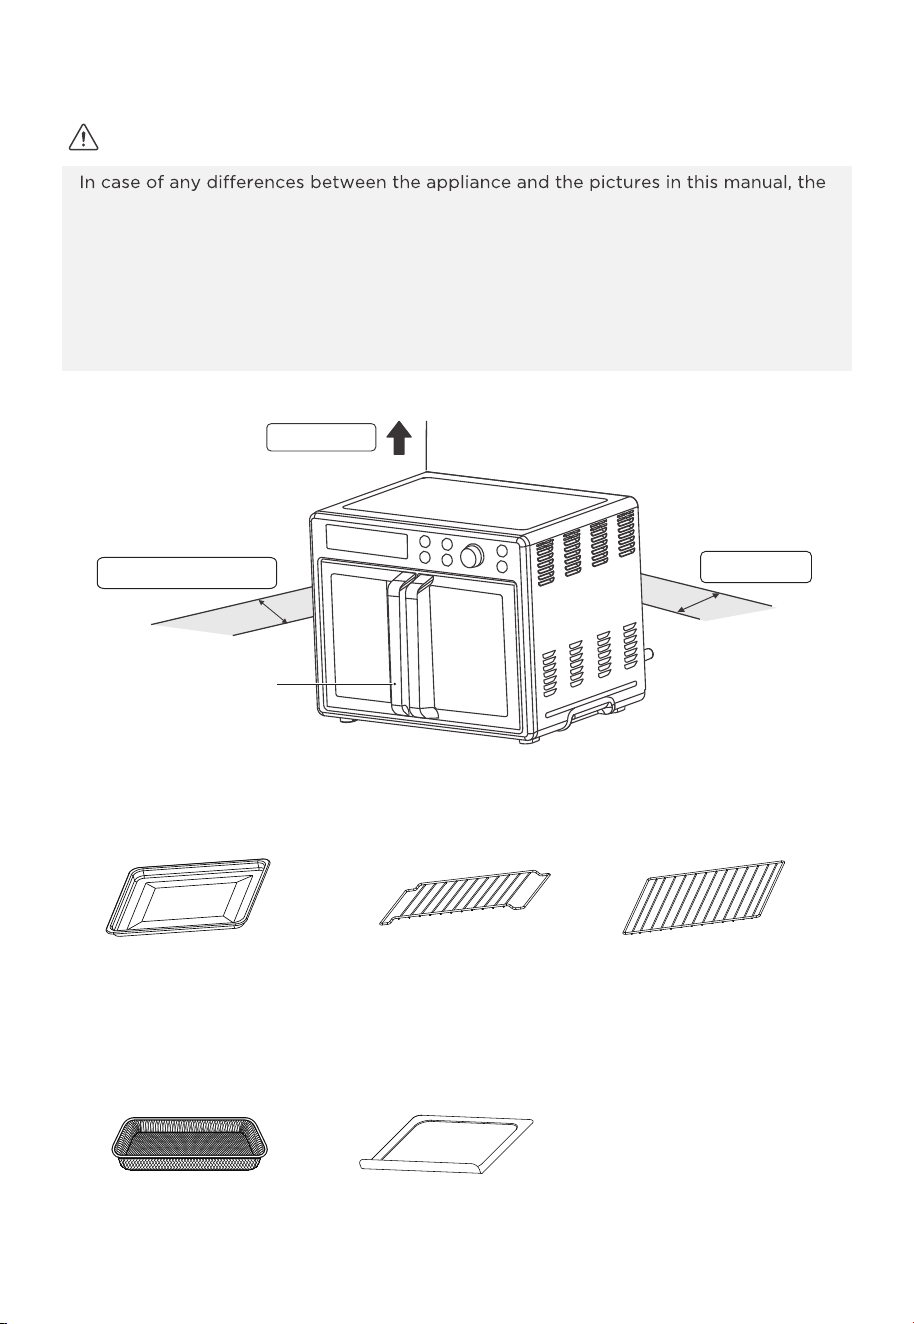
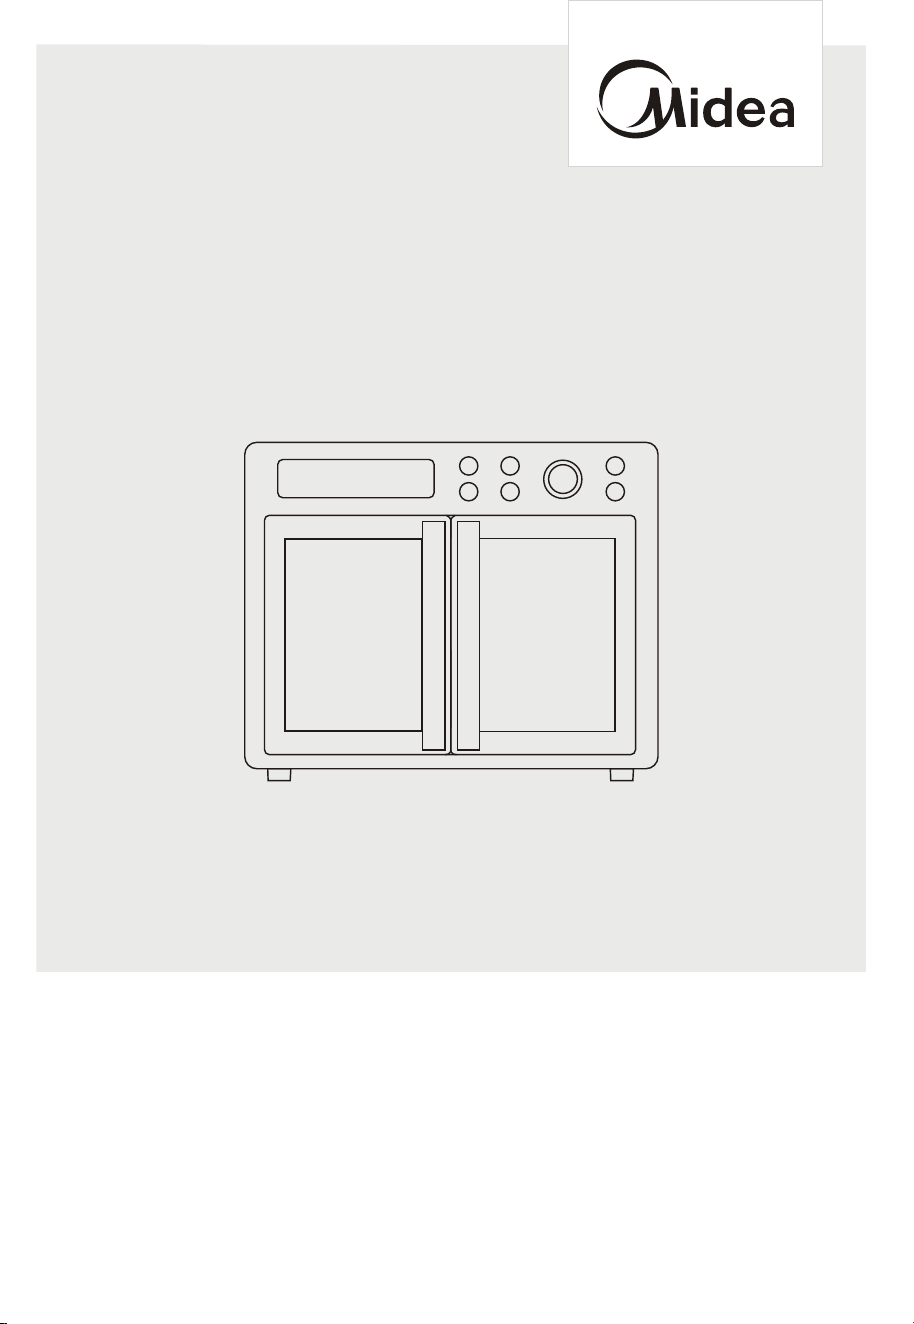
The diagram above is just for reference. Please take the appearance of the actual product as the standard.
MET26C3AST
AIR FRYER OVEN

THANK YOU LETTER
Thank you for choosing Midea! Before using your new Midea product, please read
this manual thoroughly to ensure that you know how to operate the features and
EN-01
CONTENTS
THANK YOU LETTER
--------------------------------------------------- 2
SAFETY INSTRUCTIONS
----------------------------------------------- 3
SPECIFICATION
--------------------------------------------------------- 14
PRODUCT OVERVIEW
------------------------------------------------- 14
OPERATION INSTRUCTIONS
----------------------------------------
17
23
TRADEMARKS, COPYRIGHTS AND LEGAL STATEMENT
---
25
DATA PROTECTION NOTICE
----------------------------------------
27
EN-01
EN-02
EN-05
EN-06
E N -07
EN-1 1
EN-1 3
EN-14
---------------------------------------
17
E N - 1 2
CLEANING AND CARE
TROUBLESHOOTING & FAQ
-------------------------------------------------
Danger
This symbol indicates that there are dangers to the life and health of
persons due to extremely flammable gas.
Warning of electrical voltage
This symbol indicates that there is a danger to life and health of
persons due to voltage.
Warning
The signal word indicates a hazard with a medium level of risk which, if
not avoided, may result in death or serious injury.
Caution
The signal word indicates a hazard with a low degree of risk which, if
not avoided, may result in minor or moderate injury.
Attention
The signal word indicates important information (e.g. damage to
property), but not danger.
Observe instructions
This symbol indicates that a service technician should only operate and
maintain this appliance in accordance with the operating instructions.
Intended Use
SAFETY INSTRUCTIONS
Read these operating instructions carefully and attentively before using/commissioning the
unit and keep them in the immediate vicinity of the installation site or unit for later use!
The following safety guidelines are intended to prevent unforeseen risks or damage from
unsafe or incorrect operation of the appliance. Please check the packaging and appliance
on arrival to make sure everything is intact to ensure safe operation. If you find any
damage, please contact the retailer or dealer. Please note modifications or alterations to
the appliance are not allowed for your safety concern. Unintended use may cause
hazards and loss of warranty claims.
Explanation of Symbols
EN-02

IMPORTANT
SAFETY INSTRUCTIONS
When using electrical appliances, basic safety precautions should always be
followed including the following :
1. Read all instructions.
2. Do not touch hot surfaces. Use handles or knobs.
3. To protect against electrical shock do not immerse cord, plugs, or any electrical
parts in water or other liquid.
4. Close supervision is necessary when any appliance is used by or near children.
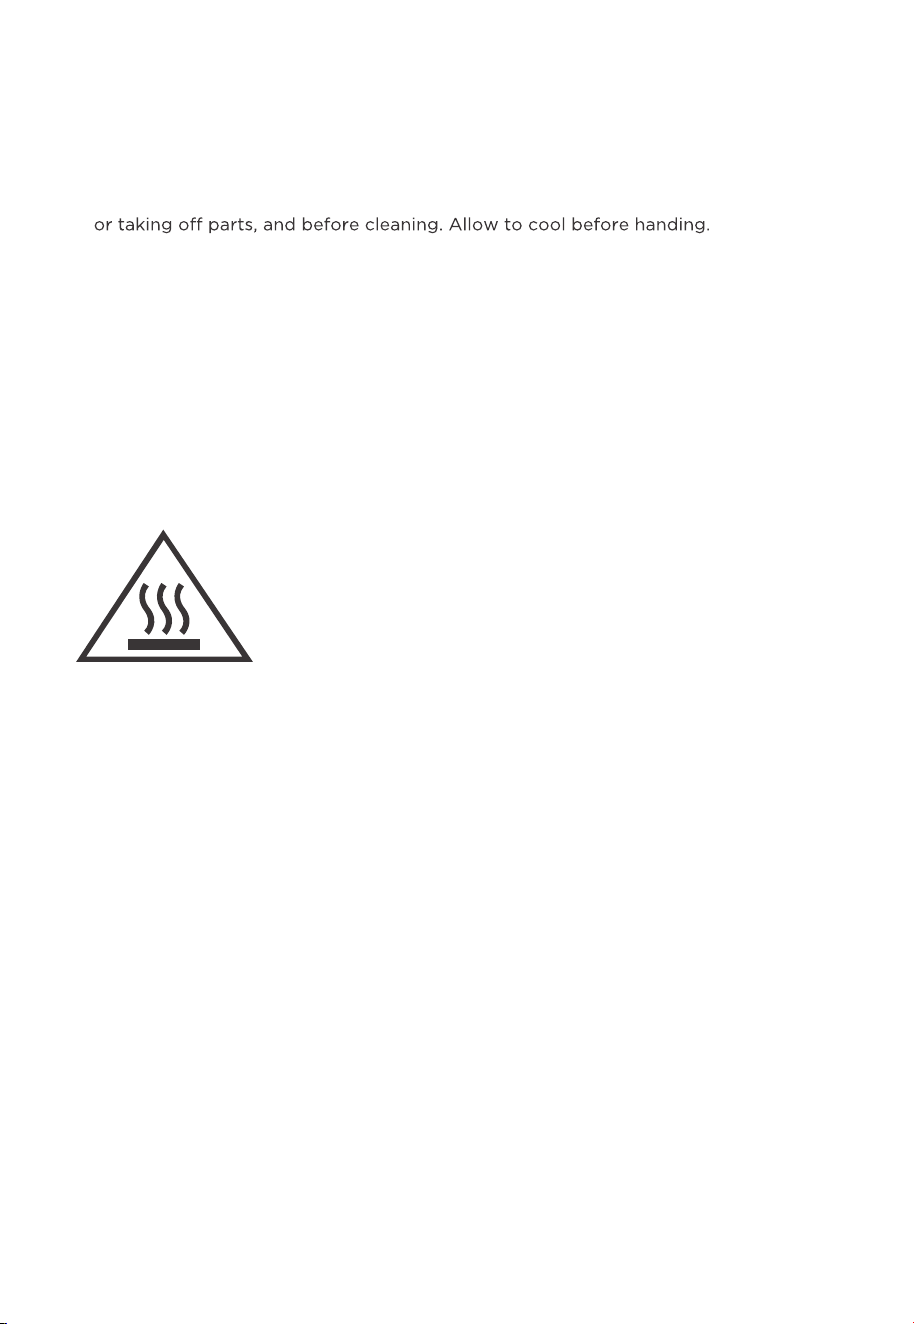
5. Unplug from outlet when not in use and before cleaning. Allow to cool before
6. Do not operate any appliance with a damaged cord or plug or after the
appliance malfunctions or has been damaged in any manner. Return appliance
to the nearest authorized service facility for examination, repair, or adjustment.
7. The use of accessory attachments not recommended by the appliance manufacturer
may cause injuries.
8. Do not use outdoors.
9. Do not let cord hang over edge of table or counter, or touch hot surfaces.
10. Do not place on or near a hot gas or electric burner, or in a heated oven.
11. Extreme caution must be used when moving an appliance containing hot oil
or other hot liquids.
13. Do not use appliance for other than intended use.
14. Use extreme caution when removing tray or disposing of hot grease.
electrical parts, creating parts, creating a risk of electric shock.
16. Oversize foods or metal utensils must not be inserted in a air fryer oven as they may
create a fire or risk of electric shock.
17. A fire may occur if the oven is covered or touching flammable material,
including curtains, draperies, walls, and the like, when in operation. Do not store any
item on top of the appliance when in operation.
18. Extreme caution should be exercised when using containers constructed of
other than metal or glass.
19. Do not store any materials, other than manufacturers recommended
accessories, in this oven when not in use.
20.Do not place any of the following materials in the oven: (that is, paper,
cardboard, plastic, and the like).
air fryer
EN-03
SAVE THESE INSTRUCTIONS
21. Do not cover crumb tray or any part of the oven with metal foil. This will
cause overheating of the oven.
22. Caution-To ensure continued protection against risk of electric shock,
connect to properly grounded outlets only.
23. Remove plug from outlet when the appliance is not in use, before putting on
24. Avoid contacting moving parts.
25. For household use only.
26. During operation, press " START/STOP " can pause cooking.
1. A short power-supply cord (or detachable power-supply cord) should be used to
reduce the risk resulting from becoming entangled in or tripping over a longer cord.
2. Longer detachable power-supply cords or extension cords are available and
may be used if care is exercised in their use.
3. If a longer detachable power-supply cord or extension cord is used:
•The marked electrical rating of the cord set or extension cord should be at
least as great as the electrical rating of the appliance.
•The cord should be arranged so that it will not drape over the countertop or
tabletop where it can be pulled on by children or tripped over unintentionally.
•The appliance is grounded type, the extension cord should be a
grounding-type 3-wire cord.
SHORT CORD INSTRUCTION
(DETACHABLE POWER-SUPPLY
CORD)
THE SURFACES ARE LIABLE TO GET HOT DURING USE.
EN-04

SPECIFICATION
MODEL
RATED VOLTAGE
POWER
120 V 60 Hz
1750 W
AC,
MET26C3AST
EN-05
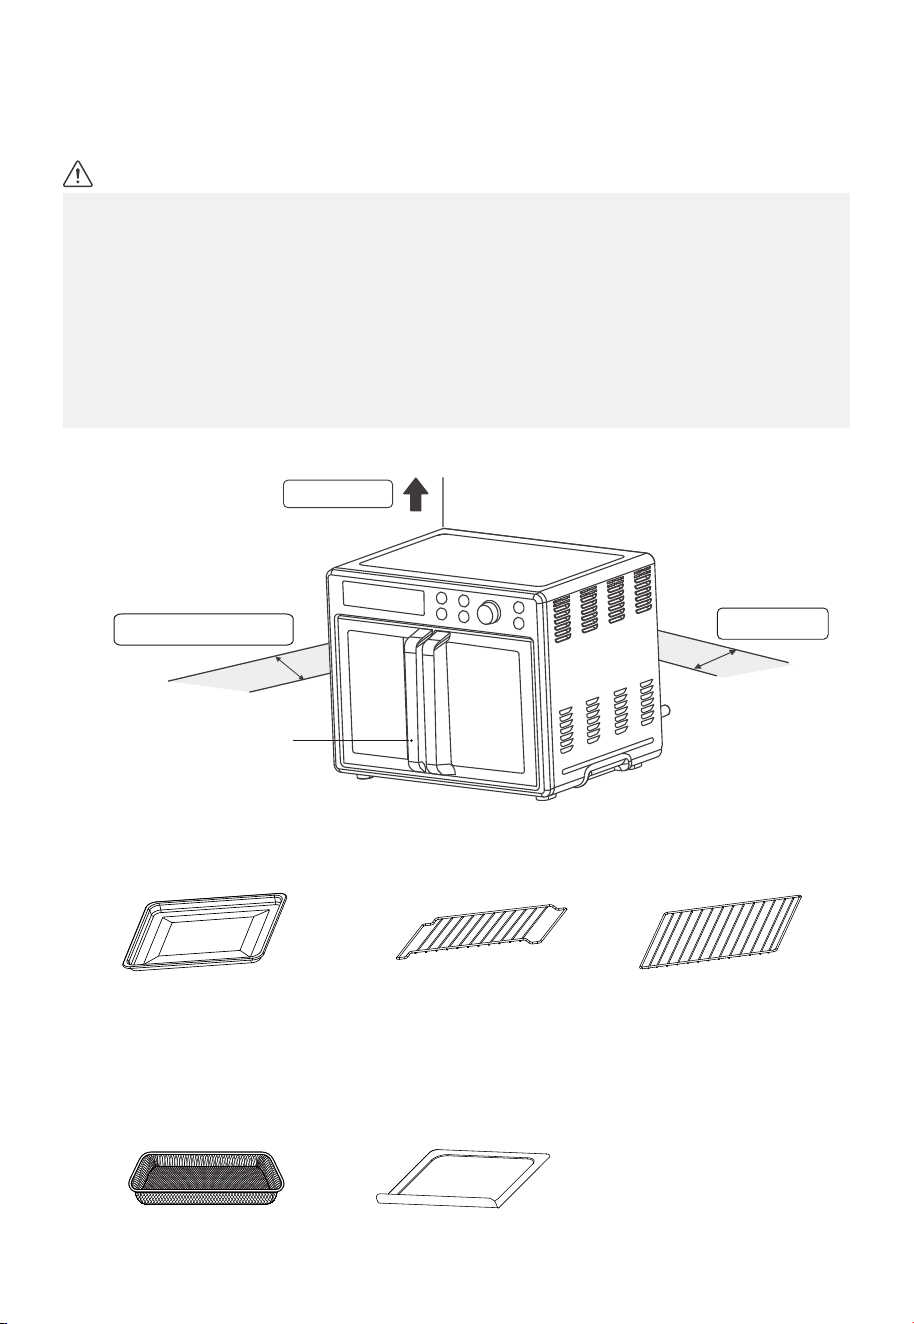
Notes
•
product shall prevail.
• Place the appliance on an insulated surface when used.
• The area where this oven is used should be dry. The oven should not be used outdoors.
• Keep the oven at 10-15cm distance from walls and cabinets. Surrounding objects may
catch fire due to heat emitted from the appliance or get covered with soot.
• Maintain a 20 cm empty space between the top of the oven and any objects or walls
above.
top > 20 cm
Rear > 10 cm
Left and right > 10 cm
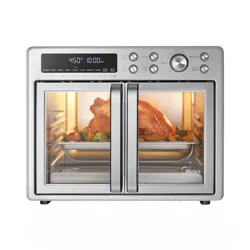
Baking tray Baking rack
(When you use the baking rack, please
put the baking rack the suitable level,
please put the convex upward.)
Baking rack
Handle
Crumb trayAir fry basket
PRODUCT OVERVIEW
EN-06
1. Remove all accessories and shipping materials packed inside the oven.
2. Wash the oven fittings with a dab of washing-up liquid and warm water. Wipe the unit
and the oven fittings dry before using with paper towels or a dry cloth.
3. Place the oven on a flat counter or other stable surface. DO NOT OPERATE ON THE
SAME CIRCUIT WITH ANOTHER APPLIANCE.
4. Before working, place the crumb tray under the bottom heating element.
5. Make sure the crumb tray is properly fitted before using the oven.
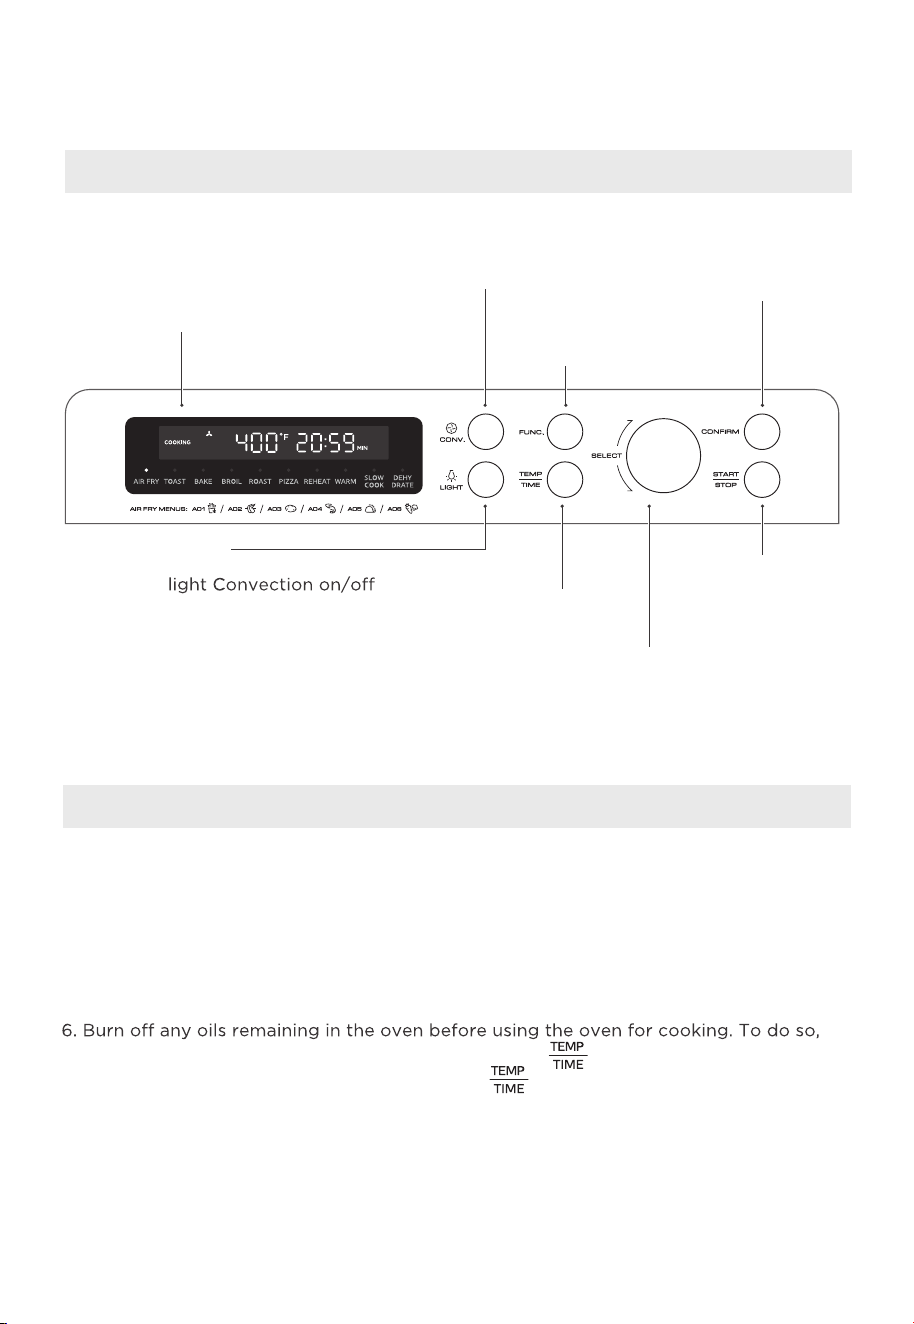
press the function button to select bake, press the " " button and rotate knob to
time 15 minutes. This will burn o any oil still on the oven.
adjust temperature 450°F. After that, press " " button and rotate knob to adjust
(NOTE: The oven may smoke inside during the process. This is normal
for a new oven and will not last more than 10-15 minutes).
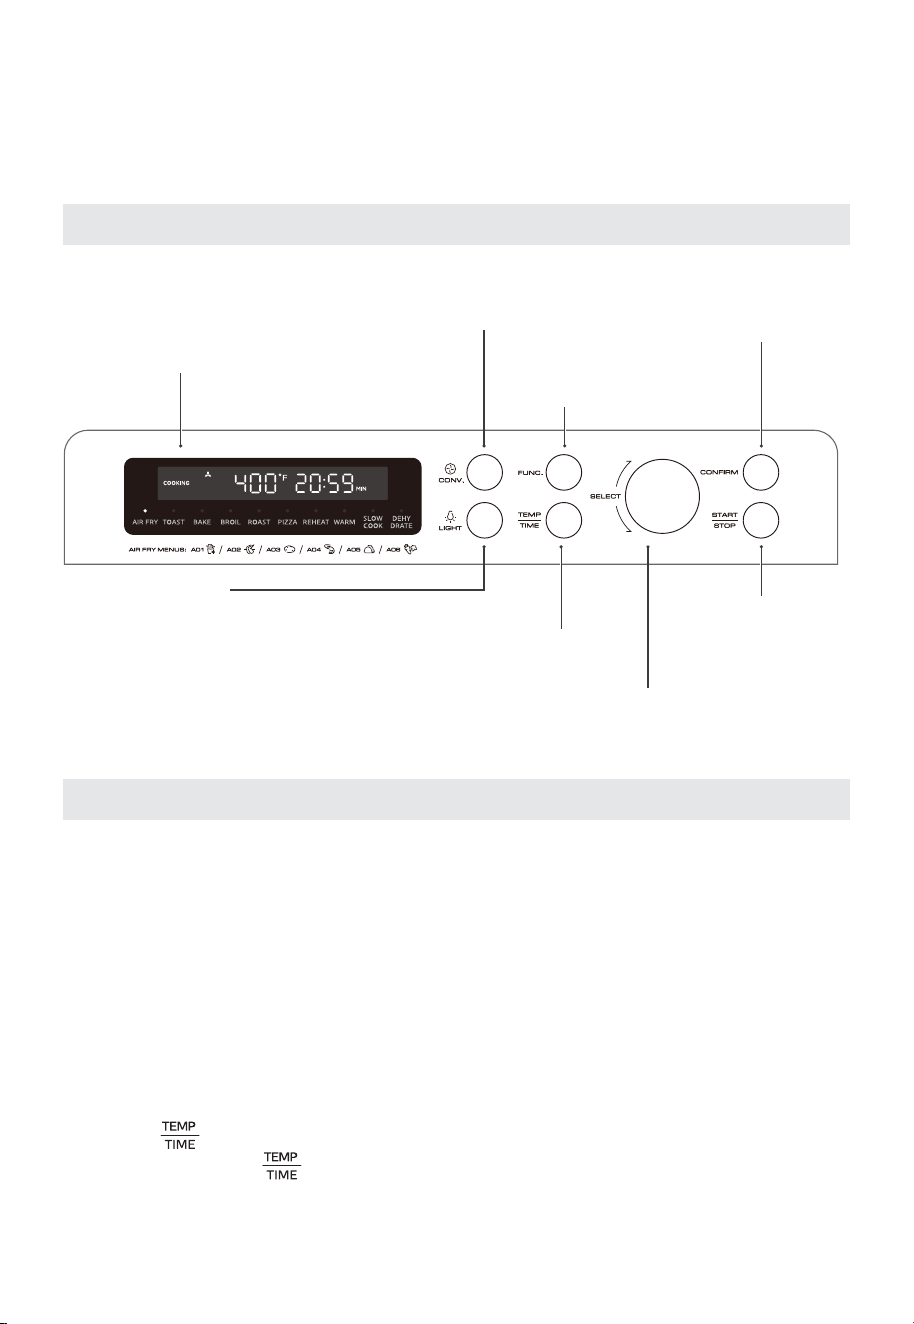
Display Screen
Convection
Press this button to
select convection mode
Function
Use to select desired
cooking function
Start / Stop
Press this button to
start or stop cooking.
Confirm
Press this button to
confirm the time and
temperature
Select
Turn to select
desired settings.
Temperature/Time
press this button to select
temperature and time.
Light
Switching an internal
while cooking
Control Panel Settings
Before Using For The First Time
OPERATION INSTRUCTIONS
EN-07
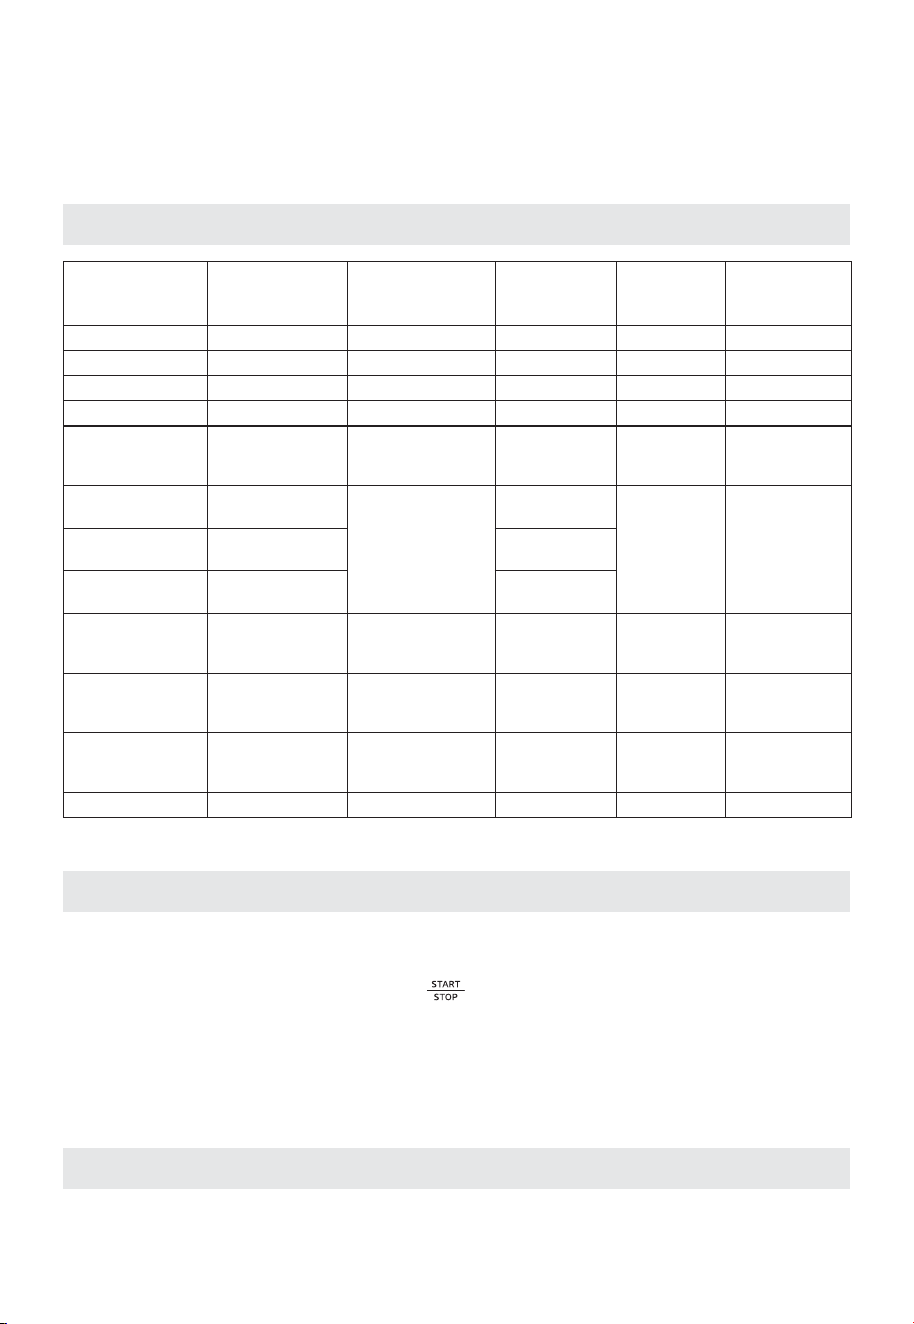
Settings
COOKING
FUNCTION
TEMP. RANGE TIME RANGE CONVECTION
AIR FRY
/ 200°F-400°F
150°F 100°F-200°F
/ 1min-30min
4h 1min-24h
200°F
370°F
350°F
//
100°F-230°F
100°F-300°F
150°F-450°F
1h
7min30s
8min30s
16min
1min-8h
1h 1min-4h
1min-30min
10min 1min-2h
/ /
DEFAULT
TEMP.
DEFAULT
TIME
DEHYDRATE
SLOW COOK
WARM
REHEAT
PIZZA(9 INCHES)
PIZZA(12 INCHES)
PIZZA(6 INCHES)
ROAST
BAKE
TOAST
Open
Open
Open
Close
180°F
Close
150°F-450°F
150°F-450°F
3min 1min-20min
350°F
370°F
330°F
Default: Close
(Optional)
Default: Open
(Optional)
Default: Close
(Optional)
350°F 150°F-450°F
10min 1min-2h
BROIL
Default: Close
(Optional)
350°F 150°F-450°F
25min 1min-2h
Default: Close
(Optional)
Function operation
Notes
1. When the oven is plugged into on outlet, the buzzer will sound once.
2. During cooking, you can press " " to stop cooking.
3. In the end of cooking, the buzzer will sound 3 times and "COMPLETE and 00:00" will display
.
4. Always remove food with oven mitts. The food and oven will turn very hot.
OPERATION INSTRUCTIONS
Eco mode
When the oven is plugged into an outlet and in standby mode, the defaute mode
will not enter ECO mode.
To enter ECO mode:
To cancel ECO mode:
In ECO mode, you can press any button to cancel it.
EN-08
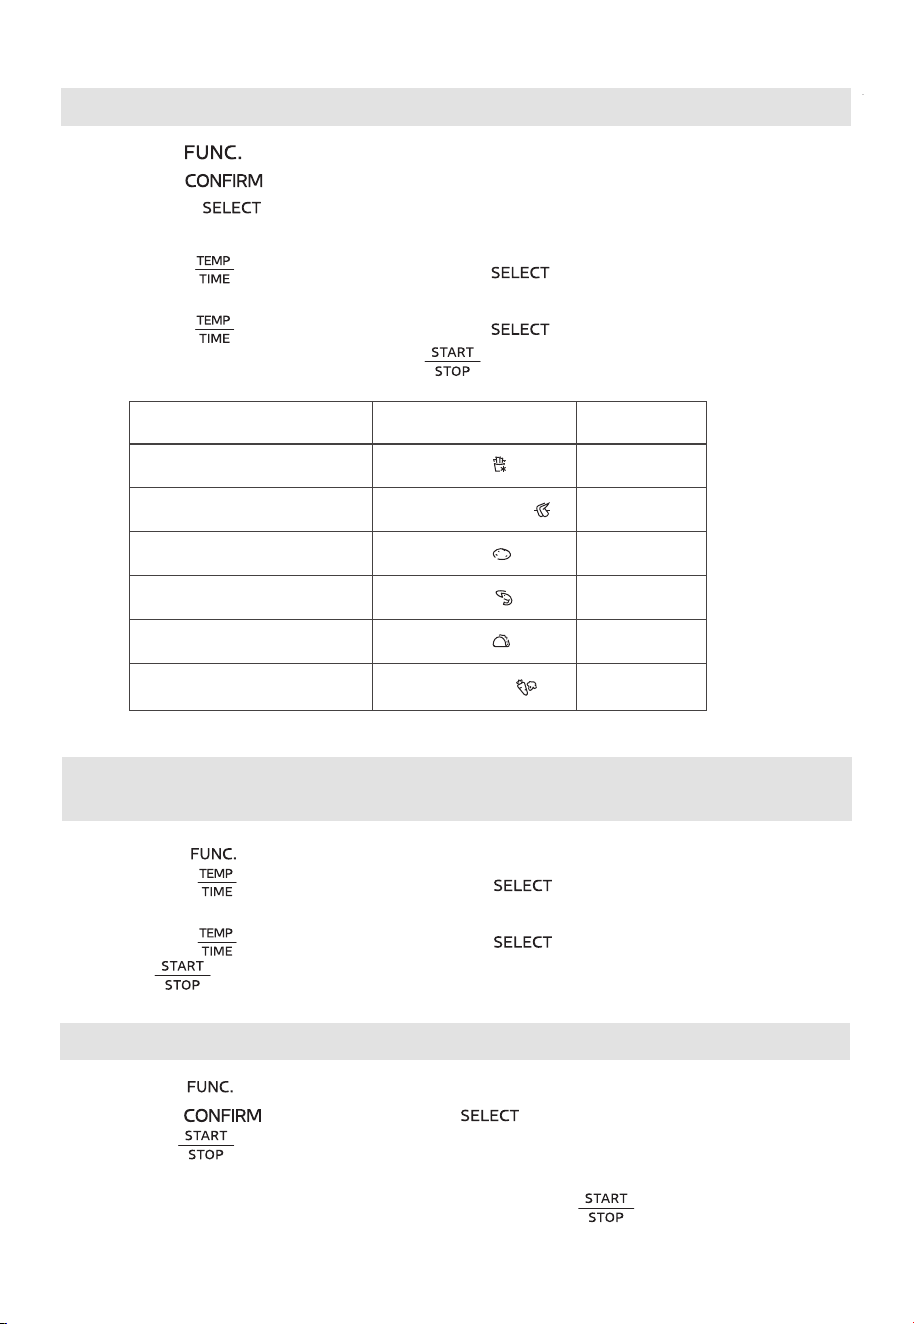
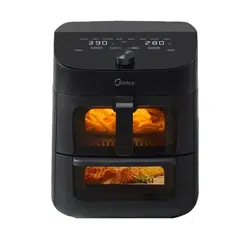
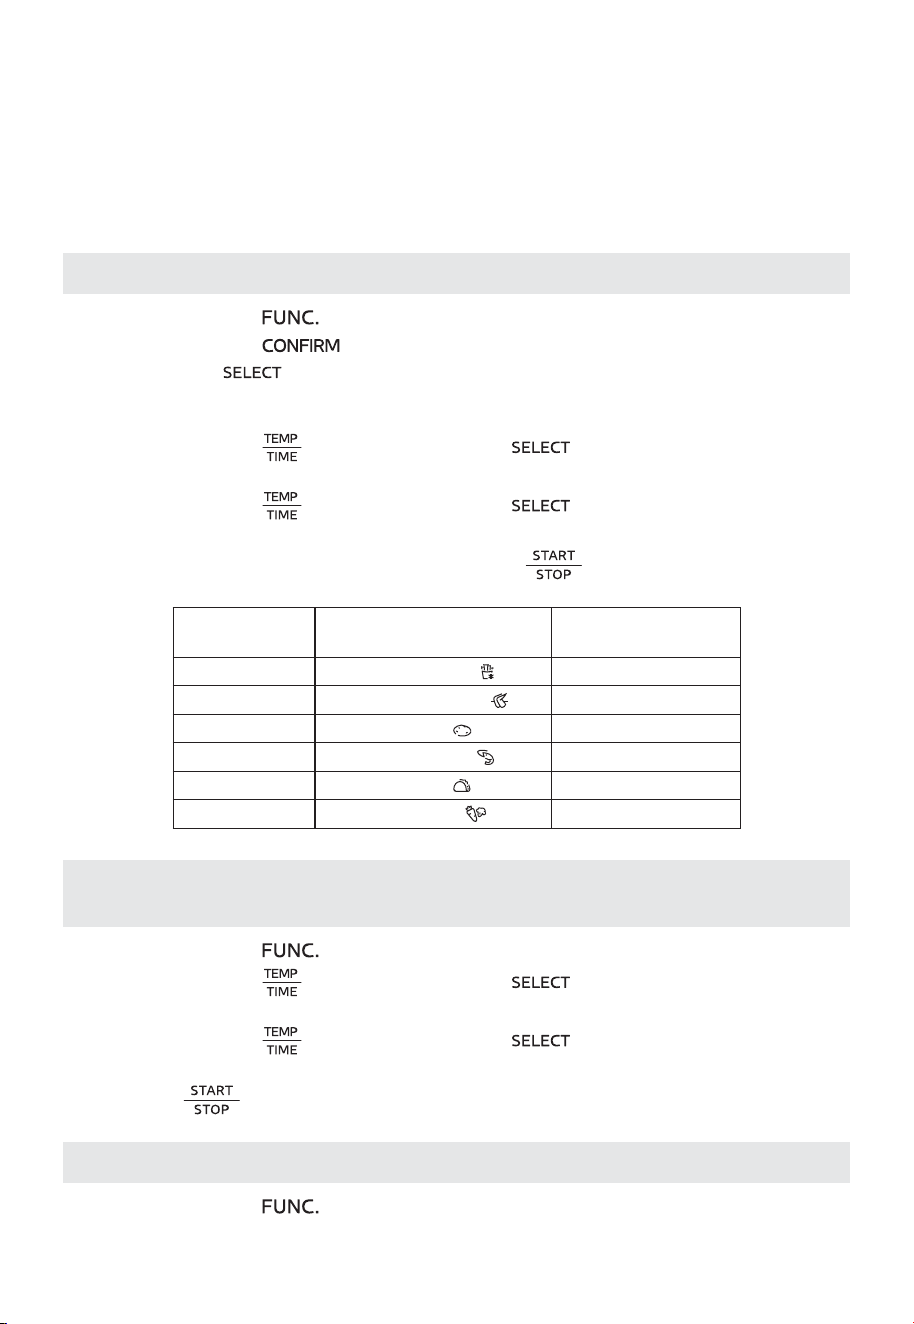
Using the air fry function
1. Press the " " button to select the air fry function.
2. Press the " " button, A01 flashes.
3. Rotate the " " knob to select A01~A06 (when you use the “A01”, please
put the chips into the air fry basket , and use the default time and default temperature).
Display AIR FRY Menu
A01
A02
A03
A04
A05
A06
Fries
Chicken Wings
Potato
Shrimp
Tacos
Vegetables
6. Put the food into the oven and press “ ” to start cooking.
4. Press the " " button and then rotate " " knob to
select cooking temperature.
5. Press the " " button and then rotate " " knob to select cooking time.
Default time
19min
11min
18min
8min
3min
10min
Using the dehydrate, slow cook, warm, reheat, roast, broil and
bake Function
1. Press the " " button to select the desired function.
2. Press the " " button and then rotate " " knob to
select cooking temperature.
3. Press the " " button and then rotate " " knob to select cooking time.
4. Press " " to start cooking.
3. Press the " " button to
Using the pizza function
1. Press the " " button to select the pizza function. The screen displays " 9 INCH ".
2. Press the " " button, rotate the " " knob to select the 6, 9 or 12 inches.
start preheating, when preheat temperature reached,
the buzzer will sound 5 times.
4. Put the food into the oven and close the door, press the " " to start cookong.
EN-09
, rotate the “ ” knob to select the 1~6 slice (default
is 4 slice).
3. Press the " " butto and then rotate " " knob to select the darkness level.
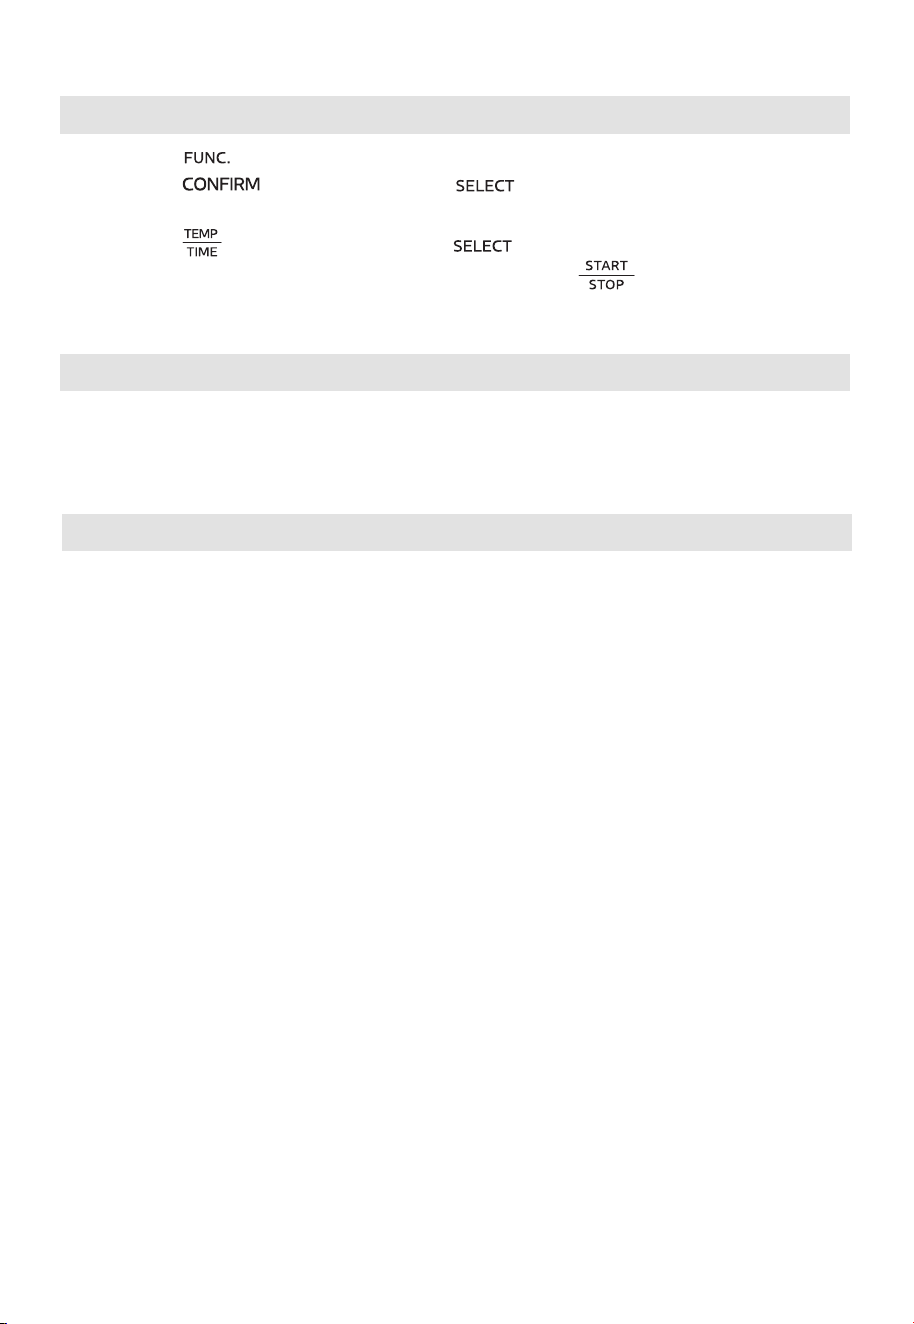
Using the toast function
1. Press the " " button to select the toast function.
2. Press the " " button
4. Put the food into the oven and close the door, press the " " to start cookong.
Using the Convecti on Fan
Select the Convection button at function mode to circulate the heat throughout
the oven cavity for even baking.
COOKING GUIDELINES
• Place the baking rack and baking tray in position that will accommodate the height
of the food to be cooked.
• The food should be put onto a baking tray to avoid catching fire by an accumulation
of food leftovers on the heating pipes.
• Make sure that you always use an ovenproof container in the oven, never use
plastic or cardboard containers in the oven.
• Clean the heating pipes periodically.
• Never use glass or ceramic pans or lids.
• NEVER let oil or other liquids from the food to drip down to the bottom of the oven.
• Set the temperature as suggested by the recipe or as desired.
• Securely shut the door and set the cooking time to begin cooking.
EN-10

.
With proper care and cleaning, your appliance will retain its appearance and remain fully
functional for a long time. We will explain here how you should correctly care for and
clean your appliance. Do not use glass cleaners or metal/glass scrapers for cleaning.
• Before cleaning, unplug the oven and allow it to cool completely.
• Wash all the accessories with mild, soaped water including the baking rack and the
baking tray.
• Do not use abrasive cleansers, scrubbing brushes and chemical cleaner as these will
cause damage to the non-stick coating of baking tray.
• Using a wet cloth to wipe the inner of the oven.
• To clean the door by using a wet cloth saturated with detergent or soap.
• Never immerse the oven in water or other liquid. Do not clean the appliance in a dishwasher
• Any other servicing should be performed by an authorized service representative.
CLEANING AND CARE
EN-11
FAQ
Why won’t the oven turn on?
•Make sure the power cord is securely plugged into the outlet.
•
•Reset the circuit breaker if necessary.
•Press the power button.
Why is my food undercooked or overcooked
•Do not add food oven recommended preheat time is complete. For best
results, check progress throughout cooking, and remove food if desired
level of brownness has been achieved. Remove food immediately after
the cook time is complete to avoid overcooking.
•This oven cooks faster than a traditional oven. Always keep an eye on your
food while cooking.
?
•This is normal. The oven is designed to control temperature precisely for
every function by adjusting the heating elements’ power levels.
Why is steam coming out from the oven door?
•This is normal. The door is vented to release steam created by foods with
a high moisture content.
Why is water dripping onto the counter from under the door?
•This is normal. The condensation created by foods with a high moisture
content (such as frozen breads) may run down the inside of the door and
drip onto the counter.
Why is there noise coming from the control panel or back of oven?
•When the oven is hot, a fan turns on to cool down the control panel.
?
•
This is a normal function and should not be a source of concern.
TROUBLESHOOTING & FAQ
EN-12

logo, word marks, trade name, trade dress and all versions thereof are
valuable assets of Midea Group and/or its aliates (“Midea”), to which Midea owns
trademarks, copyrights and other intellectual property rights, and all goodwill derived
from using any part of an Midea trademark. Use of Midea trademark for commercial
purposes without the prior written consent of Midea may constitute trademark
infringement or unfair competition in violation of relevant laws.
This manual is created by Midea and Midea reserves all copyrights thereof. No entity or
individual may use, duplicate, modify, distribute in whole or in part this manual, or
bundle or sell with other products without the prior written consent of Midea.
All the described functions and instructions were up to date at the time of printing this
manual. However, the actual product may vary due to improved functions and designs.
TRADEMARKS, COPYRIGHTS
AND LEGAL STATEMENT
EN-13

DATA PROTECTION NOTICE
For the provision of the services agreed with the customer,
we agree to comply without restriction with all stipulations of applicable data protection
law, in line with agreed countries within which services to the customer will be delivered.
Generally, our data processing is to fulfil our obligation under contract with you and for
product safety reasons, to safeguard your rights in connection with warranty and
product registration questions. In some cases, but only if appropriate data protection is
ensured, personal data might be transferred to recipients located outside of the
European Economic Area.
Further information are provided on request. You can contact our Data Protection
Ocer via [email protected]. To exercise your rights such as right to object your
personal date being processed for direct marketing purposes, please contact us via
[email protected]. To find further information, please follow the QR Code.
EN-14
MANUAL DEL USUARIO
MET26C3AST
Advertencias: Antes de utilizar este producto, lea este manual cuidadosamente y guárdelo para futuras
consultas. El diseño y las especificaciones con el fin de mejorar el producto están sujetos a cambios sin
previo aviso. Consulte con su distribuidor o fabricante para obtener mayor información.
El diagrama anterior es solo para referencia. Tome la apariencia del producto real como estándar.
HORNO ELÉCTRICO CON FREIDORA DE AIRE

ES-01
CONTENIDO
NOTA DE AGRADECIMIENTO
¡Gracias por elegir Midea! Antes de utilizar su nuevo producto Midea, lea este manual
detenidamente para asegurarse de que sabe cómo manejar las características y
funciones que le ofrece su nuevo electrodoméstico de forma segura.
NOTA DE AGRADECIMIENTO -----------------------------------ES-01
INSTRUCCIONES DE SEGURIDAD -----------------------------ES-02
ESPECIFICACIONES ----------------------------------------------ES-05
DESCRIPCIÓN DEL PRODUCTO --------------------------------ES-06
INSTRUCCIONES DE FUNCIONAMIENTO --------------------ES-07
LIMPIEZA Y CUIDADO -------------------------------------------ES-11
SOLUCIÓN DE PROBLEMAS Y PREGUNTAS
FRECUENTES -----------------------------------------------------ES-12
MARCAS COMERCIALES, DERECHOS DE AUTOR Y
DECLARACIÓN LEGAL ------------------------------------------ES-13
AVISO DE PROTECCIÓN DE DATOS ---------------------------E -14S
ES-02
INSTRUCCIONES DE SEGURIDAD
Uso previsto
Las siguientes recomendaciones de seguridad están destinadas a evitar riesgos
imprevistos o daños causados por una operación insegura o incorrecta del aparato.
Revise el empaque y el aparato que acaba de comprar y asegúrese de que todo esté
intacto para garantizar un funcionamiento seguro. Si encuentra algún daño, póngase en
contacto con su sucursal o distribuidor. Tenga en cuenta que, por motivos de seguridad,
no se permiten modificaciones o alteraciones en el aparato. El uso inapropiado puede
causar peligros y la pérdida de garantía.
Explicación de los símbolos
Peligro
Este símbolo indica que existen peligros para la vida y la salud de las personas
debido a gases extremadamente inflamables.
Advertencia de voltaje eléctrico
Este símbolo indica que existe peligro para la vida y la salud de las personas
debido al voltaje.
Advertencia
Indica un peligro inminente con un nivel medio de riesgo que, si no se evita,
puede ocasionar la muerte o lesiones graves.
Precaución
Indica un peligro con un bajo grado de riesgo que, si no se evita, puede ocasionar
lesiones leves o moderadas.
Atención
Indica información importante, como daños materiales, pero no peligro.
Respete las instrucciones
Este símbolo indica que solo un técnico especializado debe manipular el aparato
de acuerdo con las instrucciones de funcionamiento.
¡Lea atentamente estas instrucciones de funcionamiento antes de usar o poner en
marcha su aparato y guárdelas cerca del aparato o de donde lo instale para posteriores
consultas!

ES-03
INSTRUCCIONES DE SEGURIDAD
IMPORTANTES
Cuando utilice electrodomésticos, siga siempre las siguientes precauciones de seguridad
básicas:
1. Lea todas los instrucciones.
2. Evite tocar las superficies calientes. Utilice las manijas o las perillas solamente.
3. Para evitar descargas eléctricas, no sumerja el cable, los enchufes ni el
electrodoméstico en agua ni en ningún otro líquido.
4. No deje el electrodoméstico en uso cerca de niños, o si es usado por ellos, debe
supervisarlos.
5. Desenchufe el electrodoméstico del tomacorriente cuando no lo esté utilizando y
antes de limpiarlo. Deje enfriarlo antes de colocar o retirar sus partes.
6. No utilice el electrodoméstico si el cable de alimentación o el enchufe están dañados
o si el electrodoméstico no funciona correctamente o ha sido dañado de alguna
manera. Lleve el electrodoméstico al servicio técnico autorizado más cercano para su
revisión, reparación o mantenimiento.
7. El uso de accesorios no recomendados por el fabricante del electrodoméstico puede
causar lesiones personales.
8. No use este electrodoméstico al aire libre.
9. No permita que el cable cuelgue del borde de la mesa o encimera, o que entre en
contacto con superficies calientes.
10. No coloque el electrodoméstico sobre o cerca de una hornilla caliente de gas o
eléctrica ni dentro de un horno caliente.
11. Tenga especial cuidado cuando mueva un electrodoméstico que contenga aceite
caliente u otros líquidos calientes.
12. Para desconectarlo, gire el control a la posición de apagado y luego desconecte el
enchufe del tomacorriente.
13. Utilice el electrodoméstico solo para el fin previsto.
14. Tenga especial cuidado al retirar la bandeja o al desechar la grasa caliente.
15. No limpie con esponjas de metal. Estas podrían entrar en contacto con las partes
eléctricas y producir un riesgo de descarga eléctrica.
16. Evite introducir alimentos o utensilios de metal de gran tamaño en el horno tostador,
ya que podrían provocar un incendio o un riesgo de descarga eléctrica.
17. Si durante su funcionamiento el horno tostador entra en contacto con algún
material inflamable, incluyendo cortinas, paredes o similares, puede producirse un
incendio. No coloque ningún objeto encima del electrodoméstico mientras esté en
funcionamiento.
18. Se debe tener extrema precaución cuando se utilicen recipientes que no sean de
metal o vidrio.
19. No almacene ningún material en este horno cuando no esté en uso, excepto los
accesorios recomendados por el fabricante.
20. No coloque ninguno de los siguientes materiales en el horno: (papel, cartón, plástico
y similares).
ES-04
21. No cubra la bandeja para migas ni ninguna parte del horno con papel metálico. Esto
podría provocar un sobrecalentamiento del horno.
22. Precaución: Para garantizar una protección continua contra el riesgo de descarga
eléctrica, conéctelo únicamente a tomacorrientes con conexión a tierra.
23. Desconecte el electrodoméstico del tomacorriente cuando no esté en uso, antes de
colocar o retirar las piezas y antes de limpiarlo. Déjelo enfriar antes de guardarlo.
24. Evite el contacto con las partes móviles.
25. Solo para uso doméstico.
26. Durante el funcionamiento, presione " START/STOP " (Iniciar/Detener) para pausar la
cocción.
GUARDE ESTAS INSTRUCCIONES
LAS SUPERFICIES PUEDEN CALENTARSE DURANTE
EL USO.
INSTRUCCIONES DE
CABLE CORTO (CABLE DE
ALIMENTACIÓN DESMONTABLE)
1. Se proporciona un cable de alimentación corto (o cable de alimentación
desmontable) para reducir el riesgo de enredarse o tropezarse con un cable de
alimentación más largo.
2. Se pueden utilizar cables de alimentación desmontables más largos o cables de
extensión solo si se utilizan con cuidado.
3. Si utiliza un cable de alimentación desmontable más largo o un cable de extensión:
• La clasificación eléctrica marcada en el cable de alimentación o cable de
extensión debe ser como mínimo igual que la clasificación eléctrica del
electrodoméstico.
• No deje el cable colgando por el borde de la mesa o encimera, para evitar que los
niños tiren de él o se tropiecen.
• Si el electrodoméstico es del tipo con conexión a tierra, el cable de extensión
deberá ser un cable de 3 hilos con conexión a tierra.

ES-05
ESPECIFICACIONES
MODELO MET26C3AST
VOLTAJE NOMINAL 120 VAC, 60 Hz
POTENCIA 1750 W
ES-06
DESCRIPCIÓN DEL PRODUCTO
Notas
• En caso de que haya diferencias entre el aparato y las imágenes de este manual,
prevalecerá el producto.
• Coloque el aparato sobre una superficie aislada cuando lo utilice.
• El área donde se utilice este horno debe estar seca. El horno no debe utilizarse al
aire libre.
• Mantenga el horno a una distancia de 10 a 15 cm de paredes y muebles. Los objetos
circundantes podrían incendiarse debido al calor emitido por el aparato o cubrirse
de hollín.
• Mantenga un espacio libre de 20 cm entre la parte superior del horno y cualquier
objeto o pared situado por encima del horno.
Parte superior
> 20 cm
Parte posterior
> 10 cm
Izquierda y derecha > 10 cm
Manija
Bandeja para hornear
Cesta para freír con aire
Rejilla para hornear
(Cuando utilice la rejilla para
hornear, colóquela en el nivel
adecuado y coloque la parte
convexa hacia arriba).
Bandeja para migas
Rejilla para hornear
ES-07
INSTRUCCIONES DE
FUNCIONAMIENTO
Configuración del panel de control
Light (Luz)
Presione este botón para
encender/apagar la luz
interna del horno durante
la cocción.
Temperature/Time (Temperatura/
Tiempo)
Presione este botón para seleccionar
la temperatura y el tiempo.
Start / Stop (Iniciar /
Detener)
Presione este botón
para iniciar o detener la
cocción.
Select (Seleccionar)
Gire para seleccionar la
configuración deseada.
Function (Función)
Presione este botón para
seleccionar la función de
cocción deseada.
Convection (Convección)
Presione este botón para
seleccionar el modo de convección.
Pantalla de visualización
Confirm (Confirmar)
Presione este botón
para confirmar el tiempo
y la temperatura.
Antes de usar por primera vez
1. Retire todos los accesorios y materiales de embalaje en el interior del horno.
2. Lave los accesorios del horno con un poco de detergente líquido y agua tibia. Seque
la unidad y los accesorios del horno antes de utilizarlos con toallas de papel o un
paño seco.
3. Coloque el horno sobre una encimera plana u otra superficie estable. NO UTILICE EN
EL MISMO CIRCUITO CON OTRO ELECTRODOMÉSTICO.
4. Antes de poner en funcionamiento el horno, coloque la bandeja para migas debajo
del elemento calefactor inferior.
5. Asegúrese de que la bandeja para migas esté correctamente instalada antes de
utilizar el horno.
6. Elimine los restos de aceite que queden en el horno antes de utilizarlo para cocinar.
Para hacerlo, presione el botón de función para seleccionar hornear, presione el
botón "
" y gire la perilla para ajustar la temperatura a 450°F. A continuación,
presione el botón "
" y gire la perilla para configurar el tiempo en 15 minutos. Esto
eliminará el aceite que aún quede en el horno.
(NOTA: El interior del horno podría humear durante este proceso. Esto es normal
cuando el horno es nuevo y este proceso no durará más de 10-15 minutos).
ES-08
INSTRUCCIONES DE
FUNCIONAMIENTO
Configuración
FUNCIÓN DE
COCCIÓN
TEMPERATURA
PREDETER-
MINADA
TEMPERATURA
RANGO
TIEMPO
PREDETER-
MINADO
RANGO DE
TIEMPO
CONVECCIÓN
FREÍR CON AIRE / 200°F - 400°F / 1 min - 3O min Abierto
DESHIDRATAR 150°F 100°F - 200°F 4 h 1 min - 24 h Abierto
COCCIÓN LENTA 200°F 100°F - 230°F 1 h 1 min - 8 h Abierto
CALENTAR 180°F 100°F - 300°F 1 h 1 min - 4 h Cerrado
RECALENTAR 350°F 150°F - 450°F 3 min 1 min - 2O min
Predeterminado:
Cerrado
(Opcional)
PIZZA
(6PULGADAS)
370°F
150°F - 450°F
7 min 30s
1 min - 3O min
Predeterminado:
Abierto
(Opcional)
PIZZA (9
PULGADAS)
370°F 8 min 30 s
PIZZA (12
PULGADAS)
330°F 16 min
ROSTIZAR 350°F 150°F - 450°F lO min 1 min - 2 h
Predeterminado:
Cerrado
(Opcional)
ASAR 350°F 150°F - 450°F lO min 1 min - 2 h
Predeterminado:
Cerrado
(Opcional)
HORNEAR 350°F 150°F - 450°F 25 min 1 min - 2 h
Predeterminado:
Cerrado
(Opcional)
TOSTAR / / / / Cerrado
Uso de las funciones
Notas
1. Cuando el horno esté enchufado a un tomacorriente, la alarma sonará una vez.
2. Durante la cocción, puede presionar "
" para detener la cocción.
3. Al final de la cocción, la alarma sonará 3 veces y se mostrará en la pantalla
"COMPLETE and 00:00" (Completo y 00:00).
4. Retire siempre los alimentos con guantes de cocina. Una vez finalizado el ciclo de
cocción, los alimentos y el horno estarán muy calientes.
Modo Eco
Cuando el horno esté enchufado a un tomacorriente y en modo de espera, el modo
predeterminado no ingresará al modo ECO.
ES-09
Para ingresar al modo ECO:
En estado de espera, la pantalla se apagará si no se realiza ninguna operación dentro de
5 minutos.
Para cancelar el modo ECO:
En el modo ECO, puede presionar cualquier botón para cancelarlo.
Uso de la función de freír con aire
1. Presione el botón " " para seleccionar la función de freír con aire.
2. Presione el botón "
", parpadeará A01.
3. Gire la perilla "
" para seleccionar A01~A06 (cuando utilice "A01", coloque
las papas fritas en la canasta para freír con aire y utilice el tiempo y la temperatura
predeterminados).
4. Presione el botón "
" y luego gire la perilla " " para seleccionar la
temperatura de cocción.
5. Presione el botón "
" y luego gire la perilla " " para seleccionar el tiempo de
cocción.
6. Introduzca los alimentos en el horno y presione "
" para iniciar la cocción.
Pantalla Menú FREÍR CON AIRE Tiempo
predeterminado
A01 Papas fritas
19 min
A02 Alitas de pollo
11 min
A03 Papas
18 min
A04 Camarones
8 min
A05 Tacos
3 min
A06 Verduras
10 min
Uso de las funciones deshidratar, cocción lenta, calentar, recalentar,
rostizar, asar y hornear
1. Presione el botón " " para seleccionar la función deseada.
2. Presione el botón "
" y luego gire la perilla " " para seleccionar la
temperatura de cocción.
3. Presione el botón "
" y luego gire la perilla " " para seleccionar el tiempo de
cocción.
4. Presione "
" para iniciar la cocción.
Uso de la función de pizza
1. Presione el botón " " para seleccionar la función de pizza. Se mostrará en la
pantalla "9 INCH" (9 Pulgadas).
ES-10
2. Presione el botón " " y gire la perilla " " para seleccionar 6, 9 o
12 pulgadas.
3. Presione el botón "
" para iniciar el precalentamiento; cuando se alcance la
temperatura de precalentamiento, la alarma sonará 5 veces.
4. Introduzca los alimentos en el horno y cierre la puerta, presione el botón "
"
para iniciar la cocción.
Uso de la función de tostar
1. Presione el botón " " para seleccionar la función de tostar.
2. Presione el botón "
" y gire la perilla " ” para seleccionar 1 - 6 rebanadas
(4 rebanadas de forma predeterminada).
3. Presione el botón "
" y gire la perilla " " para seleccionar el nivel de tostado.
4. Introduzca los alimentos en el horno y cierre la puerta, presione el botón "
"
para iniciar la cocción.
Uso del ventilador de convección
Seleccione el botón Convection (Convección) en el modo de funcionamiento para hacer
circular el calor por todo el interior del horno para una cocción uniforme.
GUÍA DE COCCIÓN
• Coloque la rejilla y la bandeja para hornear en una posición que se adapte a la altura
de los alimentos que se van a cocinar.
• Los alimentos deben colocarse en una bandeja para hornear para evitar que se
incendien por la acumulación de restos de comida en los tubos de calefacción.
• Asegúrese de utilizar siempre un recipiente resistente al horno, nunca utilice
recipientes de plástico o cartón en el horno.
• Limpie periódicamente los tubos de calefacción.
• No utilice nunca ollas o tapas de vidrio o cerámica.
• NUNCA deje que el aceite u otros líquidos de los alimentos goteen hasta el fondo del
horno.
• Establezca la temperatura según lo sugerido por la receta o según lo desee.
• Cierre bien la puerta y programe el tiempo de cocción para iniciar la cocción.

ES-11
LIMPIEZA Y CUIDADO
Con un buen cuidado y limpieza, su electrodoméstico conservará su aspecto y seguirá
funcionando perfectamente durante mucho tiempo. Aquí le explicaremos cómo debe
cuidar y limpiar correctamente su electrodoméstico. No utilice limpiadores de vidrio, ni
raspadores de metal o vidrio para la limpieza.
• Antes de la limpieza, desenchufe el horno y déjelo enfriar completamente.
• Lave todos los accesorios con agua jabonosa suave, incluida la rejilla y la bandeja para
hornear.
• No utilice limpiadores abrasivos, cepillos ni limpiadores químicos, ya que dañarán el
revestimiento antiadherente de la bandeja para hornear.
• Utilice un paño húmedo para limpiar el interior del horno.
• Para limpiar la puerta, utilice un paño húmedo empapado con detergente o jabón.
• Nunca sumerja el horno en agua u otro líquido. No lave el horno en el lavavajillas.
• Cualquier otro servicio debe ser realizado por un centro de servicio autorizado.

ES-12
SOLUCIÓN DE PROBLEMAS Y
PREGUNTAS FRECUENTES
PREGUNTAS FRECUENTES
¿Por qué no enciende el horno?
• Asegúrese de que el cable de alimentación esté correctamente enchufado al
tomacorriente.
• Inserte el cable de alimentación en un tomacorriente diferente.
• Restablezca el disyuntor si es necesario.
• Presione el botón de encendido.
¿Por qué los alimentos están crudos o demasiado cocidos?
• No agregue alimentos hasta que haya transcurrido el tiempo de precalentamiento
recomendado. Para obtener los mejores resultados, compruebe el progreso durante la
cocción y retire los alimentos si se ha alcanzado el nivel de dorado deseado. Retire los
alimentos inmediatamente después de finalizar el tiempo de cocción para evitar que
se cocinen en exceso.
• Este horno cocina más rápido que un horno tradicional. Vigile siempre los alimentos
durante la cocción.
¿Por qué los elementos calefactores se encienden y se apagan?
• Esto es normal. El horno está diseñado para controlar la temperatura con precisión
para cada función ajustando los niveles de potencia de los elementos calefactores.
¿Por qué sale vapor por la puerta del horno?
• Esto es normal. La puerta tiene una salida de ventilación para liberar el vapor creado
por los alimentos con un alto contenido de humedad.
¿Por qué gotea agua sobre la encimera por debajo de la puerta del horno?
• Esto es normal. La condensación creada por alimentos con un alto contenido de
humedad (como panes congelados) puede deslizarse por el interior de la puerta y
gotear sobre la encimera.
¿Por qué sale ruido del panel de control o de la parte posterior del horno?
• Cuando el horno está caliente, se enciende el ventilador para enfriar el panel de
control.
¿Por qué parece que el horno sigue funcionando aunque esté apagado?
• El ventilador de enfriamiento puede seguir funcionando incluso después de apagar el
horno.
Esta es una función normal y no debería ser motivo de preocupación.

ES-13
MARCAS COMERCIALES,
DERECHOS DE AUTOR Y
DECLARACIÓN LEGAL
El logotipo, las marcas denominativas, el nombre comercial, la imagen
comercial y todas las versiones de los mismos son activos valiosos de Midea Group y/
o sus filiales ("Midea"), de las que Midea posee marcas comerciales, derechos de autor
y otros derechos de propiedad intelectual, y todo el fondo de comercio derivado del
uso de cualquier parte de una marca comercial de Midea. El uso de la marca Midea con
fines comerciales sin el consentimiento previo por escrito de Midea puede constituir una
infracción de la marca o una competencia desleal en violación de las leyes pertinentes.
Este manual ha sido creado por Midea, y Midea se reserva todos los derechos de autor
del mismo. Ninguna entidad o individuo puede usar, duplicar, modificar, distribuir en
su totalidad o en parte este manual, o agrupar o vender con otros productos sin el
consentimiento previo por escrito de Midea.
Todas las funciones e instrucciones descritas estaban actualizadas en el momento de
imprimir este manual. Sin embargo, el producto real puede variar debido a funciones y
diseños mejorados.

ES-14
AVISO DE PROTECCIÓN DE DATOS
Para la prestación de los servicios acordados con el cliente, nos comprometemos a
cumplir sin restricciones todas las estipulaciones de la ley de protección de datos
aplicable, de conformidad con los países acordados en los que se prestarán los servicios
al cliente.
En general, nuestro tratamiento de datos tiene por objeto cumplir nuestra obligación
contractual con usted y, por motivos de seguridad del producto, salvaguardar sus
derechos en relación con la garantía y el registro del producto. En algunos casos, pero
solo si se garantiza la protección de datos adecuada, los datos personales podrían
transferirse a destinatarios ubicados fuera del Espacio Económico Europeo.
Si desea, puede solicitar más información al respecto. Puede ponerse en contacto con
nuestro responsable de protección de datos a través de [email protected]. Para
ejercer sus derechos, como el derecho a oponerse a que sus datos personales sean
tratados con fines de marketing directo, póngase en contacto con nosotros a través de
[email protected]. Para obtener más información, siga el código QR.
© Midea 2024 Todos los derechos reservados
PN:16171000A19588