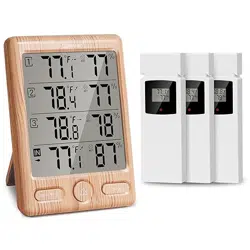
GEEVON Thermometer
Item No.T228646
User Manual
Thank you for purchasing T228646 Thermometer.
Please take a moment to read this guide and store it for
future reference.
Features & Benefits:
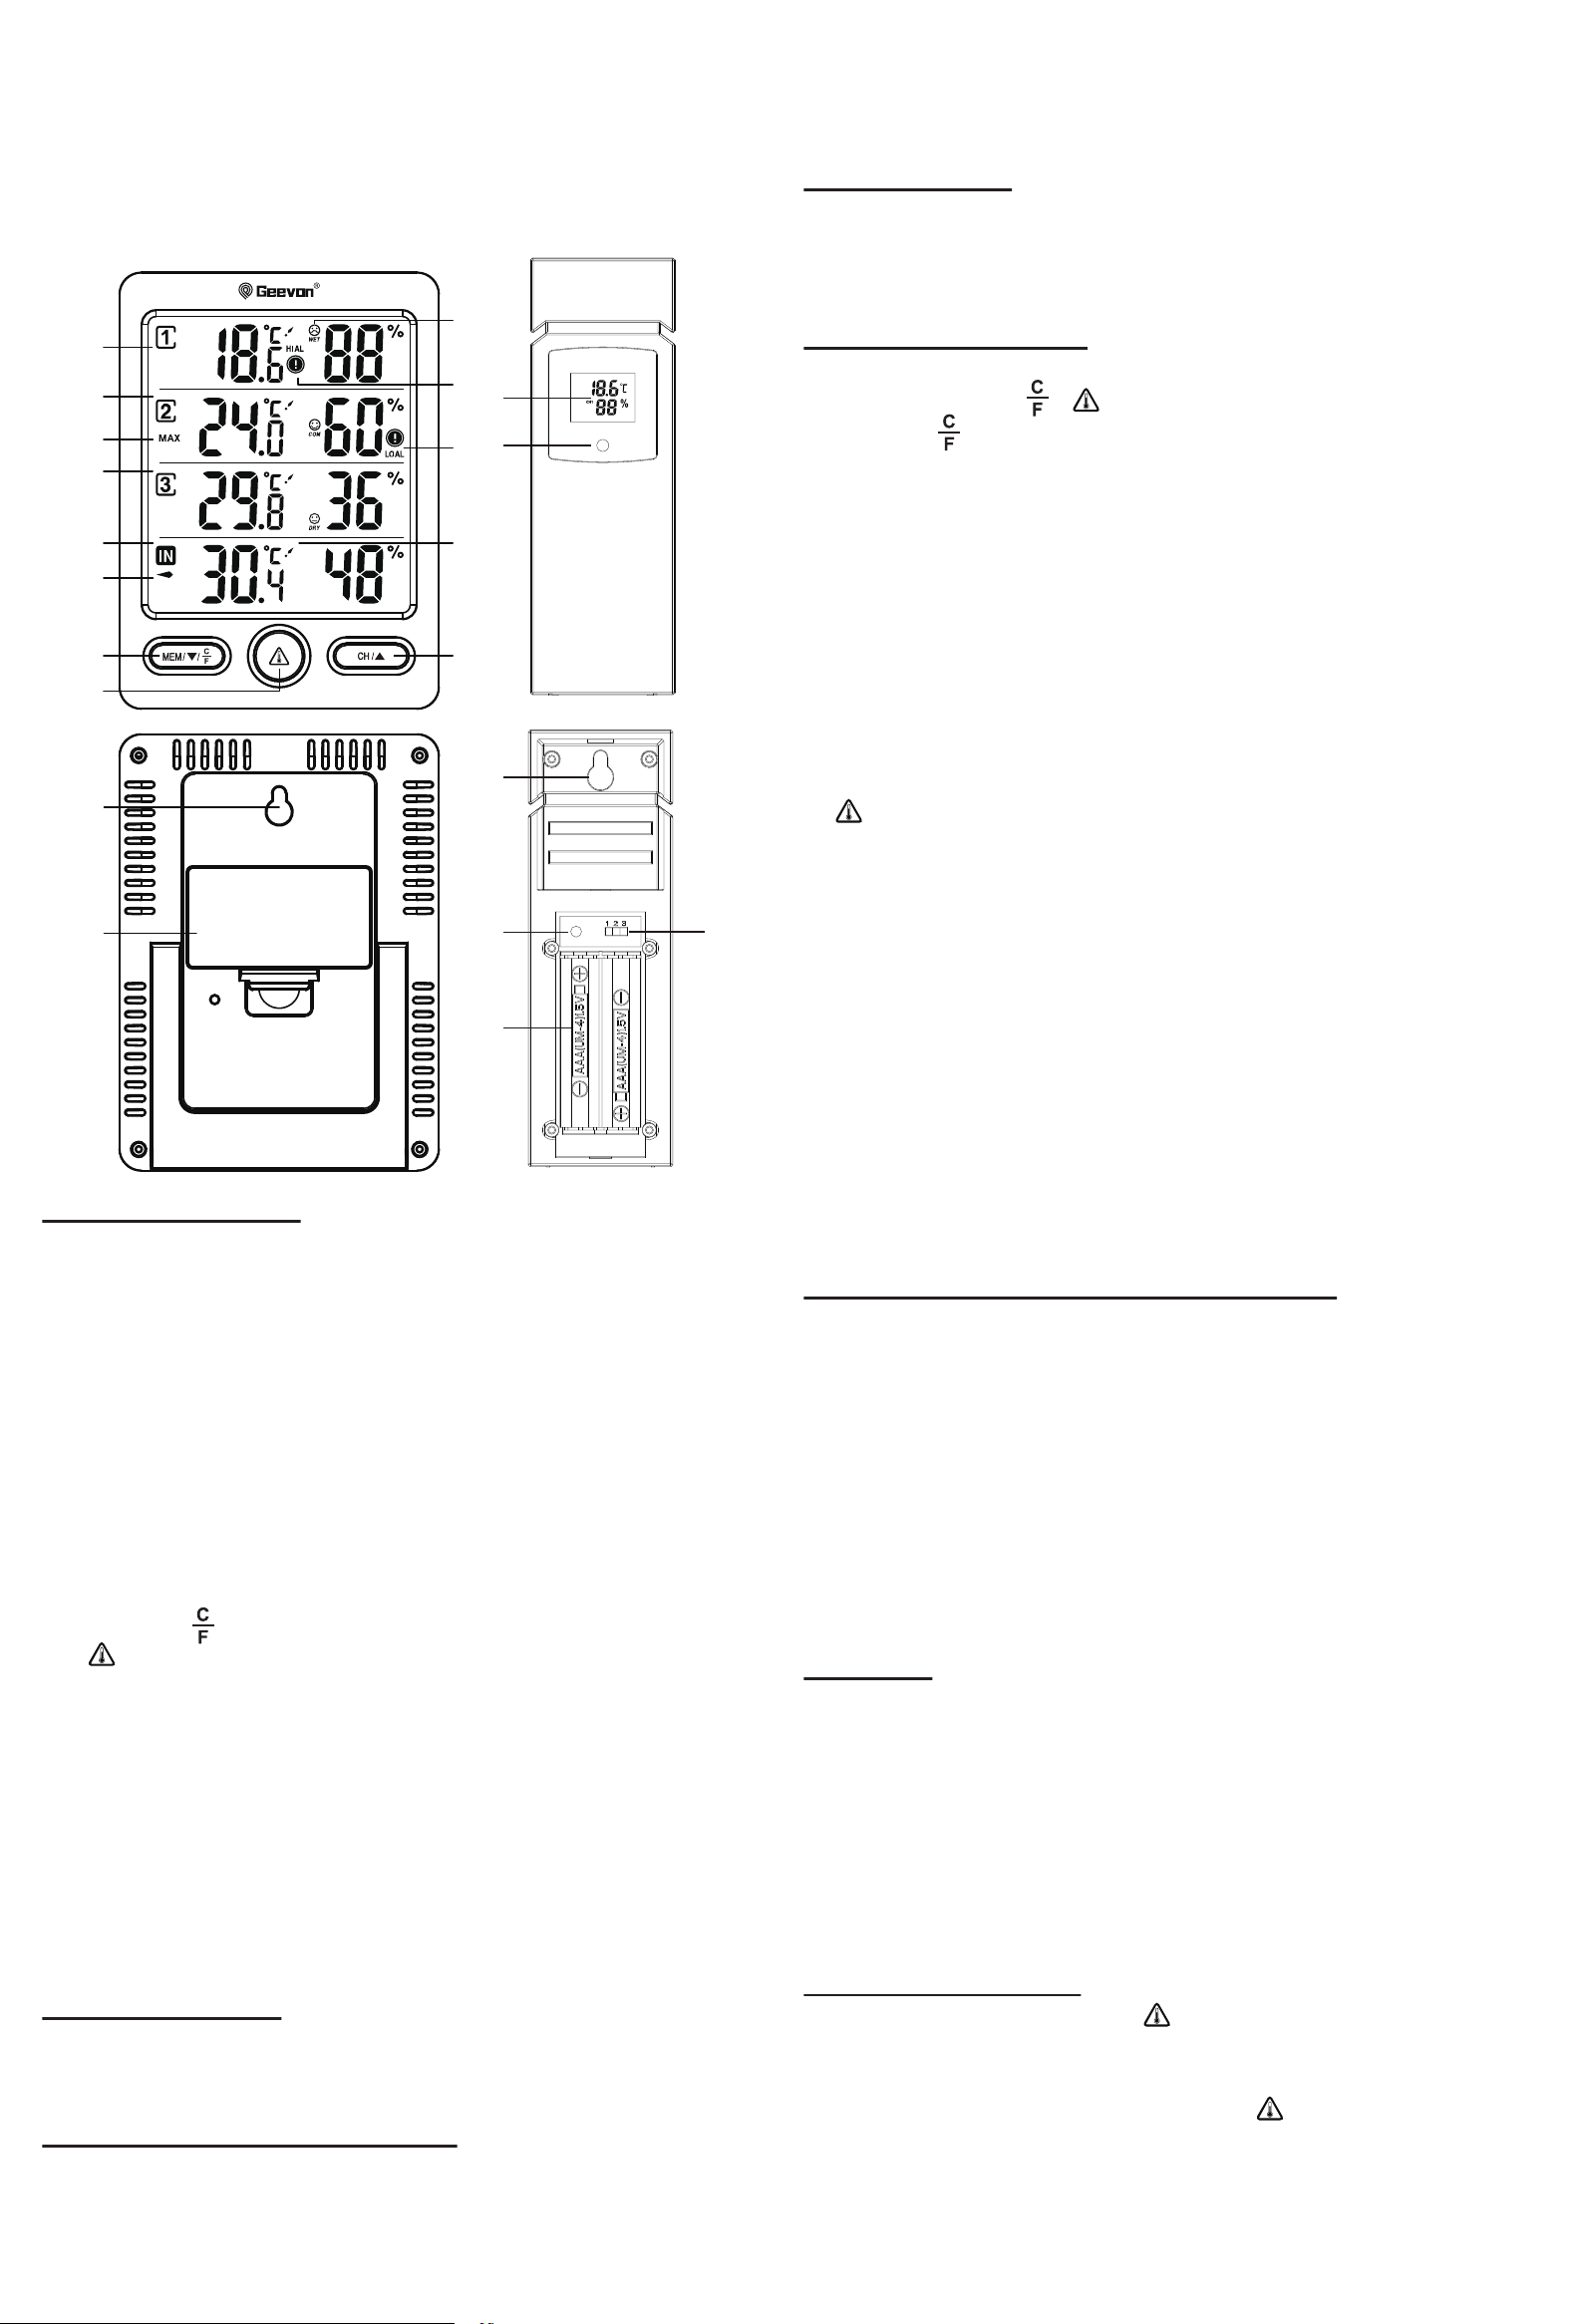
DISPLAY UNIT & OUTDOOR SENSOR
1. Channel 1 outdoor temperature and humidity
2. Channel 1 comfortable level
3. Channel 1 temperature alert
4. Channel 2 outdoor temperature and humidity
5. Channel 2 outdoor temperature and humidity max/min
record
6. Channel 2 humidity alert
7. Channel 3 outdoor temperature and humidity
8. Indoor temperature and humidity
9. Channel indicator icon
10. Tendency indoor temperature
11. MEM/▼/ button
12. button
13. CH/▲ button
14. Wall mount hole
15. Battery Compartment 2xAA (batteries not included)
16. Outdoor sensor display
17. Wireless signal indicator
(Flashes when data is being sent to the display unit)
18. Integrated hang hole
19. C/F Switch hole
20. Compartment 2xAAA batteries (batteries not included)
21. TX channel selector, select external sensor channel
Package Contents:
1. Display Unit
2. 3 x Outdoor Sensor
3. Instructions Manual
Installing or Replacing Batteries:
•We recommend using high quality alkaline batteries for the
best product performance.
•Heavy duty or rechargeable batteries are not recommended.
•The outdoor sensor requires high quality alkaline batteries in
low temperature conditions. Cold temperatures could cause
other batteries to function improperly.
•Do not mix old and new batteries. Do not mix alkaline,
standard, and/or rechargeable batteries.
Default settings:
1. Default temperature: °F
The LCD display fully for 3 seconds when changing new
battery or resetting, then with a sound BI into the normal
state, after testing temperature, receiving RF for 3 minutes.
Display / Keys Details:
There are totally 3 keys for the alarm clock, they are
included: MEM/▼/ , , CH/▲.
1. MEM/▼/ buttons:
a. Press to decrease the setting value during setting.
b. Press and hold 2 seconds button for fast adjust during
setting mode.
c. In normal display mode, press this button to display
max/min temperature/humidity of the channel where the
arrow is located.
d. In normal display mode, press and hold this button to
switch between °C and °F.
e. Press and hold this button to clear the record of MAX/MIN
temperature and humidity when display shows MAX or MIN
temperature and humidity.
2. buttons:
a. In normal display mode, press this button to display HI/LO
temperature/humidity alert.
b. In checking mode, press and hold this button to enter alert
mode.
c. In setting mode, press this button to confirm the setting;
press and hold this button to open or close alert.
3. CH/▲buttons:
a. Press to increase the setting value during setting.
b. Press and hold 2 seconds button for fast adjust during
setting mode.
c. In normal display mode, press this button to select the
setting channel.
d. In normal display mode, press and hold to clear data and
search RF.
Indoor/outdoor temperature and humidity:
1. Indoor temperature -10°C ~ 60°C (50°F ~ 140°F), display
LL.L when below -10°C and display HH.H when higher than
60°C.
2. Outdoor temperature -50°C ~ 70°C (-58°F ~ 158°F),
display LL.L when below -50°C and display HH.H when
higher than 70°C.
3. Temperature resolution: 0.1°C
4. Indoor and outdoor humidity range: 20%-95%, display
20% when below 20% and display 95% when higher than
95%.
5. Humidity resolution: 1 %RH
Accuracy:
1. Temperature accuracy:
-40°C ~ -20°C: ± 4°C
-20°C ~ 0°C: ± 2°C
0°C ~ +50°C: ±1°C
Note: when the temperature in -50°C ~ -40°C and 50°C ~
70°C range, the temperature is only for reference.
2. Humidity accuracy: +/- 5 % RH (@25°C , 30%RH to
50%RH); +/- 10 % RH (@25°C , 20%RH to 29%RH, 51%RH
to 95%RH)
Temperature alert set:
1. In standard mode, press “ ” to check the alert setting
value, the order is: HI AL→ LO AL→ current temperature and
humidity
2. In checking mode, press and hold “ ” to enter alert
setting of the channel where the arrow
is located. In setting mode, press and hold “ALERT” button to
open or close alert function of the channel where the arrow is
located.
1
2
3
6
10
13
4
5
7
8
9
11
12
14
15
17
18
20
21
19
16
3. Press “ ” to set and order is: temperature upper limit→
temperature lower limit→ humidity upper limit→ humidity
lower limit→ exit.
4. In set, press “CH/▲” to go ahead by once. Hold “CH/▲” to
go ahead at 8 steps per second.
5. In set, press “MEM/▼/ ” to back by once. Hold
“MEM/▼/ ” to go back at 8 steps per second.
6. Press or no handling in 10s will exit.
Temperature alert:
1. Alert icon will flash when alert, alarm time is 2 minutes.
2. In alert status, alert icon will twinkle and temperature and
humidity will always display.
3. Alarm sound:
0-10S:BI once/second
10-20S: BI twice/second
20-30S: BI three times/second
After 30S continuous BI four times sound until the alarm finish.
4. Alarm stop conditions:
a. Press any button to stop alarm sound but temperature and
alert icon will continuously flash.
b. When temperature go back into alert range.
c. Press “ ” to enter alert mode, press and hold “ ” to
enter alert setting of the channel where the arrow is located.
In setting mode, press and hold “ ” button to turn off alert
function of the channel where the arrow is located.
Setting the Temperature Units:
To switch the temperature measurement between °C and °F,
press and hold the “MEM/▼/ ” button which is also the C/F
option button. You can switch between Celsius and Fahrenheit
at any time (except when setting other setting options).
Checking the MAX/MIN temperature and humidity:
a. Press the “MEM/▼/ ” button to check MAX/MIN
temperature and humidity of the channel where the arrow is
located.
b. Press and hold the “MEM/▼/ ” button to clear the record
of MAX/MIN temperature and humidity when display shows
MAX or MIN temperature and humidity.
Setting the Channel:
Setting the channel connection between the display unit and
outdoor sensor:
a. Synchronizing 3 channel remote data on the same screen
at the same time. When the arrow icon is in the indoor area,
press and hold the “CH/▲” button to clear all channel data
and re-search RF, press and hold again to turn off search RF;
When the arrow icon is on any outdoor channel, press and
hold the “CH/▲” button to clear this channel data and
re-search RF, press and hold again to turn off search RF.
b. To change the channel option on the outdoor sensor open
the battery compartment cover, on the upper left side is a button.
c. ALWAYS MAKE SURE THE CHANNEL CHOSEN ON THE
DISPLAY UNIT MATCHES THE CHANNEL OPTION
CHOSEN ON THE OUTDOOR SENSOR.
Comfortable level:
COM: the temperature is between 20°C and 28°C , the
humidity is between 40% and 70%.
WET: the humidity higher than 70%
DRY: the humidity lower than 40%
Not display: the temperature is not between 20°C and 28°C,
the humidity is between 40% and 70%
Low Battery Indicator:
If the low battery indicator is displayed on the LCD for either
the outdoor sensor or the display unit, immediately change
the batteries to prevent disruptions in communications of the
devices.
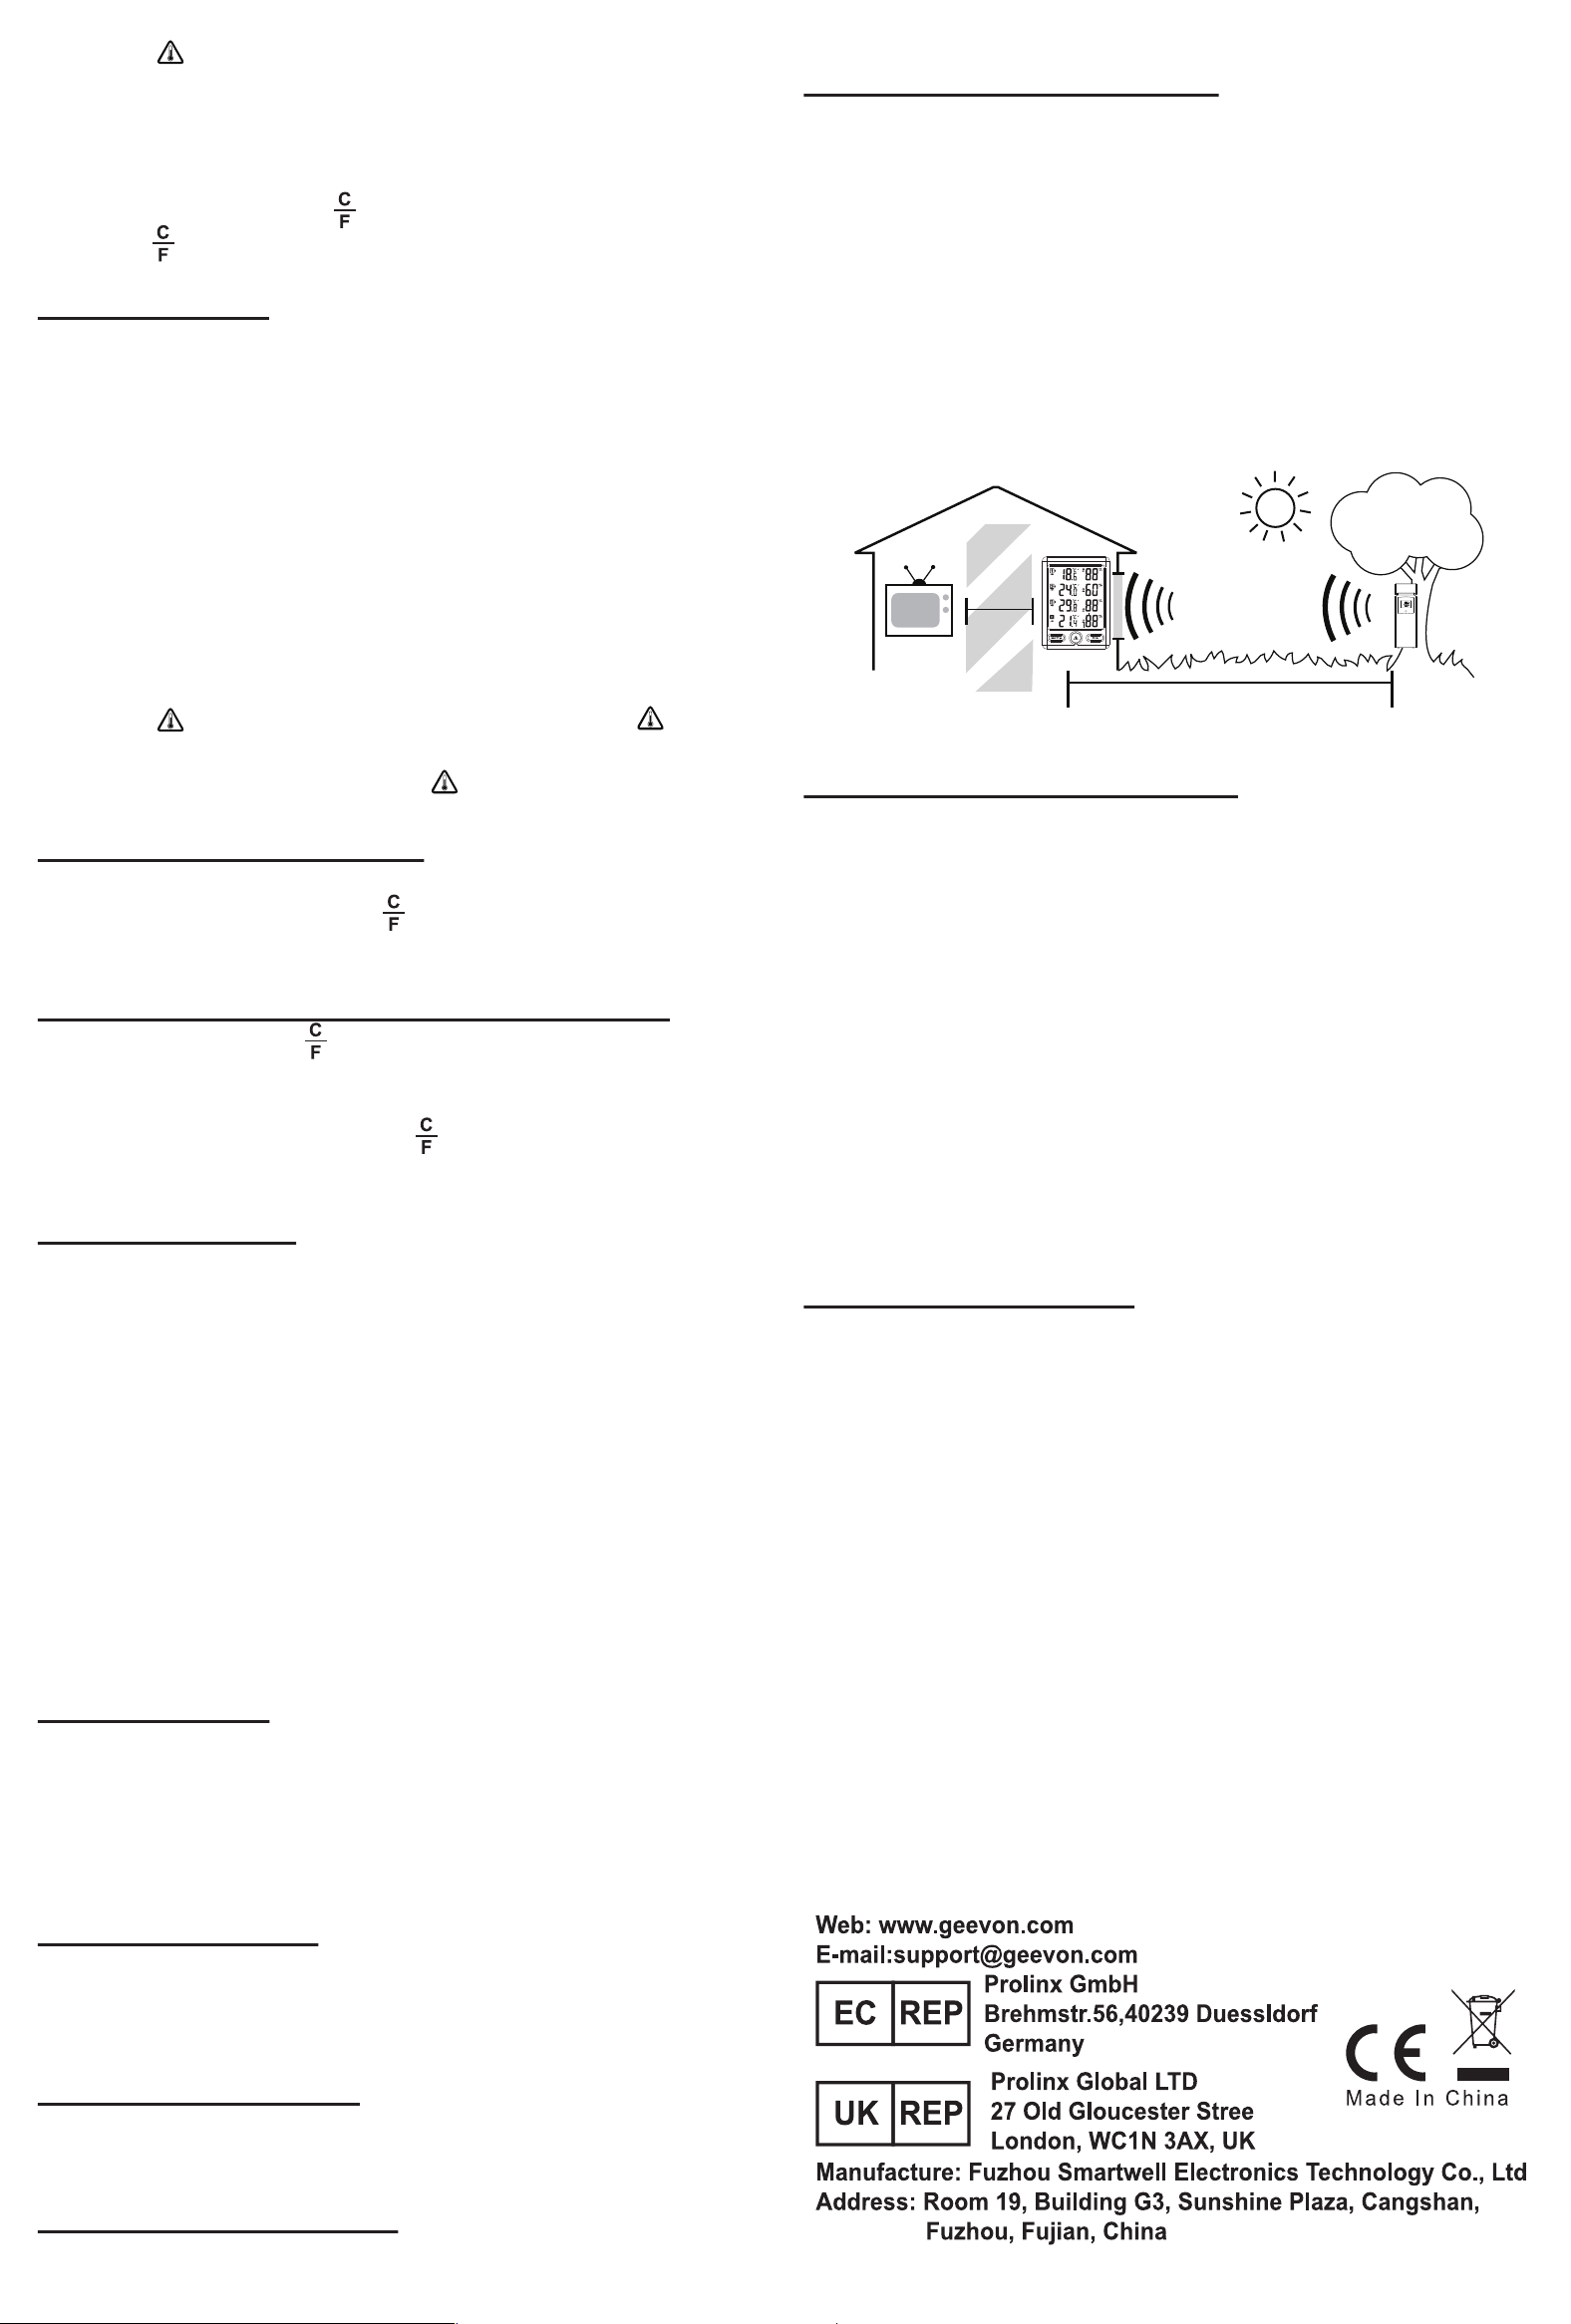
Placement of the Device:
Proper placement of both the display unit and the outdoor
sensor are critical to the accuracy and performance of this
product.
DISPLAY UNIT PLACEMENT:
Place the display unit in a dry area free of dirt and dust.
Display unit stands up right for tabletop/countertop use.
Important Placement Guidelines:
a. To ensure accurate temperature measurement, place units
out of direct sunlight and away from any heat sources or
vents.
b. Display unit and outdoor sensor must be within 200ft (60m)
of each other.
c. To maximize wireless range, place units away from large
metallic items, thick walls, metal surfaces, or other objects
that may limit wireless communication.
d. To prevent wireless interference, place both units at least
3ft (1 m) away from electronic devices (TV, computer,
microwave, radio, etc.
OUTDOOR SENSOR PLACEMENT:
a. The sensor must be placed outside to observe outdoor
conditions. It is water resistant and designed for general
outdoor use, however, to prevent damage place the sensor in
an area which is protected from the direct weather elements
and direct sunshine. The best location is 4 to 8 feet above the
ground with permanent shade and plenty of fresh air to
circulate around the sensor.
b. Display unit and outdoor sensor must be within 100 feet of
each other.
c. In order to maximize the wireless range, place units away
from large metallic items, thick walls, metal surfaces or other
objects that may limit wireless communications.
d. To prevent wireless interferences, place both units at least
3 feet away from electronic devices (EX: TV, computer,
microwave etc.)
Outdoor Sensor Function:
a. Once the display unit has been set up and the channel
synchronized with the outdoor sensor, the display unit will
begin the registration process. It can take up to 3 minutes to
complete the registration, where the display unit will search
for an RF (Radio Frequency) signal from the outdoor sensor.
The outdoor sensor signal strength will show the connection
strength to the outdoor sensor. If there are no bars or if bars
are not showing at its maximum strength (4 bars) try placing
the outdoor sensor or display unit elsewhere for better
connection.
b. If the RF Signal was lost and not reconnected, the outdoor
temperature and humidity level will begin to flash after 1 hour
of lost connection. If no connection was found after 2 hours
only a dotted line ‘ - -. - ’ will be displayed in place of the
temperature and humidity level.
c. To manually restart the RF registration, press and hold the
“CH” button for 3 seconds. The display unit will now search
for the RF signal for the next 3 minutes.
TV
(200 feet maximum)
(60 meters)
(0.9 m)
3 feet
AT
LEAST
APART
