Model: US-24297
1. Overview
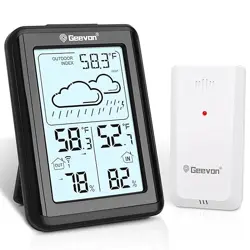
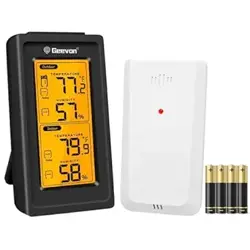
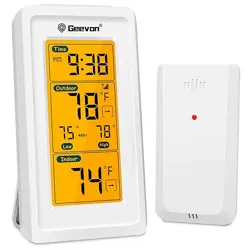
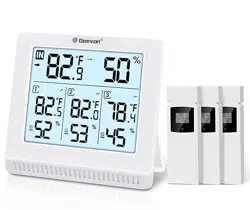
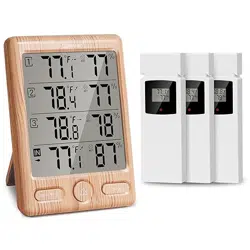
The Geevon Indoor Outdoor Thermometer is a wireless digital weather station designed to monitor temperature and humidity in multiple areas. It consists of a main display unit (host) and one remote sensor.

Key capabilities include monitoring three channels, displaying weather icons, calculating Mold/Dew/Heat indexes, and recording historical maximum and minimum values.
2. Package Contents
- 1 x Main Display Unit (Host)
- 1 x Outdoor Remote Sensor
- 1 x User Manual
Note: Batteries are not included.
3. Product Features
3.1 Display and Readout
The main unit features a 3.8-inch digital display. The screen shows the following information:
- Time and Date
- Indoor Temperature and Humidity
- Outdoor Temperature and Humidity (from the remote sensor)
- Weather Forecast Icons (e.g., sunny, cloudy, rainy)
- MOLD, DEW, and HEAT Index indicators
- Channel Indicator (for selecting which sensor data is displayed)
- Signal Strength Indicator for the remote sensor
- Low Battery Indicator
- Temperature Trend Arrows (showing if values are rising or falling)

The backlight can be activated for 10 seconds by pressing the designated button, aiding visibility in low light.
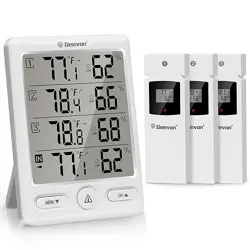
3.2 Three-Channel Monitoring
The device can monitor temperature and humidity in three different areas. Only one sensor is included in the box; additional sensors (sold separately) can be paired to use all three channels. The channel button cycles through the displays for Channel 1, 2, and 3.
3.3 Health and Comfort Indexes
The unit calculates three environmental indexes:
- MOLD Index: Indicates risk level for mold growth based on temperature and humidity.
- DEW Index: Displays the dew point temperature.
- HEAT Index: Shows the perceived temperature based on heat and humidity.


3.4 History Records and Trends
The device records the maximum and minimum temperature and humidity values over the past 24 hours. Trend arrows next to the readings show whether the values are currently increasing, decreasing, or stable.

3.5 Weather Forecast
Based on atmospheric pressure trends (from the built-in sensor in the main unit), the display shows one of several weather icons to indicate a forecast for the next 12-24 hours.

4. Use Guide
4.1 Initial Setup
- Install Batteries: Insert the required batteries into the main unit and the outdoor sensor. Ensure correct polarity (+/-).
- Power On: The main unit and sensor will power on automatically.
- Sensor Pairing: Place the sensor within 3 feet (1 meter) of the main unit. The units should automatically synchronize. The wireless connection icon on the main display will become solid when the signal is successfully received.
- Sensor Placement: Once paired, place the outdoor sensor in its desired location. The maximum wireless transmission range is 200 feet (60 meters) in open air. Walls, windows, and other obstacles will reduce this range.
Video: Step-by-Step Guide: How to Use the Outdoor Sensor?
This video guides you through the initial setup and placement of the outdoor sensor.
4.2 Understanding the Buttons
The main unit has four buttons on its back or side:
- UP / °C/°F Button: Press to toggle the temperature unit between Celsius (°C) and Fahrenheit (°F).
- CHANNEL Button: Press to cycle through the display for Channel 1, Channel 2, and Channel 3. Use this to view data from different sensors if multiple are connected.
- ALARM / LIGHT Button:
- Short Press: Activates the backlight for 10 seconds.
- Long Press: Enters the alarm setting mode.
- SET / HISTORY Button:
- Short Press: Cycles through the display of current values, 24-hour MAX values, and 24-hour MIN values.
- Long Press: Enters the main settings menu for time, date, and alarm.
Video: Introduction of the Button Functions on the Thermometer
This video explains the function of each button on the main unit.
4.3 Setting the Time and Date
- Long press the SET / HISTORY button until the time digits start flashing.
- Use the UP button to adjust the flashing value (e.g., hour).
- Press the CHANNEL button to move to the next setting (e.g., minute, year, month, day).
- Use the UP button to adjust each value.
- Press the SET / HISTORY button to confirm and exit the setting mode.
4.4 Mounting Options
The main display unit can be placed on a flat surface using the built-in stand or wall-mounted using the keyhole slot on the back.


5. Specifications
- Model Number: US-24297
- Indoor Temperature Range: -9.9°C to +50°C (14.0°F to 122°F)
- Outdoor Temperature Range: -40°C to +60°C (-40°F to 140°F)
- Humidity Range: 20% to 95% RH
- Temperature Accuracy: ±1°C (within 0°C to +50°C / 32°F to 122°F)
- Humidity Accuracy: ±5% RH (within 35% to 70% RH)
- Wireless Range: Up to 200 ft (60 m) in open air
- Display Backlight: 10-second duration
- Power Supply: Batteries (not included) for both main unit and sensor.
- Dimensions (Main Unit): Approximately 3.1" W x 4.2" H
- Material: ABS plastic
6. Troubleshooting
- No Outdoor Reading / "---" Displayed:
- Check that batteries in the sensor are installed correctly and have sufficient charge.
- Move the sensor closer to the main unit to re-establish connection, then return it to the desired location.
- Ensure the distance between sensor and main unit is within 200 ft with minimal obstructions.
- Incorrect Time/Date: Reset the time and date following the instructions in section 4.3.
- Dim Display: Press the ALARM/LIGHT button to activate the 10-second backlight. The display is not permanently lit.
- Low Battery Indicator: Replace the batteries in the indicated unit (main or sensor) promptly.
Video: How to connect the host and sensor signal?
This video demonstrates troubleshooting steps for establishing a connection between the main unit and the remote sensor.
7. Warranty and Support
This product comes with a 1-year limited warranty from the date of purchase. For warranty service or product support, contact the seller or manufacturer through your point of purchase.