Loading ...
Loading ...
Loading ...

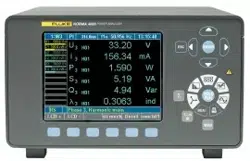
NORMA 4000/5000
Operators Manual
7-8
Note
If the cable connecting the two devices is extremely long, or if the PC is
unable to handle data at the set rate, you might consider adjusting the
RS232 settings for the Power Analyzer to those of the PC. To do this,
proceed as follows:
1. Move the cursor to the first field in line RS232.
2. Enter the settings for baud rate, data bits/parity/stop bits and
handshake and confirm by pressing Enter.
3. The new settings are now shown in the fields of line RS232.
4. Save the configuration settings by pressing the SAVE function
key.
Configure GPIB Address
The general-purpose interface bus (GPIB) port is an IEEE488 interface. The IEEE488
interface works like an IP address in a network. The Power Analyzer is assigned a unique
device address (numerical code) for communication on the GPIB port. If more than one
Power Analyzer is used simultaneously in the network, the device address can be
adjusted accordingly.
1. Move the cursor to the field in line GPIB and press Enter.
A list with available addresses is displayed.
2. Select an address that has not yet been assigned at the GPIB port and confirm
with Enter.
The selected address is shown in line GPIB.
Configure Ethernet
Settings Description
0..... Device IP address
0..... IP subnet mask address
0.... IP gateway address
Telnet
VNC®
Transport protocol for standard Remote Control Commands (SCPI)
Protocol for remote terminal server
Before the Ethernet interface can be operated properly, enter the correct network
addresses and protocol.
1. Move the cursor to one of the address fields in line LAN and press Enter.
A window with a numeric entry field is displayed.
2. Enter the required IP address, IP netmask and IP gateway and confirm each by
pressing Enter.
Address, netmask and gateway are shown in line LAN.
3. Select the LAN protocol to use and press Enter.
Telnet communicates with the device by its standard Remote Control command
set, VNC® is a widely used protocol to show a device screen on a remote
computer and control it by keyboard and mouse. VNC is a registered trademark
of RealVNC Ltd.
1.888.610.7664 sales@GlobalTestSupply.com
Fluke-Direct.com
Loading ...
Loading ...
Loading ...