Loading ...
Loading ...
Loading ...
9
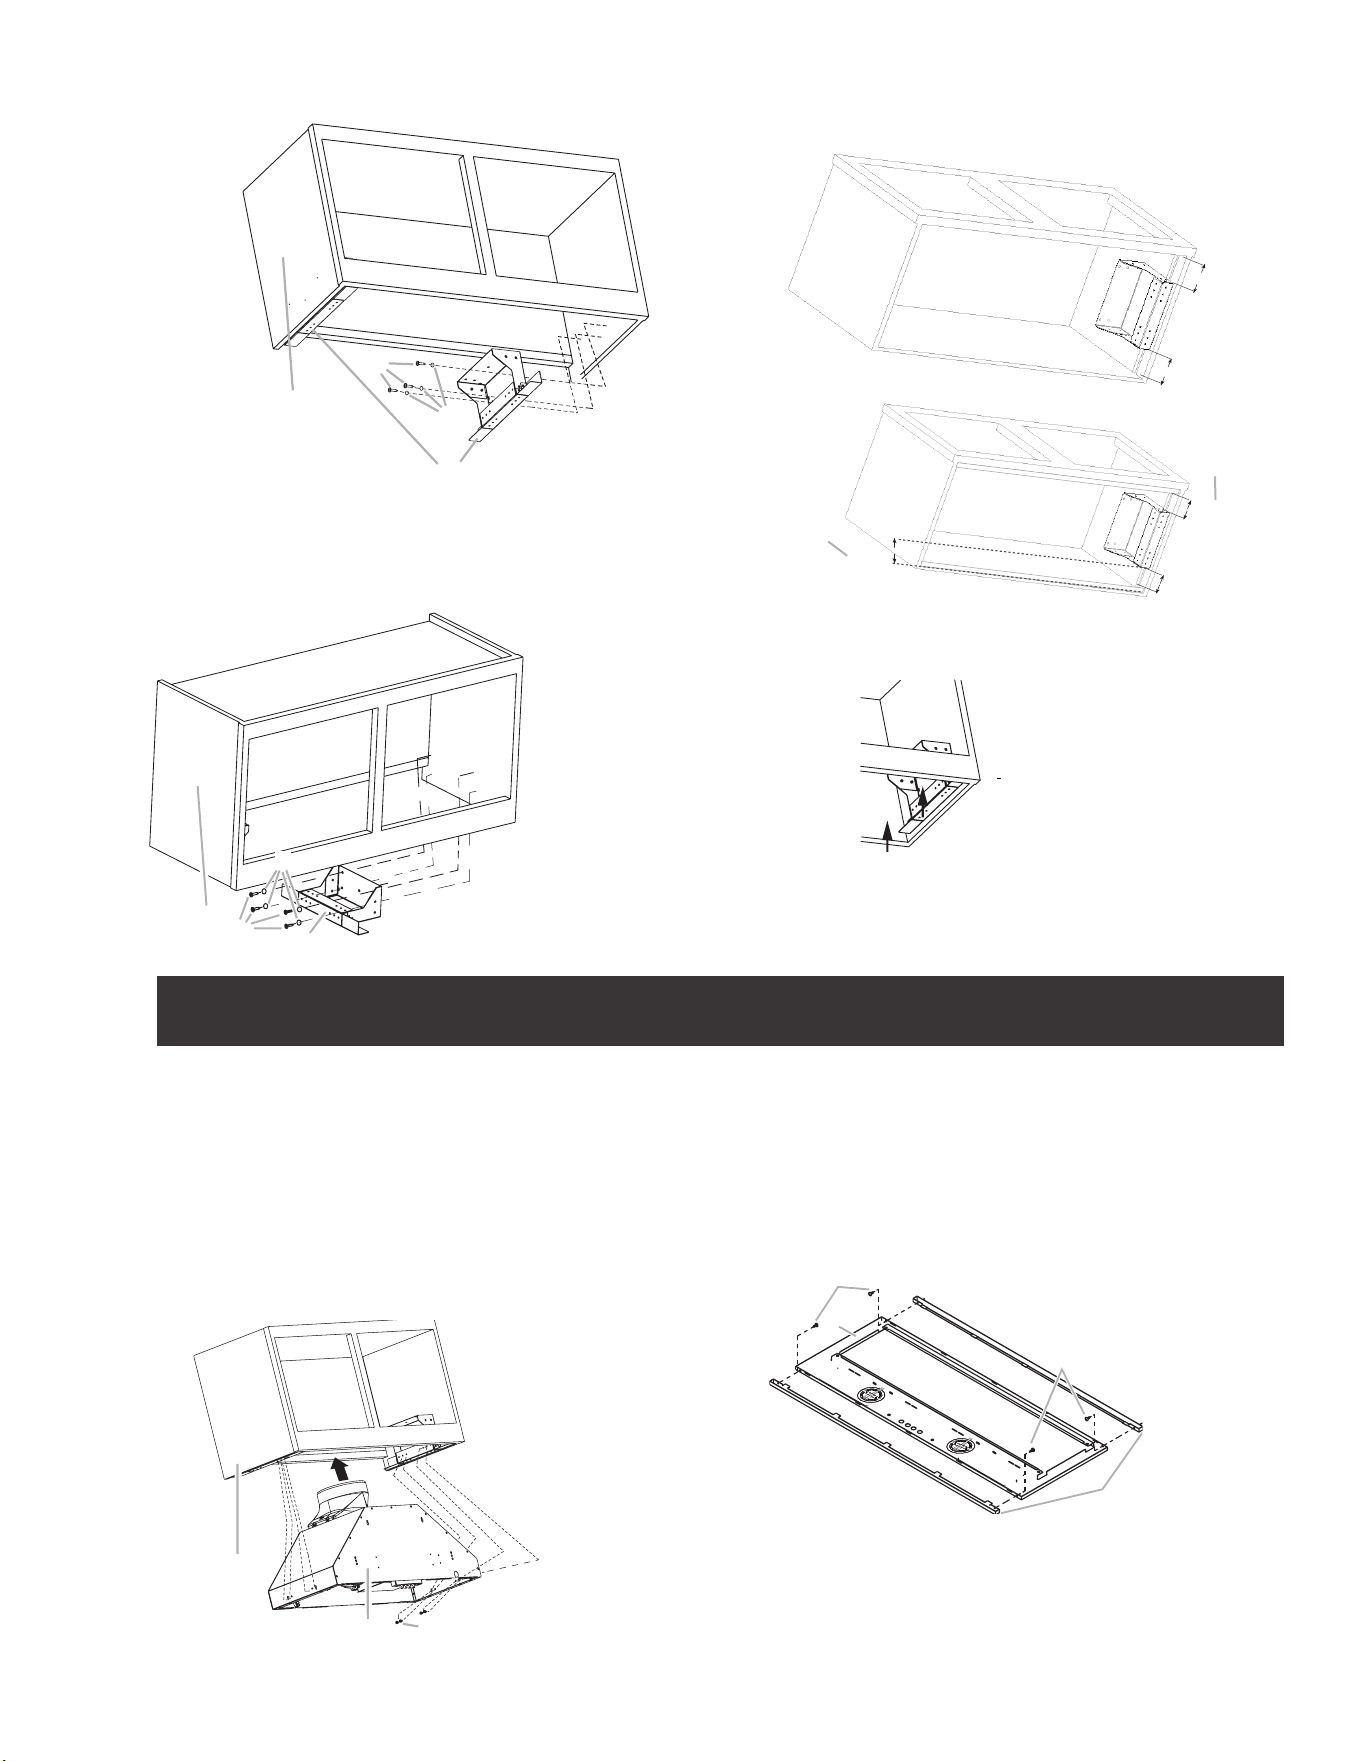
Bracket Orientation for 29.4”(74.8 cm) cabinet
Bracket Orientation for 36.7” (93.3cm) cabinet
Move the bracket
.3” (1 cm) bot-
tom to top side of the cabinet
3 Install the vent system according to the method needed.
Use caulking to seal the exterior wall or roof opening.
Install range hood
I WARNING
EXCESSIVE WEIGHT HAZARD.
USE TWO OR MORE PEOPLE TO MOVE AND INSTALL
RANGE HOOD.FAILURE TO DO SO CAN RESULT IN BACK OR
OTHER INJURY.
1 Remove the polyurethane piece that comes inside the hood.
2 Center the canopy in the cabinet. Align the bottom of the
canopy with the bottom of the cabinet. Install four 4.2 x 19 mm
screws into the hood canopy assembly and tighten all (8)
mounting screws.
A. Cabinet
B. Hood liner canopy
assembly
C. Screws - 4.2 x 19
mm (8)
A. Cabinet
B. Screws - 4.5 x 13 mm (8)
C. Washers (optional)
D. Mounting bracket (2)
A
B
C
D
A
B
C
D
A. Cabinet
B. Screws - 4.5 x 13 mm (8)
C. Washers (optional)
D. Mounting bracket (2)
Center brackets
into the cabinet
7.7cm
7.6cm
Bracket position without spacers
Bracket position
with 1 spacer
Bracket position
with 2 spacers
6.35cm
3 Remove the protective from the metal grease filters and
pull them out from the face panel.
4 Pull out the lamps connector cables
5 Attach the face plate to the hood insert. Tighten to secure.
NOTE: If cabinet depth is greater than 12”, it is recommended
that the two .5” metal spacers are installed.
Install to front and rear sides of the face plate with 3.5 x 9.5 mm
screws as shown in drawing.
B
C
C
A
A. Face Panel
B. Front and rear spacer
C. Screws - 3.5 x 9.5 mm (4)
A
B
C
Loading ...
Loading ...
Loading ...