Loading ...
Loading ...
Loading ...
10
C
B
A
D
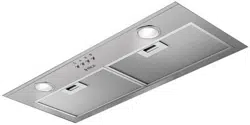
A. Screws - 3.5 x 9.5 mm flat-head (4)
B. Face plate (28.5” x 12”[72.39 cm x 30.5 cm] shown)
C. Cabinet (28.5” x 12” [72.39 cm x 30.5 cm] shown)
D. Screws - 4.2 x 15 mm truss-head (2)
Connect the vent system
Vented Installations
1 Connect the vent system to the range hood vent opening.
Seal the connection with clamps.
Non-Vented (recirculating) Installations
1 Connect the vent system to the range hood vent opening.
Seal the connection with clamps.
2 Install charcoal filters.
See the “Available accesories” section.
Complete installation
1 Replace grease filters. See the “Maintenance” section.
I WARNING
ELECTRICAL SHOCK HAZARD
I WARNING
PLUG INTO A GROUNDED 3 PRONG OUTLET.
DO NOT REMOVE GROUND PRONG.
DO NOT USE AN ADAPTER.
DO NOT USE AN EXTENSION CORD.
FAILURE TO FOLLOW THESE INSTRUCTIONS CAN RESULT
IN DEATH, FIRE, OR ELECTRICAL SHOCK.
2 Plug 3-prong power cord into a grounded 3-prong out-
let located inside the cabinet above the range hood.
3 Check the operation of the range hood fan and light.
See “Description of the hood” section. If range hood does
not operate, check to see whether a circuit breaker has
tripped or a household fuse has blown. Disconnect power
and check wiring connections.
NOTE: To get the most efficient use from your new range
hood, read the “Description of the hood” section.
Description of the hood
The range hood is designed to remove smoke, cooking vapors
and odors from the cooktop area. For best results, start the
hood before cooking and allow it to operate several minutes
after the cooking is complete to clear all smoke and odors
from the kitchen.
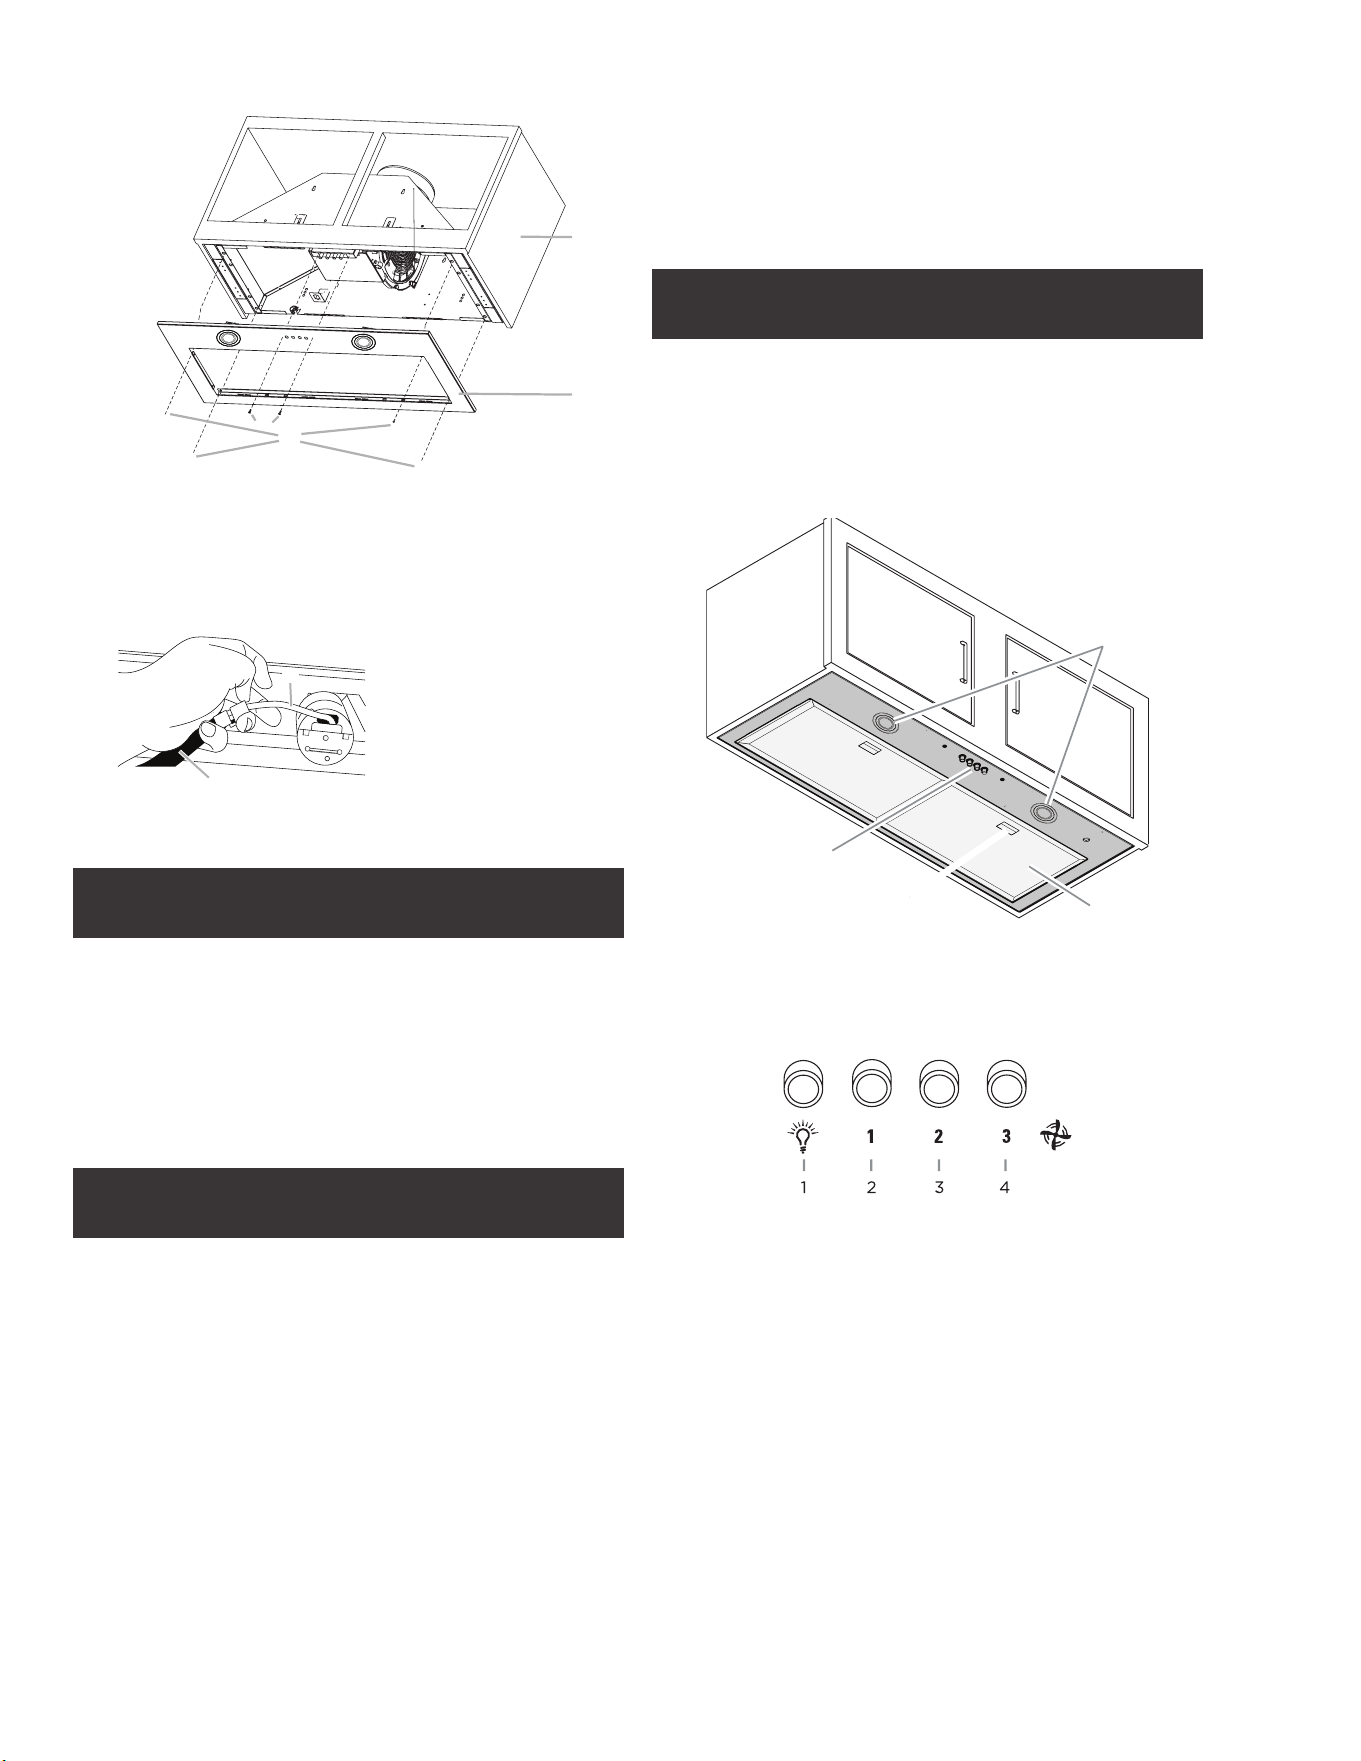
The hood controls are located on the center of the front of
the range hood liner.
A
B
C
D
A. Blower and light controls
B. Grease filter handle
C. Grease filter
D. LED lamps
Controls
1. Light On/O button
2. Blower On/O and speed minimum button
3. Blower speed medium button
4. Blower speed maximum button
Operating the light
The Light On/Off button (1) controls both lights. Press once
for On and again for Off.
Operating the blower
The Blower On/Off and speed minimum button (2) turns the
blower On at minimum speed and Off. The Blower Speed
buttons (3 and 4) set the desired speed and control the sound
level for quiet operation. The speed can be changed anytime
during fan operation by pressing the desired blower speed
button.
A. Lamp connector
B. Hood connector
7 Put the filters back in place
6 Connect the lamps connector to the connector present
inside the hood as shown in drawing.
A
B
Loading ...
Loading ...
Loading ...