1
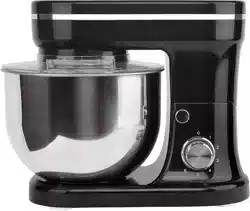
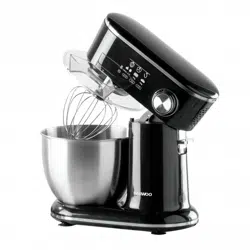
5L Stand Mixer
Model No: SDA2758
User Manual
IMPORTANT – RETAIN THESE INSTRUCTIONS FOR FUTURE REFERENCE

2
5L Stand Mixer
Model No: SDA2758
User Manual
IMPORTANT – RETAIN THESE INSTRUCTIONS FOR FUTURE REFERENCE
Contents
Page No.
2 Contents
3 Reading and Storing the User Manual
3 Important Safety Instructions for Proper Use
6 Explanation of Symbols
7 Description of Parts
7 Before First Use of Your Stand Mixer
8 Operating Instruction – Preparation for mixing
10 Operating Instruction – Using the Mixer
11 Maximum Loading Chart
11 Hints and Tips
13 Recipes for You to Try
20 Cleaning and Maintenance
20 Plug Wiring Information
20 Technical Specification
20 Recycling Information
21 Customer Support
Back Page Warranty Information

3
5L Stand Mixer
Model No: SDA2758
User Manual
IMPORTANT – RETAIN THESE INSTRUCTIONS FOR FUTURE REFERENCE
READING AND STORING THE USER MANUAL
Before using this product, please read through this manual
carefully paying particular attention to the safety instructions.
Failure to do so may result in personal injury or damage to the
product.
Carefully save this instruction manual for future reference. Ensure the
user manual is included when passing the product on to any third
parties.
IMPORTANT SAFETY INSTRUCTIONS FOR PROPER USE
When using electrical appliances, safety precautions should always be
followed.
Only use the product as described in this user manual. Any other use is
considered improper and may result in damage to property or persons.
The manufacturer or vendor cannot be held liable for damages or injury
incurred through improper or incorrect use.
• Read and familiarise yourself with all operating
instructions before using this Stand Mixer.
• Before plugging your unit into the mains, visually check
that the unit is intact and has not suffered any transit
damage.
• DO NOT use this Stand Mixer with an extension cable.
• Check that the voltage indicated on the data plate
corresponds with that of the local network before
connecting the appliance to the mains power supply.
• Close supervision is required when using this appliance
near children.
• Never leave this appliance within reach of children.
• This appliance shall not be used by children.
• Keep the appliance and its cord out of reach of children.
• Appliances can be used by persons with reduced physical,
sensory or mental capabilities or lack of experience and
knowledge if they have given supervision or instruction
concerning use of the appliance in a safe way and
understand the hazards involved.
• Children shall not play with the appliance.
• Children less than 3 years should be kept away unless
continuously supervised.

4
5L Stand Mixer
Model No: SDA2758
User Manual
IMPORTANT – RETAIN THESE INSTRUCTIONS FOR FUTURE REFERENCE
• DO NOT immerse the appliance or its cord in water or any
other liquids.
• DO NOT leave the appliance unattended during use.
• DO NOT leave the appliance unattended whilst connected
to the mains supply.
• Always use this appliance on a solid, level, non-flammable
surface.
• DO NOT use this appliance outdoors.
• It is imperative to unplug the power cord after the
appliance has been used, before it is cleaned and whilst
being repaired.
• Repairs to electrical appliances should only be performed
by qualified personnel. Improper repairs may place user at
serious risk.
• DO NOT operate this appliance with a damaged plug or
cord, after a malfunction or after being dropped or
damaged in any way.
• Regular, periodic checks should be carried out on the
power cord to ensure no damage is evident. Should there
be any signs of damage the appliance should not be used.
• If the power cord is damaged, it should only be replaced
by the manufacturer or a suitable qualified after-sales-
service in order to avoid a hazard.
• DO NOT allow the power cord to hang over sharp edges or
come in contact with hot surfaces.
• Allow the unit to cool before storage.
• Always disconnect the Stand Mixer from the supply if it is
left unattended and before assembling, disassembling or
cleaning.
• This appliance is intended for household use only and
should not be used for industrial purposes.
• DO NOT use any accessories or attachments with this
appliance other than those supplied or recommended by
the supplier.
• DO NOT use this appliance for anything other than its
intended use.

5
5L Stand Mixer
Model No: SDA2758
User Manual
IMPORTANT – RETAIN THESE INSTRUCTIONS FOR FUTURE REFERENCE
• DO NOT push objects into any openings as damage to the
appliance and/or electric shock may occur.
• Switch off the appliance and disconnect from the supply
before changing accessories or approaching parts that
move in use.
• Grasp the plug, not the cord.
• Disconnect the appliance from the mains before removing
the attachments.
• Ensure that the mixing bowl is clear of all other utensils
(attachments, spoons, etc.) before using the Mixer.
• WARNING! Do not touch or remove the attachments
whilst they are rotating and/or the stand mixer is
connected to the mains.
6
5L Stand Mixer
Model No: SDA2758
User Manual
IMPORTANT – RETAIN THESE INSTRUCTIONS FOR FUTURE REFERENCE
Explanation of Symbols
The following warning symbols or words are used in this instruction manual:
Products labelled with UK Conformity Assessment identifies
products conforming to UK statutory requirements.
Products labelled with this symbol conform to applicable
provisions of the European Economic Area.
You should now recycle your waste electrical goods and in doing
so help the environment. This symbol means waste electrical
products at the end of their useful life should not be disposed of
with normal household waste and not sent to landfill. Please
ensure it is taken to a suitable facility for disposal. Check with
your Local Authority or retailer for recycling advice or visit
www.recycle-more.co.uk, enter your postcode to find out your
nearest recycling site.
This symbol provides useful additional information on the
use of this product.
This symbol indicates that the supply uses an alternating current
mains supply.
This Class 2 symbol indicates that the product is electrically
double insulated and does not require an earth connection.
WARNING!
This designates a hazard with moderate risk, which may
result in severe injury if not adhered to.
7
5L Stand Mixer
Model No: SDA2758
User Manual
IMPORTANT – RETAIN THESE INSTRUCTIONS FOR FUTURE REFERENCE
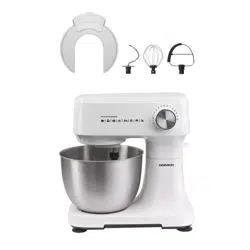
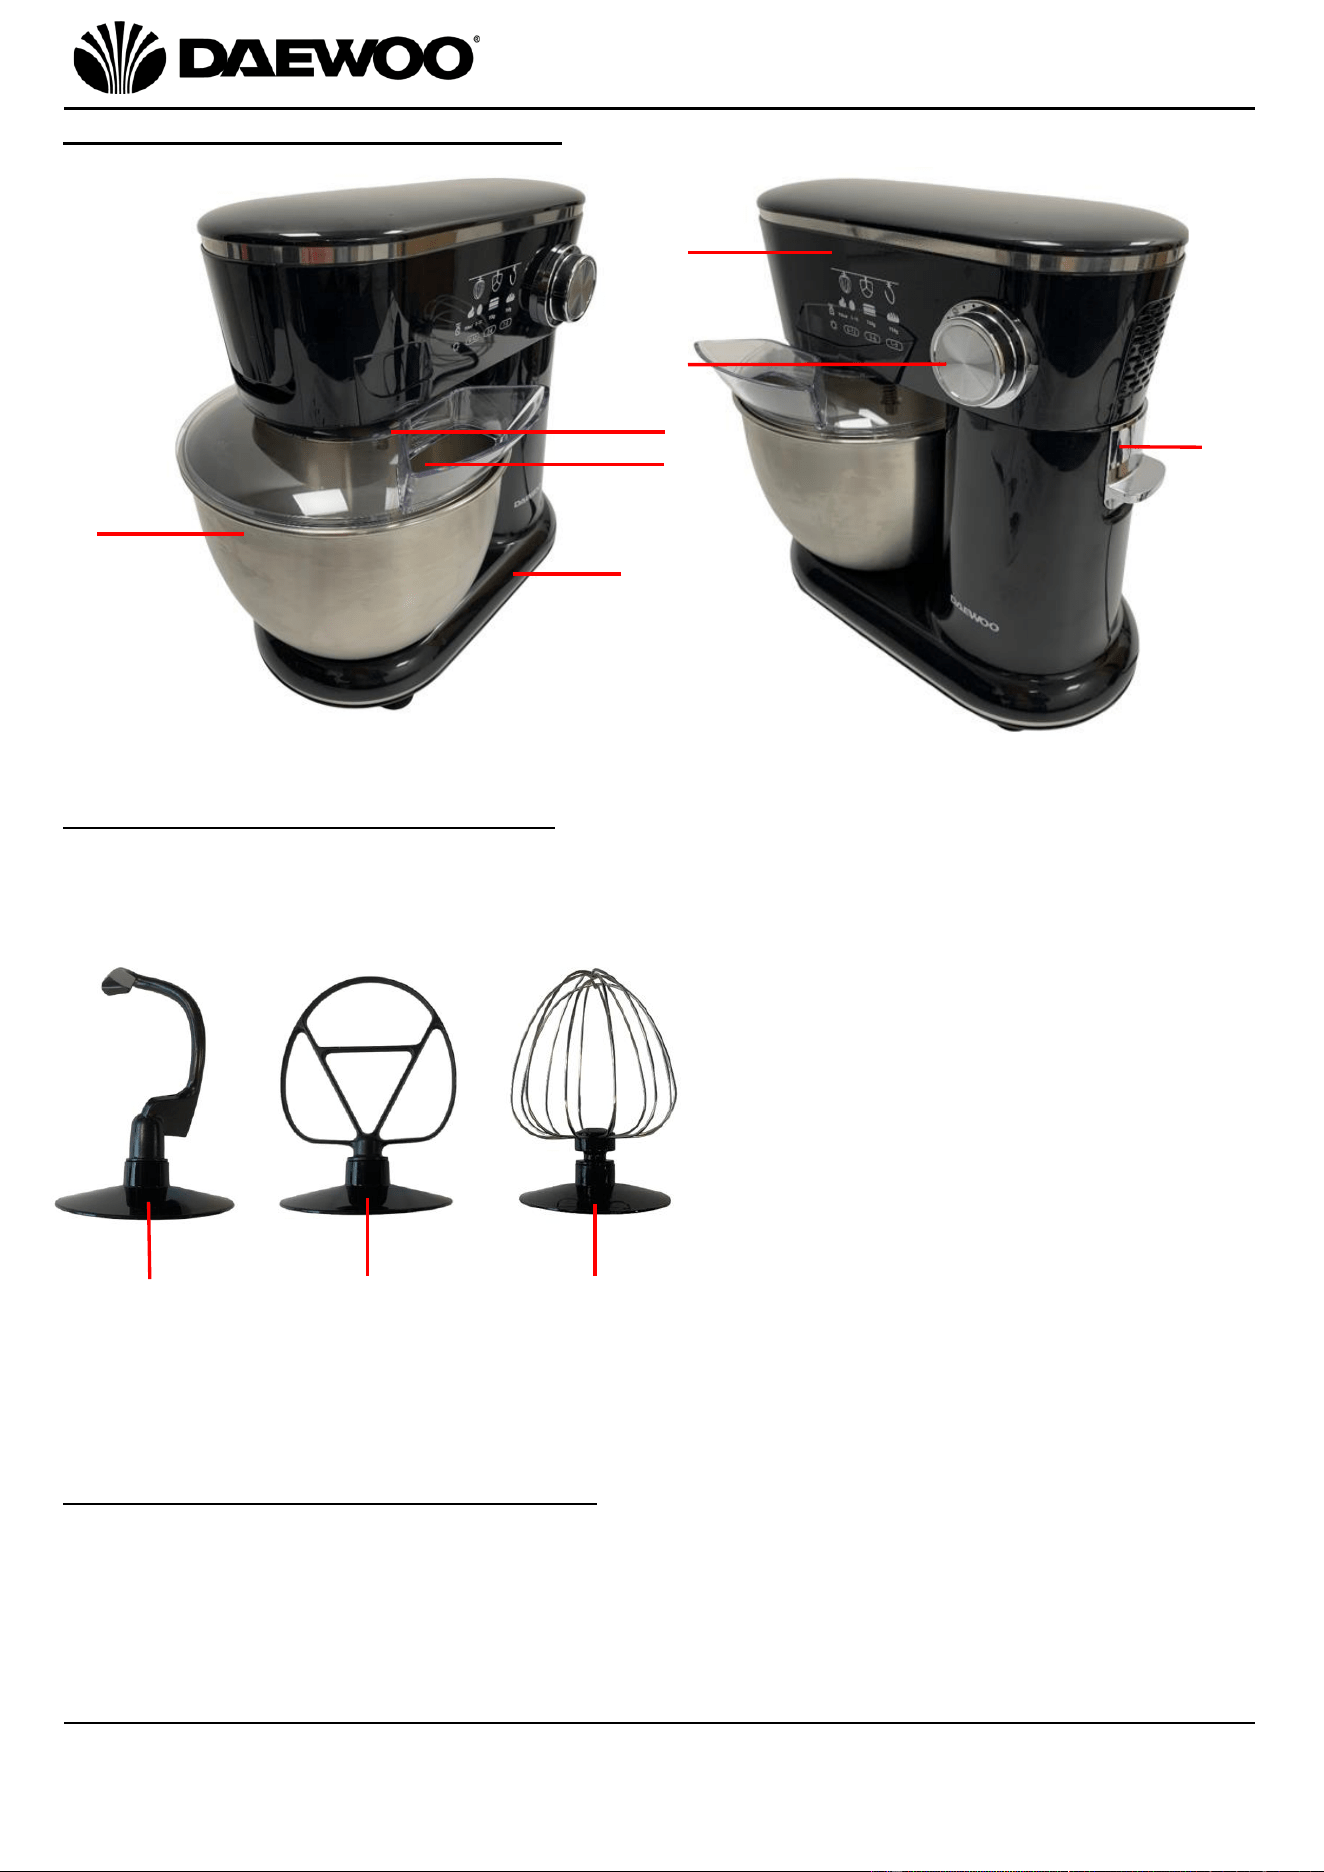
1. Top Housing
2. Speed Control
3. Spindle
4. Top Housing Release Lever
5. Splash Guard (with Shute)
6. Mixer Base
7. Mixing Bowl
8. Dough Hook
9. Mixing Attachment
10. Whisk
Description of Parts & Accessories
Description of Parts – Accessories
Before First Use of Your Stand Mixer
Remove all packing materials and discard responsibly.
Before using the Stand Mixer for the first time, wash all the attachments in warm
soapy water and dry thoroughly afterwards. Do not immerse the Stand Mixer in
water or any other liquids.
1
4
3
7
8
9
10
2
6
5
8
5L Stand Mixer
Model No: SDA2758
User Manual
IMPORTANT – RETAIN THESE INSTRUCTIONS FOR FUTURE REFERENCE
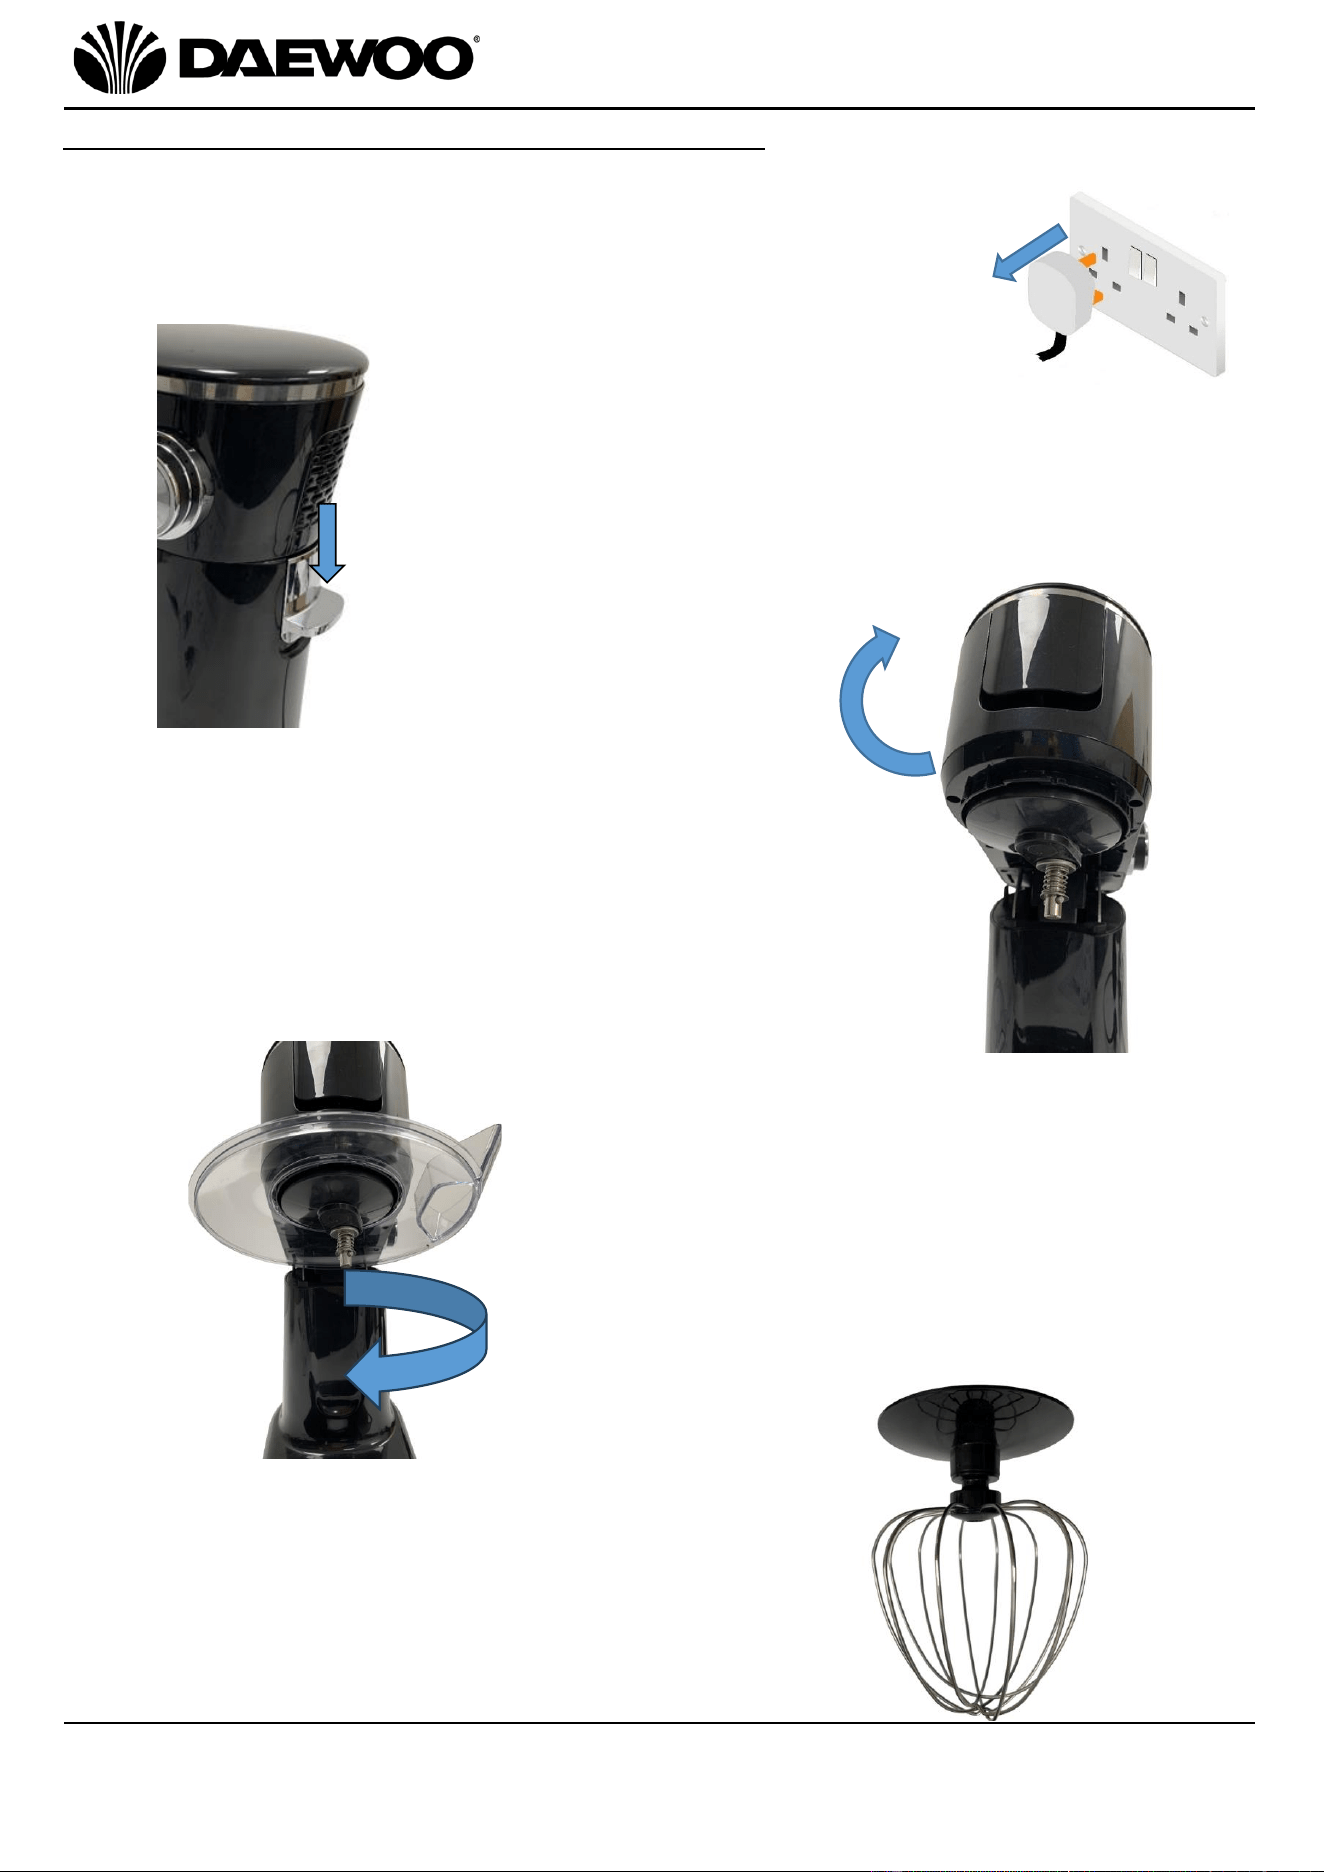
Operating Instructions – Preparation for Mixing
1. Ensure that the Stand Mixer is disconnected from the mains
supply.
2. Press the Top Housing Release Lever down
(4).
3. Whilst holding the lever down, lift the Top
Housing (1) fully up at the front of the mixer then
release the Top Housing Release Lever (4) to lock
the housing upright as shown right:
4.
4. Attach the Splash Guard (5)
to the Top Housing (1) and
turn clockwise to lock it into
place.
5. Select one of the three attachments
that is appropriate for the mixing job to
be done. The Whisk (10 - left)
attachment is used in this example.

9
5L Stand Mixer
Model No: SDA2758
User Manual
IMPORTANT – RETAIN THESE INSTRUCTIONS FOR FUTURE REFERENCE
6. Place the Mixing Bowl (7) on the Mixer Base
(6). Turn the Mixing Bowl (7) clockwise
slightly to lock it into position:
8. Support the Top Housing (1) at the front. Lift
the Top Housing Release Lever (4) and
carefully guide the Top Housing (1) down,
release the Top Housing Release Lever (4).
9. Repeat the above process with the Dough Hook (8) and Mixing Attachment (9)
depending on which accessory is required.
`
7. Align the two lugs on the mixer shaft with
the two notches in the attachment. Once
aligned, push the attachment firmly up
onto the Spindle (3). Rotate the
attachment anti-clockwise to lock into
place:

10
5L Stand Mixer
Model No: SDA2758
User Manual
IMPORTANT – RETAIN THESE INSTRUCTIONS FOR FUTURE REFERENCE
Operating Instructions – Using the Mixer
1. Before use, place the mixer on a solid, level
and even work surface that is near to a mains
outlet socket.
2. Load mixture into the Mixing Bowl (7).
Any further mixture required during mixing can be
added through Shute (8) in the Splash Guard (5).
3. Ensure the Speed Control (2) is set to ‘0’ as
shown left:
4. Insert the mains plug into the socket.
5. To operate the Mixer, rotate the Speed Control (2)
clockwise from the ‘0’ position through the
increments (1-12) to steadily increase the speed.
6. The pulse function (’P’) will give a sudden burst of
high speed mixing, this is useful to quickly whisk an
egg for example.
To Mix or knead Dough:
1. The Dough Hook (9) attachment should be used.
2. A suggested flour and water ratio of 5:3 is recommended.
3. Start with speed 1 and mix for approximately 10 seconds, then increase to speed
2 and mix for another 10 seconds, thereafter turn to speed 3 for approximately 3
minutes.
4. When filling the Mixing bowl (7), ensure that the maximum quantity is not
exceeded - see the loading chart below.
11
5L Stand Mixer
Model No: SDA2758
User Manual
IMPORTANT – RETAIN THESE INSTRUCTIONS FOR FUTURE REFERENCE
Whipping egg whites or cream:
1. The Whisk (10) Attachment should be used.
2. Use speed 6 to speed 12 and whip the egg whites without stopping for
approximately 5 minutes, the time will vary according to the size and quantity of
the eggs, repeat until the desired consistency is achieved.
3. For whipped cream, whip 250ml fresh cream at speed 6 to 12 for approximately
5 minutes.
4. When filling the Mixing Bowl (5) with fresh milk, cream or other ingredients,
ensure that the maximum quantity is not exceeded - see the loading chart
below.
Mixing Cakes, Buns, Puddings, etc.
1. The Mixing Attachment (9) should be used.
2. Mix the ingredients according to the available recipe, from speed 1 to 12
for about 5 minutes.
3. Do not exceed the maximum quantity for the mixing bowl.
Maximum Loading Chart
Ingredients
Quantity
Bread Dough
0.75kg
Cake Mix
0.75kg
Cream/Milk
1L
Egg Whites
16
Flour
0.75Kg
Pastry
0.5kg
Hints and Tips
• For most recipes, it is better to begin your mixing on a lower speed until the
ingredients begin to combine, then move up to the appropriate speed for the
particular mixture.
• Generally, there is not one set speed for an entire recipe. You will need to
change the speed of the mixer depending on what stage of the recipe you are
working on.
• Whilst mixing larger quantities, you may need to increase the speed of the mixer
due to the larger load on the machine.
• If additional ingredient needs adding to the recipe whilst mixing, it is advised to
lower the speed to avoid the ‘snow storm’ effect. The speed can be raised again
once the additional ingredients are added.
12
5L Stand Mixer
Model No: SDA2758
User Manual
IMPORTANT – RETAIN THESE INSTRUCTIONS FOR FUTURE REFERENCE
Recipes for You to Try
Olive & rosemary focaccia - serves 2
• 200ml luke - warm water
• 1/2 tablespoon sugar
• 2 tablespoon dry yeast
• 2 cups plain flour
• 1 tablespoon salt
• 1 1/2 tablespoon olive oil
• 1 small jar of olives
• 3 sprigs of rosemary
• Sea salt flakes
1. Combine the water, sugar and yeast in a jug; stir to combine. Cover mixture and
place in a warm area for about 10 minutes until the mixture is frothy.
2. Place the flour and salt in the Mixing Bowl. Add the yeast mixture and olive oil.
Using the Dough Hook attachment, mix on low speed (1-2) for about 2 minutes
or until combined and mixture forms a ball. Continue kneading for 8 minutes.
3. Remove dough from the bowl. Lightly grease the bowl and return the dough to
the bowl. Cover and allow to rise in a warm area for about 1 hour or until it has
doubled in size.
4. Preheat oven to 200°C/400°F/Gas 6. Grease and line 2 oven trays with baking
paper.
5. Knead the dough by hand to work out the air.
6. Cut the dough in half.
7. Roll each piece on a lightly floured surface into 20 x 25cm rectangles. Place on
prepared trays. Top each focaccia with olives, rosemary. Sprinkle with sea salt
and olive oil. Bake for 15-20 minutes or until cooked through.
8. Serve warm, cut into pieces.
13
5L Stand Mixer
Model No: SDA2758
User Manual
IMPORTANT – RETAIN THESE INSTRUCTIONS FOR FUTURE REFERENCE
Choc Chip Cookies - makes 32 (approx)
• 2 1/2 cups flour
• 3/4 teaspoon baking soda
• 1/2 teaspoon salt
• 230g soft cubed butter
• 240g light brown sugar
• 144g granulated sugar
• 2 large eggs
• 1 1/2 tsp vanilla extract
• 220g chopped chocolate
1. Stir together the flour, baking soda and salt and set to one side.
2. Place the butter and sugar in the bowl with the mixing beater attachment. Start
on speed 3 for 2 seconds then adjust to speed 4 and continue to beat for 10
seconds or until the mixture is creamed together. While beating add the eggs
and vanilla, continue to beat for a further 2 minutes after both eggs have been
added.
3. Reduce the speed to 3 and add the flour, baking soda and salt. Reduced to
speed 1 and add the chopped chocolate.
4. Place the dough out onto a sheet of waxed paper, wrap it tightly and chill for 24
hours.
5. Preheat oven to 180°C/350°F/Gas 4. Lightly grease and line a baking tray.
6. Shape the dough into golf ball size balls and arrange on the baking tray, spacing
each ball 3 inches apart. Bake in batches for 12-15 minutes or until golden
brown. Cool on a wire rack.
14
5L Stand Mixer
Model No: SDA2758
User Manual
IMPORTANT – RETAIN THESE INSTRUCTIONS FOR FUTURE REFERENCE
Cupcakes - makes 12
• 300g soft butter
• 300g caster sugar
• 1tablespoon vanilla extract
• 1tablespoon baking powder
• 300g self-raising flour
• 6 eggs
• 2 tablespoon milk
• Few drops Food colouring
• Chocolate shavings
Butter icing:
• 140g soft butter
• 300g icing sugar
1. Pre-heat your oven to 180°C/350°F/Gas 4.
2. Place the butter, sugar, vanilla essence, baking powder, flour and eggs in the
bowl with the Mixing beater. Start on speed 3 for 2 seconds then adjust to
speed 4 and continue to beat for 10 seconds or until the mixture is creamed
together.
3. Spoon the mixture into the cases and bake on the middle shelf for 15-20
minutes until risen and golden. Cool on a wire rack.
4. For the icing, place the butter in the bowl with the mixing beater and beat on
speed 2 until the mixture starts to combine then increase to speed 3 and beat
until soft. Add the icing sugar and beat until soft and creamy. If the mixture is
too dry add some water (approx. 1tsp) a little at a time.
5. Add a few drops of food colouring and beat until combined.
6. Swirl the frosting thickly over the cupcakes, decorate with the chocolate
shavings and serve.
15
5L Stand Mixer
Model No: SDA2758
User Manual
IMPORTANT – RETAIN THESE INSTRUCTIONS FOR FUTURE REFERENCE
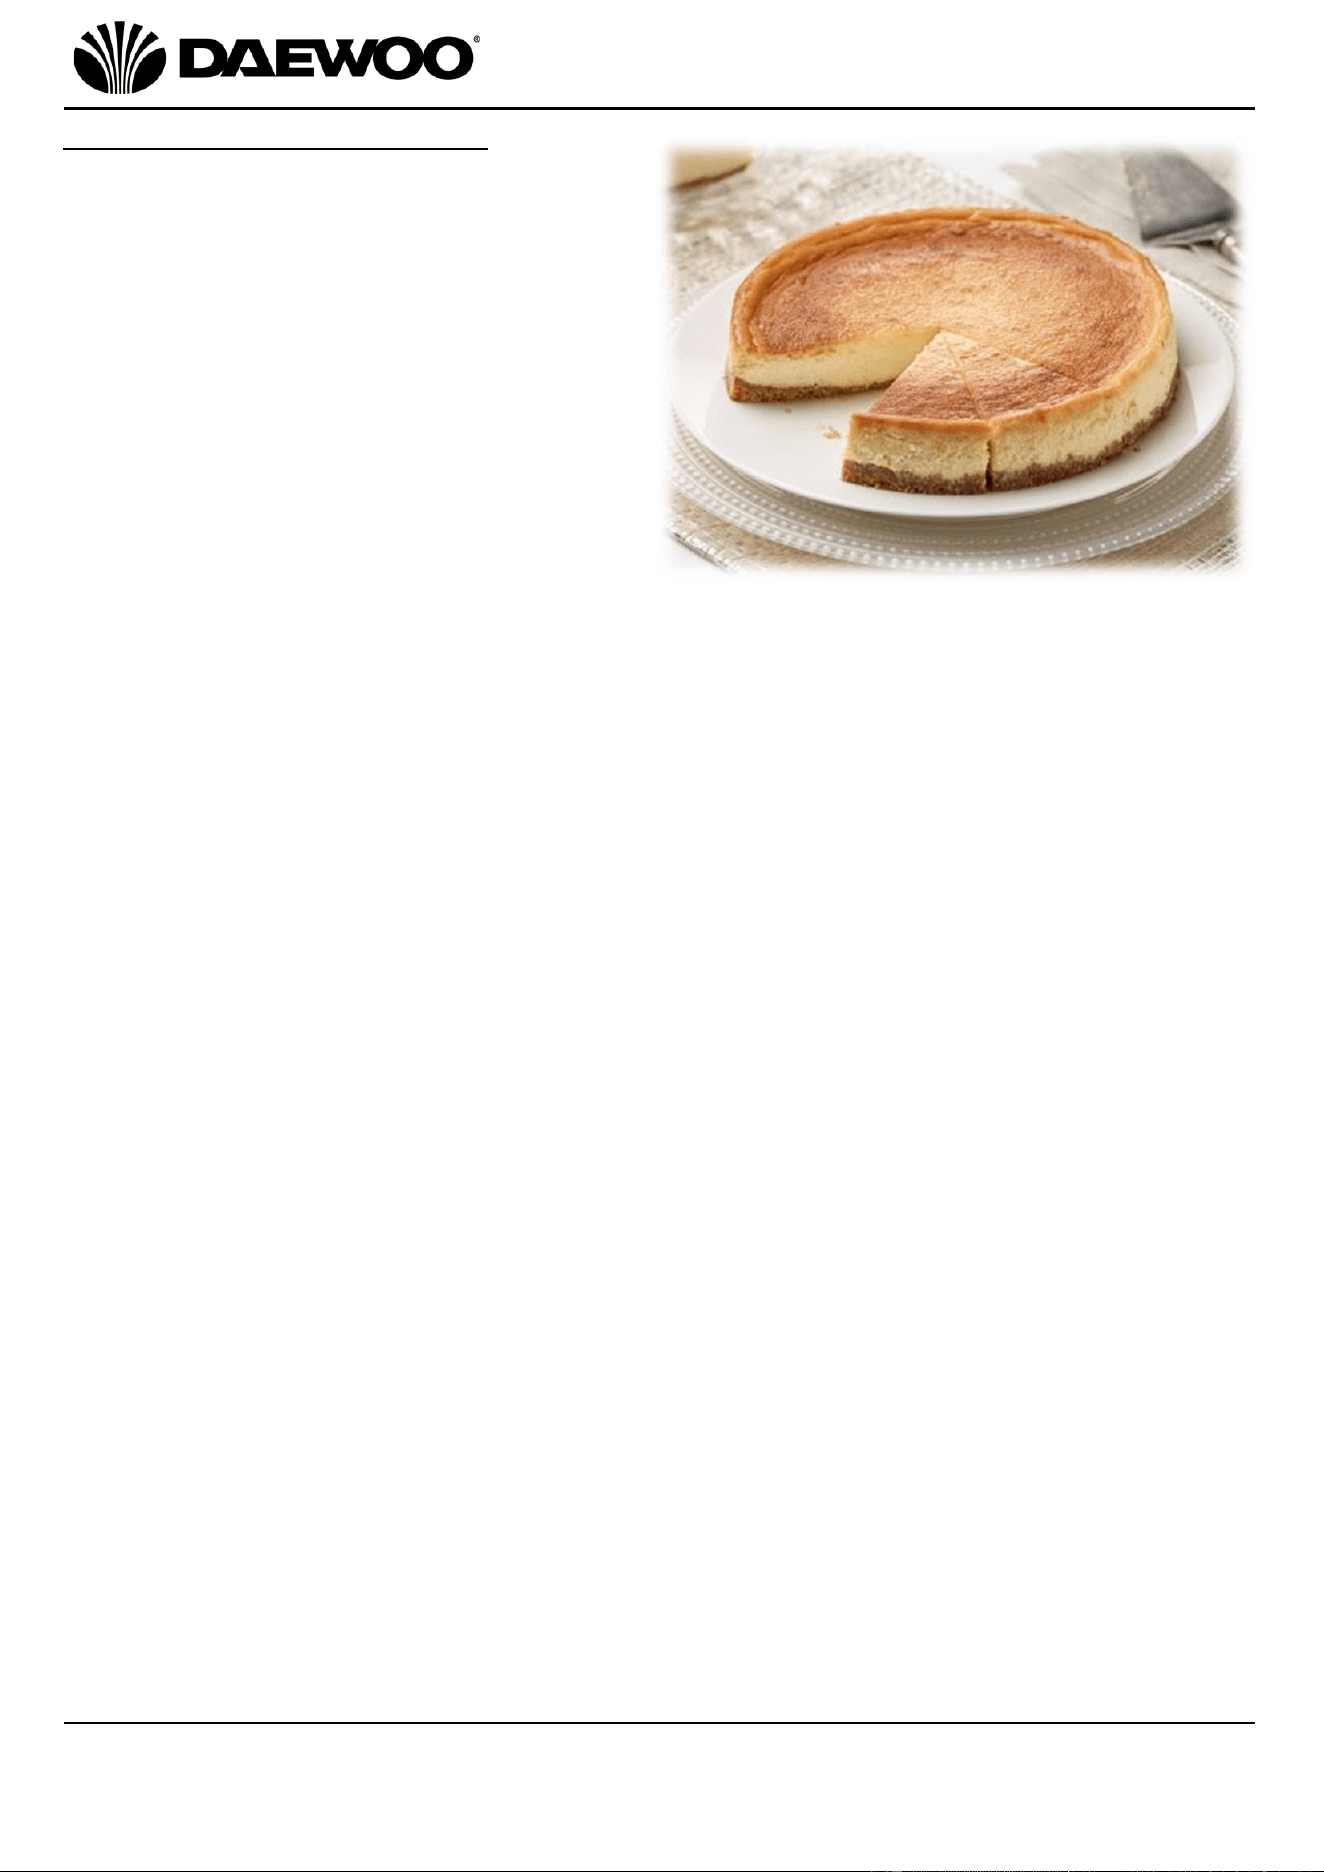
Ricotta Cheesecake - serves 8
• 90g soft butter
• 1 1/4 cup caster sugar
• 6 eggs
• 1 1/4 cups plain flour
• 1/4 cup self-raising flour
• 750g ricotta
• 3 teaspoons grated lemon rind
• 1 tablespoons lemon juice
1. Using the mixing beater attachment, beat butter, 1/4 cup of sugar and 1 egg on
low speed (2) until combined.
2. Add flour and beat on low speed (1) until combined. Using the back of a spoon,
press mixture over the base of prepared tin. Refrigerate for 30 minutes.
3. Grease a 22cm springform tin and line the base with baking paper. Preheat oven
to 200°C/400°F/Gas 6.
4. Bake for 15 minutes. Remove from oven and allow to cool. Reduce oven
temperature to 160°C/320°F/Gas 2 1/2.
5. Place ricotta, 1 cup of sugar, 5 eggs, rind and juice in the Mixing Bowl. Using the
Whisk, mix on high speed (6) until smooth.
6. Pour into tin and bake for about 1 hour or until set but still wobbly in the centre.
Turn the oven off. Cool cake in the oven with the door ajar. Refrigerate for
several hours before serving dusted with icing sugar.

16
5L Stand Mixer
Model No: SDA2758
User Manual
IMPORTANT – RETAIN THESE INSTRUCTIONS FOR FUTURE REFERENCE
lemon slice - serves 8
• 125g soft butter
• 1 1/4 cups icing sugar
• 1 1/4 cups plain flour
• 3 eggs
• 1 cup caster sugar
• 1 tsp grated lemon rind
• 1/2 cup lemon juice
1. Preheat oven to180°C/350°F/Gas 4. Grease and line a 23cm square pan with
baking paper, extended 2cm above the edge of the pan.
1. Place butter and icing sugar in the Mixing Bowl. Using the mixing beater
attachment, beat on medium speed (3-4) for 1 minute or until smooth and
creamy. Add 1 cup of the flour and mix on low speed (1) until just combined.
2. Press the mixture evenly over the base of prepared pan. Bake for about 15
minutes or until browned lightly.
3. Meanwhile, place eggs, caster sugar, remaining flour, rind and juice in the
Mixing Bowl. Using the Whisk attachment, mix on medium speed (3-4) until
combined. Pour the egg mixture over hot base.
4. Bake for about 20 minutes or until firm. Cool in pan.
17
5L Stand Mixer
Model No: SDA2758
User Manual
IMPORTANT – RETAIN THESE INSTRUCTIONS FOR FUTURE REFERENCE
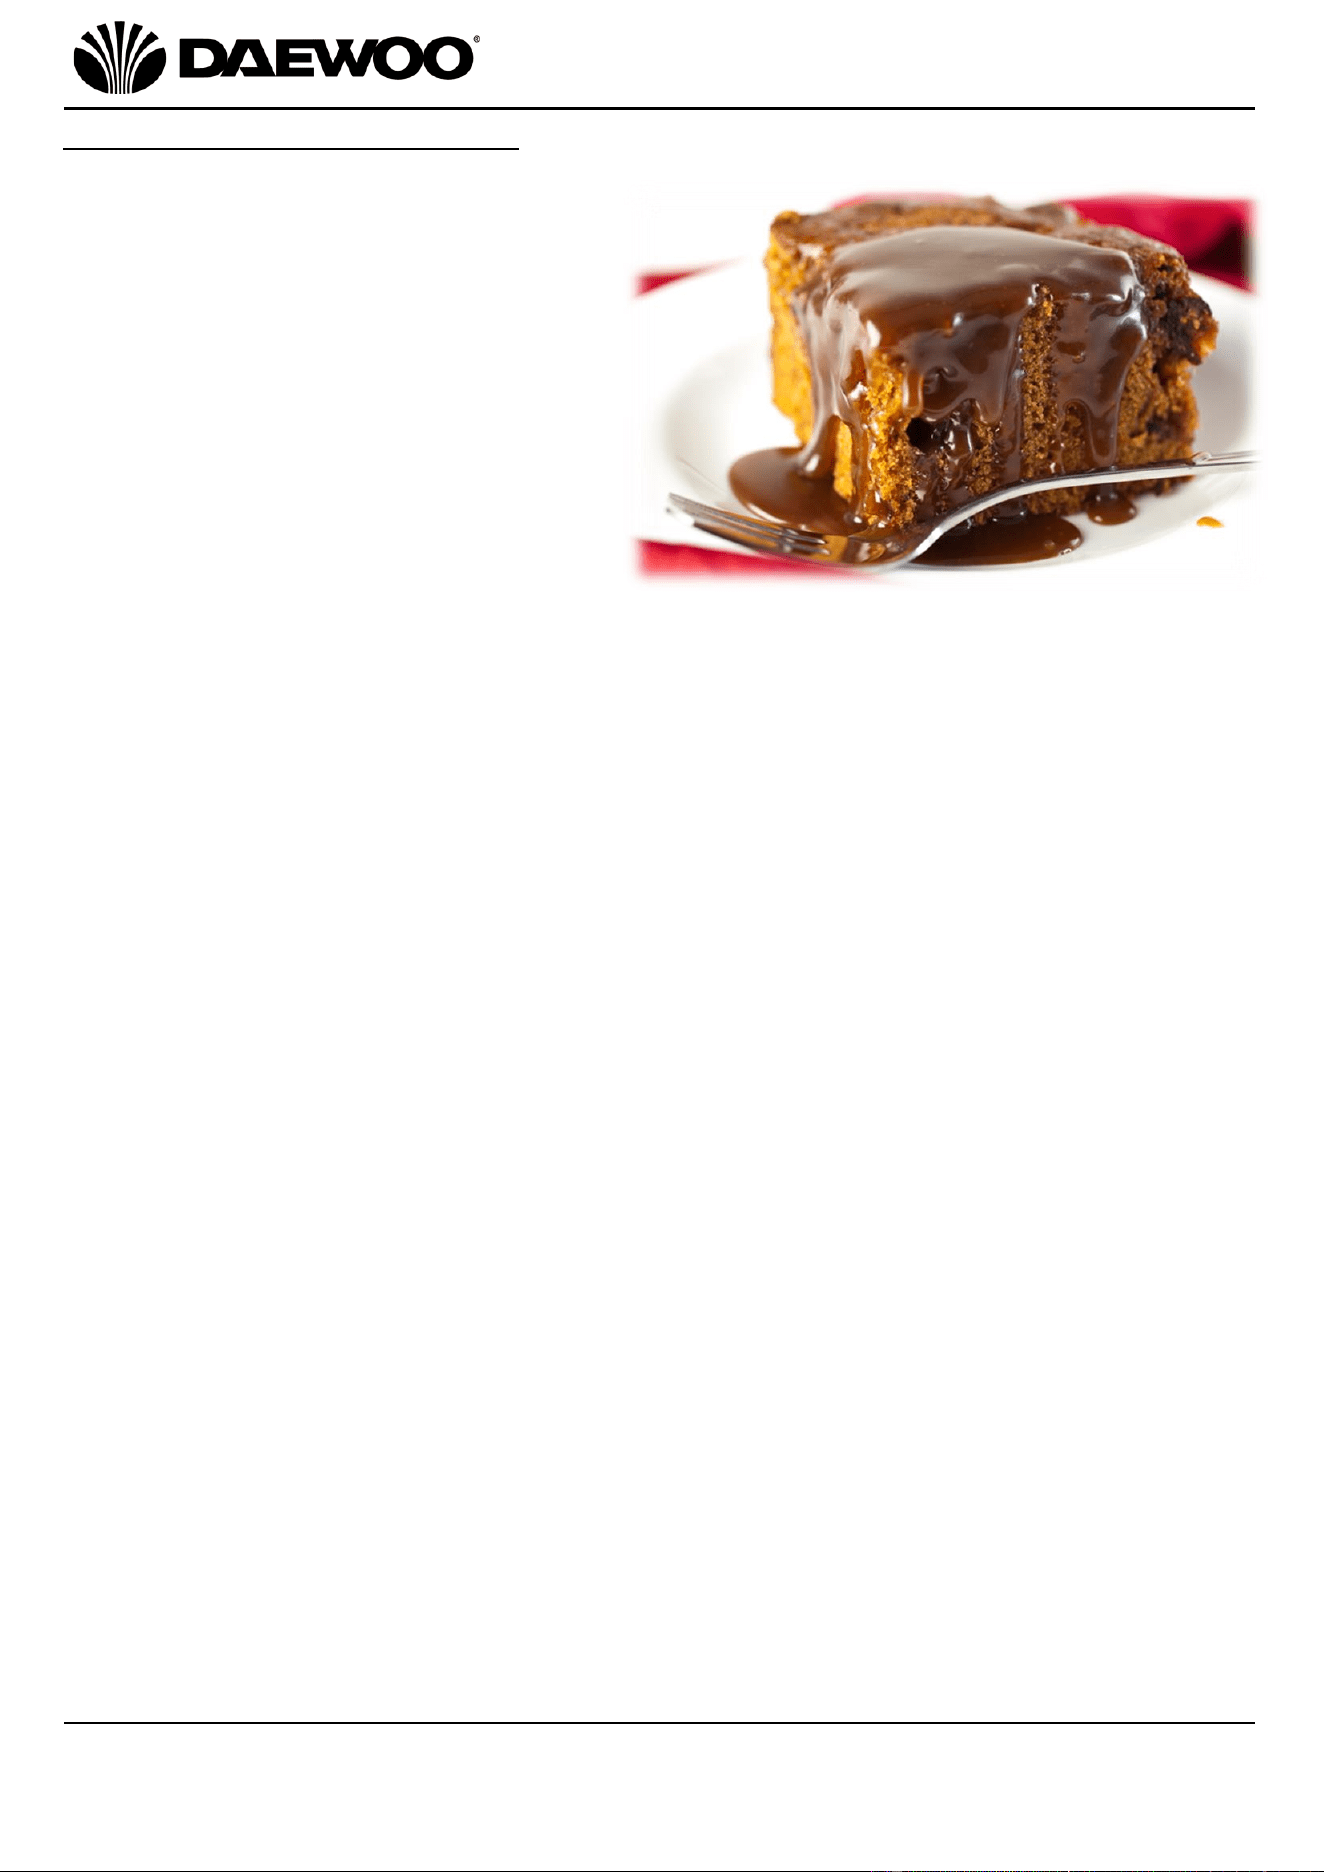
Sticky Toffee Pudding - serves 6
• 200g pitted dates, chopped
• 1 1/2 tablespoon baking powder
• 1/3 cup boiling water
• 125g soft butter
• 1 cup brown sugar
• 2 eggs
• 1 1/2 cups plain flour
• 1/4 cup milk
Toffee Sauce:
• 200g butter
• 1 cup cream
• 1 cup brown sugar
1. Place the dates, baking powder and boiling water in a bowl. Set aside for 10
minutes.
2. Preheat oven to 180°C/350°F/Gas 4. Grease and line a 20cm square cake pan
with baking paper. Using the mixer beater attachment, mix the butter and sugar
on medium speed (3-4) for about 2 minutes or until creamy.
3. Gradually add the eggs and beat well. Add the flour, milk and date mixture.
4. Mix on medium speed (3-4) until just combined.
5. Spoon mixture into prepared pan and bake for 40 minutes or until cooked when
tested.
6. To make the toffee sauce, place all ingredients in a small saucepan. Stir over
medium heat until melted and simmer for 3 minutes.
7. Serve pudding with warm toffee sauce.

18
5L Stand Mixer
Model No: SDA2758
User Manual
IMPORTANT – RETAIN THESE INSTRUCTIONS FOR FUTURE REFERENCE
Macaroons – makes 24
• 125g ground almonds
• 175g icing sugar
• 3 egg whites
• 1 tablespoon salt
• 75g caster sugar
• Food colouring
• 1 tablespoon almond essence
Chocolate filling:
• 140g soft butter
• 300g icing sugar
• 50g cocoa powder
1. Mix together ground almonds and icing sugar in a small bowl.
2. Add the egg whites and salt to the Mixing Bowl with the Whisk attached. Whisk
on speed 6 until thick and glossy.
3. While whisking slowly add the caster sugar, food colouring and almond essence.
Continue to whisk on speed 6 until thick with stiff peaks. Replace Whisk with the
mixer Beater attachment. Beat on speed 2 while adding the ground almond
mixture. Set aside.
4. For the chocolate filling, place the butter in the bowl with the spatula beater
and beat on speed 2 working up to speed 3 until soft. Add the icing sugar and
cocoa powder and beat until soft and creamy. If the mixture is too dry add some
water (approx. 1tsp) a little at a time.
5. Line a baking sheet with parchment paper. Fill a piping bag with the meringue
mixture. Pipe onto the baking sheet to make 3cm circles. Sharply tap the sheet
on the work surface to pop any air bubbles. Leave the macaroons to dry for
between 30-45 minutes.
6. Pre-heat your oven to 160°C/320°F/Gas 2 1/2. Bake the macaroons for 6-8
minutes. Allow to cool, then sandwich together with the chocolate filling.

19
5L Stand Mixer
Model No: SDA2758
User Manual
IMPORTANT – RETAIN THESE INSTRUCTIONS FOR FUTURE REFERENCE
Coconut Marshmallows - makes 50
• 1/3 cup gelatine
• 4 cups caster sugar
• 2 teaspoons lemon juice
• 2 cups shredded coconut, lightly toasted
1. Combine gelatine and 1 cup of cold water. Stand for 5 minutes.
2. Stir sugar and 2 cups of hot water in a large saucepan over low heat until sugar
dissolves. Bring to boil.
3. Add gelatine mixture; simmer, uncovered for 20 minutes. Cool to room
temperature.
4. Transfer sugar mixture to the Mixing Bowl. Add juice. Using the Whisk
attachment, begin beating on low speed (1). Gradually increase to very high
speed (6) over 15 minutes. Mixture should be very thick and hold its shape.
5. Rinse a 20cm x 30cm tray with cold water; do not dry. Spread marshmallow
mixture into tray.
6. Sprinkle with enough coconut to cover the surface. Allow to sit at room
temperature for 2 hours or until firm.
7. Cut marshmallow into squares using a wet knife; toss in remaining coconut.
20
5L Stand Mixer
Model No: SDA2758
User Manual
IMPORTANT – RETAIN THESE INSTRUCTIONS FOR FUTURE REFERENCE
Cleaning and Maintenance
• Always disconnect the Stand Mixer from the mains power supply before
cleaning.
• Wash all the attachments in warm soapy water.
• Clean the outside of the Stand Mixer with a clean damp cloth. Never clean with
harsh or abrasive cleaners.
• Do not submerge the Stand Mixer in water or any other liquids.
• Do not clean any parts of this stand mixer in a dishwasher otherwise damage
may occur.
Non-Wireable Mains Plug
If your appliance is supplied with a non-wireable plug fitted to the mains lead and
should the fuse need replacing, you must use an ASTA approved one (conforming
to BS 1362 of the same rating). If in doubt, consult a qualified electrician who will
be pleased to do this for you. If you need to remove the plug – DISCONNECT
FROM THE MAINS – and then cut it off the mains lead and immediately dispose of
it safely. Never attempt to reuse the plug or insert it into a socket outlet as there is
a danger of electric shock.
Technical Specification
Model Number
SDA2758
Rated Voltage
220-240V AC ~ 50-60Hz
Rated Power
1000W
Protection Class
II
Recycling Information
Disposal of the Packaging
Dispose of paper and cardboard in appropriate paper re-cycling facilities.
Dispose of recyclable plastics in appropriate plastic re-cycling facilities.
Dispose of non-recyclable plastics in the appropriate plastics collection service.
Disposal of the Product
You should now recycle your waste electrical goods and in doing so
help the environment. This symbol means waste electrical products
at the end of their useful life should not be disposed of with normal
household waste and not sent to landfill. Please ensure it is taken
to a suitable facility for disposal. Check with your Local Authority or
retailer for recycling advice or visit www.recycle-more.co.uk, enter
your postcode to find out your nearest recycling site.
21
5L Stand Mixer
Model No: SDA2758
User Manual
IMPORTANT – RETAIN THESE INSTRUCTIONS FOR FUTURE REFERENCE

22
5L Stand Mixer
Model No: SDA2758
User Manual
IMPORTANT – RETAIN THESE INSTRUCTIONS FOR FUTURE REFERENCE
WARRANTY
Thank you for purchasing your Daewoo product.
As part of our commitment to quality, we are offering you an extra 2 years warranty in
addition to your 1 year guarantee
Your Daewoo product is guaranteed for 1 year from the date of original purchase, with proof
of purchase or receipt. If any defect should occur due to faulty workmanship or material, your
faulty product should be returned to the place of purchase, replacement or refund is at the
discretion of the retailer.
The guarantee is subject to the following provisions:
•
The product must be correctly installed and operated in accordance with the
requirements contained in the instruction manual.
•
The product must be used solely for domestic purposes.
•
It does not cover general wear and tear, damage, misuse or any consumable parts.
•
The guarantee will be rendered invalid if the product is re-sold or has been damaged through
inexpert repair.
•
The guarantee is only valid within the UK and Eire.
Your standard 1 year guarantee will only be extended to the maximum available for your
individual product upon registration. (Note: products must be registered individually and
covers the main body and housing). If you do not register your product within 28 days of the
original purchase date, your product will only be guaranteed for 1 year.
To validate your extended 2 year warranty*please register your purchase online within 28
days of the original purchase date by registering at:
https://help.daewooelectricals.com
or
Contact Us (daewooelectricals.com)
*Your extended warranty is only valid with proof of purchase receipt and subject to the
conditions outlined above.
Daewoo is a registered trademark.
Produced and imported under licence by
Eurosonic Group Limited
Brightgate House
1 Brightgate Way
Manchester M32 0TB UK
EU Rep: EuroSonic Magppie (ESM) Ltd. Ireland D05 X006
www.esgltd.com