HEAVY-DUTY STAPLE & NAIL GUN 4 - 14MM
mODEL NO: Ak7061.V2
Thank you for purchasing a Sealey product. Manufactured to a high standard, this product will, if used according to these instructions,
and properly maintained, give you years of trouble free performance.
IMPORTANT: PLEASE READ THESE INSTRUCTIONS CAREFULLY. NOTE THE SAFE OPERATIONAL REQUIREMENTS, WARNINGS & CAUTIONS. USE
THE PRODUCT CORRECTLY AND WITH CARE FOR THE PURPOSE FOR WHICH IT IS INTENDED. FAILURE TO DO SO MAY CAUSE DAMAGE AND/OR
PERSONAL INJURY AND WILL INVALIDATE THE WARRANTY. KEEP THESE INSTRUCTIONS SAFE FOR FUTURE USE.
1. SAFETY
WARNING! Ensure health & safety, local authority, & general workshop practice regulations are adhered to when using this
staple/nail gun.
9 maintain the staple/nail gun in good condition, (use an authorised service agent).
9 Use this product in an adequate working area for its function, keep area clean, tidy and free from unrelated materials. Ensure there is adequate
lighting.
WARNING! Always wear approved eye or face protection when operating the staple/nail gun.
9 Remove ill fitting clothing, ties, watches, rings, other loose jewellery, and tie back long hair.
9 Wear appropriate protective clothing.
9 maintain correct balance and footing. Ensure the floor is not slippery and wear non slip shoes.
9 Keep children and unauthorised persons away from the working area.
8 DO NOT force this product to achieve a task it was not designed to perform.
8 DO NOT operate if any parts are damaged or missing. This may cause failure or possible injury.
8 DO NOT get the Stapler/Nailer wet or use in damp or wet locations.
8 DO NOT point at other persons or animals.
8 DO NOT operate if you are tired, under the influence of alcohol, drugs or intoxicating medication.
9 When not in use store in a safe, dry, child proof area.
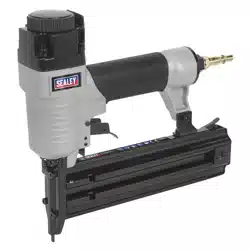
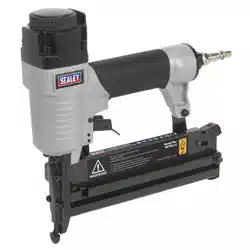
2. INTRODUCTION
3-in-1 Staple and nail gun. Fitted with adjustable power control and staple remover. Features removable sole plate for easy clearance of
blockages. Supplied with starter pack of nails and staples. Suitable for a wide range of applications. Supplied in storage case.
3. SPECIFICATION
model no .............................................................. AK7061.V2
Crown size .................................................................. 9.5mm
Application/Fixing sizes:
Staple size:
Staples:4, 6, 8, 10, 12, 14mm
Hoop staples .................................................... 10, 12, 14mm
Nails ................................................................. 10, 12, 14mm
Consumables:
Staple 6mm pack of 500 ........................................ AK7061/8
Staple 8mm pack of 500mm ................................... AK7061/9
Staple 10mm pack of 500....................................... AK7061/2
Staple 12mm pack of 500....................................... AK7061/3
Nail 10mm 18SWG pack of 500 ............................. AK7061/1
Nail 12mm 18SWG pack of 500 ............................. AK7061/5
Nail 14mm 18SWG pack of 500 ............................. AK7061/7
Hoop 12mm pack of 500 ........................................ AK7061/6
Refer to
instruction
manual
Wear eye
protection
Original Language Version
© Jack Sealey Limited
AK7061.V2 | Issue:2 (H,F) 16/05/19
Original Language Version
© Jack Sealey Limited
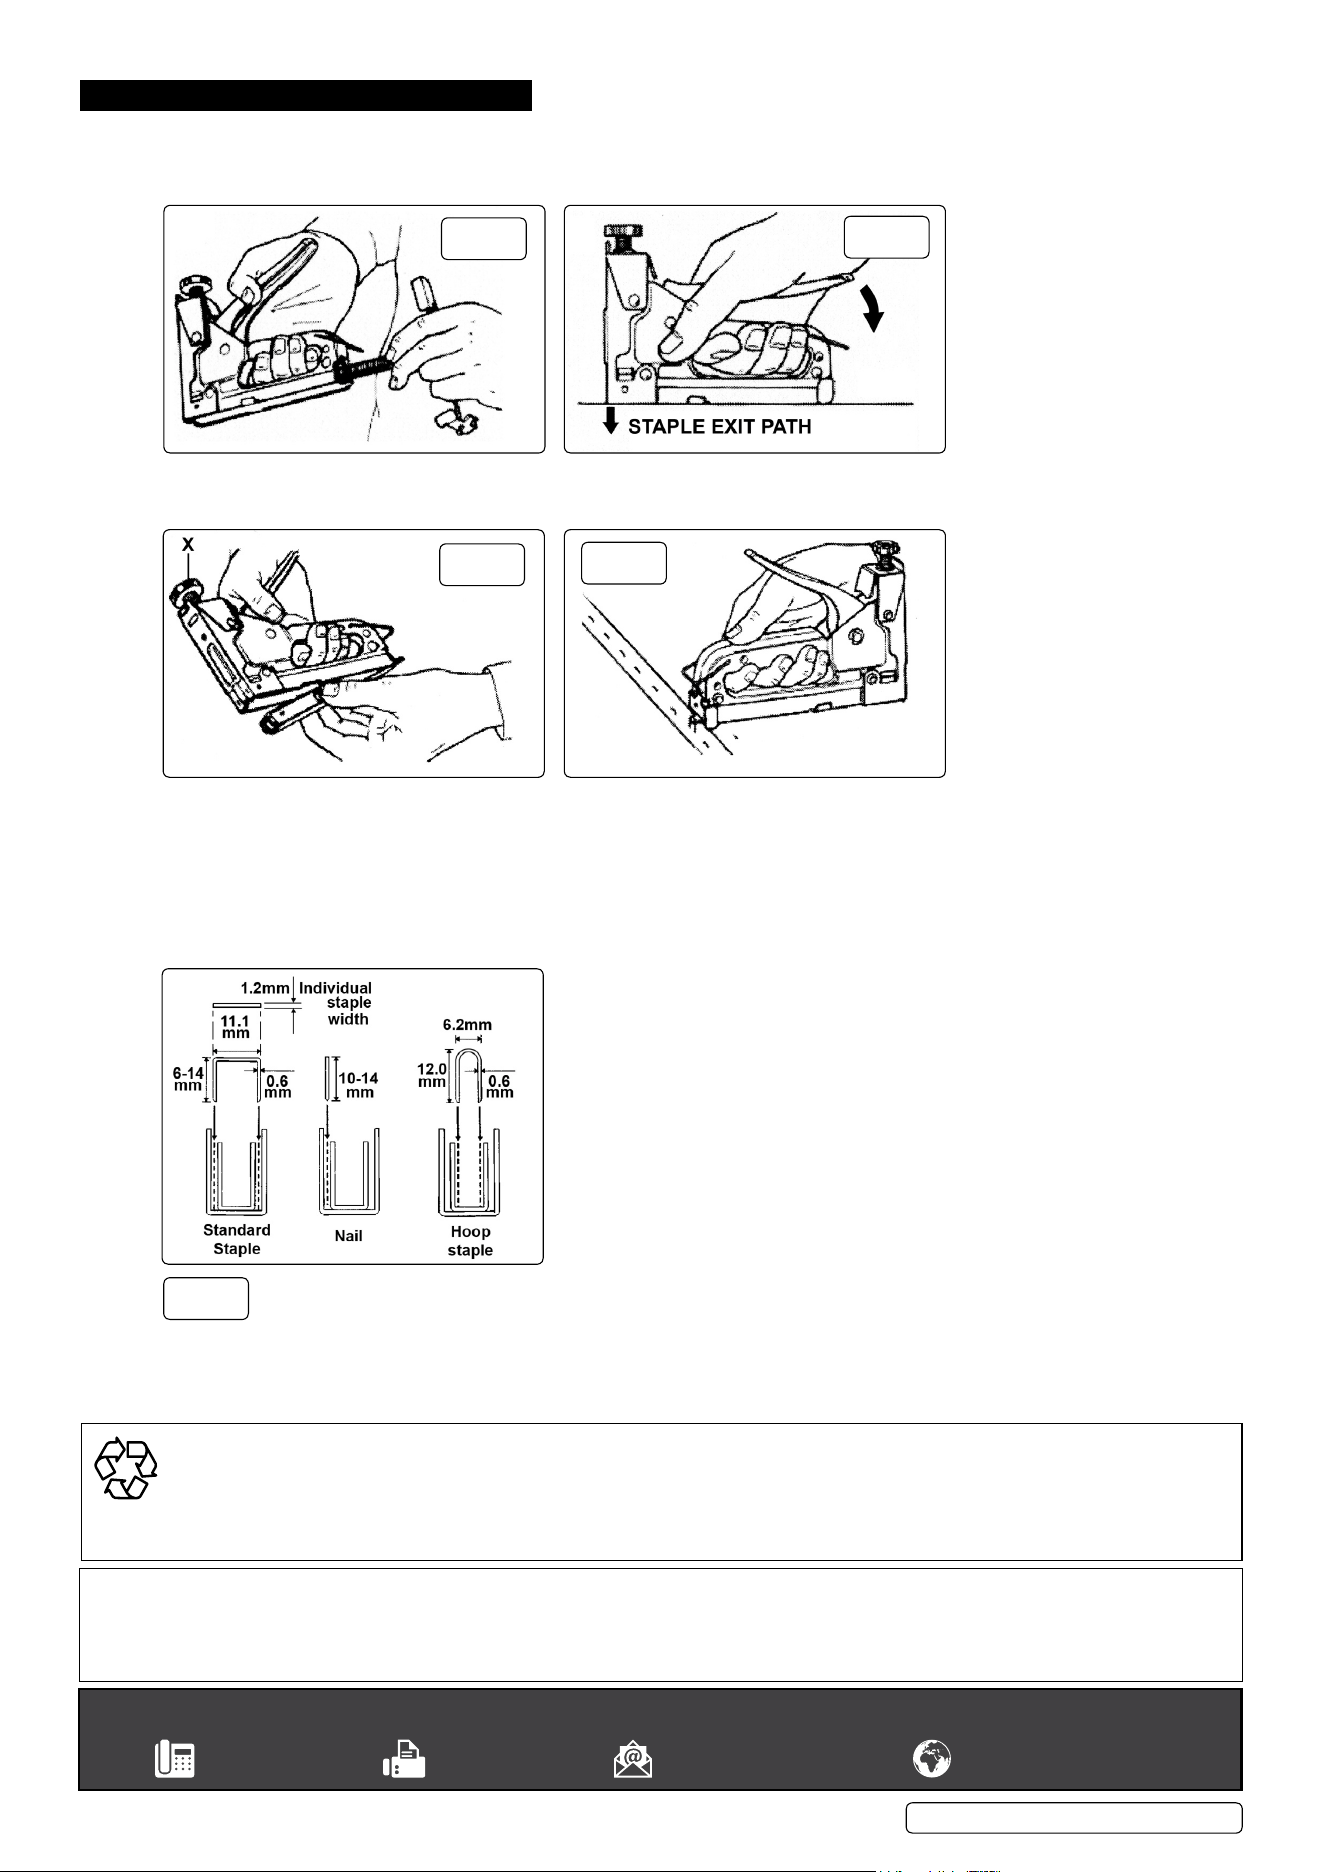
4. OPERATION
4.1. Hold the stapler in one hand and point away from your body. Push in and down on the stapler feed bar and withdraw it from the stapler.
Insert new staples (fig.1) or nails into the guidance track. See (fig.5) for staple placement within the track. Reinsert the feed bar and hook
upwards to retain it.
4.2. Prior to stapling, ensure that the stapler is correctly positioned and the sole plate is in firm contact with the surfaced to be stapled. Firmly
depress the trigger until the gun fires (fig.2).
4.3. HOW TO CLEAR bLOCkAGES.
Remove the feed bar (fig.1) and any loose staples remaining in the guidance track. Using the tabs on the sole plate, pull the sole plate back and
downwards to hinge it away from the main body. Clear any damaged staples away from the staple exit path. Hinge up the sole plate. Pull back
on the tabs and move it back into position within the main body. (fig.3)
4.4. The stapling force can be adjusted using the knurled knob in front of the trigger (fig.3X). Turn the knob clockwise to increase the stapling force
and anti-clockwise to decrease the stapling force.
4.5. Staple removal. At the rear end of the sole plate is a semicircular protrusion that can be used to lever out driven staples. See fig.4.
.
AK7061.V2 | Issue:2 (H,F) 16/05/19
fig.
1
fig.
2
fig.
3
fig.
4
fig.
5
Sealey Group, kempson Way, Suffolk business Park, bury St Edmunds, Suffolk. IP32 7AR
01284 757500 01284 703534 sales@sealey.co.uk www.sealey.co.uk
ENVIRONMENT PROTECTION
Recycle unwanted materials instead of disposing of them as waste. All tools, accessories and packaging should be sorted, taken to
a recycling centre and disposed of in a manner which is compatible with the environment. When the product becomes completely
unserviceable and requires disposal, drain any fluids (if applicable) into approved containers and dispose of the product and fluids
according to local regulations.
Note: It is our policy to continually improve products and as such we reserve the right to alter data, specifications and component parts without prior
notice. If you require documentation for alternative versions, please email or call our technical team on technical@sealey.co.uk or 01284 757505.
Important: No Liability is accepted for incorrect use of this product.
Warranty: Guarantee is 12 months from purchase date, proof of which is required for any claim.