Loading ...
Loading ...
Loading ...

Part 1 – Introduction
14
Not pulling the cable back may cause water to seep in
and damage the product.
Installation
• Check the wall or ceiling to see if it needs to be
reinforced. The camera may fall o if the wall or
ceiling is not strong enough to support its weight.
• Install the camera in a shaded area. If the camera
is installed in direct sunlight, it may be aected
adversely.
1
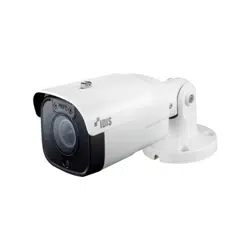
Screw the camera sun shield to the camera using the
screw provided with the camera.
2
Screw the bottom cover to the wall or ceiling by
using screws(4) and bushings(4) provided with the
camera.
3
Band the stand to adjust the camera angle
accordingly. For details, refer to the angle
adjustment section.
4
Connect the external devices, network and power
adapter.
5
Apply power.
Angle Adjustment
2
1
3
Screw B
Screw A
1
Vertical (Tilt) Rotation
2
Horizontal (Pan) Rotation
3
Lens Rotation
• Vertical (Tilt) Rotation
After fully assembling the screw B, loosen the 2 to 2.5
wheels again and move the cover of the 2 joints on
the left side to slightly open. (However, make sure the
screws are not fully loosened so that it comes o).
Once the camera has been oriented, turn the screws
clockwise to fully secure them.
• Horizontal (Pan) Rotation
After fully assembling the screw B, loosen the 2 to 2.5
wheels again and move the cover of the 2 joints on
the left side to slightly open. (However, make sure the
screws are not fully loosened so that it comes o).
Once the camera has been oriented, turn the screws
clockwise to fully secure them.
• Lens Rotation
After fully assembling the screw A, loosen the 2 to 2.5
wheels again to orient the camera and turn the screw
clockwise to secure it fully.
Loading ...
Loading ...
Loading ...
