Loading ...
Loading ...
Loading ...

999-995-220.10_REV. B
10
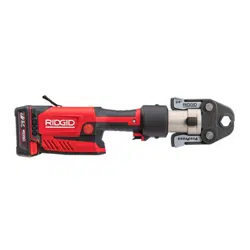
RP 350/RP 351 Press Tools
Pressing A Fitting With Typical Actuator
And Press Ring Set
1. Open ring and place around fitting. Properly align ring
press profile with contour of the fitting as specified in
Fitting Manufacturer’s Installation Instructions. Release
ring to close around fitting (Figure 11).
2. Confirm appropriate actuator is properly installed in
tool. Squeeze actuator arms to open the actuator
tips. Align actuator tips with ring pockets. Release
actuator arms and fully engage actuator tips into ring
pockets (Figure 12). Mis aligning actuator tip to ring
pocket can damage the ring or actuator during press-
ing. Do not hang tool and actuator from press ring.
Tool could unexpectedly drop and cause serious
injury or death.
Figure 11 – Installing Press Ring Onto Fitting
Figure 12 – Attaching Actuator to Press Ring
3. Confirm ring is appropriately placed and square to fit-
ting. Keep fingers and hands away from the actuator
and ring to avoid crushing injuries in attachment or
between attachment and surroundings.
Normal Mode: Depress the run switch (Figures 1 & 2).
Once the tool cycle begins and the rollers contact the
jaw arms, the tool will lock-on and automatically com-
plete the cycle. Releasing the switch will not stop the
tool once it has locked on. This assures consistent,
repeatable press connection integrity.
Control Mode: Depress the run switch (Figures 1 &
2). The jaws will engage the fitting but the press con-
nection is not made. Make adjustments as neces-
sary. Press the run switch again, the tool will lock-on
and automatically complete the cycle. Releasing the
switch will not stop the tool once it has locked on.
This assures consistent, repeatable press connection
integrity.
4. If tool must be removed before a press connection is
completed, depress the pressure release button
(Figures 1 & 2).
Any time release button is depressed, the
press is NOT complete and the press connection must be
pressed again to ensure completion. If the tool malfunc-
tions during operation, use this procedure.
5. Release the run switch.
6. Squeeze actuator arms to open actuator. Remove
actuator from fitting.
7. Remove ring from fitting. Avoid sharp edges that may
have formed on fitting during pressing operation.
8. When operation is complete, depress ON/OFF button
one time to turn tool OFF. Remove battery or AC
Adapter from tool.
Inspecting The Pressed Connection
1. Inspect the pressed fitting for:
• Full insertion of tube into fitting.
• Excessive misalignment of the tubes. A slight
amount of misalignment at a press connection is
considered normal.
• Incorrect attachment alignment with the fitting con-
tour. Distorted or deformed fitting.
• Any other issues per the fitting manufacturer. This
could include the removal of a control ring or decal
(used to indicate the connection has not yet been
pressed).
If any issues are found, remove fitting and install a
new press connection.
2. Test the press connection in accordance with con-
nector manufacturer instructions, normal practice and
applicable codes.
Bluetooth Functions (Wireless Data
Transfer)
The RIDGID
®
RP 350 and RP 351 Press Tools include
Bluetooth
®
wireless technology allowing wireless data
NOTICE
Loading ...
Loading ...
Loading ...