Loading ...
Loading ...
Loading ...

999-995-220.10_REV. B
9
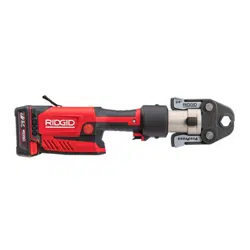
RP 350/RP 351 Press Tools
2. With dry hands, insert a fully charged battery or AC
Adapter into tool. If using the corded power adapter
with a GFCI, the GFCI (RCD) should have a rated
residual current of 30 mA or less. Depress ON/OFF
button one time to turn tool ON. All LEDs will be lit
green indicating that the tool is ready to use. See
Figure 5 – Tool Status Lights for any other light.
Pressing A Fitting With Typical Scissor
Jaws
1. Properly hold the tool with both hands.
Figure 8 – Holding the Tool
2. Squeeze jaw arms to open jaws.
3. Place open jaws around fitting (Figure 9). Properly
align jaw press profile with contour of the fitting as
specified in Fitting Manufacturer’s Installation Instruc -
tions. Release jaw arms to close jaws around fitting. Do
not hang jaw set from fitting. Tool could unexpectedly
drop and cause serious injury or death.
Figure 9 – Placing Scissor-Style Jaws Around Fitting
Figure 10 – Jaws Square to Fitting
4. Confirm jaw is appropriately placed and square to fit-
ting (Figure 10). Keep fingers and hands away from
the jaws to avoid crushing injuries in jaws or between
jaws and surroundings.
Normal Mode: Depress the run switch (Figures 1 &
2). Once the tool cycle begins and the rollers contact
the jaw arms, the tool will lock-on and automatically
complete the cycle. Releasing the switch will not
stop the tool once it has locked on. This assures
consistent, repeatable press connection integrity.
Control Mode: Depress the run switch (Figures 1 &
2). The jaws will engage the fitting but the press con-
nection is not made. Make adjustments as necessary.
Press the run switch again, the tool will lock-on and
automatically complete the cycle. Releasing the
switch will not stop the tool once it has locked on. This
assures consistent, repeatable press connection
integrity.
If tool must be removed before a press connection is
completed, depress the pressure release button
(Figures 1 & 2).
Any time release button is depressed, the
press connection is NOT complete and the fitting must be
pressed again to ensure completion. If the tool malfunc-
tions during operation, use this procedure.
5. Release the run switch.
6. Squeeze jaw arms to open jaws.
7. Remove jaw from fitting. Avoid sharp edges that may
have formed on fitting during pressing operation.
8. When operation is complete, depress ON/OFF button
one time to turn tool OFF. Remove battery or AC
Adapter from tool.
NOTICE
Loading ...
Loading ...
Loading ...