Loading ...
Loading ...
Loading ...

6
Power Save
To put the tool into power save mode and extend
the run time by dimming the laser, press and hold
the MODE button for 3 seconds. Visual range is
decreased in power save mode. Pressing MODE
again for 3 seconds will deactivate power save if
battery level is above 3%.
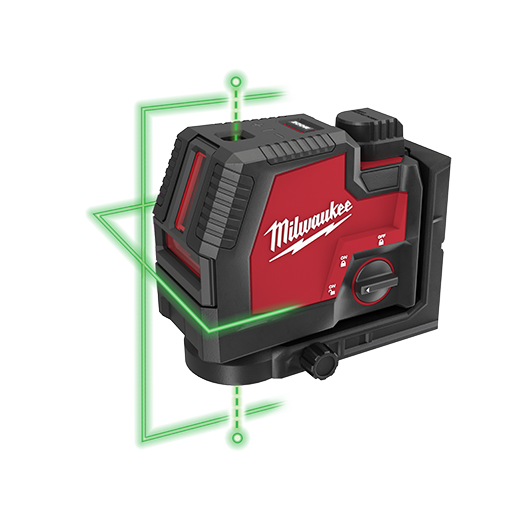
Using the Laser Level
1. For best results, place the tool on a work surface
that is:
• sturdy
• level (within 4 degrees of true level)
• free of vibrations
• 90° to the work area
2. Turn on the tool.
3. The tool will self-level when placed on surfaces
within 4 degrees of true level.
4. The tool is ready once the emitted lines are con-
tinuous and no longer moving on the work surface.
5. If the tool cannot achieve a level state (i.e., the
work surface is > 4 degrees o true level), the laser
points will ash rapidly (3 ashes per second).
Relocate or adjust the work surface.
Troubleshooting
If the tool does not turn on:
• Ensure battery is installed properly. Fuel gauge
should indicate remaining charge when correctly
installed.
• Ensure battery is charged.
• Ensure the tool's internal temperature is within speci-
ed operating ranges. If stored in excessive heat or
cold, allow at least 2 hours to acclimate to ambient
temperature before turning on the tool.
If problem persists, please contact a MILWAUKEE
service facility for support.
ACCURACY FIELD
CHECK
NOTICE
Perform the Accuracy Field Check
procedure immediately upon unboxing
of each new Laser Level and before exposure to
jobsite conditions. See "Accuracy Field Check"
for information. Should any deviation from listed
product accuracy be found, please con-
tact a MILWAUKEE service facility. Failure to do so
could result in rejection of warranty claim.
Inuences on Accuracy
Ambient temperature gradients can impact laser
accuracy. For accurate and repeatable results, the
following procedure should be conducted with the
laser elevated o the ground and placed in the center
of the working area.
Abusive treatment of the Laser Level, such as exces-
sive impacts from drop, can also lead to deviations
in product accuracy.
Therefore, it is recommended to conduct the Field
Check procedure after any impact or before complet-
ing any critical jobs.
Horizontal Height Accuracy
A free measuring distance of approximately 66' on a
rm surface between two walls or structures A and
B is required for this check.
It is also suggested to mount the Laser Level to a
commercially available Tripod for easy adjustment.
1. Securely mount the tool within 1' of wall A.
A B
1'
66'
2. Turn the tool to ON and to Perpendicular
Level & Plumb Lines Mode.
3. Direct the front laser beam against the nearest
wall A and allow to self-level. Mark the center of
the laser cross on the wall (point I).
4. Rotate the tool 180° without changing the height,
allow it to self-level, and mark the center of the
laser cross on the opposite wall B (point II).
180
A B
5. Move the tool within 1' of wall B. Allow the laser
to self level. Align the laser cross in the general
direction of point II on wall B.
A B
1'
6. Adjust the height of the tool (using the tripod or
by adding shims, if required) to align the laser
cross directly onto point II on wall B. Allow the
tool to self-level.
7. Rotate the tool 180° without changing the height,
allow it to self-level, and mark the center of the
laser cross on wall A (point III). Point III should
be aligned as vertically above or below point I on
wall A as possible.
Loading ...
Loading ...
Loading ...