Loading ...
Loading ...
Loading ...

HARNESS INSTALLATION
3. Plug the harness into the amplifier and route the speaker wires to their respective locations.
Separate the speaker connectors and plug in the amplifier harness to each speaker.
4. Plug the 4-pin male, rear audio connector into the 4-pin female rear audio signal connector
coming from the radio harness.
5. Plug the switched power harness into the 2-pin amp connector on the throttle side of the fairing.
6. Plug the Supplied blue wire on the Boss Audio Amplifier kit into the switched power harness lead
with one wire. This allows for an accessory 12V port to remain available.
7. Route the power leads along the clutch side of the frame neck, in the electrical caddy to the seat area.
8. Reconnect the battery terminals and pull the excess harness slack back into the fairing. Create a slack
loop with excess harness slack.
9. Plug the radio in and set the gain.
10. Test component function and set the gain to optimize system performance.
11. Carefully reassemble the motorcycle and enjoy your new audio kit
Note: Refer to the motorcycle manufacturer owner’s manual for bike. instructions regarding
gas tank removal.
1211
5 - Routing Power Harness / Rear Speaker Harness
Pass the Power / Ground Harness and Rear Speaker Harness through the fairing and route next to the
factory wiring harness. Routing the new wire harnesses along with the factory harness is recommended.
Be sure to zip tie the harnesses together for a clean, tight fit. Due to the size wire for the Power / Ground
Harness and Rear Speaker Harness, it is recommended to route the wiring under the gas tank along the
top of the frame on the motorcycle.
Step 6 - Rear Speaker Installation
With the seat already removed, route the Rear Speaker Harness toward the rear of the motorcycle over
the fender along the brake side of the motorcycle. Unplug factory speaker wires from the speaker and
plug them directly into the Rear Speaker Input / Output Harness. These are labeled clutch and brake side.
If you have a 2020 Street or Tri Glide, the following steps must be completed before amplifier installation:
Remove four screws from the HD Connect Module. Remove Module from Bracket.
Relocate Module to the clutch side of the radio and secure with two 8” zip ties included.
1. Fasten the amplifier to the bracket with the supplied hardware.
Insert the bolts through the bottom of the bracket and install the locknuts to the amplifier.
2. After finishing System Setup, use the supplied hardware and fasten the amp/bracket assembly
to the radio chassis with the 10-pin connector and power connector facing the throttle side.
NOTE: There may be some connectors that will need to be relocated off the radio
chassis for the amp bracket to fit.
Amplifier and Amp plate Installation 2014 – Newer
Street Glide FLHT/Batwing models:
AMP INSTALLATION
*NOTE* after installation this vehicles head unit must be flashed to get
proper sound from the upgraded system. Please see the following link
to find a recommended HD shop that can flash the stock system.
https://technoresearch.info/tuning-centers-map/
Amplifier Wiring
Step 3 - Amplifier Mounting
Mount amplifier upside down with the supplied screws to the mounting plate. Align the amplifier to the
appropriate holes on the plate.
Step 4 - Fairing Speaker Wiring
Unplug the factory speaker wires from the speaker and plug them directly into the Front Speaker Input
Harness. These are labeled clutch and brake side. Now you can plug the new Front Speaker Output
Harness onto your new speaker terminals. Route power / ground through fairing. Including installing
rear speaker wires, feed the Rear Speaker Input / Output Harness through fairing towards the rear of
the speaker.
Once the amplifier is mounted, you can now begin plugging in the wiring harness in their appropriate
sockets. Plug the switched power harness into the 2-pin amp connector on the throttle side of the fairing.
Note: Be careful when plugging in the harnesses to the appropriate socket. The 4-pin Molex plugs for the
Input / Output Harnesses fit in both sides of the amplifier.
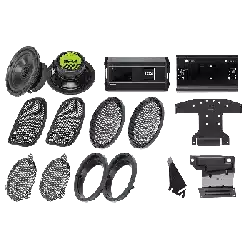
BHD3F
Harley Davidson Front System
BHD3F
Harley Davidson Front System
Loading ...
Loading ...
Loading ...