Loading ...
Loading ...
Loading ...
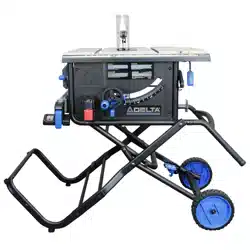
RIVING KNIFE HEIGHT SETTINGS
See Figure 48.
The height of the riving knife should be adjusted based on the
type of cut being made. For all through cuts (when the wood is
completely severed), it should be in the raised position, with anti-
kickback pawls and guard installed. For non-through cuts (when
the blade does not penetrate the top of the workpiece), the riving
knife should be in the lowered position and anti-kickback pawls
and guard removed.
TO RAISE OR LOWER THE RIVING
KNIFE:
1. Remove the blade guard, anti-kickback pawls, and throat
plate and raise blade to the full height above the table.
2. Locate the locking lever
A
near the base of the riving
knife.
3. Rotate the lever
A
by turning clockwise to unlock and
release the riving knife from its locked position.
4. Using your hand positioned near the top of the knife, lean
the knife outward away from the two locking pins beside
its middle slot. This now frees the knife to slide into the
upward/cut-through position.
5. Lift the knife upward along the sliding slot until you feel the
new locking pins position.
6. Release the knife and it should snap into its new position;
wiggle if necessary.
7. Return the locking lever
A
to the locked position. If you
have done this properly the riving knife will be aligned with
the blade. If it is not retrace your steps until it does. The
appropriate marking will be seen at the table top level.
NOTE: When adjusting the riving knife up or down, be sure
to pull in a radial motion, as shown.
Location point for NON-THROUGH CUT POSITION.
NOTE: Riving knife is located in this position for non-through cuts
and is also in this position when packaged for shipment.
Location point for THROUGH CUT POSITION, see Figure 49.
(Operator should adjust the riving knife to this position when
making through cuts.)
(NOTE: You MUST locate the riving knife in through cut position
prior to making any alignment adjustments to the riving knife).
Figure 48
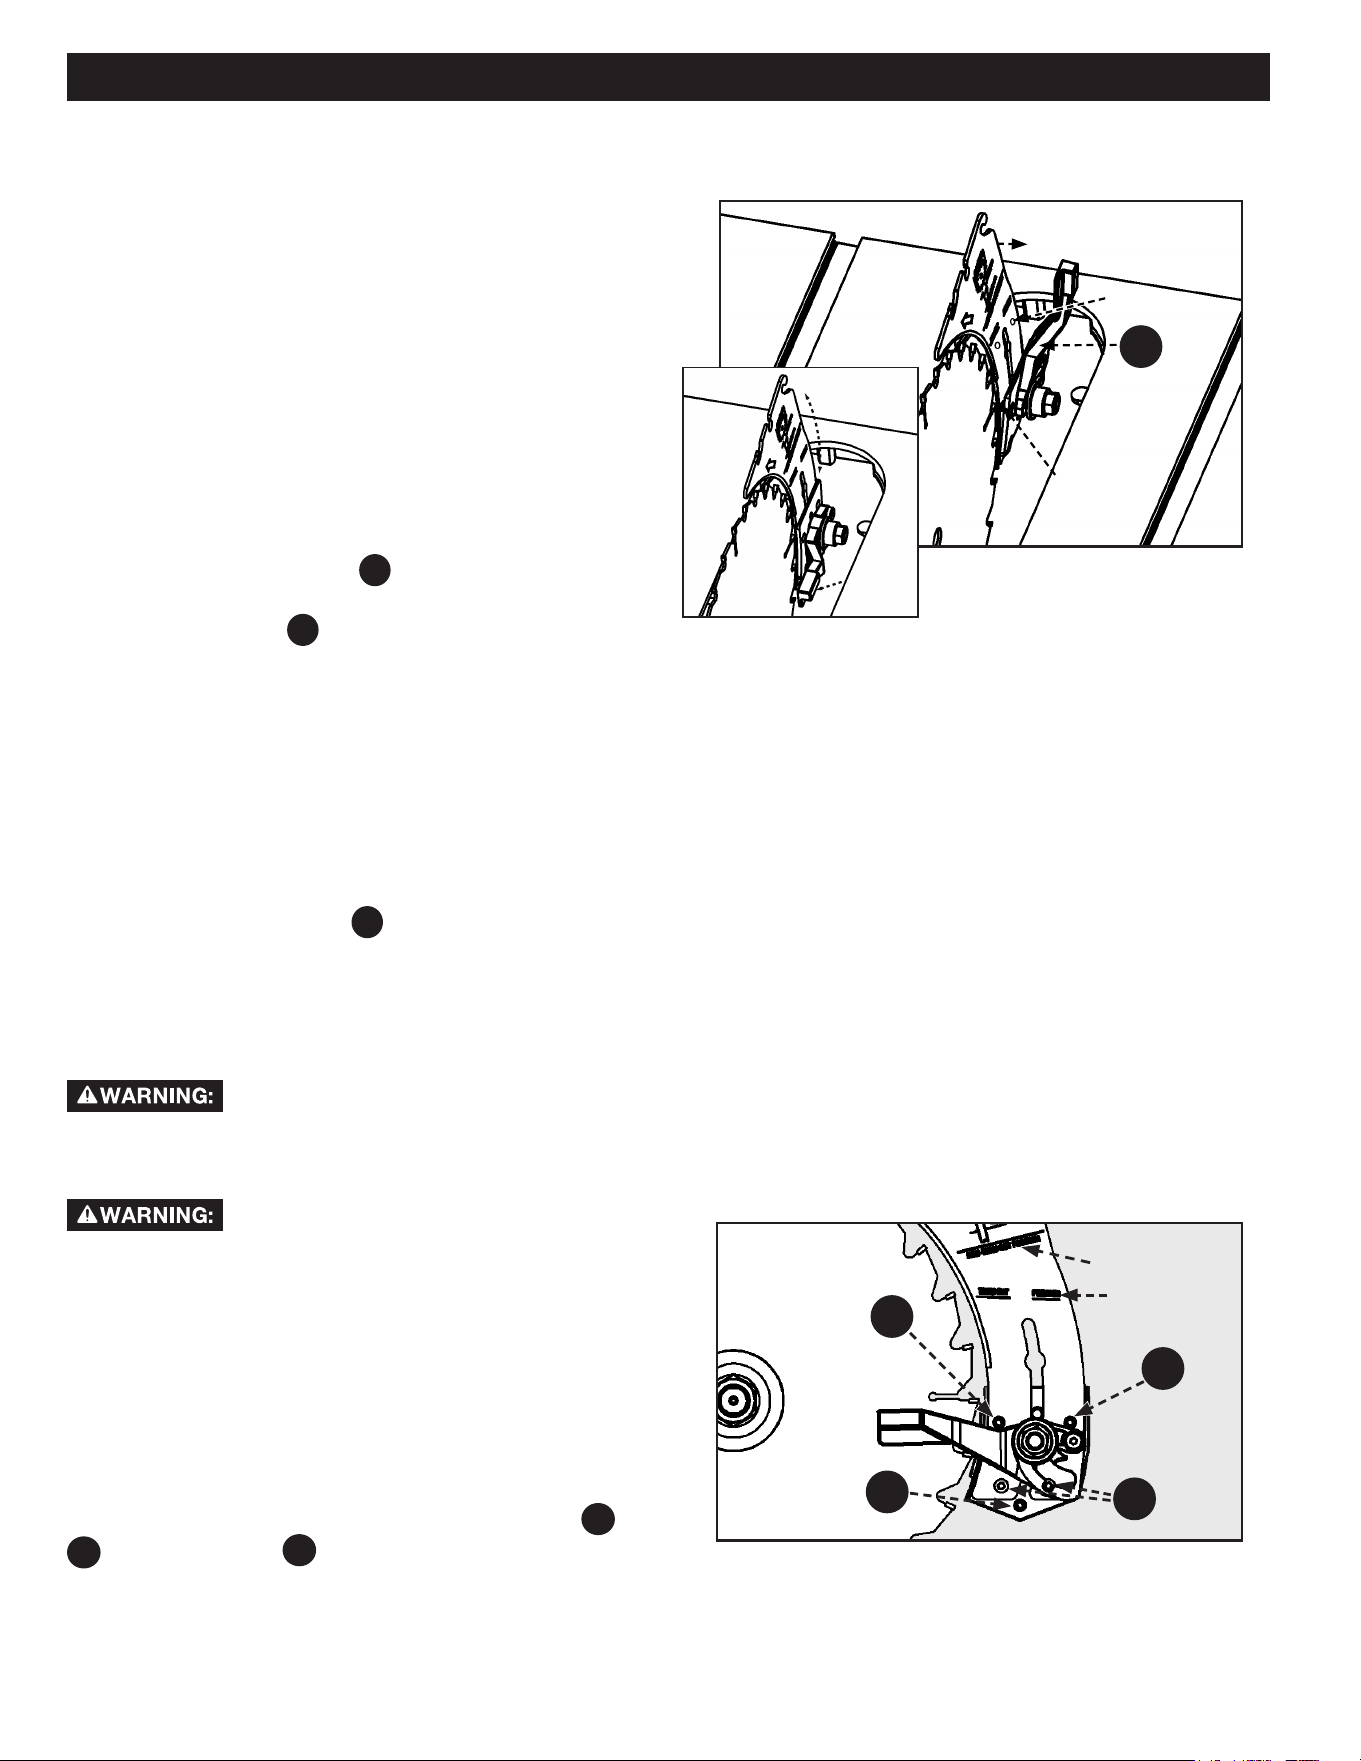
Figure 49
RIVING KNIFE POSITION AND ALIGNMENT
DO NOT operate saw unless riving knife is
securely clamped in the raised position for through cutting or
the lowered position for non-through cutting, unless Riving Knife
would interfere with the cut.
NEVER use a blade that does not match the
dimensions indicated for use with your riving knife.
NOTE: You will need a long handled 3mm hex wrench for
BB2
and
BB3
and a 4mm one for
AA
.
Lower Lower
Position Position
Detents Detents
Upper Position Upper Position
Detents on Pins Detents on Pins
Pull Away
to Release Riving Knife
LockedLocked
Adjust
A
NON-THROUGH
CUT
THROUGH
CUT
3mm Hex
3mm Hex
3mm Hex
4mm Hex
BB3
BB2
BB1
AA
28
Loading ...
Loading ...
Loading ...