
TP10174
THIS INSTRUCTION BOOKLET CONTAINS IMPORTANT SAFETY INFORMATION.
PLEASE READ AND KEEP FOR FUTURE REFERENCE.
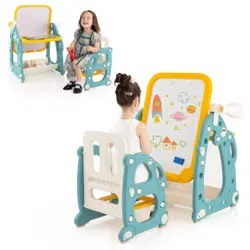
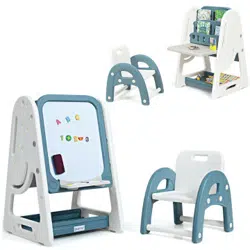
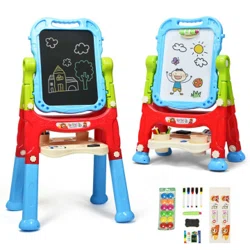
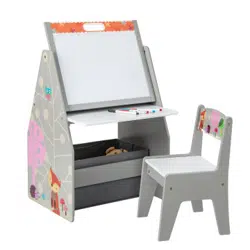
Kids Table and Chair Set
Tisch- und Stuhlset für Kinder
Ensemble Table et Chaises pour Enfants
Juego de Mesa y Silla para Niños
Set di Tavolo e Sedie per Bambini
Stolik z krzesełkami dla dzieci
AUS:cs.au@costway.com
FRA:cs.fr@costway.com
DEU:cs.de@costway.com
DEU office: FDS GmbH, Neuer Höltigbaum 36, 22143 Hamburg, Deutschland
GBR office: FDS Corporation Limited,Unit 4, Blackacre Road, Great Blakenham,Ipswich, Ip6 0FL,United Kingdom
ITA office: Milano
FRA office: Saint Vigor d'Ymonville
POL office: GdańskAUS office: TruganinaUSA office: Fontana
If you're having difficulty, our friendly
customer team is always here to help.
Oct. 18, 2023, R1 EN 17191:2021
Before You Start
Assembled only by adults
Remove all packaging, separate and count all parts and hardware.
Read through each step carefully and follow the proper order.
We recommend that, where possible, all items are assembled near the area in which
they will be placed in use, to avoid moving the product unnecessarily once assembled.
Ensure a secure surface during installation, and always place the product on a flat,
steady and stable surface.
Caution: Children should use this product under the parental supervision.
Danger: Keep all small parts and packaging materials for this product away from babies
and children, otherwise they may pose a choking hazard.
Danger: Lack of attachment may cause a risk of tipping.
Bevor Sie beginnen
Montage nur durch Erwachsene
Entfernen Sie alle Verpackungen, Überprüfen Sie, ob alle Teile und Zubehörteile
vorhanden sind.
Lesen Sie jeden Montageschritt sorgfältig durch und folgen Sie den Anleitungen.
Wir empfehlen, alle Teile möglichst in der Nähe des Aufstellungsortes zu montieren, um
unnötige Bewegungen nach der Montage zu vermeiden.
Achten Sie bei der Montage auf einen sicheren Untergrund und stellen Sie den Artikel
immer auf eine ebene, feste und stabile Fläche.
Vorsicht: Kinder sollten diesen Artikel unter elterlicher Aufsicht benutzen.
Gefahr: Halten Sie alle Kleinteile und Verpackungsmaterialien, die verschluckt werden
können, von Babys und Kindern fern.
Gefahr: Unsachgemäße Montage kann zu Kippgefahr führen.
Bitte sorgfältig lesen und zum späteren Nachschlagen aufbewahren.
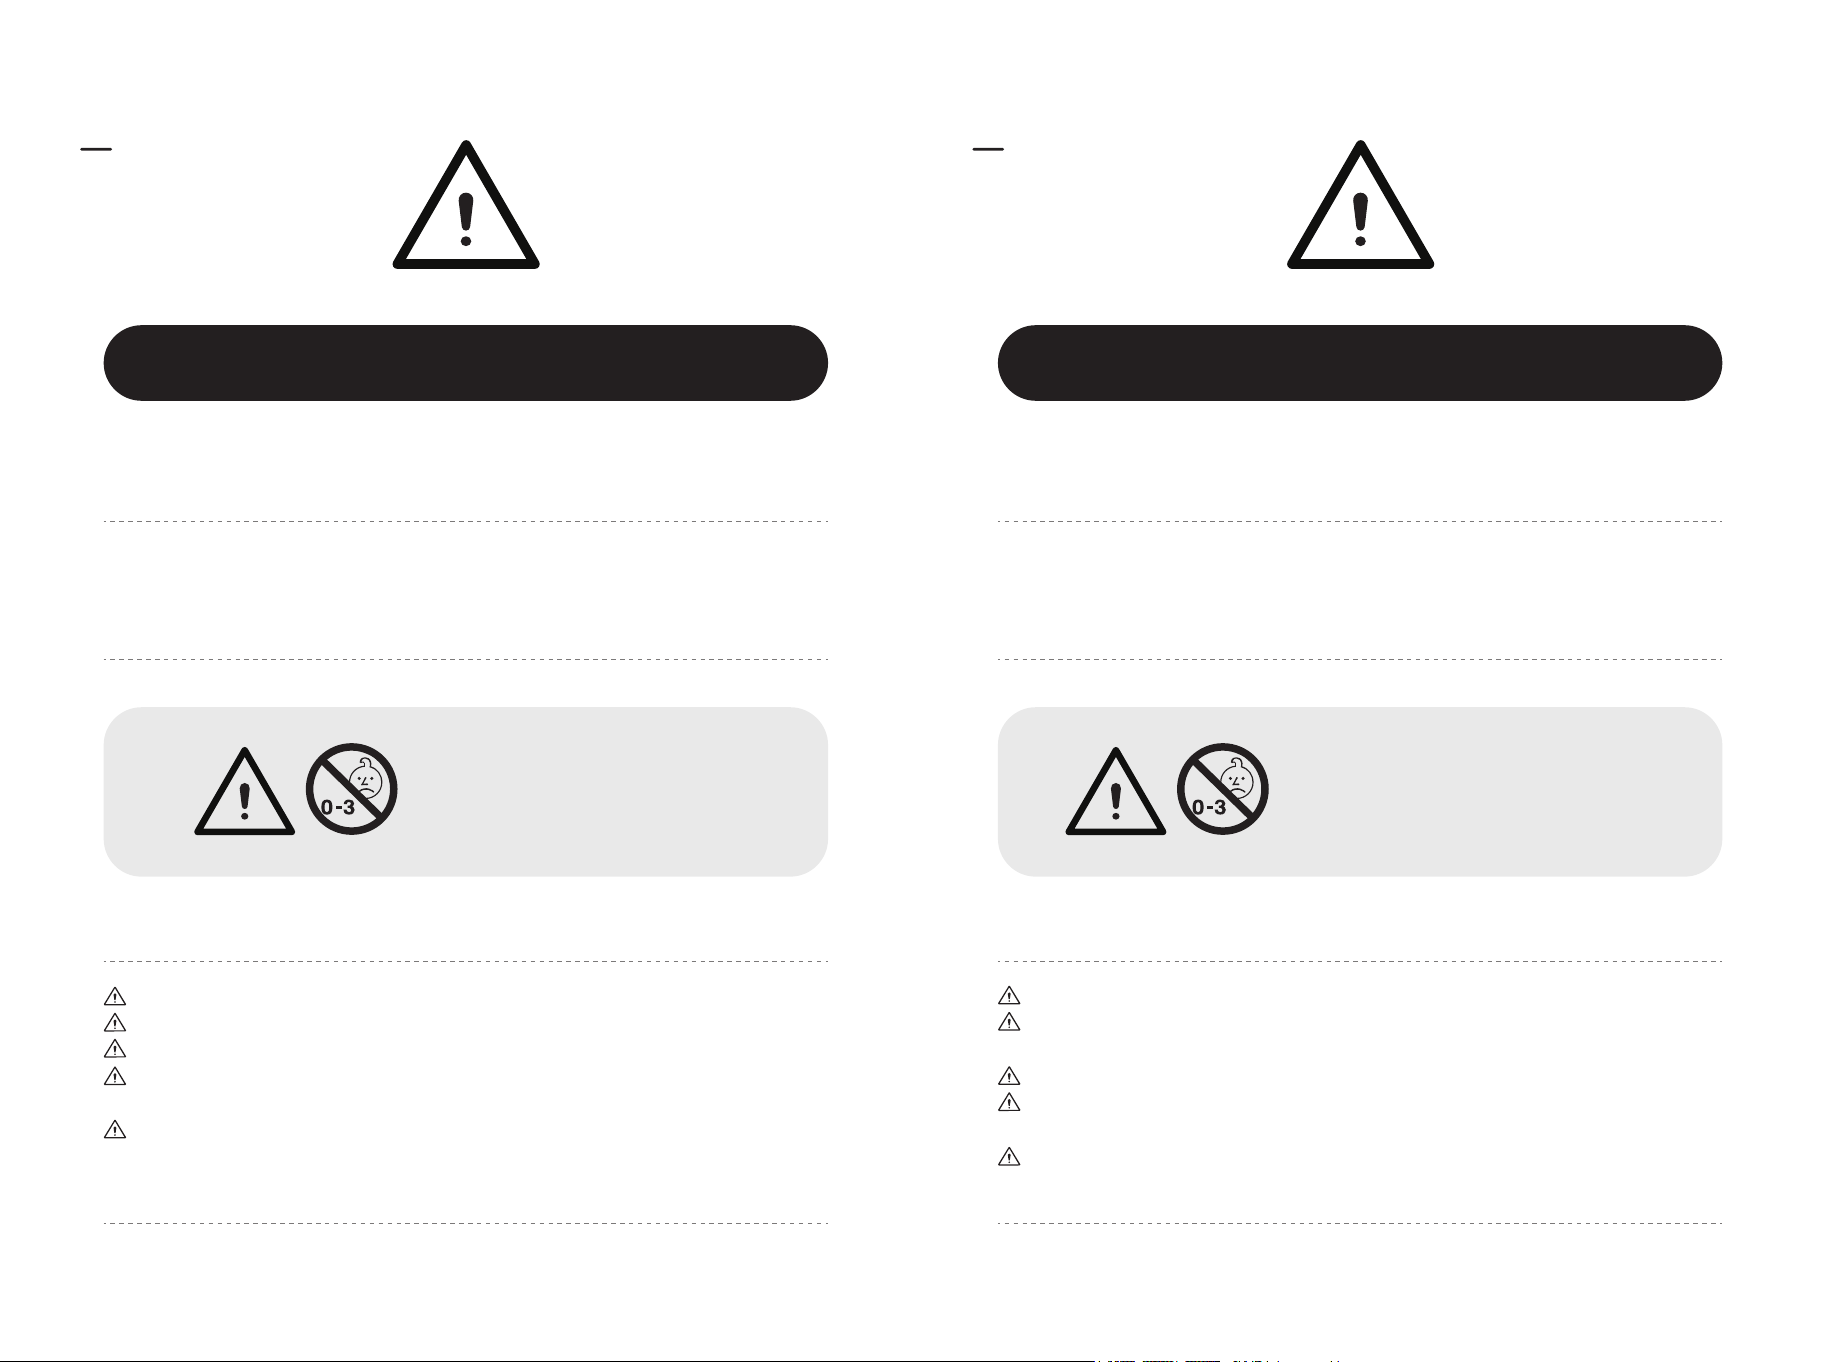
WARNING:
CHOKING HAZARD
-Small parts.
Not for children under 3 years.
Please read all instructions carefully and keep it for future reference.
EN DE
Warning for Assembly Achtung bei Montage
General Security Warning Allgemeine Sicherheitswarnung
Achtung:
ERSTICKUNGSGEFAHR
-Kleine Teile.
Nicht für Kinder unter 3 Jahren.
02 03

Avant de Commencer
Construction seulement par des adultes
Retirez tous les emballages, séparez et comptez toutes les pièces et le matériel.
Lisez attentivement chaque étape et suivez l'ordre correct.
Nous recommandons que, dans la mesure du possible, tous les articles soient
assemblés à proximité de la zone dans laquelle ils seront utilisés, afin d'éviter de
déplacer inutilement le produit une fois assemblé.
Assurez-vous que la surface soit solide pendant la construction et placez toujours le
produit sur une surface plane et stable.
Attention : Les enfants doivent utiliser ce produit sous la surveillance de leurs parents.
Danger : Gardez toutes les petites pièces et les matériaux d'emballage de ce produit hors
de la portée des bébés et des enfants pour éviter un risque d'étouffement.
Danger : Le manque de la fixation pourrait entraîner un risque de basculement.
Veuillez lire attentivement toutes les instructions et les conserver pour la référence ultérieure.
Antes de Empezar
El producto solo puede ser ensamblado por adultos.
Retire todo el embalaje, separe y cuente todas las piezas y los accesorios.
Lea detenidamente cada paso y siga el orden correcto.
Recomendamos que, siempre que sea posible, todos los elementos se monten cerca de
la zona en la que se van a utilizar, para evitar mover el producto innecesariamente una
vez montado.
Asegure una superficie segura durante el montaje, y coloque el producto siempre sobre
una superficie plana, firme y estable.
Atención: Los niños deben utilizar este producto bajo la supervisión de sus padres.
Peligro: Mantenga todas las piezas pequeñas y los materiales de empaque de este producto
fuera del alcance de los bebés y los niños, ya que de lo contrario pueden suponer un peligro
de asfixia.
Peligro: La falta de fijación puede provocar un riesgo de vuelco.
Lea atentamente todas las instrucciones y consérvelas para futuras consultas.
AVERTISSEMENT :
RISQUE D'ÉTOUFFEMENT
– Les petites pièces.
Ne convient pas aux enfants de
moins de 3 ans.
FR ES
Avertissement pour l'Assemblage Advertencia para el Montaje
Avertissement de Sécurité Générale Advertencia de Seguridad General
ADVERTENCIA:
PELIGRO DE ASFIXIA
- Piezas pequeñas.
No es adecuado para niños
menores de 3 años.
04 05

Prima di Iniziare
Questo prodotto è montato dagli adulti.
Rimuovere tutti gli imballaggi, separare e contare tutte le parti e tutti gli accessori.
Leggere attentamente ogni passo e seguire l'ordine corretto.
Si consiglia, ove possibile, di montare tutti gli articoli vicino alla zona in cui verranno
posti in uso, per evitare di spostare inutilmente il prodotto una volta assemblato.
Garantire una superficie sicura durante il montaggio e posizionare il prodotto sempre
su una superficie piana, stabile.
Attenzione: I bambini devono usare questo prodotto sotto la supervisione dei genitori.
Pericolo: Tenere tutte le piccole parti e i materiali di imballaggio di questo prodotto lontano
da neonati e bambini, altrimenti potrebbero rappresentare un rischio di soffocamento.
Pericolo: La mancanza di accessorio può causare un rischio di ribaltamento.
Zanim Zaczniesz
Montażem powinny zająć się wyłącznie osoby dorosłe
Usuń opakowanie i upewnij się, że zestaw zawiera wszystkie części i elementy
montażowe.
Przeczytaj uważnie każdy krok i postępuj we właściwej kolejności.
Zalecamy, aby w miarę możliwości wszystkie elementy były montowane w pobliżu
miejsca, w którym będą używane, aby uniknąć niepotrzebnego przenoszenia produktu
po złożeniu.
Zapewnij bezpieczną powierzchnię podczas montażu i zawsze umieszczaj produkt na
płaskiej i stabilnej powierzchni.
Uwaga: Dzieci moga używać tego produktu jedynie pod nadzorem dorosłych.
Niebezpieczeństwo: Trzymaj wszystkie małe części i materiały opakowaniowe dla tego
produktu z dala od niemowląt i dzieci, w przeciwnym razie mogą stwarzać ryzyko zadławienia.
Niebezpieczeństwo: Brak mocowania może spowodować ryzyko przewrócenia.
AVVERTENZA:
RISCHIO DI SOFFOCAMENTO
- Piccole parti.
Non per i bambini sotto i 3 anni.
Przeczytaj uważnie wszystkie instrukcje i zachowaj je na przyszłość.Si prega di leggere attentamente tutte le istruzioni e conservarle per riferimento futuro.
PLIT
Avvertenza per il Montaggio Ostrzeżenie
Avvertenza di sicurezza generale Ogólne ostrzeżenia dotyczące bezpieczeństwa
UWAGA:
RYZYKO ZADŁAWIENIA
- Produkt zawiera małe elementy.
Nieodpowiednie dla dzieci poniżej
3 roku życia.
06 07

AA
x 8
M6 x 40MM
FF x 6
Φ12 x 10MM
BB x 4
M6 x 20MM
CC x 6
Cam Bolt /
Nockenbolzen /
Boulon à Came
/ Perno de Leva
/ Bullone a
Camme / Bolec
zamka
meblowego
No drills necessary.
Do not use power
screwdriver.
Phillips Screwdriver (Not Provided) /
Phillips-Schraubenzieher (nicht mitgeliefert) / Tournevis
Phillips (Non Fourni) / Destornillador de Estrella ( No
Suministrado) / Cacciavite a Croce (Non Fornito) /
Śrubokręt krzyżakowy (brak w zestawie).
EE x 8
Φ10 x 10MM
DD x 4
M4 x 18MM
GG x 4
M6 x 16MM
EN
Keine Bohrer erforderlich.
Keinen Akkuschrauber
verwenden.
DE
Aucune perceuse n’est
nécessaire.
Ne pas utiliser de tournevis
électrique.
FR
No hace falta taladrar.
No utilice un destornillador
eléctrico.
ES
Nie wymaga użycia wiertarki.
Nie używaj wkrętarki
elektrycznej.
PL
Non sono necessarie
esercitazioni.
Non utilizzare cacciaviti
elettrici.
IT
A x1 B x1 C x1 D x1
E x2 F x2 G x1 H x1
I x1 J x2 K x1
M x1 N x1 O x1
L x2
08 09
Suitable age: 3-6 years old
/ Geeignetes Alter: 3-6 Jahre alt
/ Âge approprié: 3-6 ans
/ Edad adecuada: 3-6 años
/ Età adatta: 3-6 anni
/ Odpowiednie dla dzieci w wieku: 3-6 lat
1
B C
CC
CC
EE
FF
D
AA
D
FF
EE
B
B
2
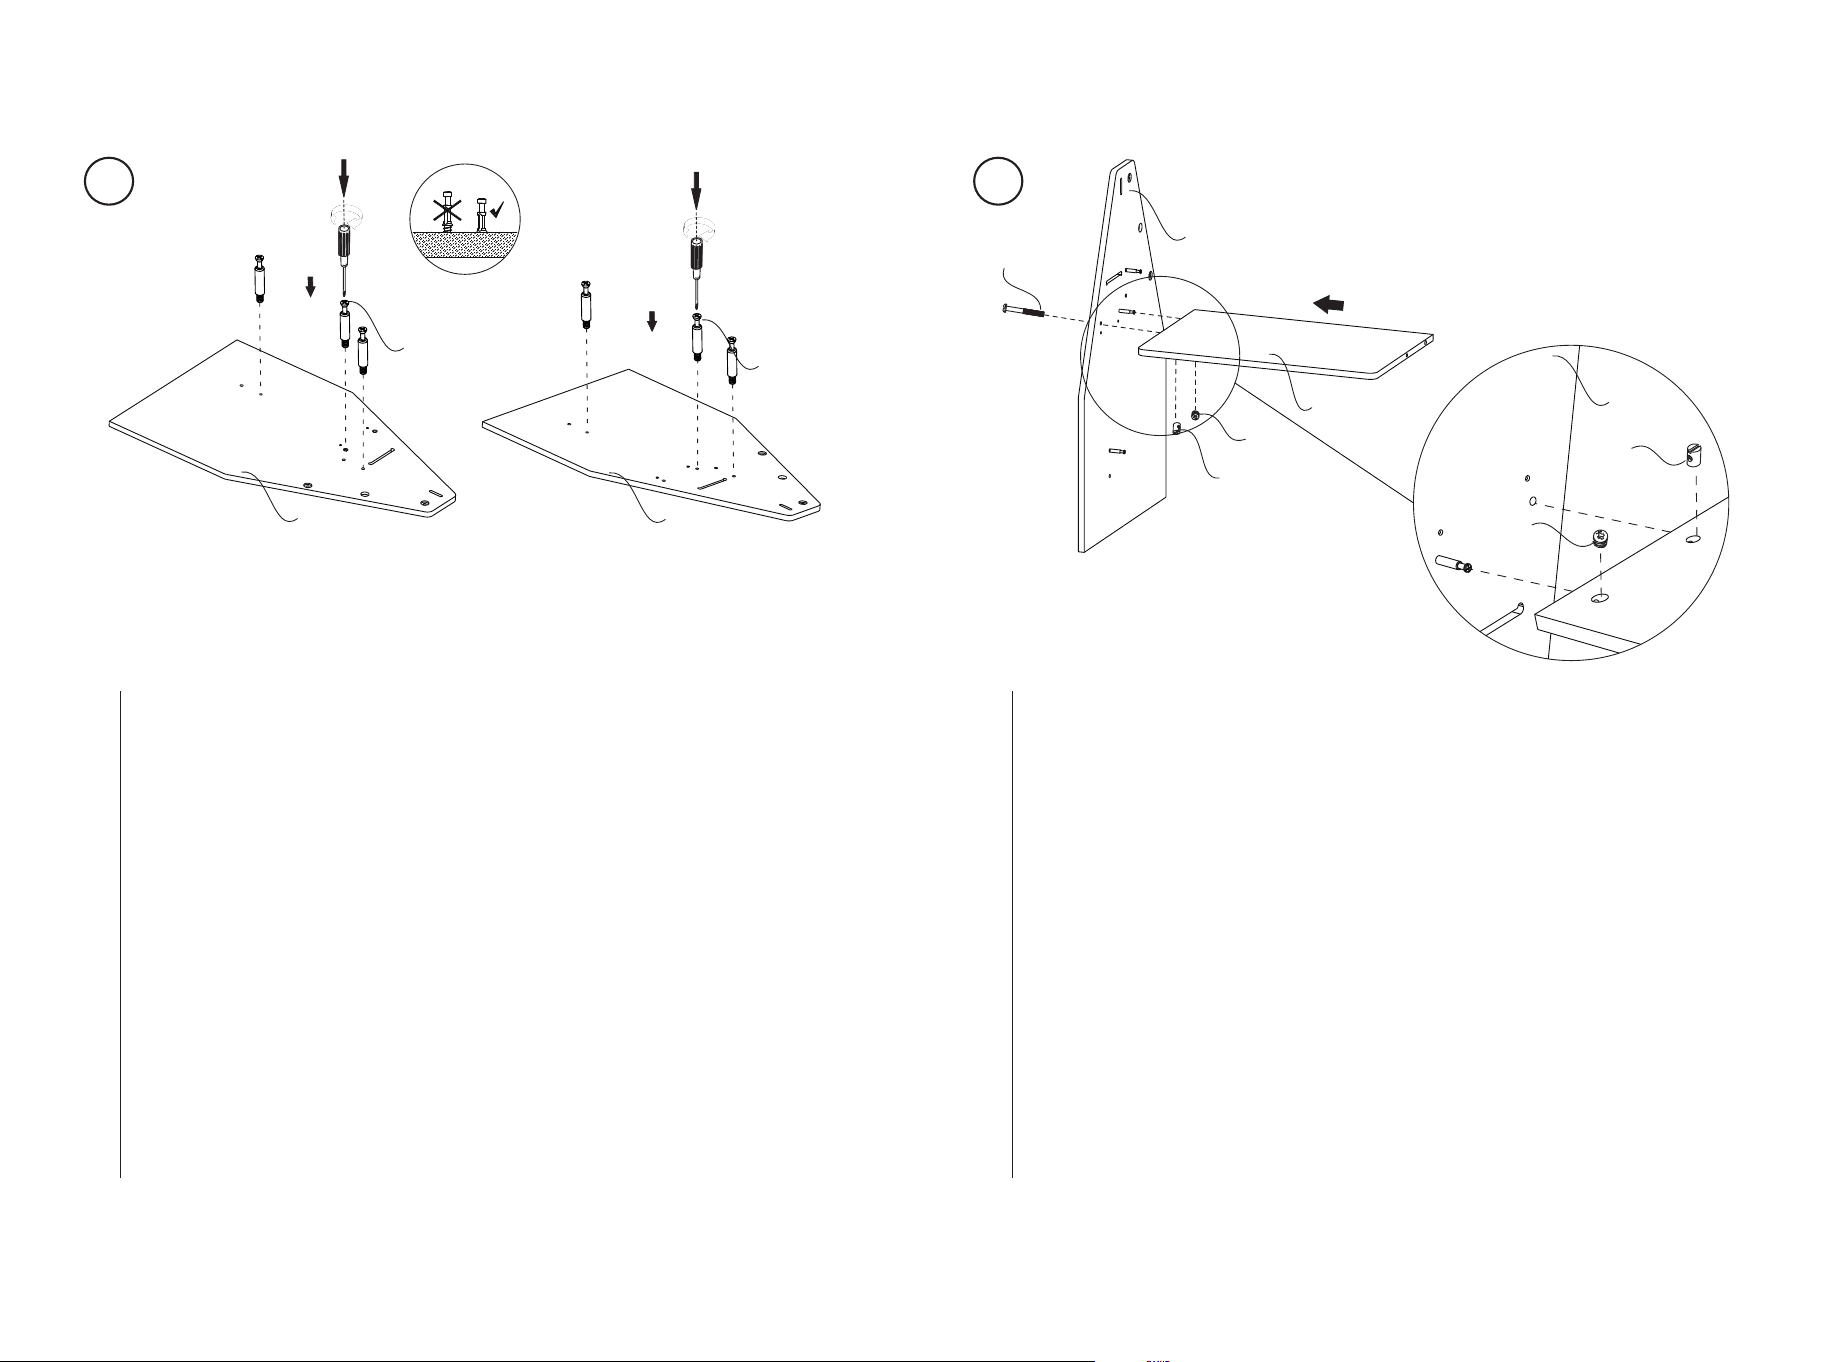
Lock the cam bolts (CC) to the two side panels (B,C). Do not lock the
screw crooked, please lock it tightly.
Verriegeln Sie die Nockenbolzen (CC) an den beiden Seitenteilen
(B,C). Ziehen Sie die Schraube nicht schief an, sondern ziehen Sie sie
fest an.
Verrouillez les boulons à came (CC) sur les deux panneaux latéraux
(B,C). Ne verrouillez pas la vis de travers, veuillez la verrouiller
fermement.
Fije los pernos de leva (CC) a los dos paneles laterales (B,C). No
bloquee el tornillo torcido, por favor bloquéelo firmemente.
Bloccare i bulloni a camme (CC) sui due pannelli laterali (B,C). Non
bloccare la vite in modo storto, ma in modo stretto.
Wkręć bolce zamków meblowych (CC) w dwa boczne panele (B, C).
Uważaj, aby wkręcić je prosto i do oporu.
EN
DE
FR
ES
IT
PL
Lock the table (D) to the left panel (B).
Verriegeln Sie den Tisch (D) an der linken Platte (B).
Verrouillez la table (D) sur le panneau gauche (B).
Fije la mesa (D) al panel izquierdo (B).
Bloccare il tavolo (D) sul pannello sinistro (B).
Przykręć blat (D) do lewego panelu (B).
EN
DE
FR
ES
IT
PL
10 11
E
FF
E
FF
FF
E
E
FF
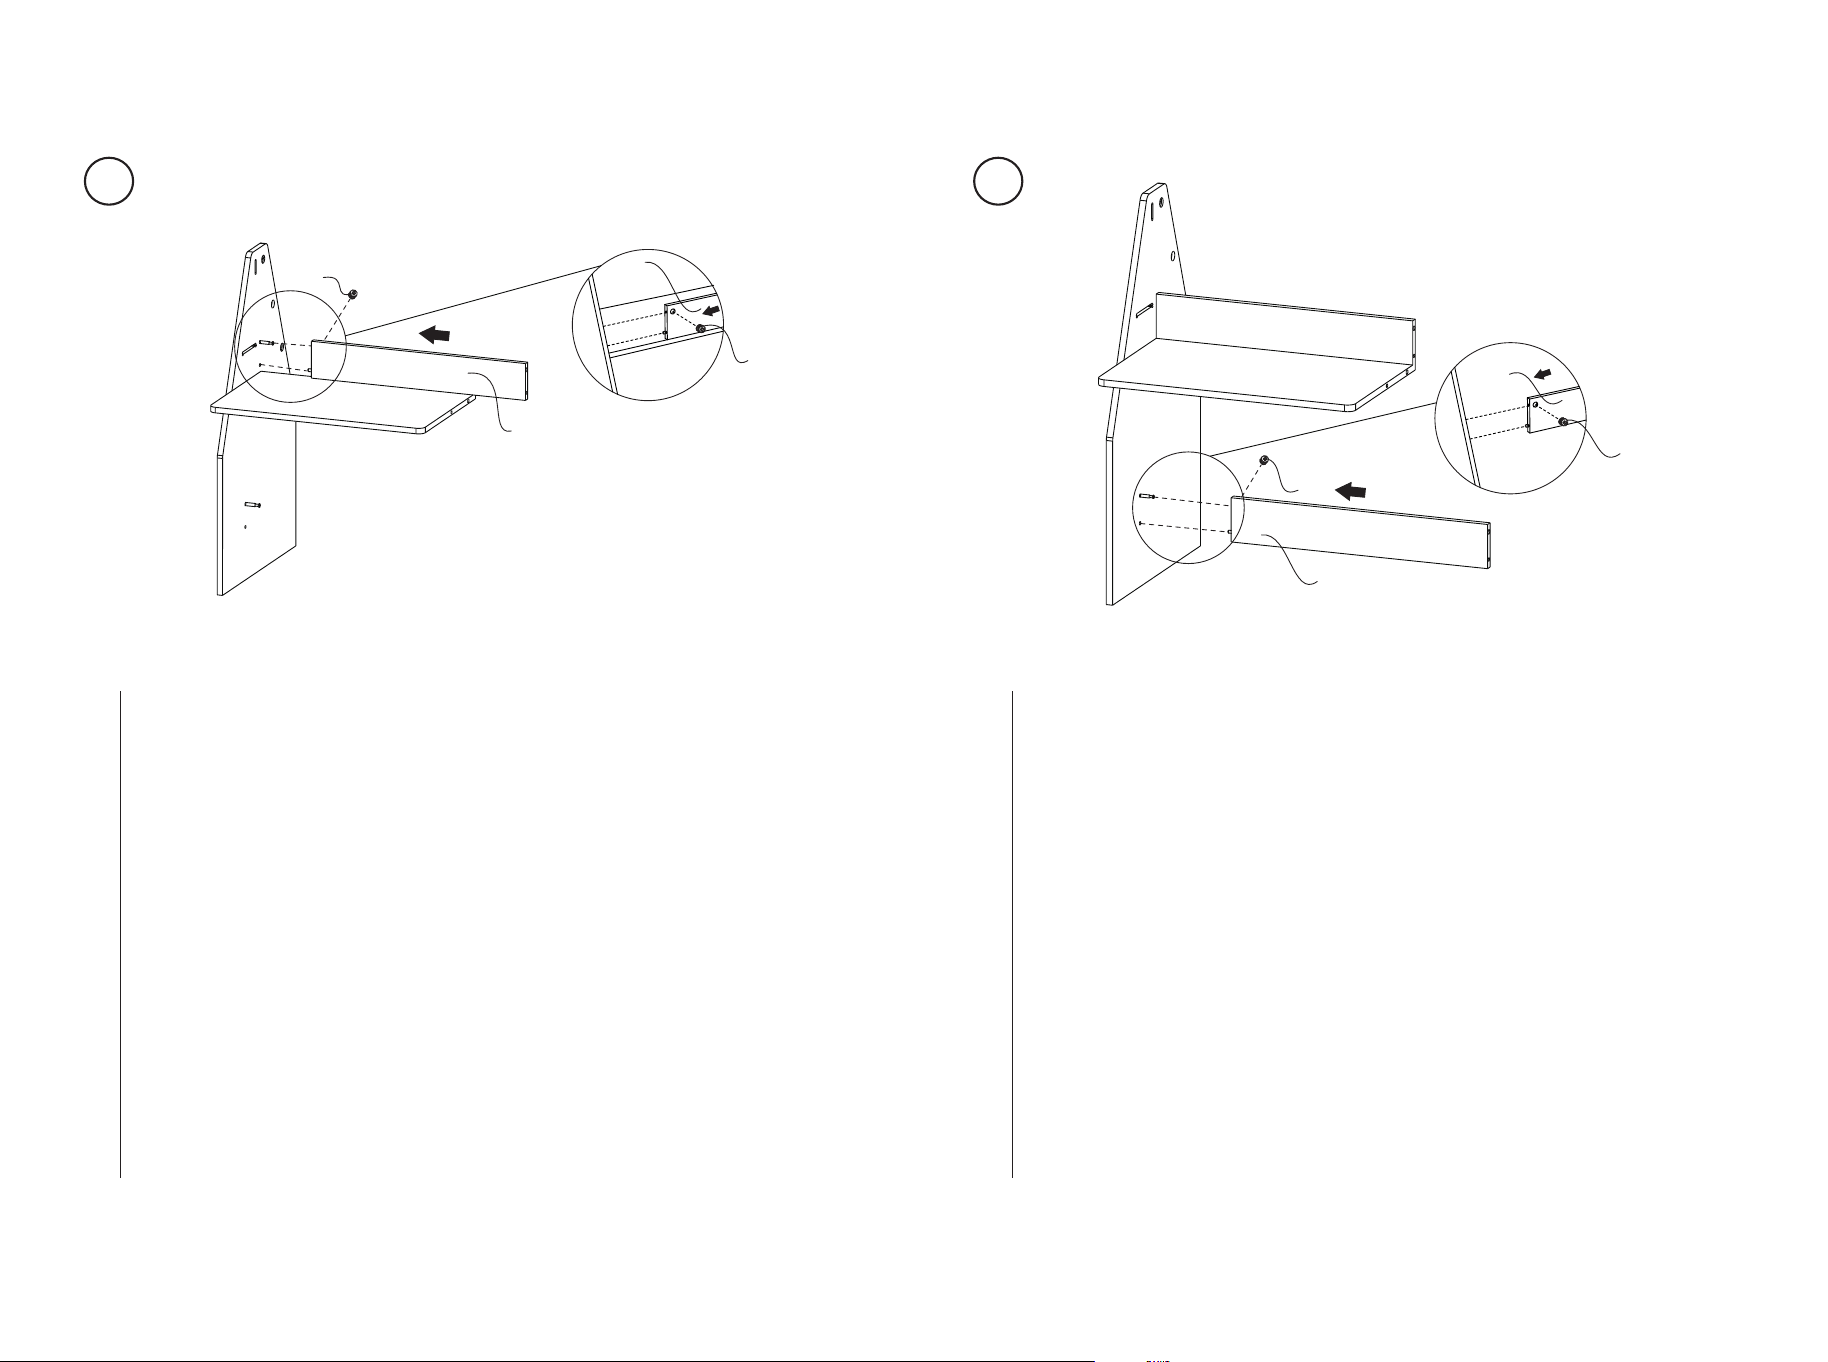
3 4
Lock the rear panel (E) over the left panel (B).
Verriegeln Sie die Rückwand (E) über die linke Platte (B).
Verrouillez le panneau arrière (E) sur le panneau gauche (B).
Fije el panel trasero (E) sobre el panel izquierdo (B).
Bloccare il pannello posteriore (E) sul pannello sinistro (B).
Przykręć tylny panel (E) do lewego panelu (B) ponad blatem (D).
EN
DE
FR
ES
IT
PL
Lock the rear panel (E) under the left panel (B).
Verriegeln Sie die Rückwand (E) unter die linke Platte (B).
Verrouillez le panneau arrière (E) sous le panneau gauche (B).
Fije el panel trasero (E) debajo del panel izquierdo (B).
Bloccare il pannello posteriore (E) sotto il pannello sinistro (B).
Przykręć tylny panel (E) do lewego panelu (B) poniżej blatu (D).
EN
DE
FR
ES
IT
PL
12 13
F
DD
L
BB
L
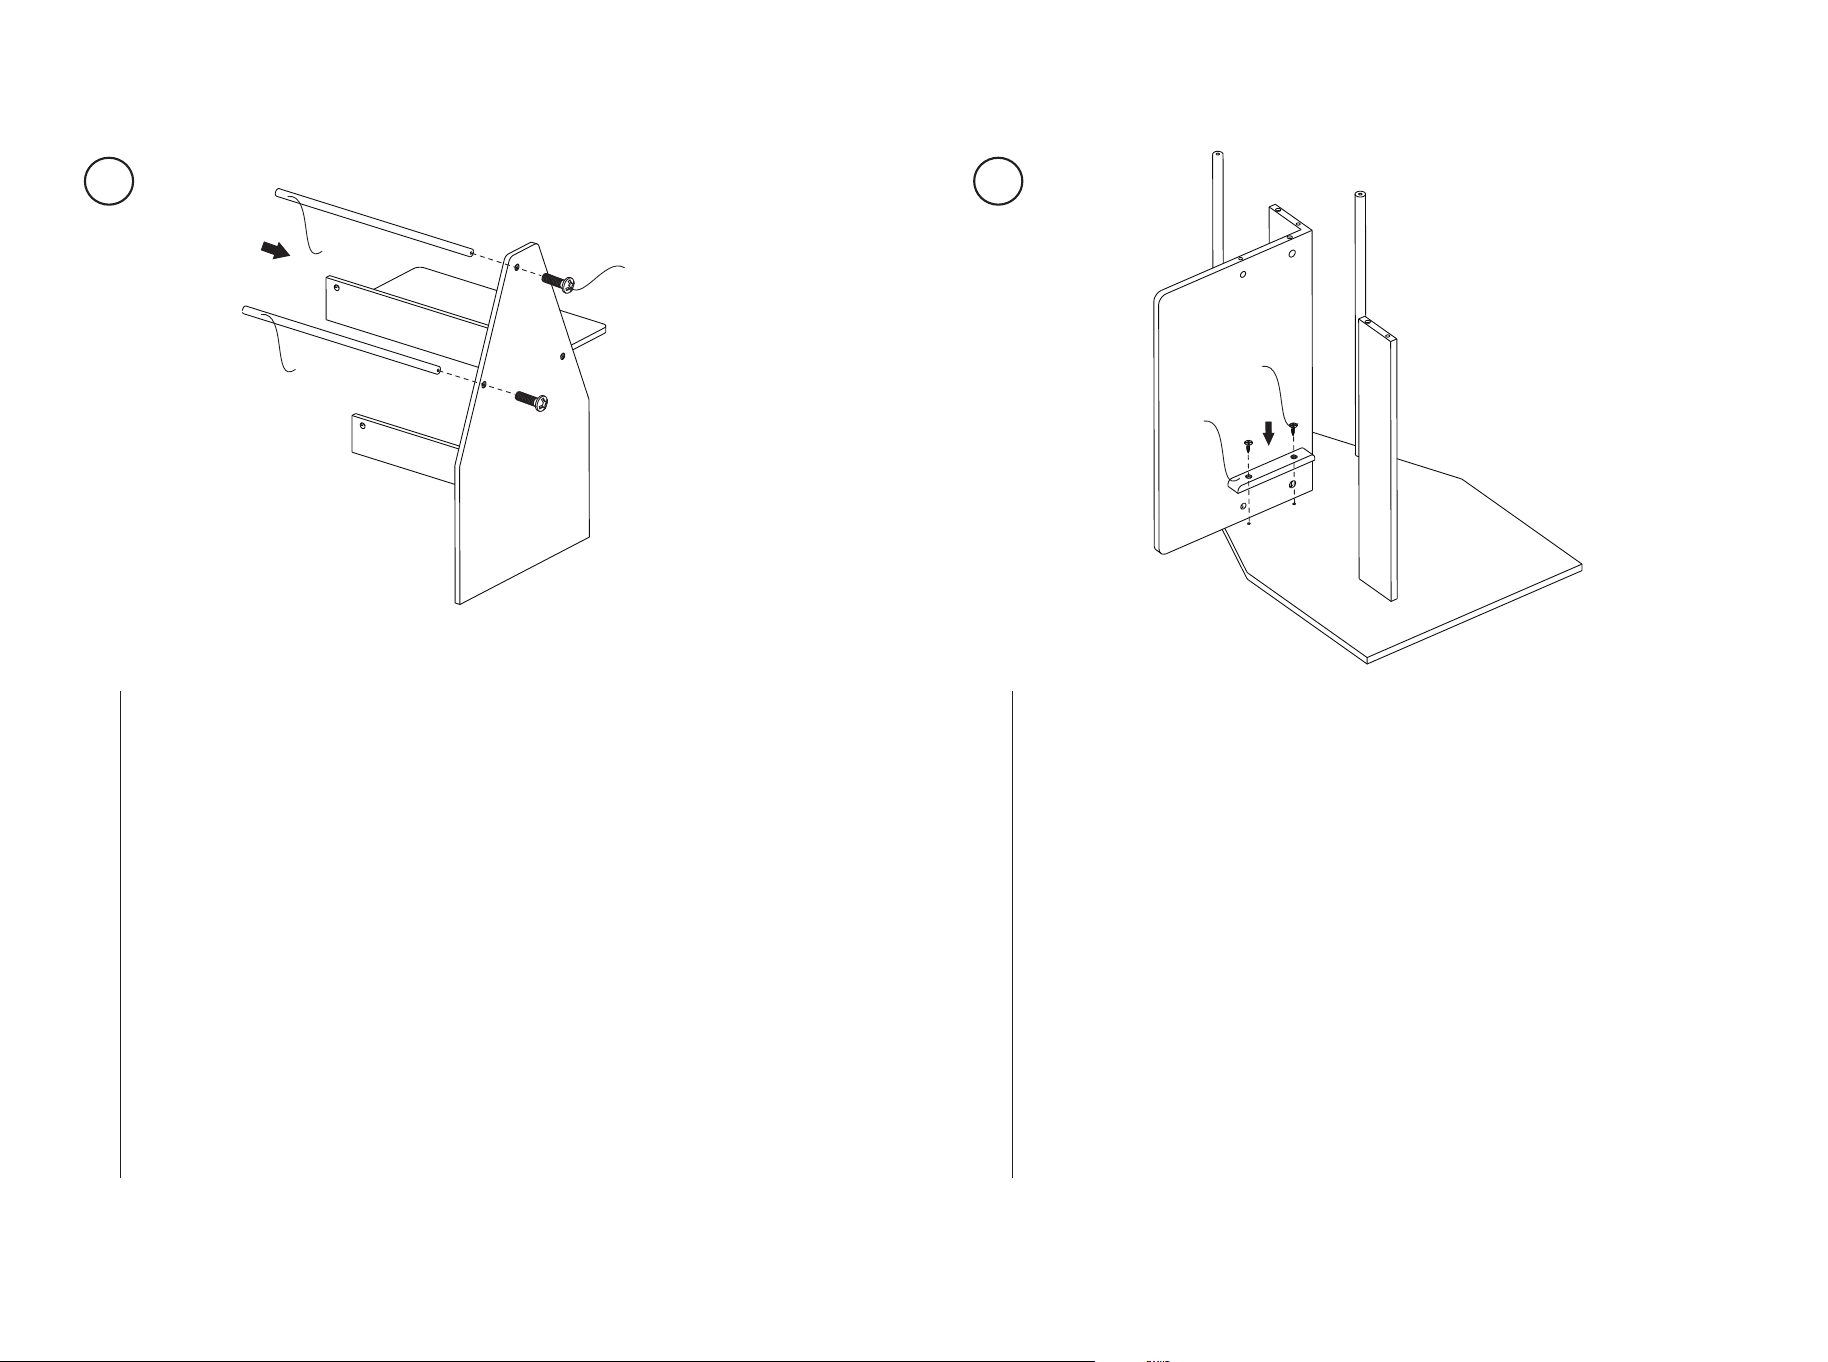
5 6
Lock the two metal tubes (L) to the left panel (B).
Verriegeln Sie die beiden Metallrohre (L) an der linke Platte (B).
Verrouillez les deux tubes métalliques (L) sur le panneau gauche (B).
Fije los dos tubos metálicos (L) al panel izquierdo (B).
Bloccare i due tubi metallici (L) sul pannello sinistro (B).
Przykręć dwie rurki (L) do lewego panelu (B).
EN
DE
FR
ES
IT
PL
Place the left panel assembly down on the flat surface and lock the
small block (F) to the left panel (B).
Legen Sie die linke Paneelbaugruppe auf die ebene Fläche und
verriegeln Sie den kleinen Block (F) an der linken Platte (B).
Placez l’assemblage du panneau gauche sur la surface plane et
verrouillez le petit bloc (F) au panneau gauche (B).
Coloque el conjunto del panel izquierdo hacia abajo sobre la superficie
plana y bloquee el bloque pequeño (F) en el panel izquierdo (B).
Posizionare il gruppo del pannello sinistro sulla superficie piana e
bloccare il blocco piccolo (F) al pannello sinistro (B).
Połóż zmontowaną konstrukcję na płaskim podłożu i przykręć wspornik
(F) do lewego panelu (B) pod blatem (D).
EN
DE
FR
ES
IT
PL
14 15
N
M
A
GG
7
8
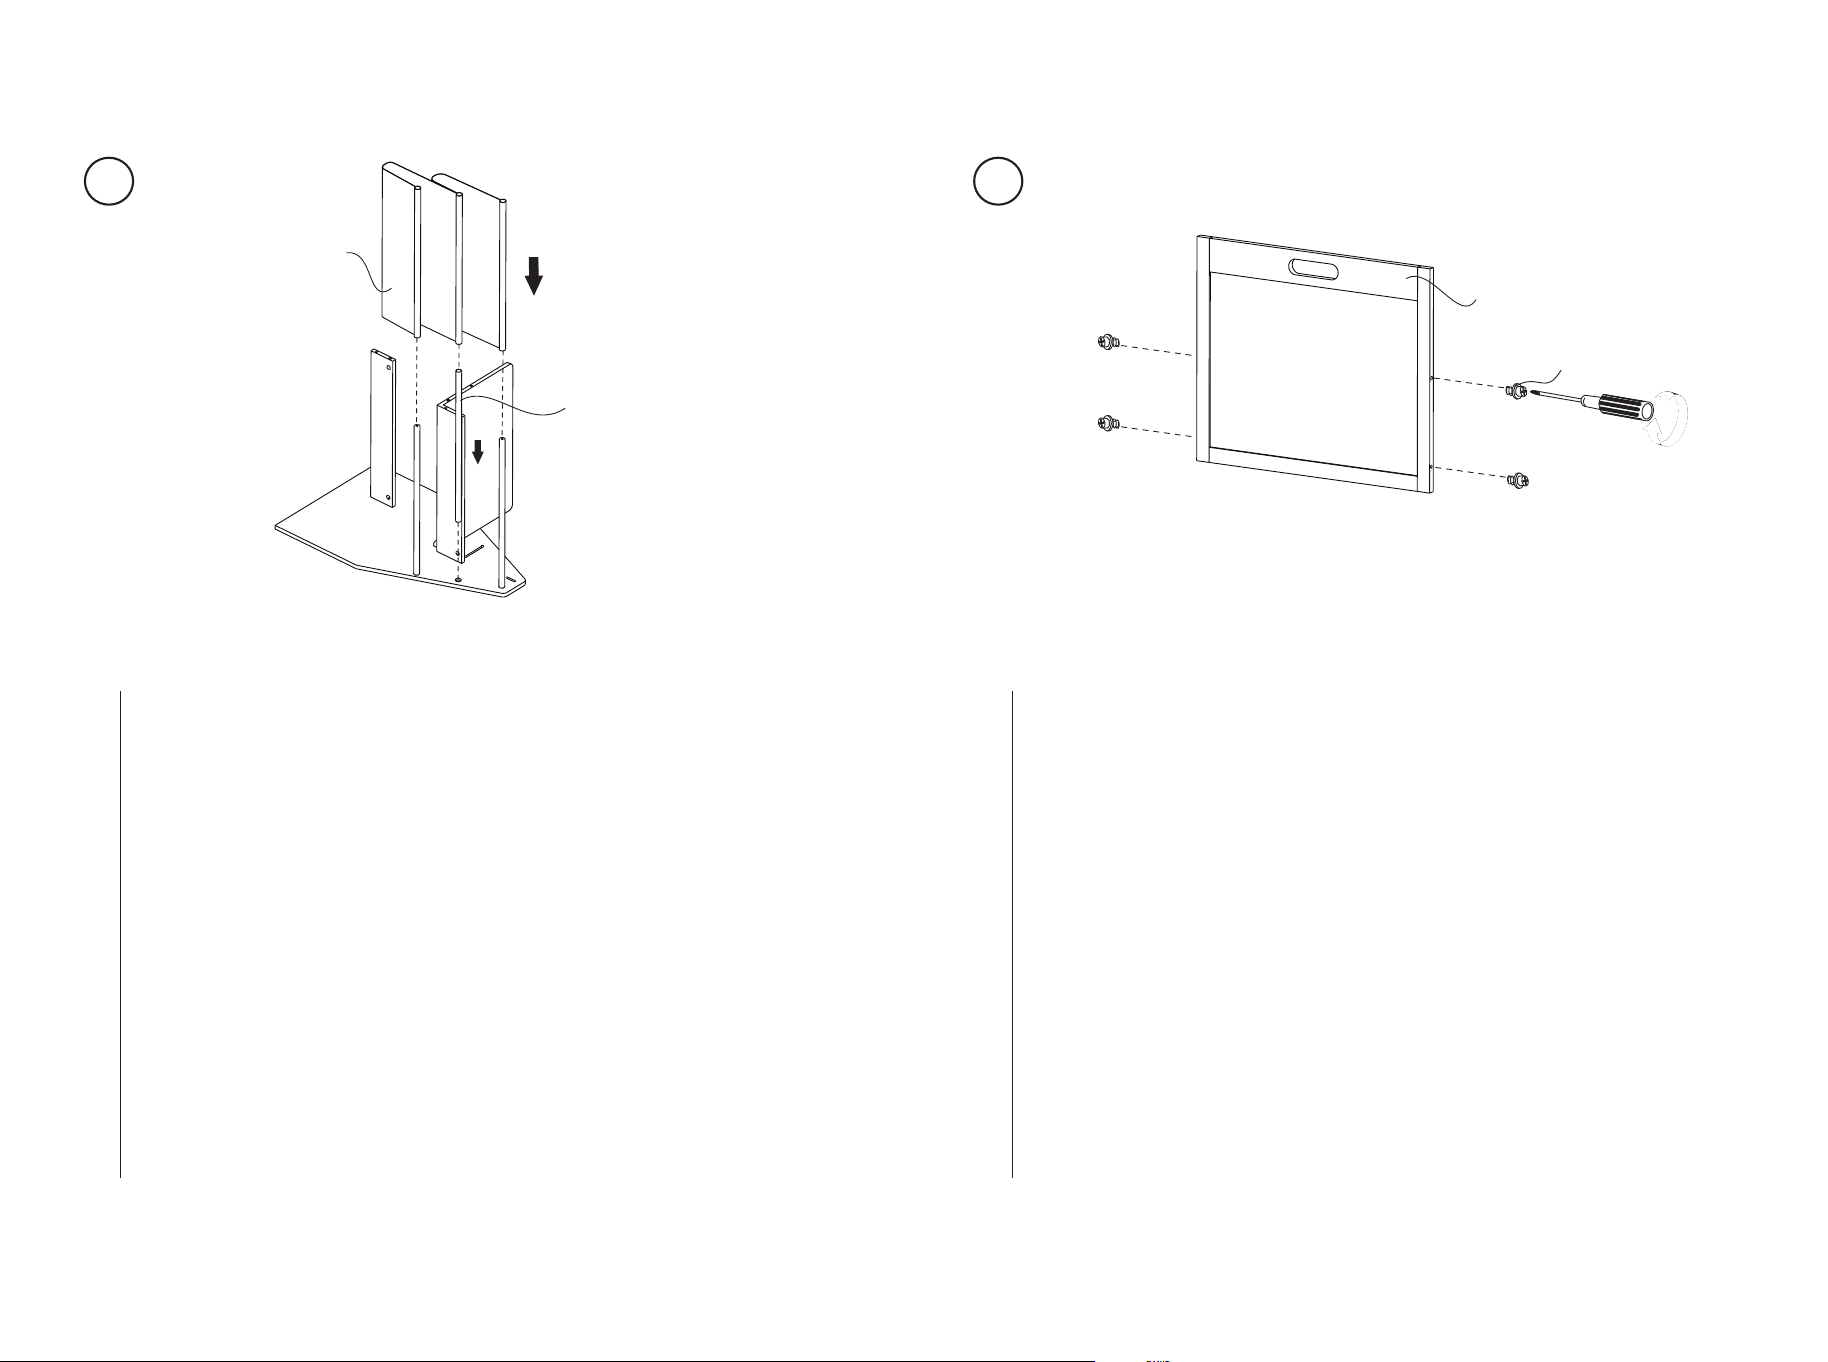
Place the cloth cover (N) over the locked metal tube (L). Insert the other
metal tube (M) into the middle tube sleeve of the cloth cover.
Legen Sie die Stoffabdeckung (N) über das verriegelte Metallrohr (L).
Stecken Sie das andere Metallrohr (M) in die mittlere Rohrhülse der
Stoffabdeckung.
Placez la housse en tissu (N) sur le tube métallique verrouillé (L).
Insérez l’autre tube métallique (M) dans le manchon du tube central de
la housse en tissu.
Coloque la cubierta de tela (N) sobre el tubo metálico fijado (L). Inserte
el otro tubo metálico (M) en el manguito del tubo central de la cubierta
de tela.
Posizionare la copertura in tessuto (N) sul tubo metallico bloccato (L).
Inserire l'altro tubo metallico (M) nel manicotto centrale del coperchio di
stoffa.
Załóż tunele tkaniny (N) na rurki (L). Wsuń trzecią rurkę (M) w
środkowy tunel tkaniny.
EN
DE
FR
ES
IT
PL
Lock the small screw (GG) to the left and right sides of the whiteboard
(A).
Verriegeln Sie die kleine Schraube (GG) an der linken und rechten
Seite des Whiteboards (A).
Verrouillez la petite vis (GG) sur les côtés gauche et droit du tableau
blanc (A).
Fije el tornillo pequeño (GG) a los lados izquierdo y derecho de la
pizarra blanca (A).
Bloccare la vite piccola (GG) sui lati destro e sinistro della lavagna (A).
Wkręć małe bolce (GG) w prawą i lewą krwaędź tablicy (A).
EN
DE
FR
ES
IT
PL
16 17
A
EE
FF
C
AA
BB
A
M
9
10
Place the whiteboard (A) in slot on the left panel (B).
Setzen Sie das Whiteboard (A) in den Schlitz auf der linken Seite (B)
ein.
Placez le tableau blanc (A) dans la fente du panneau gauche (B).
Coloque la pizarra blanca (A) en la ranura del panel izquierdo (B).
Inserire la lavagna (A) nella fessura del pannello sinistro (B).
Umieść tablicę (A) w wycięciach lewego panelu (B).
EN
DE
FR
ES
IT
PL
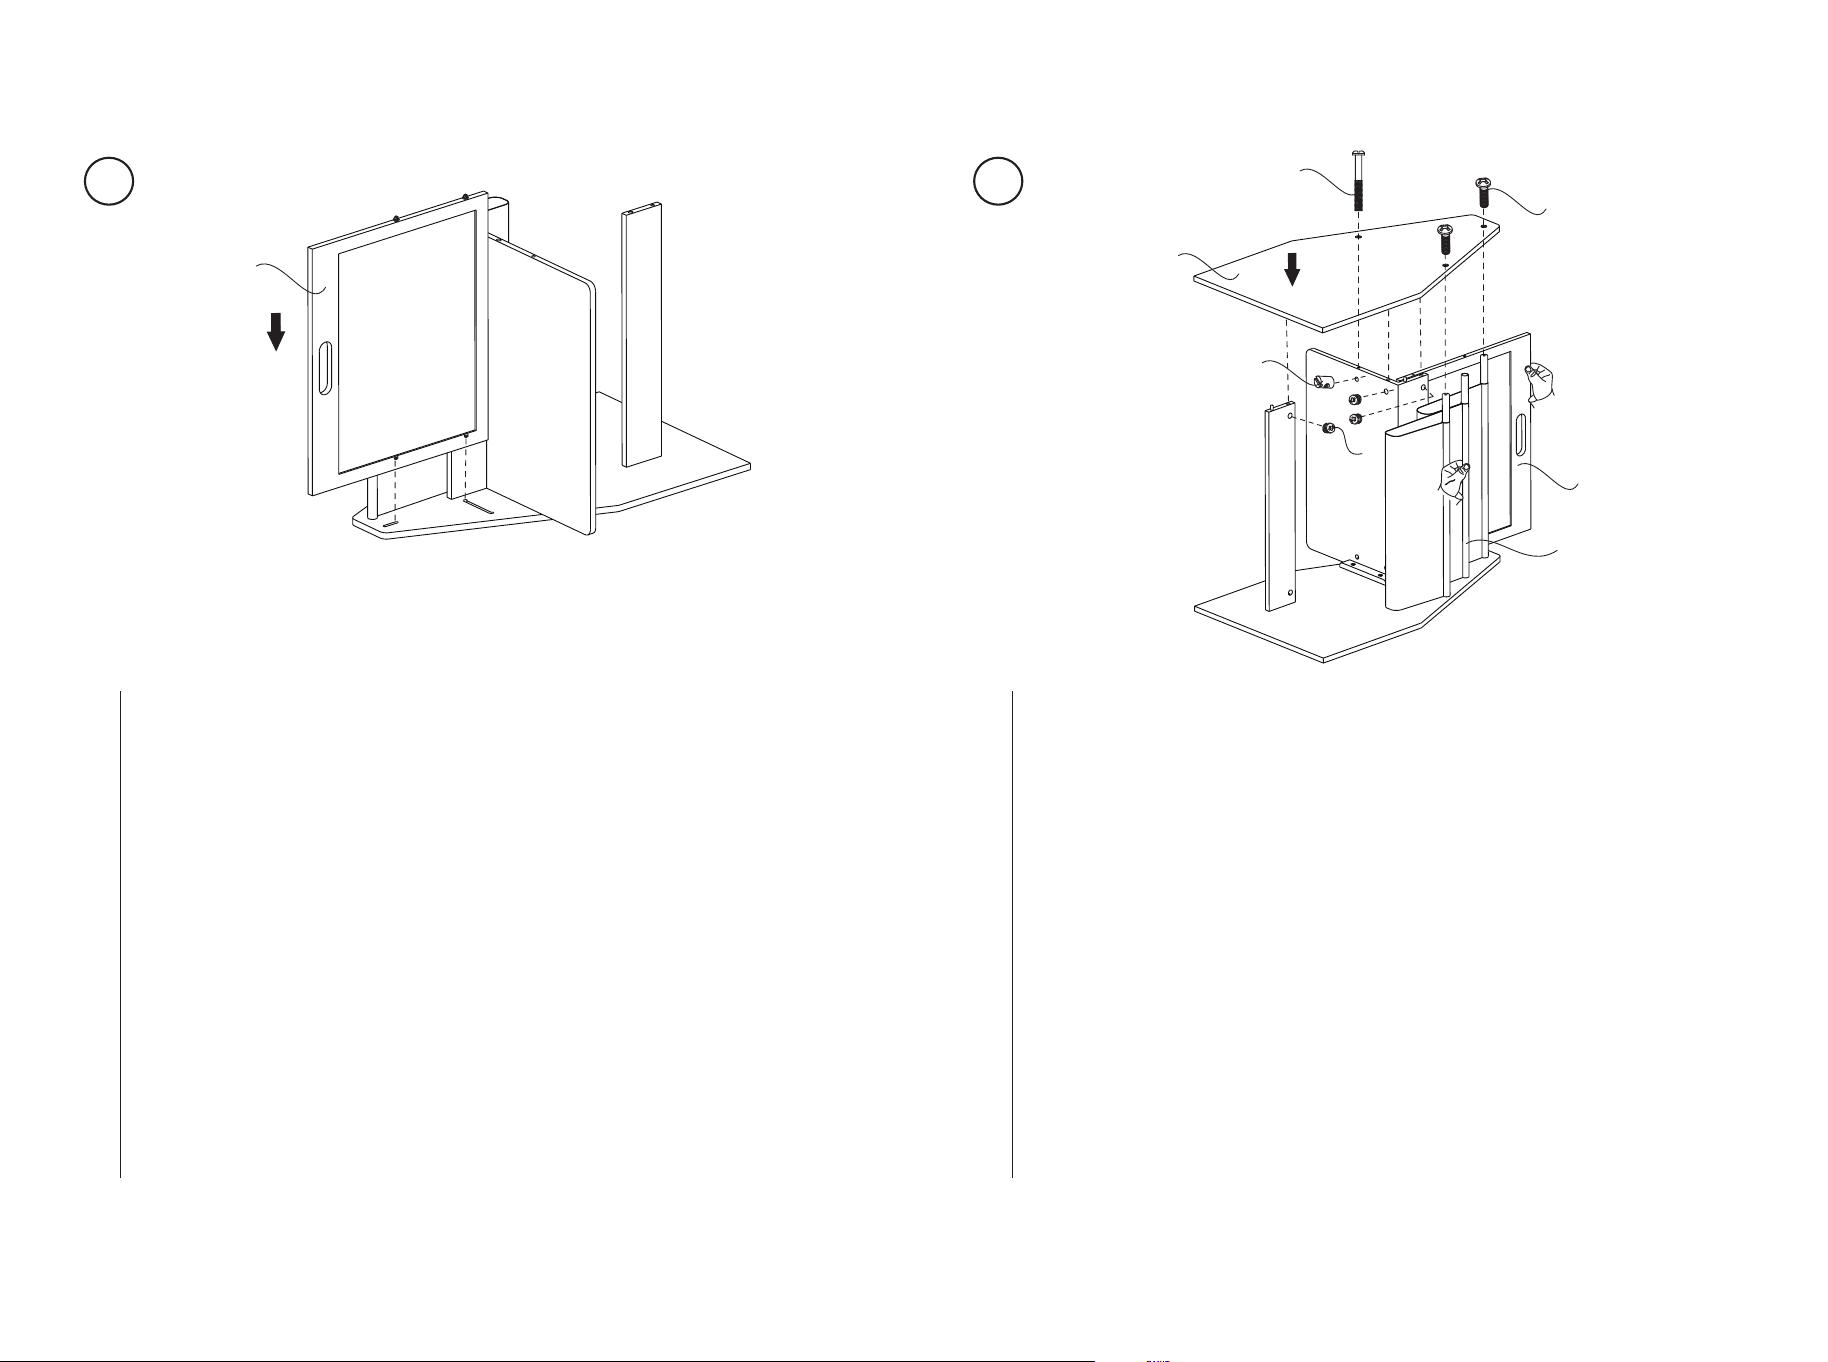
In this step, it is recommended that two people work together, one
holding the whiteboard (A) and the middle metal tube (M), and the other
locking the right board (C) to the hole.
In diesem Schritt wird empfohlen, dass zwei Personen
zusammenarbeiten, wobei eine das Whiteboard (A) und das mittlere
Metallrohr (M) hält und die andere die rechte Tafel (C) am Loch festhält.
Dans cette étape, il est recommandé que deux personnes travaillent
ensemble, l’une tenant le tableau blanc (A) et le tube métallique du
milieu (M), et l’autre verrouillant le tableau droit (C) dans le trou.
En este paso, se recomienda que trabajen dos personas juntas, una
sujetando la pizarra blanca (A) y el tubo metálico central (M), y la otra
fijando la pizarra derecha (C) al orificio.
In questo passo si consiglia di lavorare in due: uno tiene la lavagna (A)
e il tubo metallico centrale (M), l'altro blocca la lavagna destra (C) al
foro.
Przykręć prawy panel (C) do zmontowanej konstrukcji. Zalecamy
skorzystanie z pomocy drugiej osoby, która przytrzyma tablicę (A) i
środkową rurkę (M) we właściwej pozycji.
EN
DE
FR
ES
IT
PL
18 19
DD
F
O
11
12
Lock the small block (F) to the right panel (C).
Verriegeln Sie den kleinen Block (F) an der rechten Blende (C).
Verrouillez le petit bloc (F) sur le panneau droit (C).
Fije el bloque pequeño (F) al tablero derecho (C).
Bloccare il blocco piccolo (F) sul pannello destro (C).
Przykręć wspornik (F) do prawego panelu (C).
EN
DE
FR
ES
IT
PL
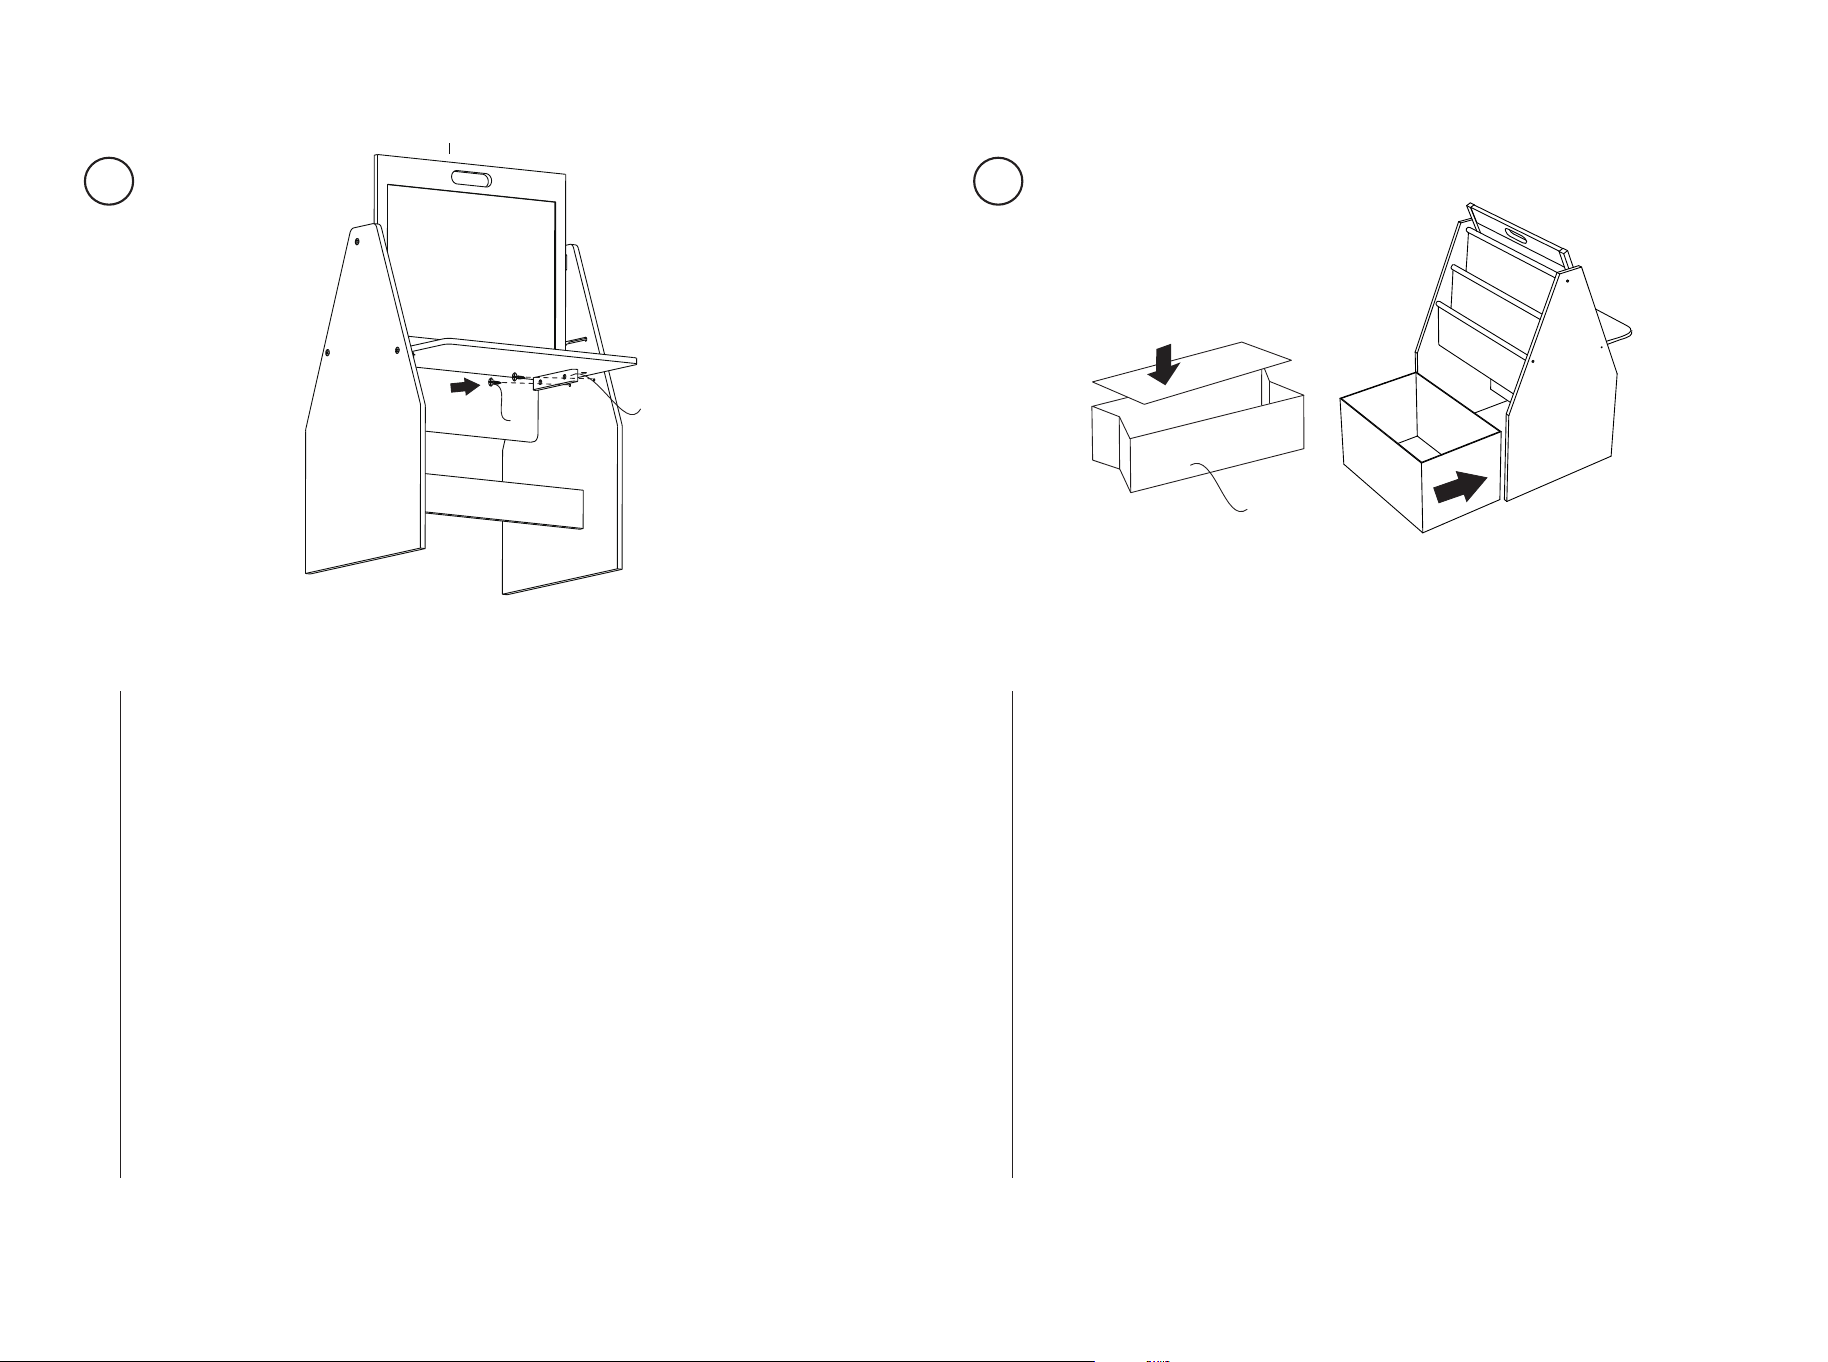
Place the drawer bottom panel inside the fabric drawer and place the
fabric drawer (O) at the bottom of the product storage side.
Setzen Sie die Schubladenunterseite in die Stoffschublade ein und
platzieren Sie die Stoffschublade (O) unten auf der Seite der
Produktaufbewahrung.
Placez le panneau inférieur du tiroir à l’intérieur du tiroir en tissu et
placez le tiroir en tissu (O) au bas du côté de rangement du produit.
Coloque el panel inferior del cajón dentro del cajón de tela y coloque el
cajón de tela (O) en la parte inferior del lado de almacenamiento del
producto.
Bloccare la vite piccola (GG) sui lati destro e sinistro della lavagna (A).
Włóż dno do materiałowej szuflady (O) i wsuń ją od tyłu zmontowanego
stolika.
EN
DE
FR
ES
IT
PL
20 21
1
EE
I
J
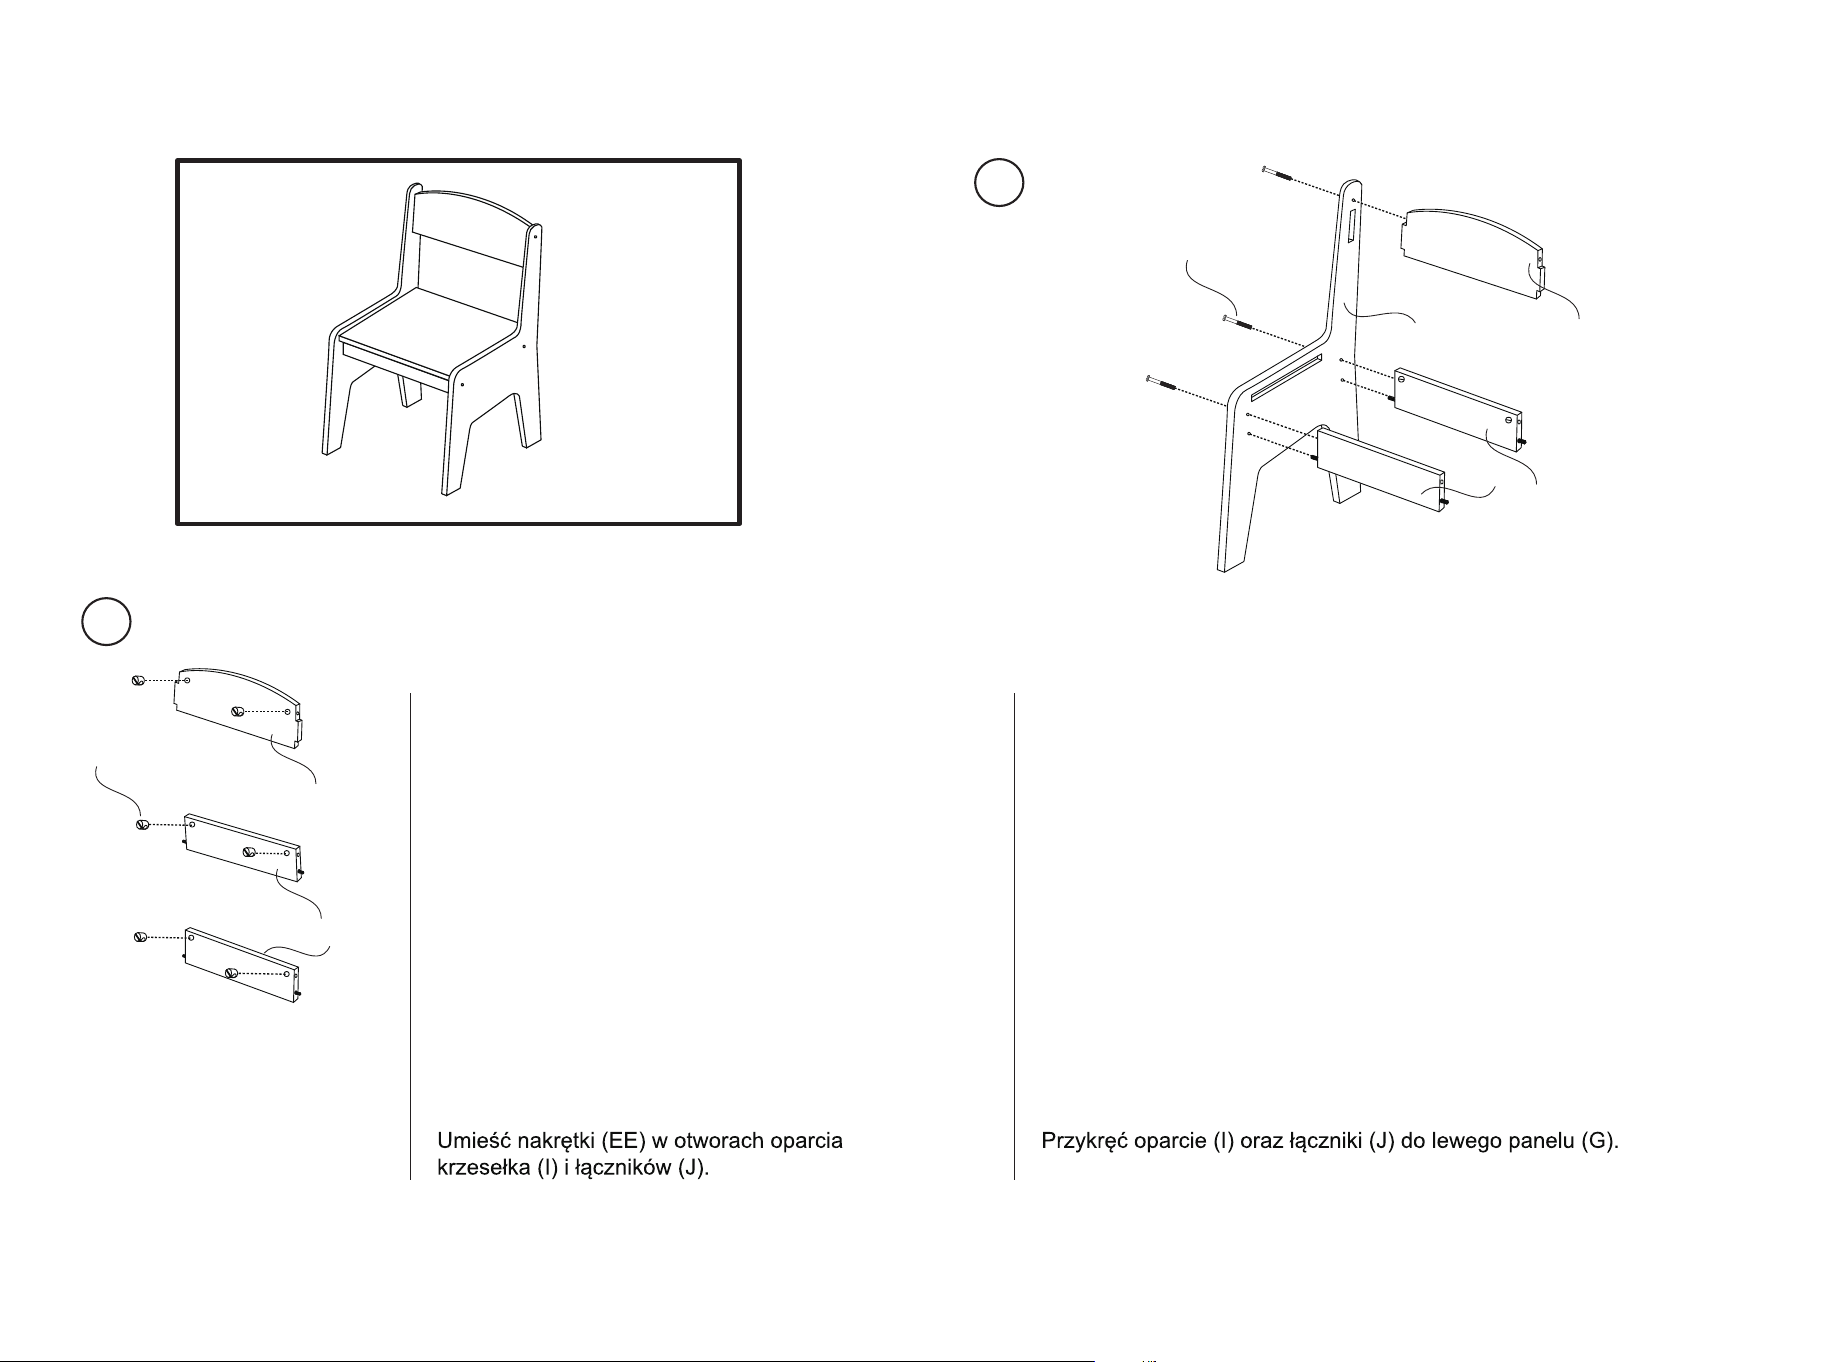
Place the nut (EE) in the holes of backrest
panel (I) and lower panel (J) respectively.
Setzen Sie die Mutter (EE) in die Löcher
der Rückenlehnenplatte (I) und der
unteren Platte (J) ein.
Placez l’écrou (EE) dans les trous du
panneau du dossier (I) et du panneau
inférieur (J) respectivement.
Coloque la tuerca (EE) en los orificios del
panel del respaldo (I) y del panel inferior
(J) respectivamente.
Inserire il dado (EE) nei fori del pannello
dello schienale (I) e del pannello inferiore
(J) rispettivamente.
EN
DE
FR
ES
IT
PL
Lock the backrest panel (I), lower panel (J) to the left panel (G) of the
chair.
Verriegeln Sie die Rückenlehnenplatte (I) und die untere Platte (J) mit
der linken Platte (G) des Stuhls.
Verrouillez le panneau du dossier (I) et le panneau inférieur (J) au
panneau gauche (G) de la chaise.
Fije el panel del respaldo (I), el panel inferior (J) al panel izquierdo (G)
de la silla.
Bloccare il pannello dello schienale (I), il pannello inferiore (J) al
pannello sinistro (G) della sedia.
EN
DE
FR
ES
IT
PL
2
I
J
AA
G
22 23
AA
H
K
3 4
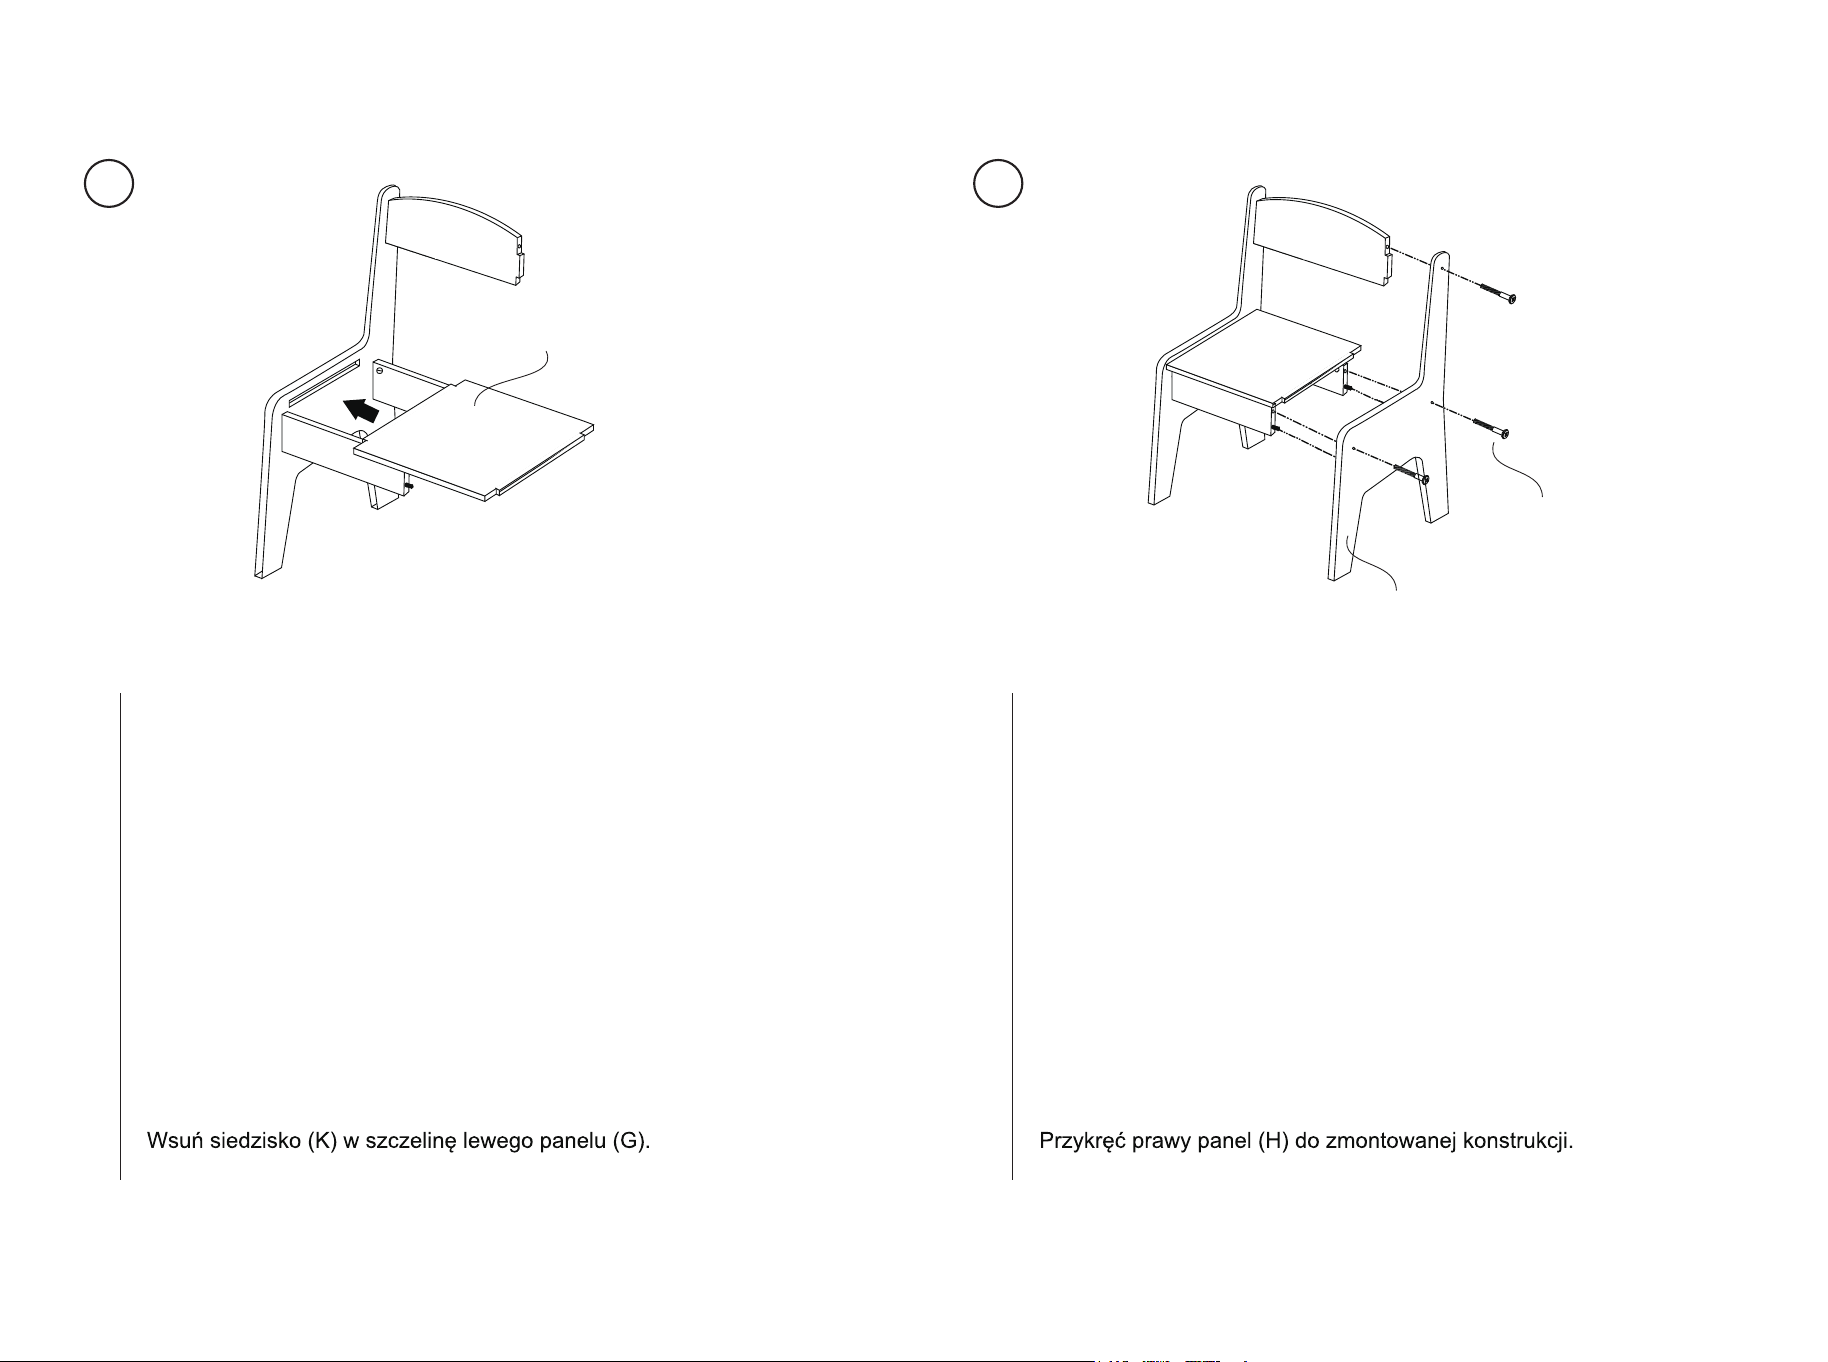
Insert the seat panel (K) into slot on the left panel (G) of the chair.
Setzen Sie die Sitzplatte (K) in den Schlitz an der linken Platte (G) des
Stuhls ein.
Insérez le panneau du siège (K) dans la fente du panneau gauche (G)
de la chaise.
Inserte el panel del asiento (K) en la ranura del panel izquierdo (G) de
la silla.
Inserire il pannello del sedile (K) nella fessura del pannello sinistro (G)
della sedia.
EN
DE
FR
ES
IT
PL
Attach the right panel (H) of the chair and lock it.
Befestigen Sie die rechte Platte (H) des Stuhls und verriegeln Sie sie.
Fixez le panneau droit (H) de la chaise et verrouillez-le.
Fije el panel derecho (H) de la silla y bloquéelo.
Fissare il pannello destro (H) della sedia e bloccarlo.
EN
DE
FR
ES
IT
PL
24 25
5 6
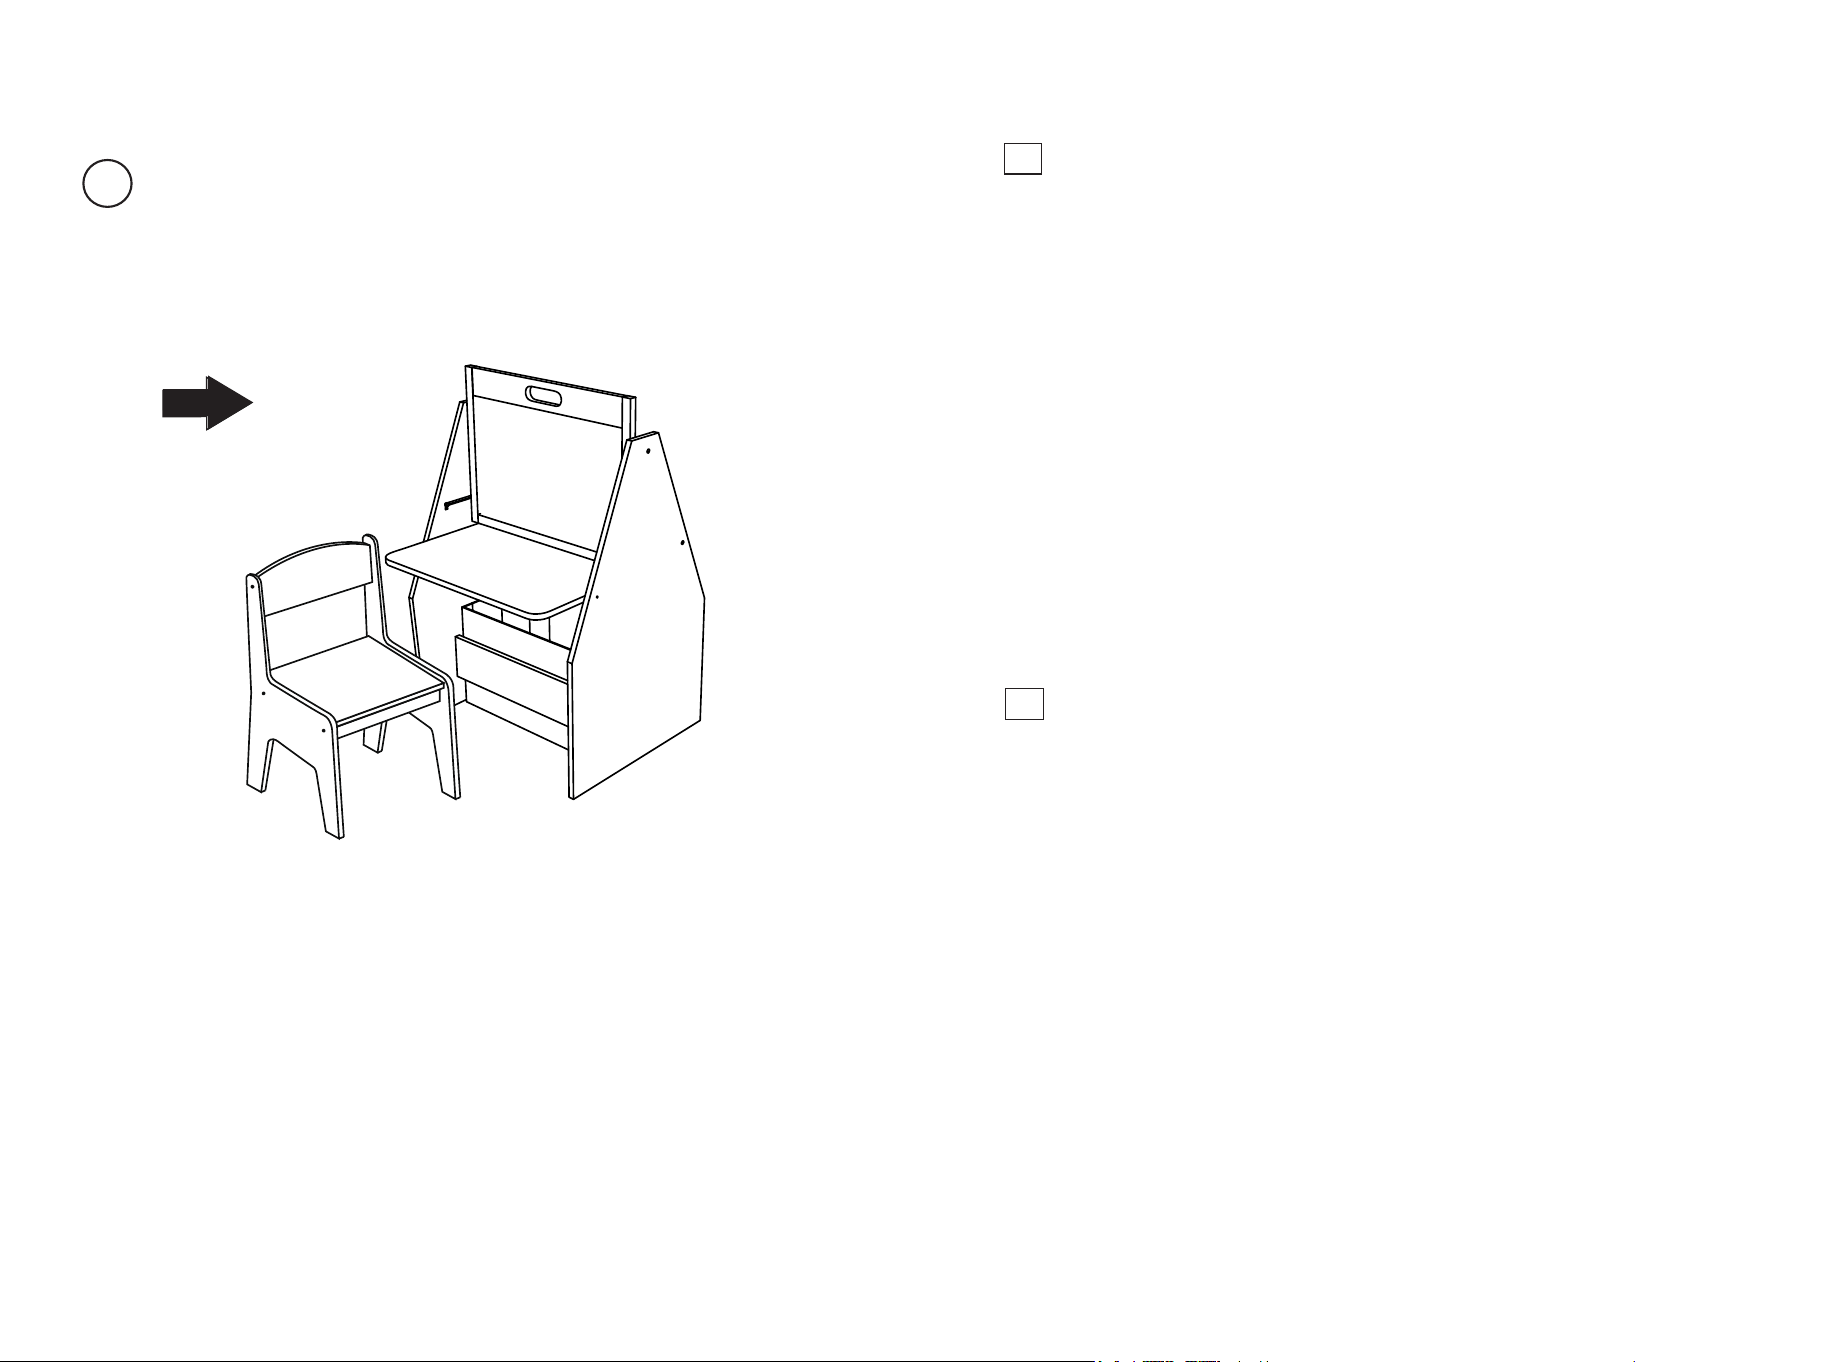
Chair assembly completed.
Montage des Stuhls abgeschlossen.
Assemblage de la chaise terminé.
Montaje de la silla completado.
Assemblaggio della sedia completato.
Zmontowane krzesełko.
EN
DE
FR
ES
IT
PL
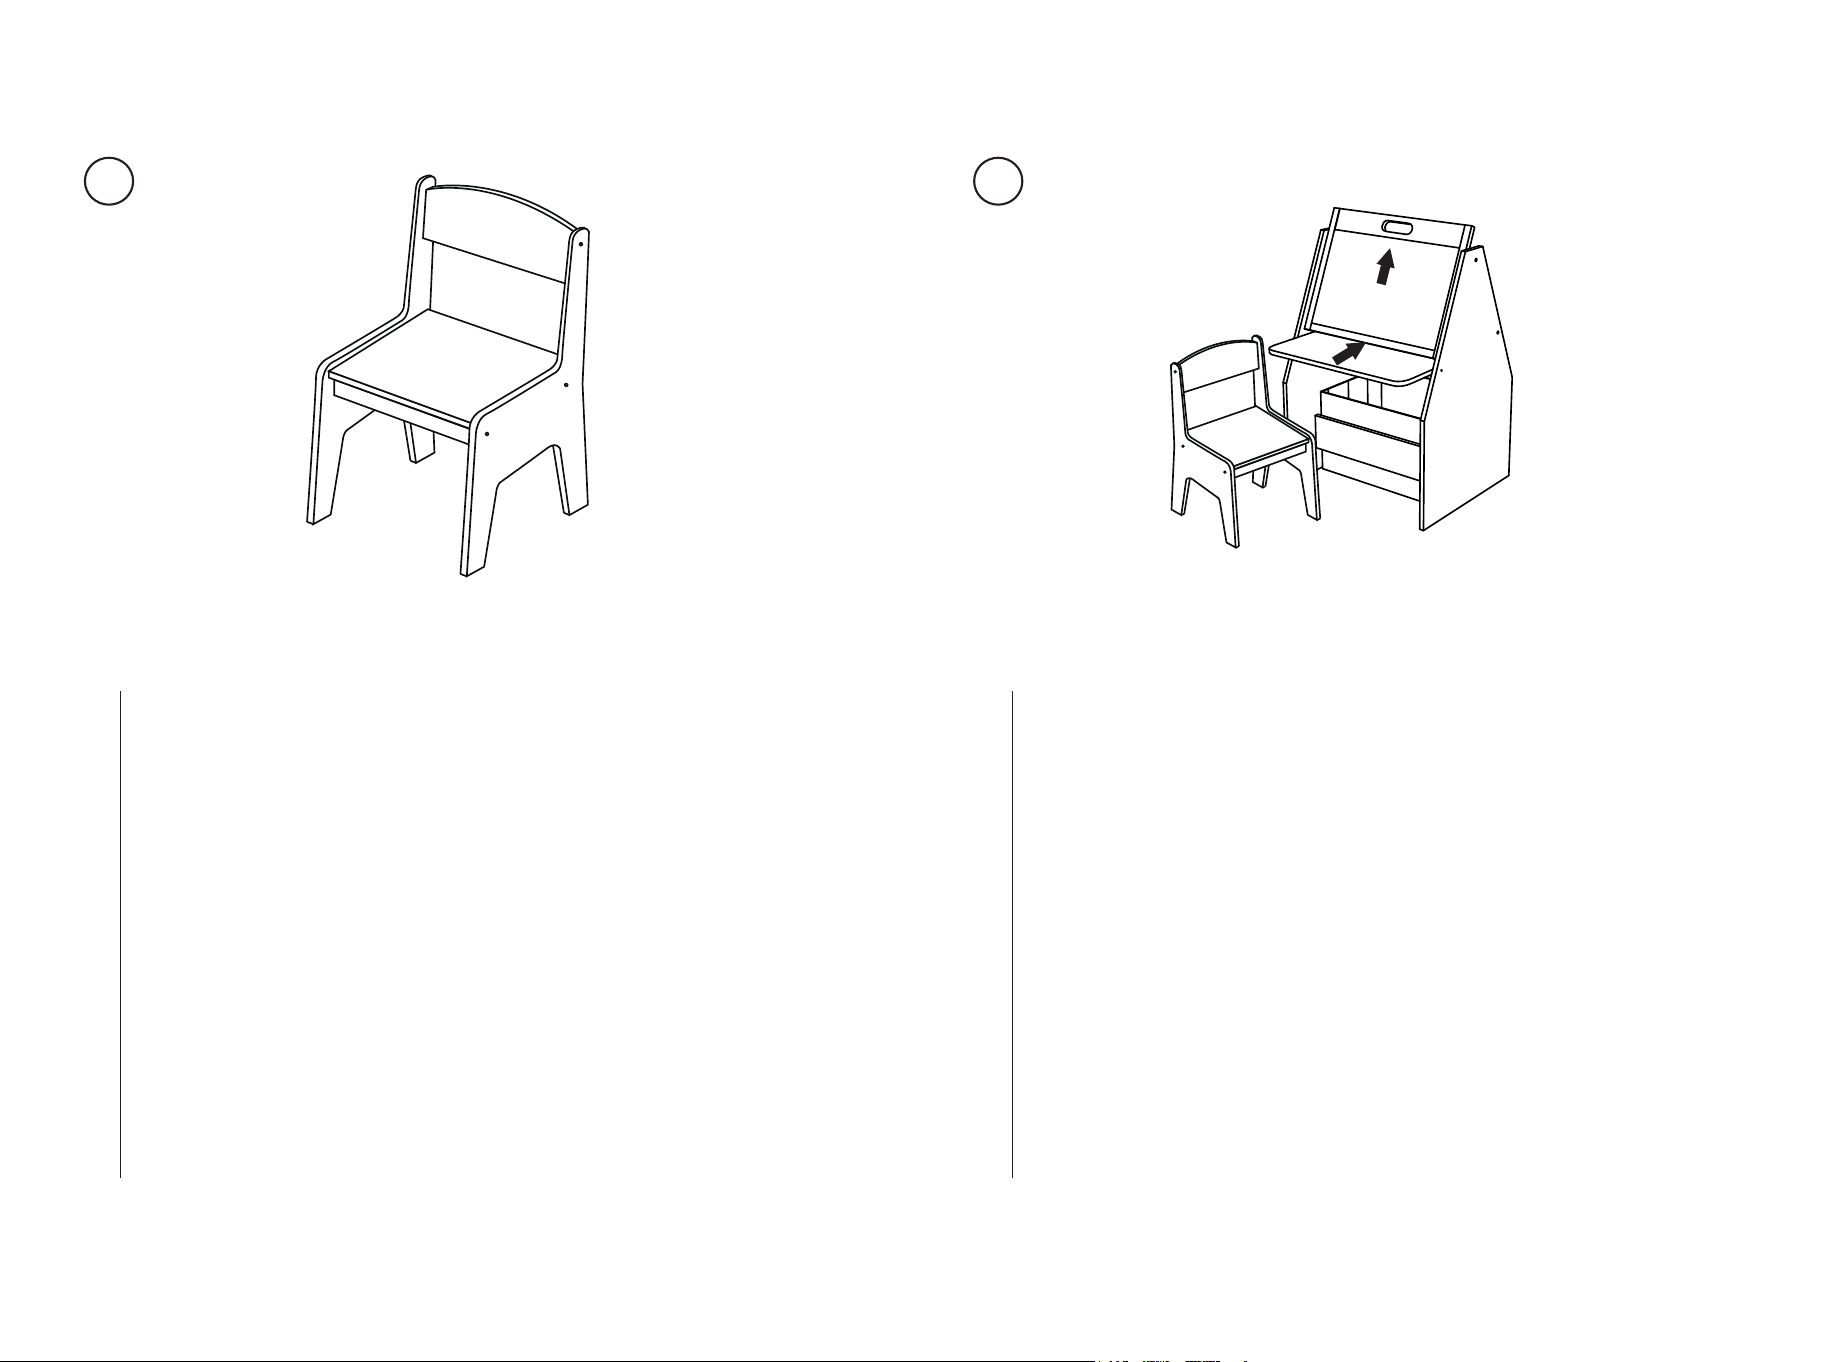
Whiteboard Angle is adjustable.
Die Neigung der Tafel ist einstellbar.
L’angle du tableau noir est réglable.
El ángulo de la pizarra es ajustable.
L'angolo della lavagna è regolabile.
Możesz regulować kąt nachylenia tablicy.
EN
DE
FR
ES
IT
PL
26 27
7
28 29
EN
● DO NOT place this product near a window as it can be used as a step by
the child and cause the child to fall out of the window.
● Be aware of the risk of open fires and other sources of strong heat in the
vicinity of the product.
● DO NOT place this product near a window where cords from blinds or
curtains could strangle a child.
● WARNING: All assembly fittings should always be tightened properly.
● WARNING: Do not to use the seating if any part is broken, torn or missing
and use only spare parts approved by the manufacturer.
● Cleaning and maintenance recommendations: Clean with a damp sponge.
NO BLEACH!
● Stellen Sie dieses Produkt NICHT in der Nähe eines Fensters auf, da es
vom Kind als Trittstufe benutzt werden kann und das Kind aus dem Fenster
fallen könnte.
● Achten Sie auf die Gefahr von offenem Feuer und anderen starken
Wärmequellen in der Nähe des Produkts.
● Stellen Sie dieses Produkt NICHT in der Nähe eines Fensters auf, wo die
Schnüre von Jalousien oder Vorhängen ein Kind strangulieren könnten.
● ACHTUNG: Alle Montagebeschläge sollten immer richtig angezogen sein.
● ACHTUNG: Benutzen Sie den Sitz nicht, wenn ein Teil gebrochen,
zerrissen oder fehlt, und verwenden Sie nur vom Hersteller zugelassene
Ersatzteile.
● Reinigungs-und Wartungsempfehlungen: Mit einem feuchten Schwamm
reinigen. KEINE BLEICHMITTEL!
DE
Instructions for the safe use of the seating
WARNING
IMPORTANT! READ CAREFULLY AND
KEEP FOR FUTURE REFERENCE
Hinweise für die sichere Benutzung des Sitzes
ACHTUNG
WICHTIG! SORGFÄLTIG LESEN UND FÜR
SPÄTERE VERWENDUNG AUFBEWAHREN
30 31
● NE PAS placer ce produit près d’une fenêtre car il peut être utilisé
comme marchepied par l’enfant et le faire tomber par la fenêtre.
● Soyez conscient du risque de feu ouvert et d’autres sources de forte
chaleur à proximité du produit.
● NE PAS placer ce produit près d’une fenêtre où les cordons des stores
ou des rideaux pourraient étrangler un enfant.
● ATTENTION : Tous les raccords de montage doivent toujours être
correctement serrés.
● AVERTISSEMENT : N’utilisez pas le siège si une pièce est cassée,
déchirée ou manquante et utilisez uniquement des pièces de rechange
approuvées par le fabricant.
● Recommandations de nettoyage et d’entretien : Nettoyez avec une
éponge humide. AUCUN AGENT DE BLANCHIMENT !
● NO coloque este producto cerca de una ventana, ya que el niño podría
utilizarlo como escalón y caerse por la ventana.
● Tenga en cuenta el riesgo de fuegos abiertos y otras fuentes de calor
intenso en las proximidades del producto.
● NO coloque este producto cerca de una ventana donde los cordones
de las persianas o cortinas puedan estrangular a un niño.
● ADVERTENCIA: Todos los accesorios de montaje deben estar siempre
bien apretados.
● ADVERTENCIA: No utilice la silla si alguna pieza está rota, desgarrada
o falta y utilice únicamente piezas de repuesto aprobadas por el fabricante.
● Recomendaciones de limpieza y mantenimiento: Limpie con una esponja
húmeda. ¡NO BLANQUEE!
● NON collocare questo prodotto vicino a una finestra, in quanto potrebbe
essere usato come gradino dal bambino e causare la sua caduta dalla
finestra.
● Fare attenzione al rischio di fuochi aperti e altre fonti di forte calore nelle
vicinanze del prodotto.
● NON collocare il prodotto vicino a una finestra in cui le corde di tende o
tapparelle potrebbero strangolare il bambino.
● AVVERTENZA: Tutti i raccordi di montaggio devono essere sempre
serrati correttamente.
● AVVERTENZA: Non utilizzare la seduta se qualche parte è rotta, lacerata
o mancante e utilizzare solo parti di ricambio approvate dal produttore.
● Raccomandazioni per la pulizia e la manutenzione: Pulire con una spugna
umida. NON LAVARE CON LA CANDEGGINA!
● NIE umieszczaj tego produktu w pobliżu okien, ponieważ może on zostać
użyty przez dziecko jako schodek i spowodować jego wypadnięcie przez
okno.
● NIE umieszczaj tego produktu w pobliżu otwartego ognia i innych źródeł
silnego ciepła.
● NIE umieszczać tego produktu w pobliżu okien, gdzie sznurki od żaluzji
lub zasłon mogłyby doprowadzić do uduszenia dziecka.
● OSTRZEŻENIE: Wszystkie elementy montażowe powinny być zawsze
prawidłowo dokręcone.
● OSTRZEŻENIE: Nie używaj siedziska, jeśli jakakolwiek część jest
uszkodzona, rozdarta lub jej brakuje i używaj tylko części zamiennych
zatwierdzonych przez producenta.
● Zalecenia dotyczące czyszczenia i konserwacji: Czyścić wilgotną gąbką.
NIE WOLNO UŻYWAĆ WYBIELACZY!
FR
ES
Istruzioni per l'uso sicuro della seduta
AVVERTENZA
IMPORTANTE! LEGGERE ATTENTAMENTE E
CONSERVARE PER RIFERIMENTO FUTURO
IT
Instrukcje dotyczące bezpiecznego korzystania
z fotelika
OSTRZEŻENIE
WAŻNE! PRZECZYTAJ UWAŻNIE I
ZACHOWAJ NA PRZYSZŁOŚĆ
PL
Instructions pour une utilisation sûre du siège
AVERTISSEMENT
IMPORTANT ! LIRE ATTENTIVEMENT ET
CONSERVER POUR RÉFÉRENCE FUTURE
Instrucciones para el uso seguro de los asientos
ADVERTENCIA
¡IMPORTANTE! LEA ATENTAMENTE Y
GUARDE PARA FUTURAS CONSULTAS

In case a return is required, the item must be returned in original box. Without this
your return will not be accepted.
DO NOT discard the box / original packaging.
Take a photo of the box markings.
Take a photo of the damaged part (if applicable).
Send us an email with the images requested.
A photo of the markings (text) on the side of the box is required in case a part is
needed for replacement. This helps our staff identify your product number to
ensure you receive the correct parts.
A photo of the damage is always required to file a claim and get your replacement
or refund processed quickly. Please make sure you have the box even if it is
damaged.
Email us directly from marketplace where your item was purchased with the
attached images and a description of your claim.
Falls eine Rücksendung erforderlich ist, muss der Artikel in der
Originalverpackung zurückgeschickt werden. Andernfalls wird Ihre Rücksendung
nicht angenommen.
Werfen Sie den Karton / die Originalverpackung NICHT weg.
Machen Sie ein Foto von der Beschriftung des Kartons.
Machen Sie ein Foto des beschädigten Teils (falls zutreffend).
Schicken Sie uns eine E-Mail mit dem gewünschten Foto.
Für den Fall, dass ein Ersatzteil benötigt wird, benötigen wir ein Foto der
Beschriftung (Text) auf der Seite des Kartons. So können unsere Mitarbeiter Ihre
Artikelnummer identifizieren und sicherstellen, dass Sie die richtigen Teile
erhalten.
Ein Foto des beschädigten Teils ist immer erforderlich, um eine Reklamation
einzureichen und eine schnelle Bearbeitung Ihres Ersatzteils oder Ihrer
Rückerstattung zu gewährleisten. Bitte stellen Sie sicher, dass Sie den Karton
haben, auch wenn er beschädigt ist.
Schicken Sie uns eine E-Mail direkt vom Marktplatz, auf dem Sie den Artikel
gekauft haben, mit den angehängten Fotos und einer
Beschreibung Ihrer
Reklamation.
EN
DE
Return / Damage Claim Instructions
Rücksendung / Beschädigung Anweisungen
Instructions De Retour / Réclamation De Dommages
Dans le cas où un retour est requis, l'article doit être retourné dans sa boîte
d'origine. Sans cela, votre retour ne sera pas accepté.
NE PAS jeter la boîte/l'emballage d'origine.
Prenez une photo des marquages de la boîte.
Prenez une photo des dommages (le cas échéant).
Envoyez-nous un e-mail avec les images demandées.
Une photo des marquages (texte) sur le côté de la boîte est requise au cas où une
pièce serait nécessaire pour le remplacement. Cela aide notre personnel à
identifier votre numéro de produit pour s'assurer que vous recevez les bonnes
pièces.
Une photo des dommages est toujours requise pour déposer une réclamation et
obtenir rapidement votre remplacement ou votre remboursement. Assurez-vous
d'avoir la boîte même si elle est endommagée.
Envoyez-nous un e-mail directement depuis le marché où votre article a été
acheté avec les images ci-jointes et une description de votre réclamation.
Instrucciones de Devolución / Reclamación de Daños
En caso de que se requiera una devolución, el artículo debe ser devuelto en la
caja original. Sin esto su devolución no será aceptada.
NO deseche la caja/embalaje original.
Tome una foto de las marcas de la caja.
Tome una foto de las piezas dañadas (si procede).
Envíenos un correo electrónico con las imágenes solicitadas.
Se requiere una foto de las marcas (texto) en el lado de la caja en caso de que se
necesite una pieza para reemplazarla. Esto ayuda a nuestro personal a identificar
su número de producto para asegurarse de que recibe las piezas correctas.
Una foto de los daños es siempre necesaria para presentar una reclamación y
conseguir que su reemplazo o reembolso sea procesado rápidamente. Por favor,
asegúrese de tener la caja aunque esté dañada.
Envíenos un correo electrónico directamente desde el mercado donde se compró
su artículo con las imágenes adjuntas y una descripción de su reclamación.
FR
ES
32 33
Nel caso in cui sia richiesto un reso, l'articolo deve essere restituito nella scatola
originale. Senza la scatola originale il tuo reso non sarà accettato.
NON scartare la scatola / confezione originale.
Fare una foto dei contrassegni sulla scatola.
Fare una foto di Danno (se è applicabile).
Inviarci una mail con le immagini richieste.
È necessaria una foto dei contrassegni (testo) sul lato della scatola nel caso in
cui la parte debba essere sostituita. Questo aiuta il nostro staff a identificare il
numero del tuo prodotto per assicurarti di ricevere le parti corrette.
Una foto del danno è sempre necessaria per presentare un reclamo e ottenere
rapidamente la sostituzione o il rimborso. Assicurati di avere la scatola anche se
è danneggiata.
Inviarci un'e-mail direttamente dal mercato in cui è stato acquistato il tuo articolo
con le immagini allegate e una descrizione del tuo reclamo.
Jeśli chcesz zwrócić produkt, musi znajdować się on w oryginalnym opakowaniu.
Towar zwrócony w nieoryginalnym opakowaniu nie zostanie przyjęty.
Nie wyrzucaj oryginalnego opakowania.
Zrób zdjęcie oznaczeń na opakowaniu.
Zrób zdjęcie uszkodzonej części (jeśli dotyczy).
Skontaktuj się z nami.
Jeśli jakakolwiek część wymaga wymiany, zrób zdjęcie oznaczeń kodu produktu,
który znajduje się na opakowaniu. Pozwoli nam to zidentyfikować produkt i
dostarczyć ci właściwą część.
Jeśli chcesz złożyć reklamację, zrób zdjęcie uszkodzonej części. Pozwoli nam to
zatwierdzić reklamację i zlecić zwrot środków na twoje konto. Do złożenia
reklamacji potrzebne będzie oryginalne opakowanie.
Skontaktuj się z nami telefonicznie, mailowo lub poprzez formularz kontaktowy.
Załącz zdjęcia produktu i opis roszczenia.
I T
PL
Istruzioni Per La Restituzione / Reclamo Per Danni
Zwroty i reklamacje
34