Loading ...
Loading ...
Loading ...
09
A11
Empty Wash Fill Dock
A12
Power Cable Storage
A11-1—Water Tank Handle
A12-1—Cable Outlets
A11-2—Dirty Water Tank
A12-2—Power Port
A11-4—Dock Location Beacon
A11-8—Maintenance Brush Latch
A11-12—Water Tank Latch
A11-5—Charging Contacts
A11-9—Dustbin
A11-13—Status Indicator Light
• Pulsing: Emptying/Washing Mop
• Red: Dock error
• Light off: Charging/Powered Off
A11-6—Washing Strip
A11-10—Water Tank Lid
A11-14—Water Filter
A11-7—High-Speed Maintenance Brush
A11-11—Clean Water Tank
A11-15—Dock Base
A12-3—Cable Slot
Power cable can exit at either side.Note:
Place the dock on a hard and flat
floor, and remove the foam used to
secure the high-speed maintenance
brush components in shipment at
the bottom.
B1-1—
Attach the base by pressing down
both sides of the base firmly, and
then pressing the connecting part in
the middle until you hear a click.
B1-2—
Installation
B
Important Information
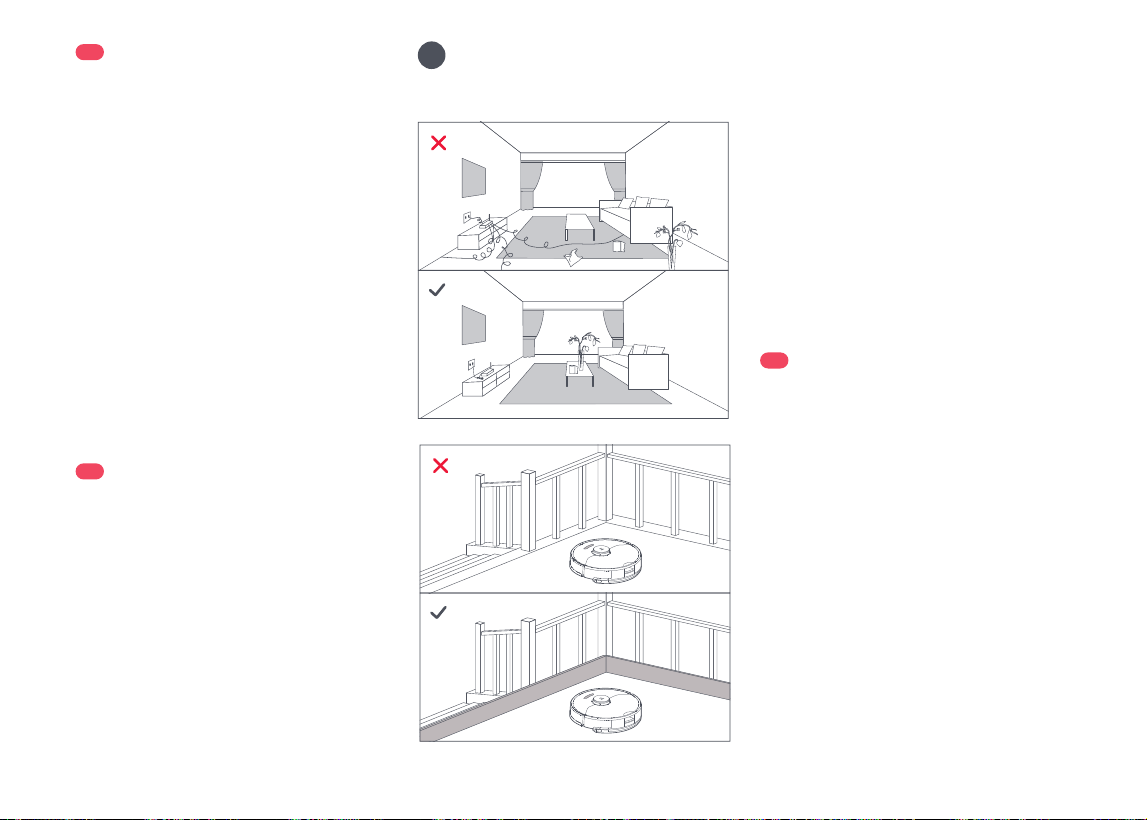
1. Tidy cables and loose items from the
ground and move any unstable, fragile,
precious, or dangerous items to prevent
personal injury or property damage due
to items becoming tangled in, struck by,
or knocked over by the robot.
2. When using the robot in a raised area,
always use a secure physical barrier to
prevent accidental falls that may result in
personal injury or property damage.
Note:
Note:
Remove the water tanks and the dustbin before
moving the dock.
When using the robot for the first time, follow it
throughout its whole cleaning route and watch for potential
problems. The robot will be able to clean by itself in future
uses.
Connect the power cable to the back
of the dock, and keep excess cable
inside the storage slot.
B1-3—
B1
Position the charging dock
A11-3—Self-Filling Port
Loading ...
Loading ...
Loading ...