Loading ...
Loading ...
Loading ...
87
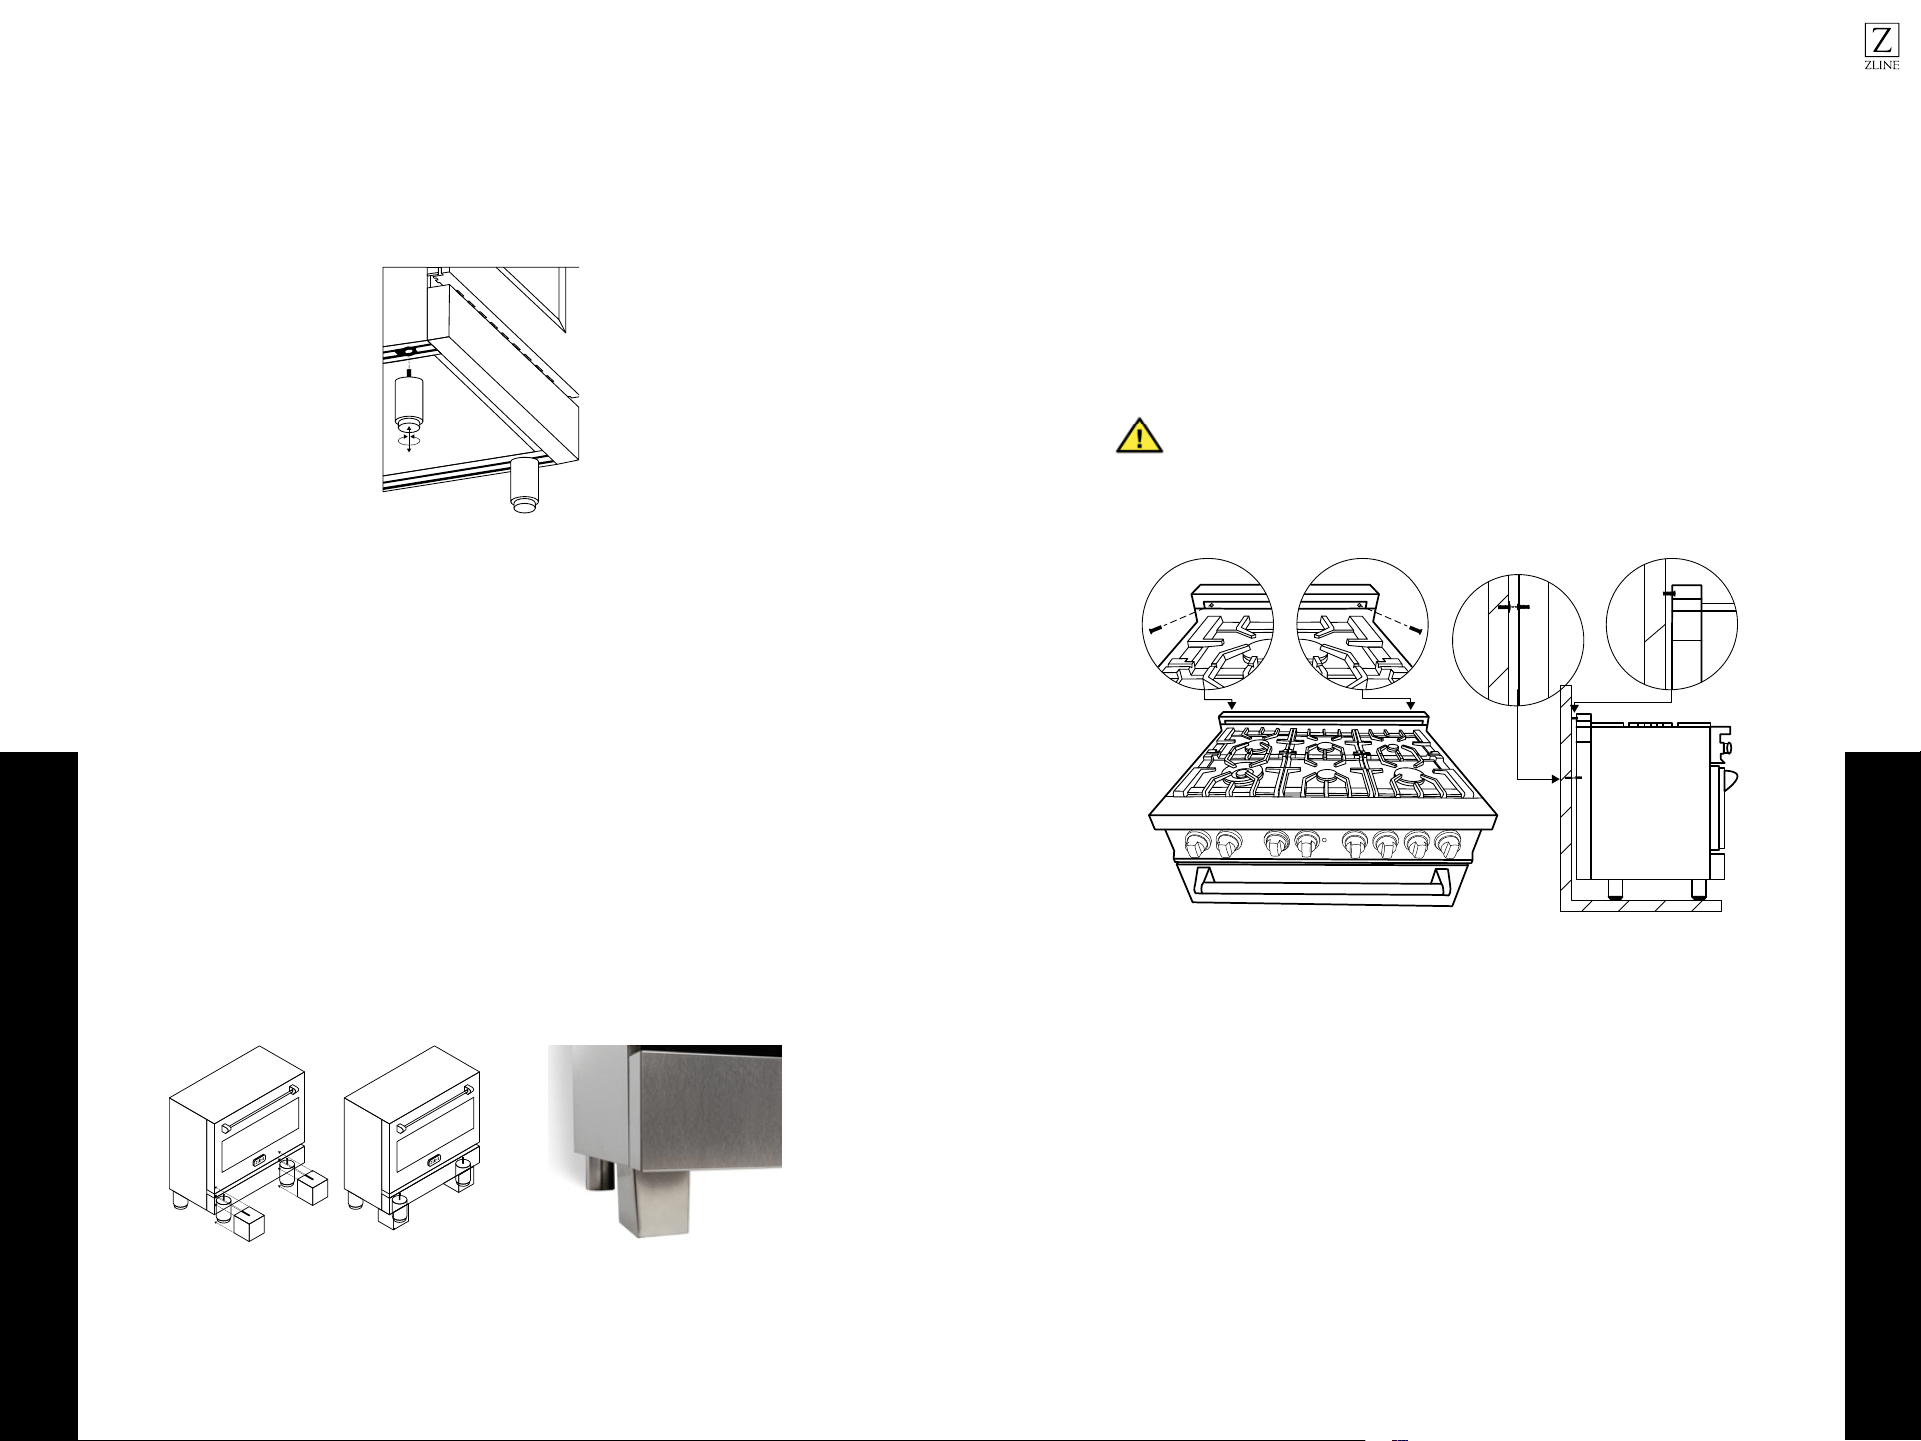
INSTALLING THE CHAINS
The chains shipped with the range must be properly secured to the rear wall. The
height of the bracket from the floor must be determined after the range legs have
been adjusted to the desired height and after the range has been leveled. If the chain
length is too short to properly secure the range to the rear wall, ask the installer to
lengthen it.
1. Measure the distance from the floor to the where the chains connect on the back
of the appliance.
2. Position the ends of the chains on the wall at the desired height plus 1/8 (0.32
cm). The chains must be placed at 2 5/16” (6.0 cm) from the side of the range.
The distance between the two chains is 25 1/4 “(64.1 cm).
3. Secure the ends of the chains to the wall with appropriate hardware.
4. Slide the range against the wall.
5. Check to see that the chains are connected properly. Then grasp the top rear
edge of the range and carefully attempt to tilt it forward. Verify that the chains
are engaged.
6. Or tighten the chains up with fixed screws on the wall. If the wall is not suitable
for installation, then the chains should be fixed to the cabinet structure.
A child or adult can tip the range and be fatally injured; Adjust the
chains if the range is moved. Failure to do so can result in death or
serious injury.
WARNING
Installing the Anti-Tip
Stability Device
INSTALLATION
Installing the Chains
The ranges must be used with the legs properly installed. Height-adjustable legs are
shipped with the range in a foam container above the range.
1. Before installing the legs, position the appliance near its final location, as the
legs are not suitable for moving the appliance over long distances.
2. After unpacking the range, raise it enough to insert the legs in the appropriate
receptacles situated on the lower part of the appliance. Lower the range gently
to keep any undue strain from legs and mounting hardware.
3. Adjust leg height to the desired level by twisting the inside portion of the leg
assembly until the proper height is reached. Check with a level that the cooktop
is perfectly level.
INSTALLING THE SQUARE COVERS
Some ranges come with attachable square leg covers. To install, loosen the round leg
from the range to accommodate for the square leg. Align the top of the square leg (with
the slit) to the top of the round legs and slide in. Adjust the square leg and the round leg
until they are flushed with the ground.
Installing the Legs
NOTE: If the range is not level, the cooking will be uneven. When adjusting the legs,
ensure they are the same height.
INSTALLATION
Installing the Legs
Loading ...
Loading ...
Loading ...