Loading ...
Loading ...
Loading ...
8
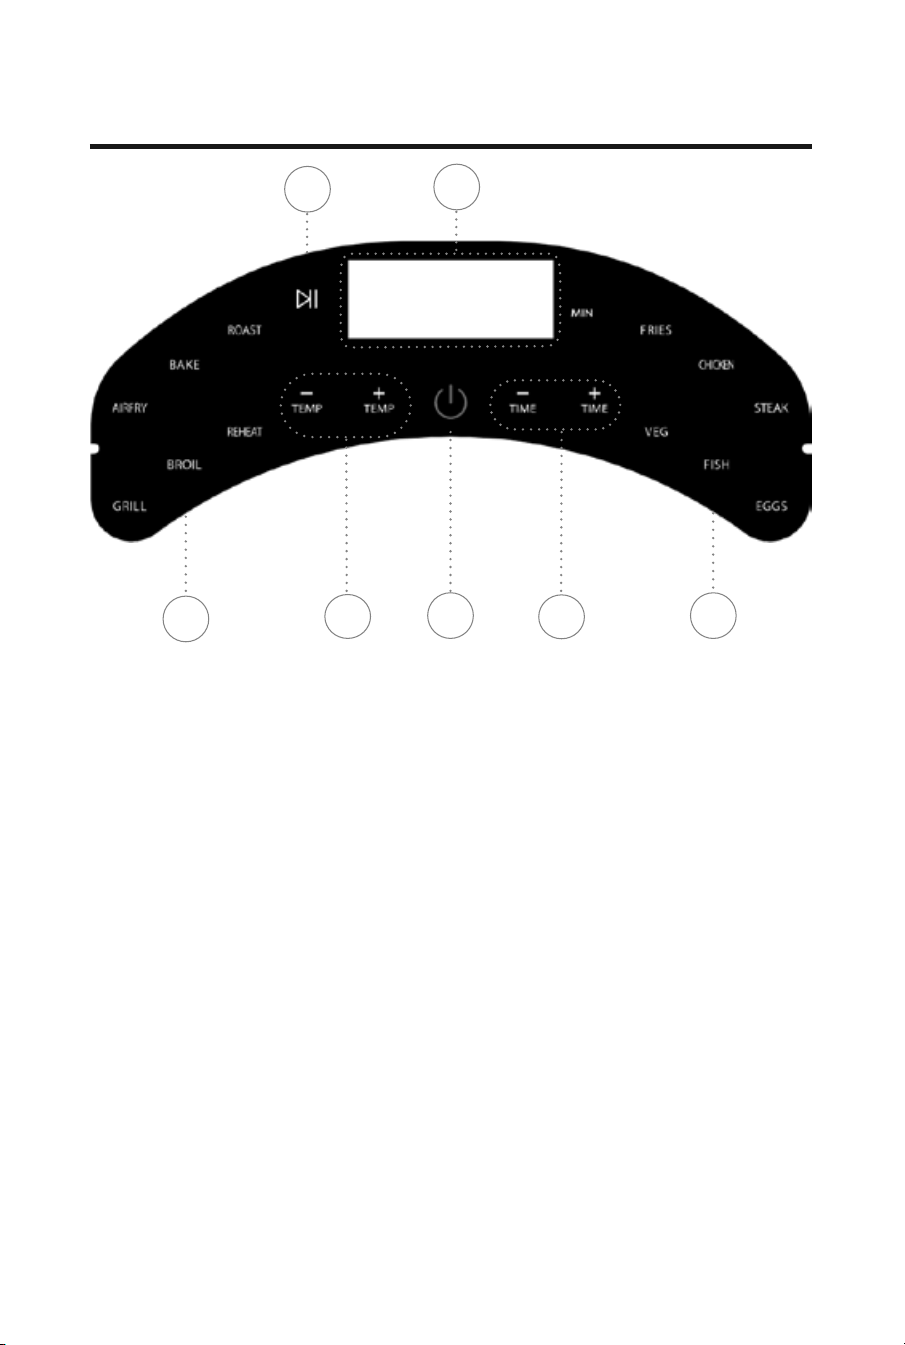
Using the Control Panel
2
5
4
6
1. Power Button: Press the Power Button to
turn the appliance on and illuminate the
control panel. Pressing the Power Button
during the cooking cycle will turn the
appliance off.
2. Cooking Functions: Press the Cooking
Function Buttons to choose from six
cooking functions. See the Function Chart
for the cooking times and temperatures
associated with each function.
3. Cooking Presets: Press the Cooking
Preset Buttons to choose from six
cooking presets. See the Preset Chart
for the cooking times and temperatures
associated with each preset.
4. Timer Control Buttons: The + and
− symbols enable you to increase or
decrease cooking time 1minute at a time.
Keeping the Button held down will rapidly
change the time. Time control range:
1– 60minutes.
5. Temperature Control Buttons: The +
and − symbols enable you to increase
or decrease cooking temperature 5° F
at a time. Keeping a button held down
will rapidly change the temperature.
Temperature control range: 180° F–400°F
6. Time and Temperature Display: This
display will keep track of the temperature
and remaining cook time.
Shake Indicator: The Shake Indicator will
illuminate when the cooking cycle has reached
its halfway point. This halfway timer gives you
the opportunity to shake or flip your food
in the appliance, which helps ensure even
cooking (see the “Shaking/Flipping” section).
7. Start/Pause Button: Once a cooking time
and temperature have been selected, press
the Start/Pause Button to begin the cooking
process. Press the Start/Pause Button again
at any point during the cooking process to
pause the cooking cycle.
1
3
7
AF3052Series_30376_E_IB_B.indd 8AF3052Series_30376_E_IB_B.indd 8 1/3/24 5:13 PM1/3/24 5:13 PM
Loading ...
Loading ...
Loading ...