Loading ...
Loading ...
Loading ...
-23-
Model W1843 (For Machines Mfd. Since 3/17)
OPERATIONS
Sanding.Belt
Sanding Belt Width .......................................... 2"
Sanding Belt Length ........................................72"
To ensure a safe operation and good sanding results, the
sanding belt must be properly installed, tensioned, and
tracked.
Tool.Needed. Qty
Hex Wrench 6mm ...............................................1
Installing.Sanding.Belt
1. DISCONNECT MACHINE FROM POWER!
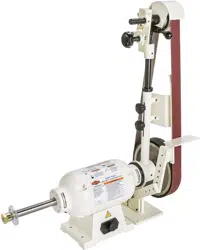
2. With the direction arrows printed on the inside front
of the belt facing down, pull down on the quick
release lever and wrap the belt around the idler and
drive wheels so that it is centered on both, as shown
in Figure 18, then release the lever.
Note: To prevent the belt seam from catching on
the workpiece, install the belt so that the direction
arrows printed on the inside face of the belt follow
the belt rotation, as shown in Figure 18.
Figure 18. Sanding belt installed.
Quick-
Release
Lever
Tool
Rest
Sanding
Belt
Platen
Belt
Direction
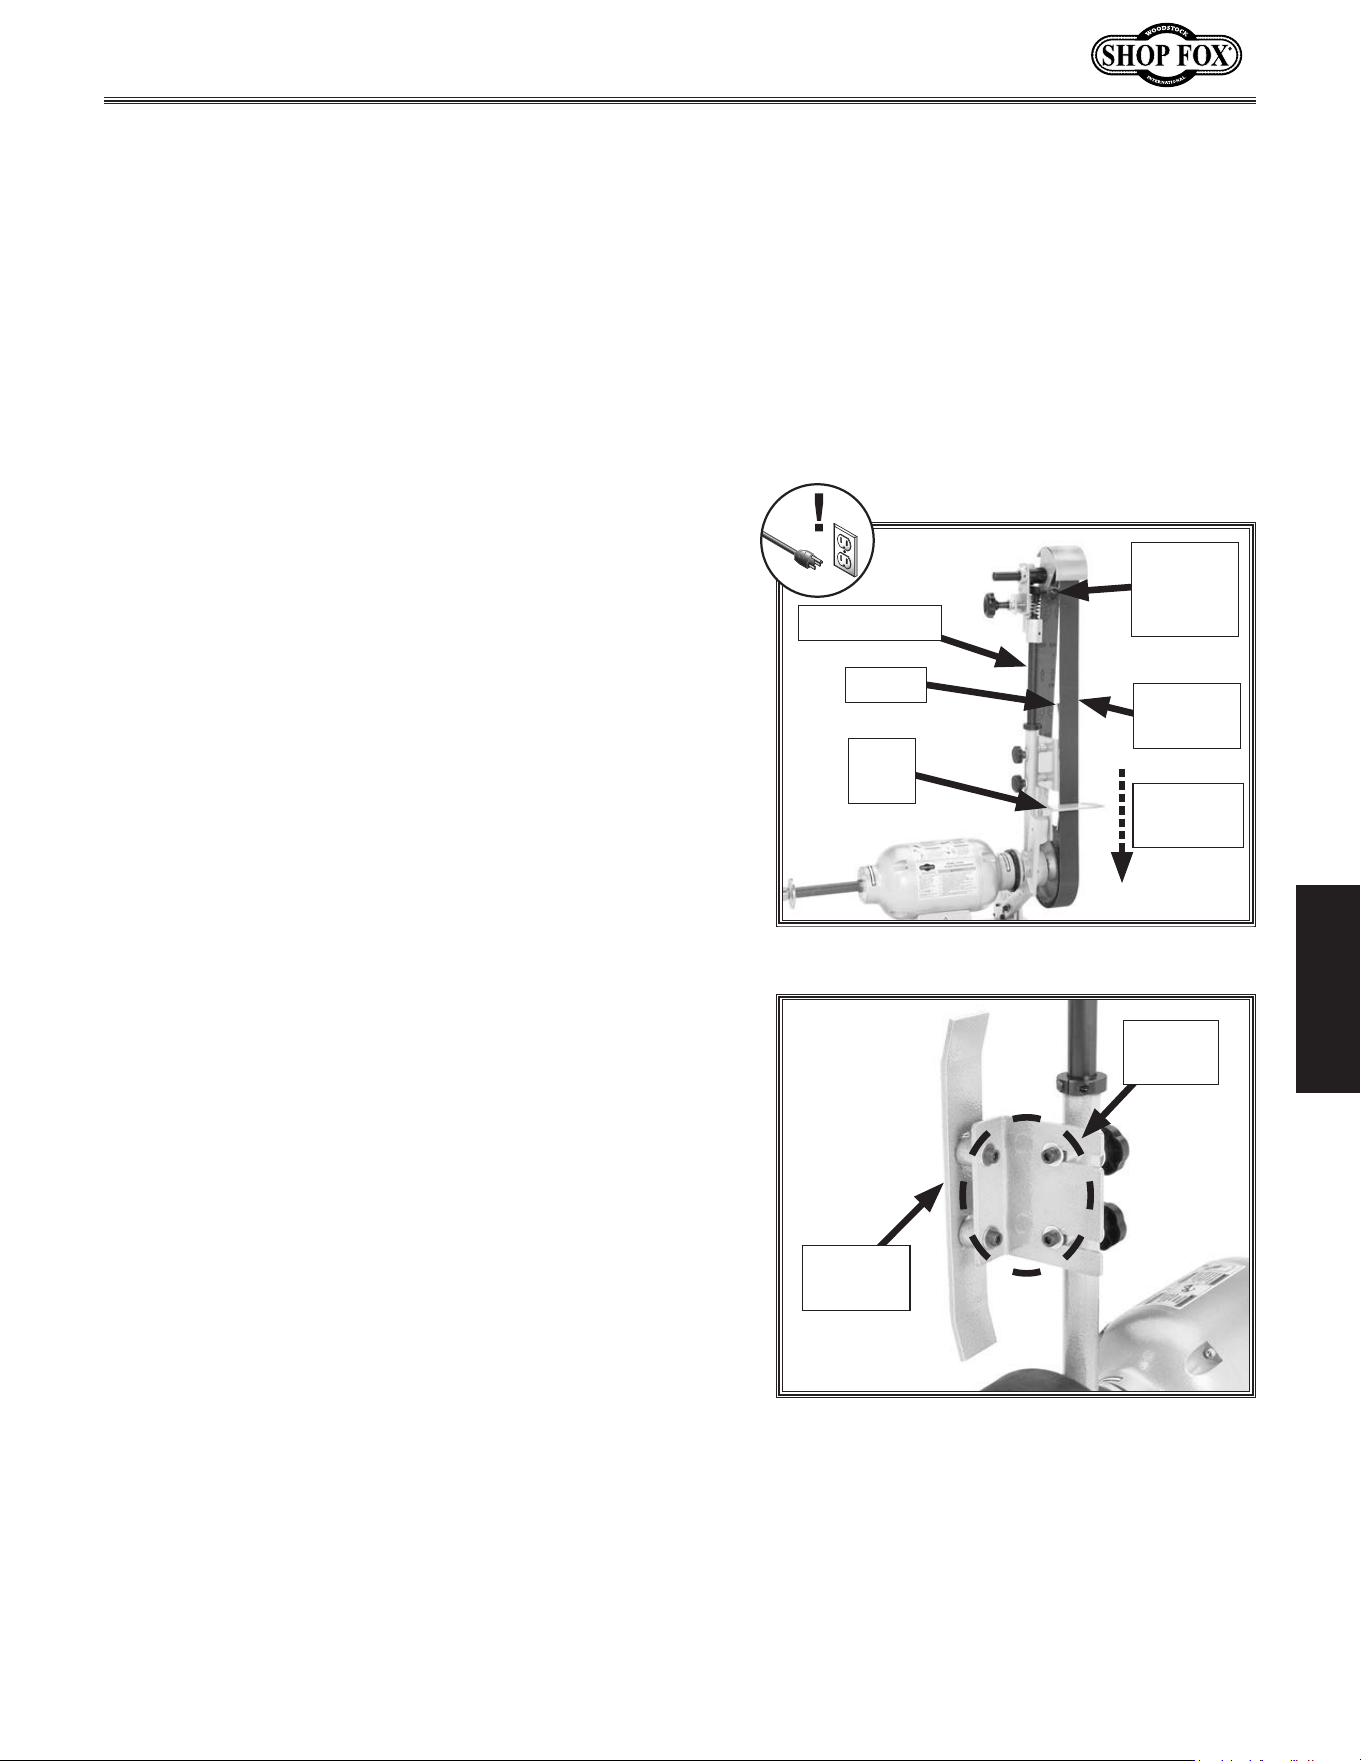
Vertical Rod
Figure 19. Sanding platen adjustment
(belt removed for clarity).
Cap
Screws
Sanding
Platen
3. Adjust the platen by loosening both cap screws
securing platen to vertical rod (see Figure 19).
Center platen behind the belt, and re-tighten cap
screws.
Note: The platen provides a solid back rest and
helps reduce friction as belt passes the tool rest.
Platen should be lightly touching backside of belt,
but not bowing belt outward.
4. If needed for your operation, adjust the tool rest
position as required. Make sure that it is no more
than
1
⁄16" away from the sanding belt to prevent the
workpiece being trapped between the tool rest and
belt.
Loading ...
Loading ...
Loading ...