Loading ...
Loading ...
Loading ...

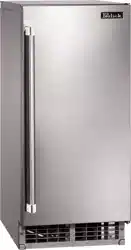
PERLICK RESIDENTIAL UNDERCOUNTER CUBELET ICE MAKER PRODUCT MANUAL
perlick customer service (800)558-5592 | 29
MAINTENANCE
CLEANING AND SANITIZING INSTRUCTIONS (cont.)
3. Sanizing Soluon
Dilute 1.25 . oz. (37 ml or 2.5 tbs) of a 5.25% sodium
hypochlorite soluon (chlorine bleach) with 2.5 gallons
(9.5 l) of warm water. This is a minimum amount. Make
more soluon if necessary. Using a chlorine test strip or
other method, conrm that you have a concentraon
of about 200 ppm.
For safety and maximum eecveness, use
the soluon immediately aer diluon.
4. Sanizing Procedure - Inial
1) Using a clean funnel and hose, pour 1 qt (1 l) of
sanizing soluon over the extruding head. Allow the
appliance to sit for 10 minutes before operaon.
2) Remove the slope from the storage bin by carefully
bending it in the center and releasing it from the
2 slope shas.
3) Remove the scoop. Remove the 2 thumbscrews
securing the scoop holder, then remove it.
4) Pour some of the sanizing soluon into a separate,
clean container. Using this sanizing soluon and a
clean cloth, wipe down the slope, scoop, scoop
holder, inside of the spout, and bin liner.
5) Rinse the parts and areas sanized in step 4
thoroughly with clean water.
6) Replace all removed parts in their original and
correct posions.
CHOKING HAZARD: Ensure all components,
fasteners, and thumbscrews are securely in place. Make sure
that none have fallen into the storage bin.
7) Make sure at least 10 minutes have elapsed since you
poured the sanizing soluon over the extruding
head, then move the control switch to the “ICE”
posion.
8) Allow the appliance to make ice for 20 minutes, then
move the control switch to the “DRAIN” posion.
9) Allow the water system to drain for 1 minute.
10) Move the control switch to the “ICE” posion.
11) Aer the gear motor starts, move the control switch
to the “DRAIN” posion.
12) Allow the water system to drain for 1 minute.
13) Move the control switch to the “OFF” posion.
5. Sanizing Procedure - Final
1) Using a clean funnel and hose, pour 1 qt (1 l) of
sanizing soluon over the extruding head. Allow the
appliance to sit for 10 minutes before operaon.
2) Move the control switch to the “ICE” posion.
3) Allow the appliance to make ice for 20 minutes, then
move the control switch to the “DRAIN” posion.
4) Allow the water system to drain for 1 minute.
5) Move the control switch to the “ICE” posion.
6) Aer the gear motor starts, move the control switch
to the “DRAIN” posion.
7) Allow the water system to drain for 1 minute.
8) Move the control switch to the “ICE” posion and
allow the appliance to run. Check for leaks.
9) Aer 30 minutes, move the control switch to the
“OFF” posion.
10) Pour warm water into the storage bin to melt all of the
ice, then clean the storage bin liner, door liner, and
door gasket with a neutral cleaner. Rinse thoroughly
aer cleaning.
11) Move the control switch to the “ICE” posion to start
the automac icemaking process.
DANGER
!
CAUTION
Loading ...
Loading ...
Loading ...