Loading ...
Loading ...
Loading ...

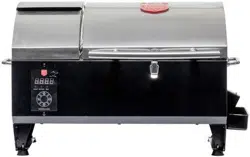
Temp
Display
USSCGRILLS.COM
Meat Probe
Increase
Temperature
Decrease
Temperature
Power
Prime /
Temp Display
ATTENTION:
FOR OUTDOOR USE ONLY. DO NOT USE THIS GRILL
INDOORS.
• Make sure the grill is always sitting level or is slightly
tilted towards the drip pan.
ATTENTION:
ENSURE EXHAUST OPENINGS ARE CLEAN AND
CLEAR PRIOR TO EACH USE. NOTE: THE EXHAUST
OPENINGS ARE LOCATED ON REAR OF THE GRILL
LID.
STANDARD STARTUP SEQUENCE
1. Fill the hopper with pellet fuel. Never leave pellets
in the hopper and only use the minimum amount of
pellets needed for cooking. Be sure to close and latch
the hopper lid. Only burn pellet fuel that is specifically
manufactured for use in pellet grills and cookers.
2. Prime your auger press the button found on the
control panel labeled “Temp Display” When pressed,
the auger spins and feeds pellet fuel to the burn pot.
Hold the “Temp Display” button in for up to 1 minute
to prime the auger tube with pellets.
3. Open the grill lid and press the “Power” button. The grill
will automatically light 5 to 8 minutes after pressing
the “Power” button. Remember, start-up times may
vary based on outside ambient temperature and fuel
quality).
NOTE: The startup mode will last approximately 15
minutes. Excessive smoke during startup is typical.
4. Set the control board to the desired cooking
temperature using the “Cook Temp” buttons on
the control board. Temperature settings are in 5°F
increments.
5. Once the grill ignites, you can hear a flowing sound
slightly louder than the blower motor of the grill. At
this point, the grill produces significantly less smoke.
Close the grill lid once ignition has occurred.
NOTE: Allow the grill lid to remain closed during
the pre-heat and as much as possible during cook
time. Feed rates during run mode are determined by
temperature readings. Each time the lid opens, the
temperature goes down, causing the auger to feed
more. This can lead to potential overcooking of food.
6. Check the actual temperature compared to the set-
point temperature by using the “Temp Display” button
on the control board. The display button helps to
determine when the grill has preheated to the desired
cooking temperature.
NOTE: During the startup, the grill temperature can
exceed the set-point temperature. It is advisable
to keep the display in “Actual” mode to check the
temperature readings and avoid overcooking or
burning.
7. Once the grill has reached its set-point temperature,
the grill is ready to have food added.
NOTE: As previously mentioned, keep the lid closed
as much as possible to maintain constant cooking
temperature. The temperature may fluctuate slightly.
NOTICE !! During operation, the technology in this
grill’s programming learns the fuel rate needed to
sustain the selected cooking temperature. Therefore,
start-up times may vary based on outside ambient
temperature and fuel quality or type (flavored or not).
Using the “Temp Display” button may help facilitate a
quicker start-up time.
STANDARD SHUTDOWN SEQUENCE
1. To turn the grill o.
2. Press the power button.
3. The word “Cool” will show on the display, and the grill
will enter a shutdown mode. The blower will continue
to run until it has reached a safe temperature.
NOTE: Shutdown sequence can take up to 1 hour
depending on the cooking temperature and the outside
temperature.
DO NOT TURN THE GRILL OFF BY UNPLUGGING IT.
SAVE THESE INSTRUCTIONS.
STANDARD USE AND OPERATION
8
© 2021 United States Stove Company
Loading ...
Loading ...
Loading ...
