Loading ...
Loading ...
Loading ...
EN
19
Installation
www.bora.com
5.6 Power connection
Observe all safety and warning information in the
Safety section.
Observe all national and regional laws and regulations
as well as the supplementary regulations of the local
utility companies.
INFO The power connection may only be established
by a certified specialist. He/she also assumes
responsibility for the proper installation and
commissioning.
The power supply line for use (pre-assembled) must be of
the type H05VV-F or H05VVH2-F as a minimum.
Cross-section: 3G 1.5 mm²
If the connection line has been damaged this must be
replaced by a special connection line. This may only
be done by an authorised member of the After Sales
Service team.
Establishing the power connection
Switch off the main switch/automatic circuit breaker
before connecting the cooktop.
Secure the main switch/automatic circuit breaker
against being switched back on without permission.
Make sure the power to the appliance is disconnected.
Connect the mains cable.
Only connect the cooktop using a permanent
connection to a power supply cable.
1
L1
2
N PE
220 - 240 V~
Fig. 5.12 Connection diagram 1-phase
Check that the cooktop has been correctly installed.
Switch on the main switch/automatic circuit breaker.
Put the cooktop into operation (see the Operation section).
Check that all the functions are working correctly.
5.7 Handover to user
Once installation is complete:
Explain the main functions to the user.
Explain all safety-related aspects of operation and
handling to the user.
Provide the user with the accessories and operating
and installation instructions for safe storage.
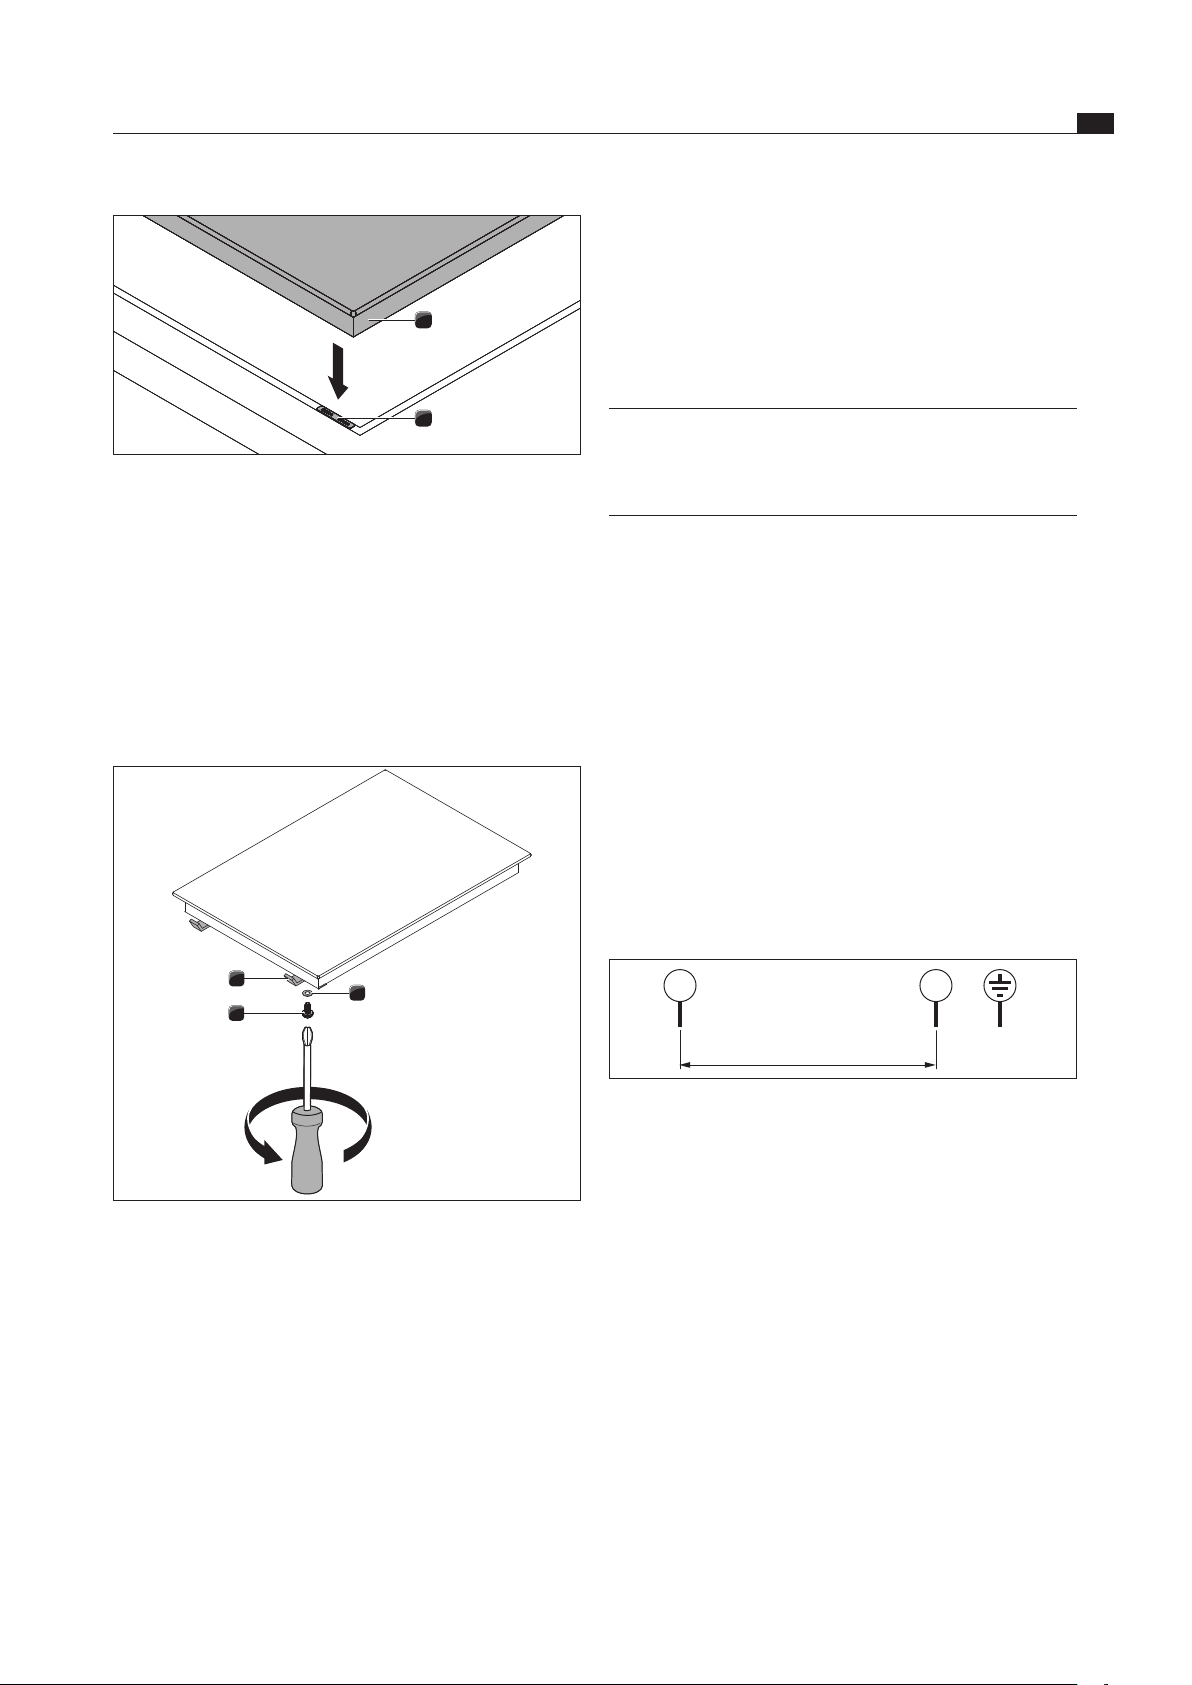
1
2
Fig. 5.10 Cooktop and height adjustment plates
[1] Cooktop
[2] Height adjustment plates
For surface mounting
Make sure that the sealing tape for the cooktop is flat
against the worktop.
For flush installation
Make sure that the sealing tape of the cooktop is
sealed well all the way round.
1
3
2
Fig. 5.11 Mounting brackets
[1] Mounting bracket
[2] Washer
[3] Screw
Affix the cooktop using the mounting brackets [1].
Use the screw [3] and the washer [2] to tighten the
mounting brackets with max. 10 Nm.
Check that the cooktop is positioned correctly.
Once all of the installation work is complete, seal the
devices with black, heat-resistant silicone sealant.
Loading ...
Loading ...
Loading ...