Loading ...
Loading ...
Loading ...
English 11
Installation
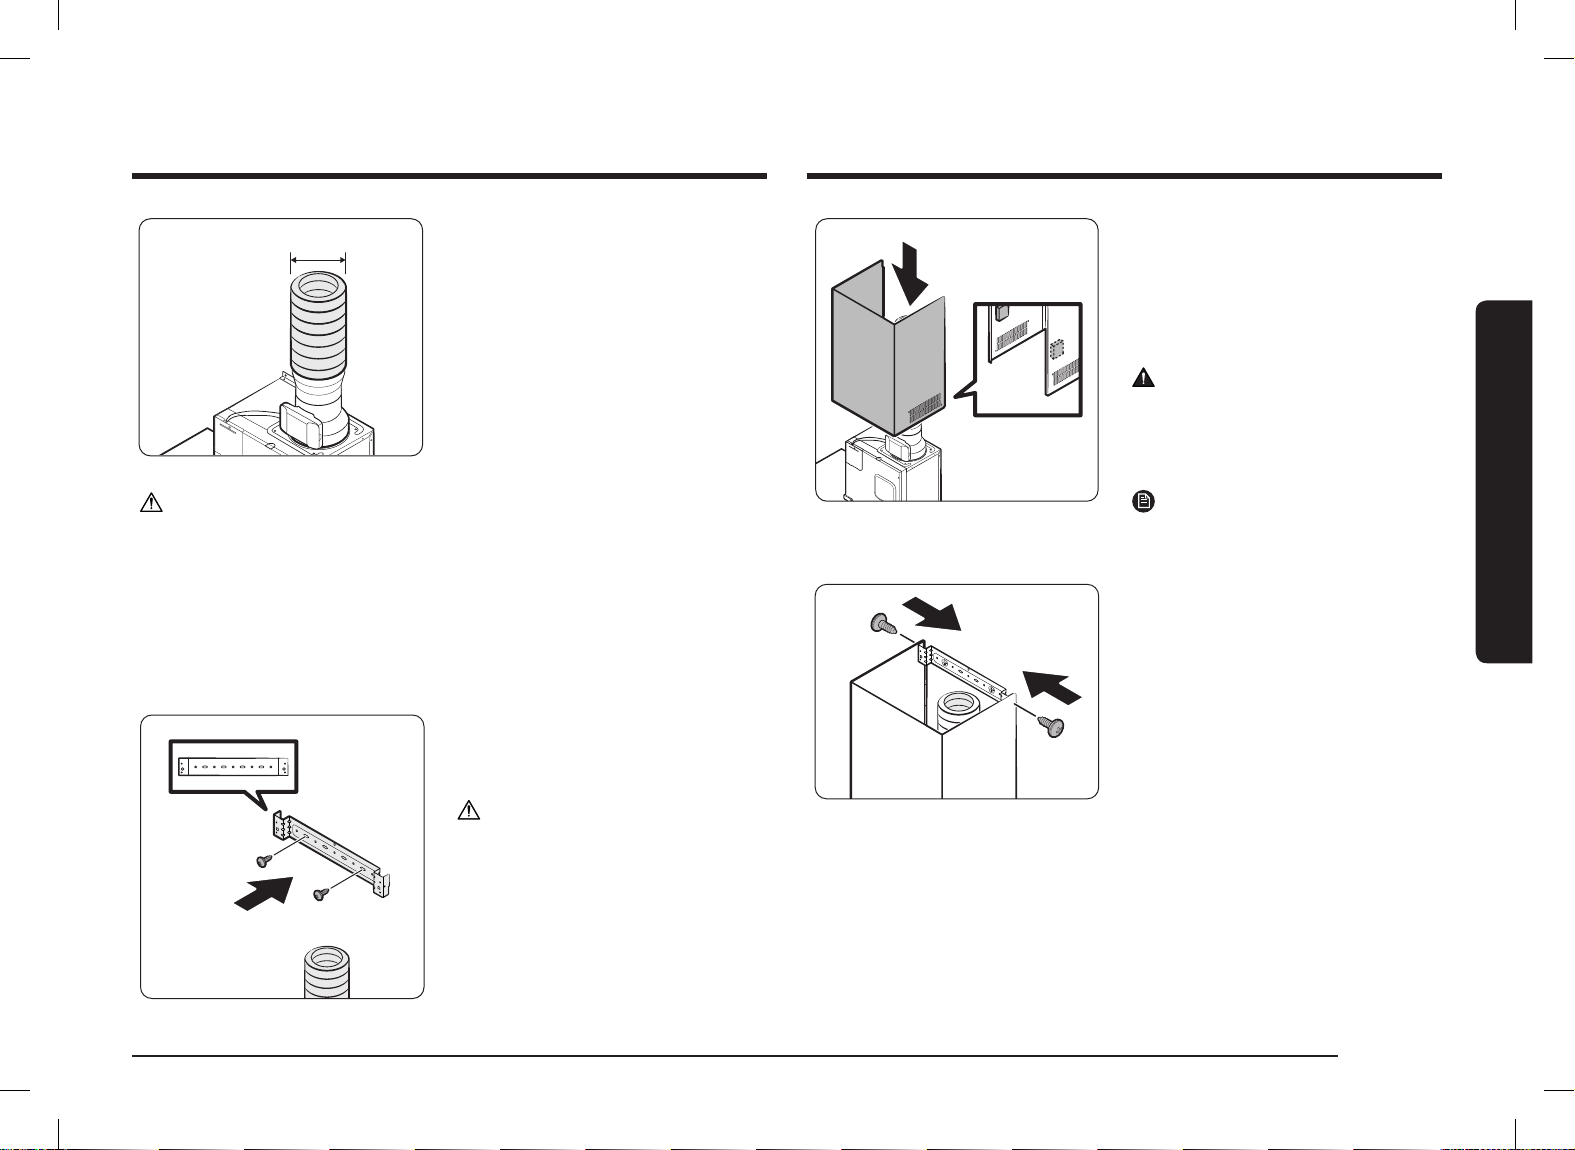
14. Attach each magnet to the inner
surface of the upper duct cover
overlapping with the lower duct
cover, and assemble the upper
duct cover in a way that it fits the
mounting bracket.
WARNING
Installation with screws or brackets
other than those specified in the
instruction of this manual may result in
electrical hazards.
NOTE
Magnets are included in the accessory
box.
15. Assemble with 10 mm hood fixing
screws from both sides.
6" (15.2 cm)
12. Fix the duct (6" (15.2 cm)) to the
hood outlet and the vent on the wall,
respectively, with tape.
CAUTION
• Ensure the exhaust outlet diameter and duct diameter match, and then connect
the duct to the wall outlet.
• If the duct and the wall outlet have different diameters, the suction performance
will decrease while significantly increasing noise.
The manufacturer is not responsible for any problems caused by this.
• Use the minimum possible length for the duct, and do not significantly alter the
cross-section.
• When connecting the duct, minimize bending. (Max bending angle: 90 degrees)
13. Fix the duct cover mounting bracket
to the ceiling or rear wall with the
10 mm hood fixing screws.
CAUTION
• Install the upper duct cover closely to
the ceiling and upper cabinets.
• Be careful not to let the upper duct
cover come into contact with the
upper cabinet door.
MANUAL INSTALL_Range Hood_DG68-01500A.indb 11MANUAL INSTALL_Range Hood_DG68-01500A.indb 11 2023-01-05 오후 3:15:322023-01-05 오후 3:15:32
Loading ...
Loading ...
Loading ...