Loading ...
Loading ...
Loading ...
EN
11
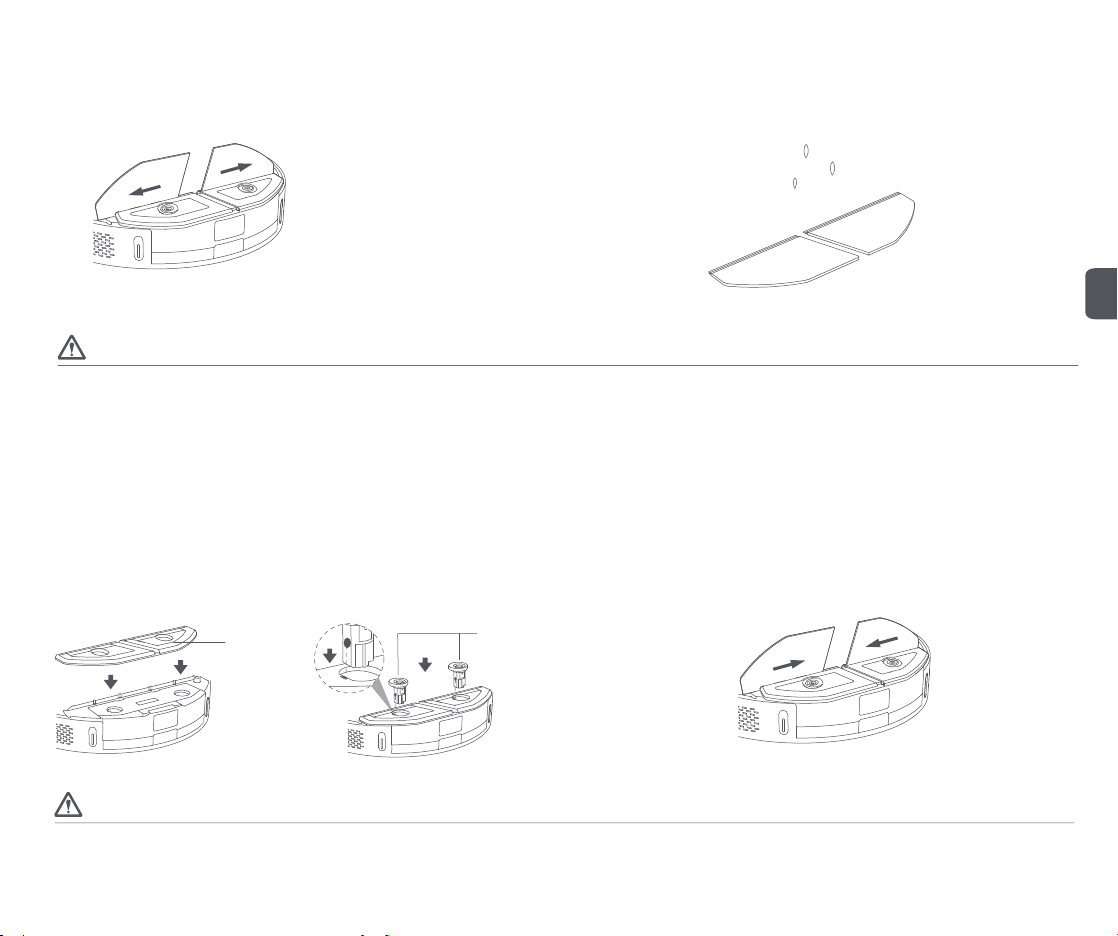
Mop removal and installation
Step 1: Remove the mop
Remove the mop from the vibrating mop assembly on both sides;
Step 2: Clean the mop
Rinse the mop with clean water before use.
Caution
1. Do not remove the vibration mop component except in special circumstances. Just remove the mop directly.
2. Please replace the original mop, so as not to affect the cleaning effect of the host due to different products;
3. It is recommended to clean the mop every time to ensure the water speed and cleaning effect, and replace the mop with a new one if necessary;
4. Please be sure to remove the mop for cleaning to avoid dirty water backfilling;
5. It is recommended to replace the original mop every March to June to ensure the cleaning effect.
Installation of vibrating mop components
Step 1: Load the vibrating mop assembly
Turn the host over, align the two holes in the mop support with the two holes in the fuselage, slide the
left half of the mop board to the left, align the red bump on the latch with the groove, and press the
latch until you hear the "click" sound; By the same token, the half operation is the same as the left
operation;
Mop support
Mop support lock
1. Before turning over the machine, pour the excess water in the water outlet box to prevent water seepage from damaging the machine;
2. When turning over the machine, please put the machine in the air or on the soft surface, do not put on the hard surface (such as the ground, table, etc.), to prevent damage to the lidar sensor;
3. When charging or not in use, please pour the excess water in the water box and clean the mop to avoid mildew or odor;
Step 2: Install the mop
Install and paste the mop in the area where the mop support is pasted;
Caution
Loading ...
Loading ...
Loading ...