
Loading ...
Loading ...
Loading ...
10 Installation Instructions Portable Air Conditioner
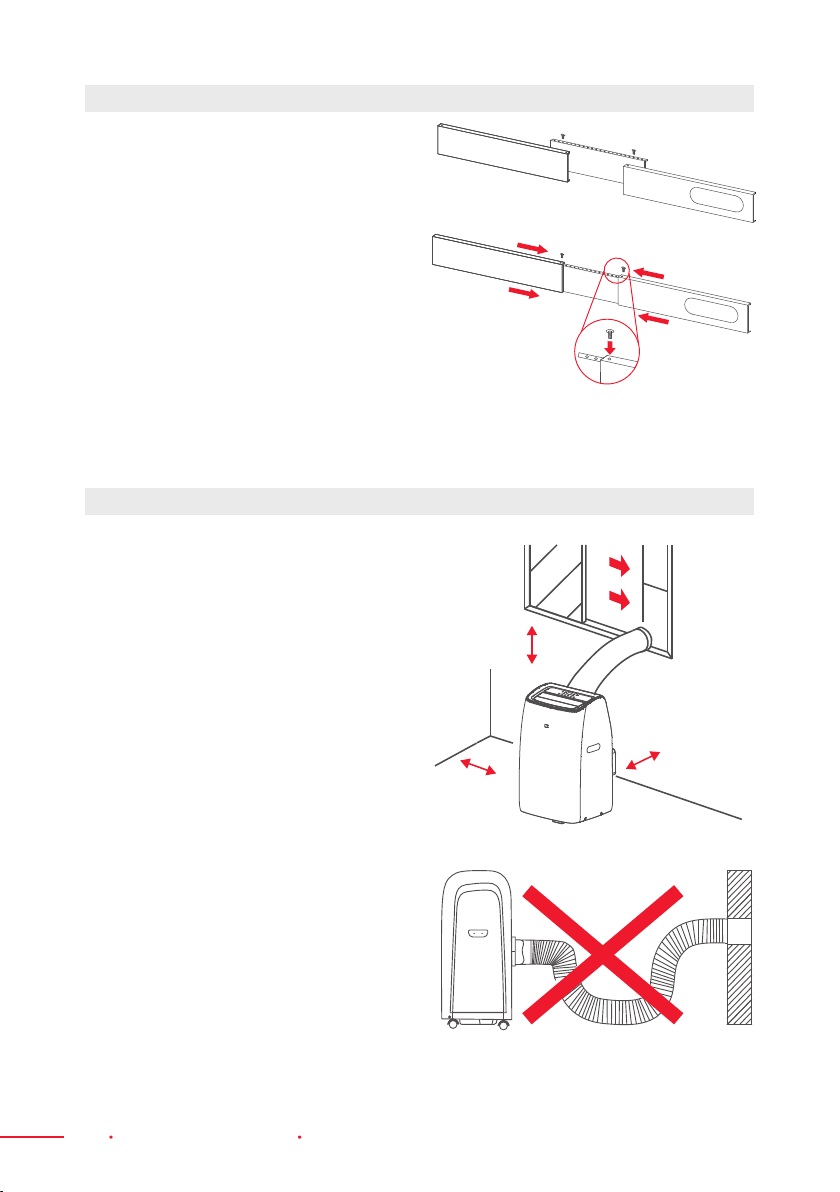
1. The unit should be placed on arm
foundation to minimize noise and
vibration. For safe and securepositioning,
place the unit on a smooth, level oor
strong enough to support the unit.
2. The unit has casters to aid placement,
but it should only be rolled on smooth,
at surfaces. Use caution when rolling
on carpeted surfaces. Use caution and
protect oors when rolling over wood
oors. Do not attempt to roll the unit
over objects.
3. The unit must be placed within reach
of a properly rated grounded socket.
4. Never place any obstacles around the
air inlet or outlet of the unit.
5. Allow at least 18" (45 cm) of space around
and above this unit for it to work more
efciently.
6. The Hose can be extended, but it is
best to keep its length to the required
minimum. Make sure that the Hose does
not have any sharp bends or sags.
WINDOW SLIDER KIT INSTALLATION
LOCATION
18" (45 cm)
18" (45 cm)
18" (45 cm)
A
B
C
D
C
D
B
1. Parts:
A) Panel with two holes;
B) Panel with one hole;
C) Panel without a hole;
D) Screw for locking the Window Kit in place.
2. Assembly:
Slide Panel B and C into PanelA and size
them to window width. Window sizes
vary. When sizing the window width and
taking measurements, make sure that the
Window Kit assembly is free from gaps
and/or air pockets.
3. Lock The Screw Into The Holes.
The holes should correspond with
the width that your window requires
to ensure that there are no gaps or air
pockets in the Window Kit assembly after
installation.
Loading ...
Loading ...
Loading ...