Loading ...
Loading ...
Loading ...
LIO-8 Quick Start Guide
38
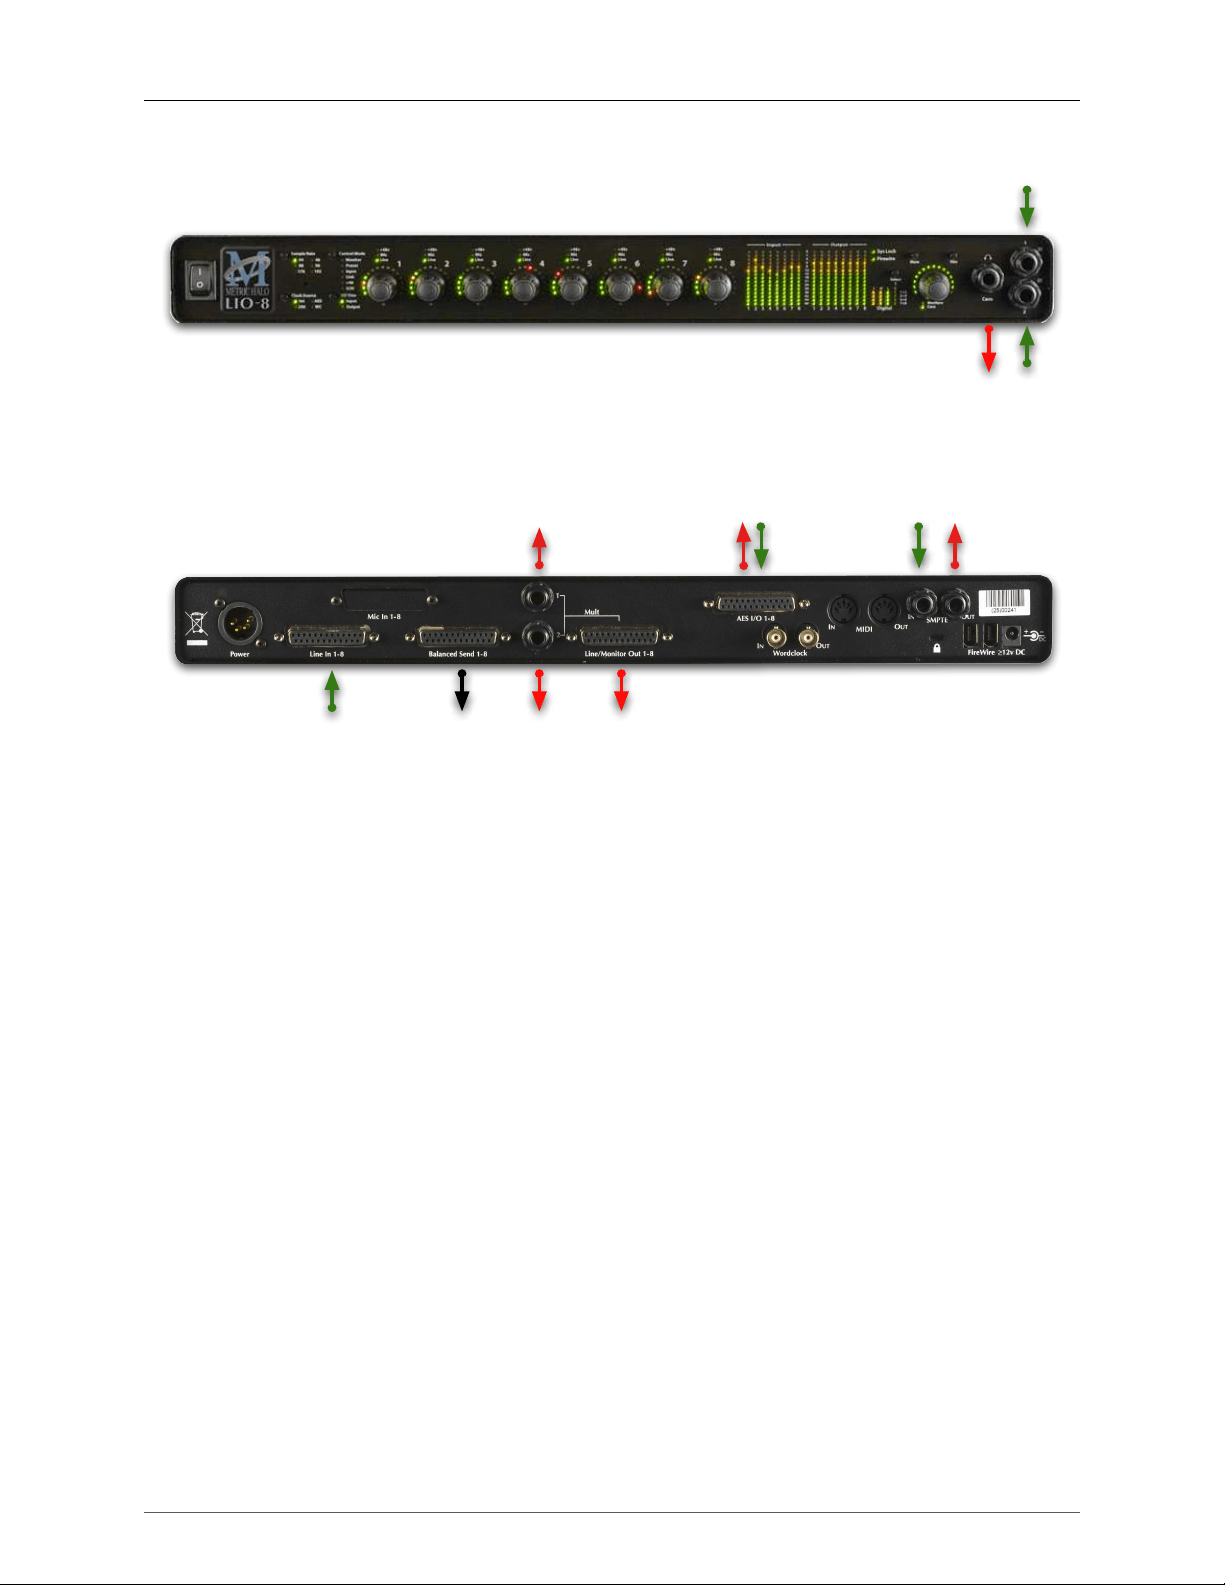
Analog
2
Cans
L/R
Digital 1-8
Analog
1
Send 1-8
(Mult of Line 1-8)
Green: Routable Inputs
Red: Routable Outputs
Black: Non-routable connections
Line
1
Line
2
FW
20
DAW
19
Analog
(Line)
1-8
Analog
1-8
Figure 3.2: LIO-8 Routing
Connect the LIO-8
Go to your computer and install the driver and MIO Console application driver from the included disc (this
will require a restart). Please see the section on
software installation if you need clarification. Connect the
FireWire cable between the LIO-8 and your computer, then go to the System Preferences and select it as the
system’s sound input and output.
Get familiar with the front panel
Look at the LED under the Monitor Control encoder; the “Monitor Control” LED should be illuminated. If
“Cans” is lit, push the encoder to switch it (all encoders have shaft buttons). The LED should be green; if it is
yellow, push the “Dim” button. If it is red push the “Mute” button. Now that you’re sure that you’re looking at
the Monitor Controller and that is not dimmed and unmuted, turn it down. The meters are now showing the
gain value of the Monitor Controller. This will happen any time you adjust an encoder.
Take a listen
Now we’re ready to listen. Don't launch MIO Console yet; open iTunes and play some music. Turn up the
Monitor Controller to a comfortable level, then try the Dim and Mute buttons again. Next, connect a pair of
headphones to the front panel. Push the Mute button to turn off your monitors, then press the Monitor encoder.
Turn the level down (you’re now controlling the headphone amplifier), then put on your cans and turn up
the encoder.
MIO Console
Once you’re comfortable with the Monitor Controller and how it works, launch MIO Console. If you're launch-
ing MIO Console for the first time, you'll see the factory default setup; more information on this is available
in the
Saving and Recalling Your Setups section of this manual.
Loading ...
Loading ...
Loading ...