Loading ...
Loading ...
Loading ...

20 PowerXL Vortex Air Fryer Pro
™
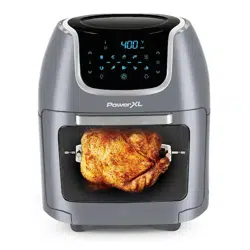
PowerXL Vortex Air Fryer Pro
™
21
Error Codes
Display Shown Possible Cause Solution
E1 Broken circuit of the thermal sensor Call Customer Service
E2 Short circuit of the thermal sensor Call Customer Service
Troubleshooting
Problem Possible Cause Solution
The appliance
does not work
The appliance is not plugged in. Plug power cord into wall socket.
The appliance has not been turned on by setting the preparation
time and temperature.
Set the temperature and time.
The appliance is plugged into an outlet that is shared
with other devices.
Plug the appliance into a dedicated power outlet.
Food not cooked
The appliance is overloaded. Use smaller batches for more even cooking.
The temperature is set too low. Raise temperature and continue cooking.
Food is not fried evenly
Some foods need to be turned during the cooking process. Check halfway through process and turn food if needed.
Foods of different sizes are being cooked together. Cook similar-sized foods together.
If using multiple racks, trays need to be rotated. Rotate trays from top to bottom and vice versa.
White smoke
coming from appliance
Oil is being used. Wipe down to remove excess oil.
Accessories have excess grease residue from previous cooking. Clean the components and appliance interior
after each use.
French fries are
not fried evenly
Wrong type of potato being used.. Use fresh, rm potatoes.
Potatoes not blanched properly during preparation. Use cut sticks and pat dry to remove excess starch.
Too many fries are being cooked at once. Cook less than 2 ½ cups of fries at a time.
Fries are not crispy
Raw fries have too much water. Dry potato sticks properly before misting oil.
Cut sticks smaller. Add a bit more oil.
Door came off
Door came off the hinge and was not replaced properly. With the door slightly open (1 in./2.5 cm) from
the closed position, align the hinge so the joints
fall into the slots and close the door.
Cleaning & Storage
Cleaning
Remove the power cord from the wall socket
and be certain the appliance is thoroughly cooled
before cleaning.
Clean the appliance after each use. The cooking
accessories are made of durable stainless steel and
are dishwasher safe. Never use abrasive cleaning
materials or utensils on these surfaces. Parts with
caked-on food should be soaked in warm, soapy
water for easy removal.
1. Wipe the outside of the appliance with a
warm, moist cloth and mild detergent.
2. To clean the appliance door, remove it by lifting
it to a 45° angle while gently pulling upward.
Clean both sides with warm, soapy water
on a damp cloth. Do not soak or submerge
the door in water or wash in the dishwasher.
3. Clean the inside of the appliance with hot water,
a mild detergent, and a nonabrasive sponge.
4. If necessary, remove unwanted food residue
from the upper screen with a soft cleaning brush.
Storage
1. Once the fan has stopped running, unplug the
appliance and let it cool thoroughly.
2. Make sure all components are clean and dry.
3. Place the appliance in the clean, dry place.
Loading ...
Loading ...
Loading ...
